Page 2 of 288

The following warning may be required by California law:
CALIFORNIA Proposition 65 Warning
WARNING:Engine exhaust, some of its constituents, and
certain vehicle components contain or emit chemicals known to
the State of California to cause cancer and birth defects or other
reproductive harm. In addition, certain fluids contained in vehicles and
certain products of component wear contain or emit chemicals known
to the State of California to cause cancer and birth defects or other
reproductive harm.
ICONS
Indicates a safety alert. Read the
following section onWarnings.
Indicates vehicle information related
to recycling and other
environmental concerns will follow.
Correct vehicle usage and the
authorized disposal of waste
cleaning and lubrication materials are significant steps towards
protecting the environment.
Indicates a message regarding child
safety restraints. Refer toSeating
and safety restraintsfor more
information.
Indicates that this Owner Guide
contains information on this subject.
Please refer to the Index to locate
the appropriate section which will
provide you more information.
Introduction
2
ProCarManuals.com
Page 10 of 288

WARNING LIGHTS AND CHIMES
Low fuel
Illuminates as an early reminder of a
low fuel condition indicated on the
fuel gauge (refer toFuel Gaugein
this chapter for more information).
When refueling, after the light
comes on, the amount of fuel that is added will be less than the
advertised capacity since there is fuel still in the tank. The ignition must
be in the ON position for this lamp to illuminate. The lamp will also
illuminate for several seconds after the ignition is turned to the ON
position regardless of the fuel level to ensure your bulb is working.
Service engine soon
Your vehicle is equipped with a
computer that monitors the engine’s
emission control system. This
system is commonly known as the
On Board Diagnostics System (OBD
II). The OBD II system protects the
environment by ensuring that your vehicle continues to meet
government emission standards. The OBD II system also assists the
service technician in properly servicing your vehicle.
TheService Engine Soonindicator light illuminates when the ignition is
first turned to the ON position to check the bulb. If it comes on after the
engine is started, one of the engine’s emission control systems may be
malfunctioning. The light may illuminate without a driveability concern
being noted. The vehicle will usually be drivable and will not require
towing.
0
000000000
MPH20km/h
406080
100
120
140
160
010 20304050
60
70
80
90
100
LOW
FUEL
DOOR
AJAR
LOW
RANGE4 X 4
CRUISE
BRAKE!
ABS+ -
LEF
H
RPM1000X0123
5
6 4
PRN 218C 18
H
D
FUEL FILL
SERVICE
ENGINE
SOON
LOW
FUEL
SERVICE
ENGINE
SOON
Instrumentation
10
ProCarManuals.com
Page 21 of 288

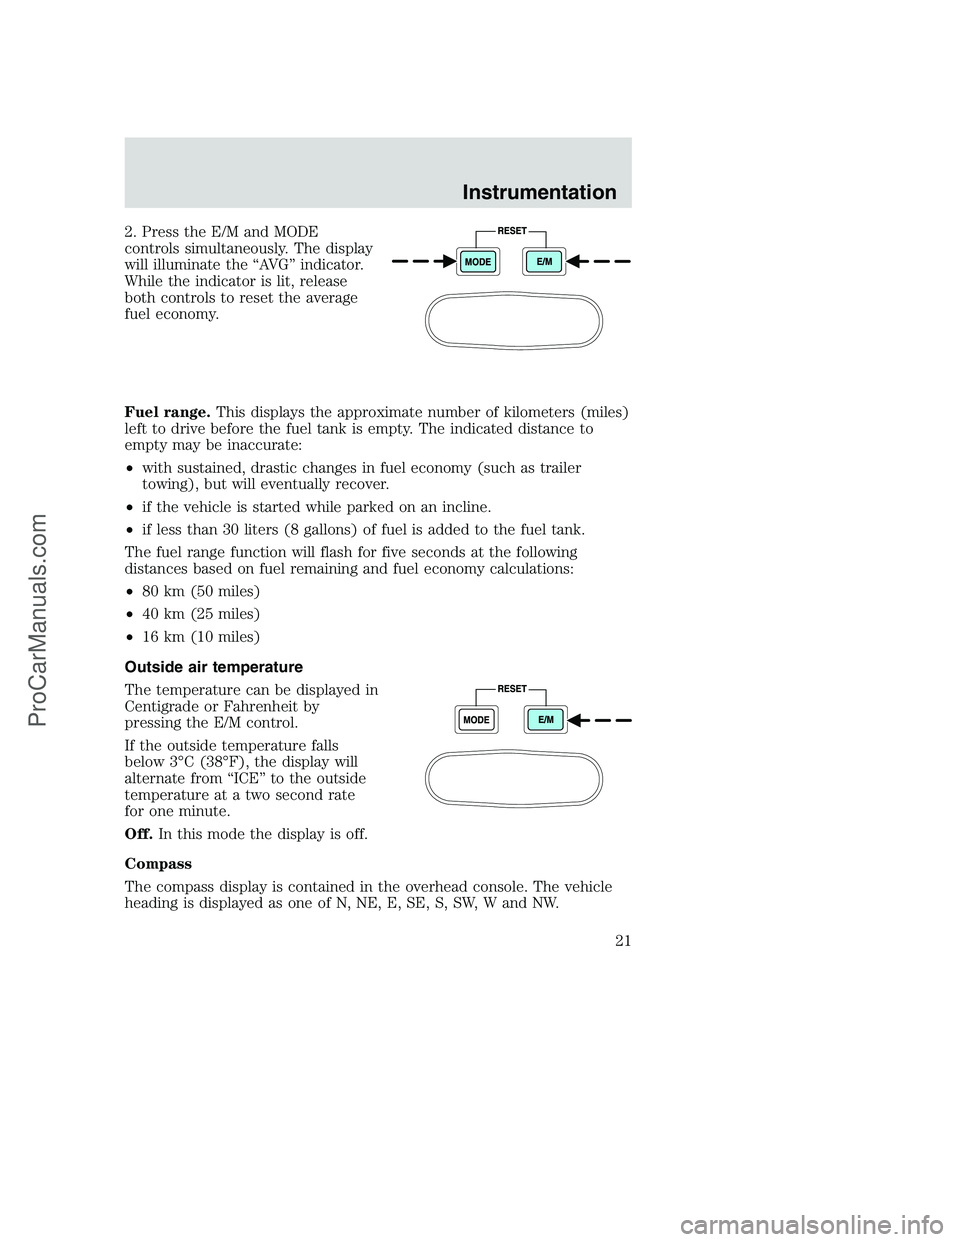
2. Press the E/M and MODE
controls simultaneously. The display
will illuminate the “AVG” indicator.
While the indicator is lit, release
both controls to reset the average
fuel economy.
Fuel range.This displays the approximate number of kilometers (miles)
left to drive before the fuel tank is empty. The indicated distance to
empty may be inaccurate:
•with sustained, drastic changes in fuel economy (such as trailer
towing), but will eventually recover.
•if the vehicle is started while parked on an incline.
•if less than 30 liters (8 gallons) of fuel is added to the fuel tank.
The fuel range function will flash for five seconds at the following
distances based on fuel remaining and fuel economy calculations:
•80 km (50 miles)
•40 km (25 miles)
•16 km (10 miles)
Outside air temperature
The temperature can be displayed in
Centigrade or Fahrenheit by
pressing the E/M control.
If the outside temperature falls
below 3°C (38°F), the display will
alternate from “ICE” to the outside
temperature at a two second rate
for one minute.
Off.In this mode the display is off.
Compass
The compass display is contained in the overhead console. The vehicle
heading is displayed as one of N, NE, E, SE, S, SW, W and NW.
Instrumentation
21
ProCarManuals.com
Page 25 of 288
High beams
•Push forward to activate.
•Pull toward you to deactivate.
Flash to pass
Pull toward you to activate and
release to deactivate.
Daytime running lamps (DRL) (if equipped)
Turns the headlamps on with a reduced output. To activate:
•the ignition must be in the ON position and
•the headlamp control is in the OFF or Parking lamps position.
Always remember to turn on your headlamps at dusk or during
inclement weather. The Daytime Running Lamp (DRL) system
does not activate with your tail lamps and generally may not provide
adequate lighting during these conditions. Failure to activate your
headlamps under these conditions may result in a collision.
Controls and features
25
ProCarManuals.com
Page 26 of 288

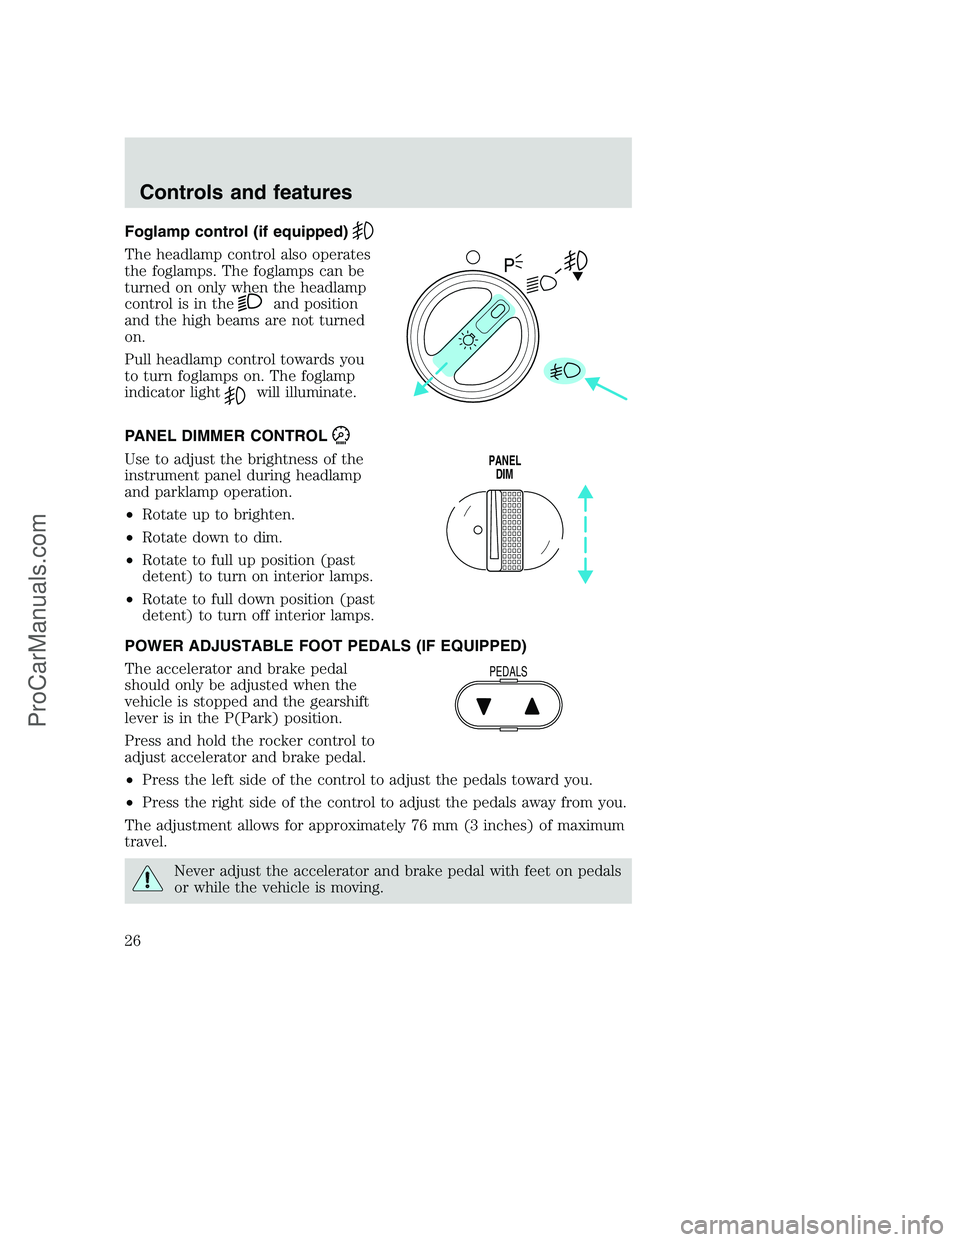
Foglamp control (if equipped)
The headlamp control also operates
the foglamps. The foglamps can be
turned on only when the headlamp
control is in the
and position
and the high beams are not turned
on.
Pull headlamp control towards you
to turn foglamps on. The foglamp
indicator light
will illuminate.
PANEL DIMMER CONTROL
Use to adjust the brightness of the
instrument panel during headlamp
and parklamp operation.
•Rotate up to brighten.
•Rotate down to dim.
•Rotate to full up position (past
detent) to turn on interior lamps.
•Rotate to full down position (past
detent) to turn off interior lamps.
POWER ADJUSTABLE FOOT PEDALS (IF EQUIPPED)
The accelerator and brake pedal
should only be adjusted when the
vehicle is stopped and the gearshift
lever is in the P(Park) position.
Press and hold the rocker control to
adjust accelerator and brake pedal.
•Press the left side of the control to adjust the pedals toward you.
•Press the right side of the control to adjust the pedals away from you.
The adjustment allows for approximately 76 mm (3 inches) of maximum
travel.
Never adjust the accelerator and brake pedal with feet on pedals
or while the vehicle is moving.
PANEL
DIM
PEDALS
Controls and features
26
ProCarManuals.com
Page 34 of 288

•If your vehicle has been parked with the windows closed during warm
weather conditions, the air conditioner will perform more efficiently in
cooling the vehicle if driven for two or three minutes with the
windows open. This will force most of the hot, stale air out of the
vehicle. Once the vehicle has been “aired out”, operate the climate
control system as desired.
•Do not put objects under the front seat that will interfere with the
airflow to the rear seats (if equipped).
•Remove any snow, ice or leaves
from the air intake area at the
base of the windshield.
•Do not place objects over the defroster outlets. These objects can
block airflow and reduce your ability to see through your windshield.
Avoid placing small objects on top of the instrument panel. These
objects may fall down into the defroster outlets and block airflow, in
addition to damaging the climate control system.
Do not place objects on top of the instrument panel, as these
objects may become projectiles in a collision or sudden stop.
To aid in side window defogging/demisting in cold weather conditions:
1. Select PANEL & FLOOR
2. Set the temperature control to full heat
3. Set the fan speed to HI
4. Direct the outer panel vents towards to side windows
To increase airflow to the outer panel vents, close the central panel
vents.
Controls and features
34
ProCarManuals.com
Page 71 of 288

•Terrain.Hills, mountains and tall buildings between your vehicle’s
antenna and the radio station signal can cause FM reception problems.
Static can be caused on AM stations by power lines, electric fences,
traffic lights and thunderstorms. Moving away from an interfering
structure (out of its “shadow”) returns your reception to normal.
•Station overload.Weak signals are sometimes captured by stronger
signals when you pass a broadcast tower. A stronger signal may
temporarily overtake a weaker signal and play while the weak station
frequency is displayed.
The audio system automatically switches to single channel reception if it
will improve the reception of a station normally received in stereo.
Audio system warranties and service
Refer to theWarranty Guidefor audio system warranty information.
If service is necessary, see your dealer or a qualified technician.
POSITIONS OF THE IGNITION
1. ACCESSORY, allows the electrical
accessories such as the radio to
operate while the engine is not
running.
2. LOCK, locks the steering wheel,
automatic transmission gearshift
lever and allows key removal.
3. OFF, shuts off the engine and all
accessories without locking the
steering wheel.
4. ON, all electrical circuits operational. Warning lights illuminated. Key
position when driving.
5. START, cranks the engine. Release the key as soon as the engine
starts.
3
1
2
5
4
Controls and features
71
ProCarManuals.com
Page 77 of 288
TILT STEERING WHEEL (IF EQUIPPED)
Pull the tilt steering control toward
you to move the steering wheel up
or down. Hold the control while
adjusting the wheel to the desired
position, then release the control to
lock the steering wheel in position.
Never adjust the steering wheel when the vehicle is moving.
HAZARD FLASHER
For information on the hazard flasher control, refer toHazard flasherin
theRoadside emergencieschapter.
WINDSHIELD WIPER/WASHER CONTROLS
Rotate the windshield wiper control
to the desired interval, low or high
speed position.
The bars of varying length are for
intermittent wipers. When in this
position rotate the control upward
for fast intervals and downward for
slow intervals.
Controls and features
77
ProCarManuals.com