Page 54 of 224

²Place the provided height
adaptors onto the back of the
GARAGE control as needed.
²Press the GARAGE control to
activate the transmitter.
Electronic compass/temperature display
Outside air temperature
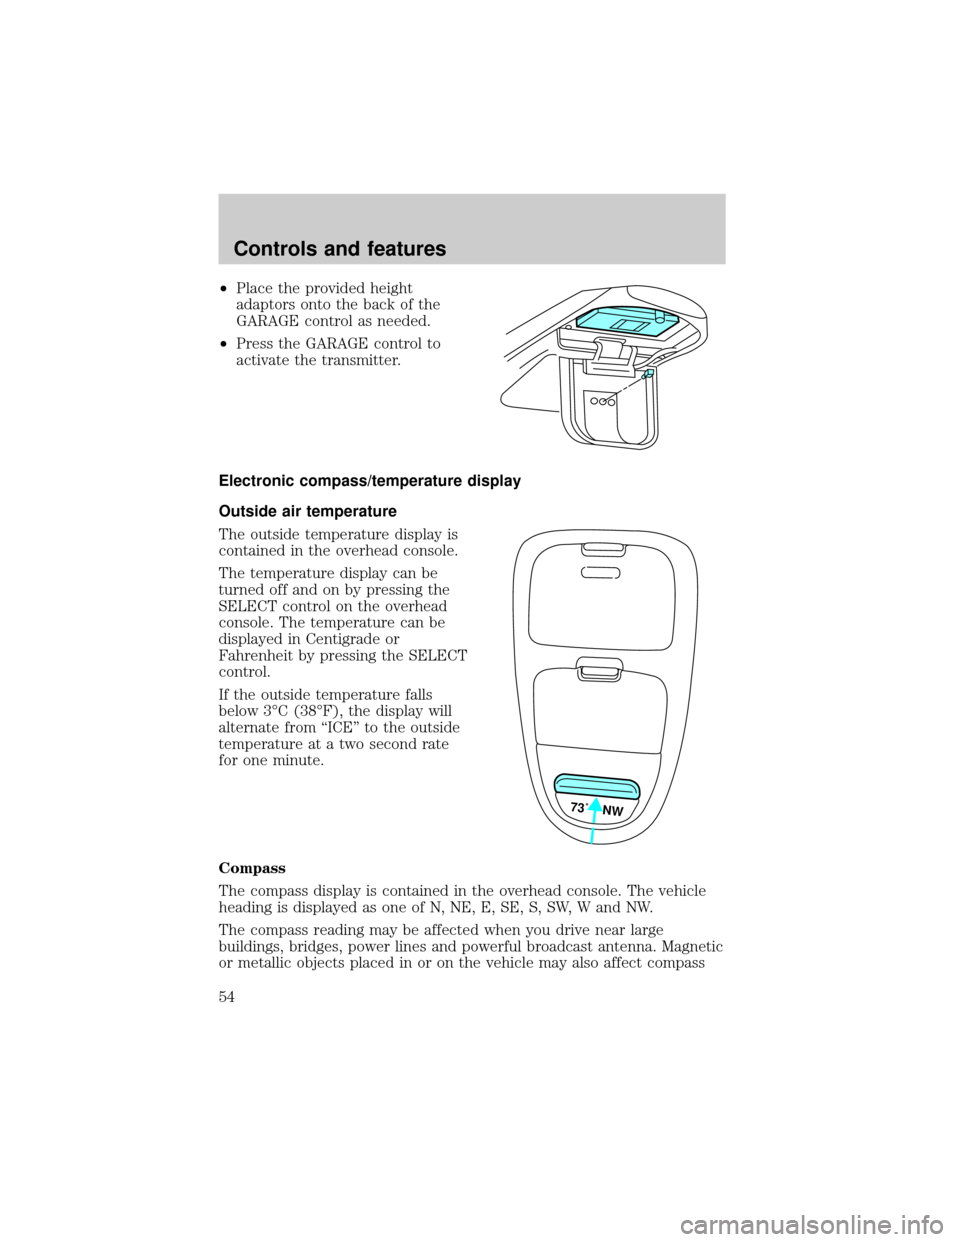
The outside temperature display is
contained in the overhead console.
The temperature display can be
turned off and on by pressing the
SELECT control on the overhead
console. The temperature can be
displayed in Centigrade or
Fahrenheit by pressing the SELECT
control.
If the outside temperature falls
below 3ÉC (38ÉF), the display will
alternate from ªICEº to the outside
temperature at a two second rate
for one minute.
Compass
The compass display is contained in the overhead console. The vehicle
heading is displayed as one of N, NE, E, SE, S, SW, W and NW.
The compass reading may be affected when you drive near large
buildings, bridges, power lines and powerful broadcast antenna. Magnetic
or metallic objects placed in or on the vehicle may also affect compass
73˚ NW
Controls and features
54
Page 83 of 224

The safety belt pretensioner is a device which removes excess webbing
from the safety belt system. The safety belt pretensioner uses the same
crash sensor system as the front air bag supplemental restraint system
(SRS). When the safety belt pretensioner deploys, webbing from the lap
and shoulder belt is tightened. The driver and front passenger seat belt
system (including retractors, buckles and height adjusters) must be
replaced if the vehicle is involved in a collision that results in
deployment of front air bags and safety belt pretensioners.
Safety belt height adjustment
Your vehicle has safety belt height
adjustments for the driver, front
passenger and rear outboard
passengers. Adjust the height of the
shoulder belt so the belt rests
across the middle of your shoulder.
To lower the shoulder belt height, push the button and slide the height
adjuster down. To raise the height of the shoulder belt, slide the height
adjuster up. Pull down on the height adjuster to make sure it is locked in
place.
Position the shoulder belt height adjusters so that the belt rests
across the middle of your shoulder. Failure to adjust the safety
belt properly could reduce the effectiveness of the seat belt and
increase the risk of injury in a collision.
Seating and safety restraints
83
Page 89 of 224

6. Within seven seconds of the safety belt warning light turning off,
buckle then unbuckle the safety belt.
²This will disable Belt Minder if it is currently enabled, or enable Belt
Minder if it is currently disabled.
7. Confirmation of disabling Belt Minder is provided by flashing the
safety belt warning light four times per second for three seconds.
8. Confirmation of enabling Belt Minder is provided by flashing the safety
belt warning light four times per second for three seconds, followed by
three seconds with the safety belt warning light off, then followed by
flashing the safety belt warning light four times per second for three
seconds again.
9. After receiving confirmation, the deactivation/activation procedure is
complete.
Safety belt maintenance
Inspect the safety belt systems periodically to make sure they work
properly and are not damaged. Inspect the safety belts to make sure
there are no nicks, wears or cuts, replacing if necessary. All safety belt
assemblies, including retractors, buckles, front seat belt buckle
assemblies, buckle support assemblies (slide bar-if equipped), shoulder
belt height adjusters (if equipped), shoulder belt guide on seatback (if
equipped), child safety seat tether bracket assemblies (if equipped), and
attaching hardware, should be inspected after a collision. Ford
recommends that all safety belt assemblies used in vehicles involved in a
collision be replaced. However, if the collision was minor and a qualified
technician finds that the belts do not show damage and continue to
operate properly, they do not need to be replaced. Safety belt assemblies
not in use during a collision should also be inspected and replaced if
either damage or improper operation is noted.
Failure to inspect and if necessary replace the safety belt
assembly under the above conditions could result in severe
personal injuries in the event of a collision.
Refer toCleaning and maintaining the safety beltsin the
Maintenance and caresection.
Seating and safety restraints
89
Page 124 of 224

Trailer frontal area considerations:
²Not to exceed towing vehicle front area without Class III trailer towing
package
²Not to exceed 5.52 square meters (60 square feet) with Class III
trailer towing package
Trailer frontal area considerations:
²Not to exceed towing vehicle front area without Class III trailer towing
package
²Not to exceed 5.52 square meters (60 square feet) with Class III
trailer towing package
Preparing to tow
Use the proper equipment for towing a trailer, and make sure it is
properly attached to your vehicle. See your dealer or a reliable trailer
dealer if you require assistance.
Hitches
Do not use hitches that clamp onto the vehicle's bumper or attach to the
axle. You must distribute the load in your trailer so that 10% of the total
weight of the trailer is on the tongue.
Load equalizing hitch
When hooking up a trailer using a load equalizing hitch, always use the
following procedure:
1. Park the unloaded vehicle on a level surface.
2. Measure the height of a reference point on the front and rear bumpers
at the center of the vehicle.
3. Attach the trailer to the vehicle and adjust the hitch equalizers so that
the front bumper height is within 0±13 mm (0.5 in) of the reference
point. After proper adjustment, the rear bumper should be no higher
than in Step 3.
Adjusting an equalizing hitch so the rear bumper of the vehicle
is lower or higher than it was unloaded will defeat the function
of the load equalizing hitch and may cause unpredictable handling.
Driving
124
Page 199 of 224
ENGINE DATA
Engine 4.6L V8 engine 5.4L V8 engine
Cubic inches 281 330
Required fuel 87 octane 87 octane
Firing order 1-3-7-2-6-5-4-8 1-3-7-2-6-5-4-8
Spark plug gap1.3-1.4 mm
(0.052-0.056 inch)1.3-1.4 mm
(0.052-0.056 inch)
Ignition system Coil on plug Coil on plug
Compression ratio 9.0:1 9.0:1
VEHICLE DIMENSIONS
DimensionBody Style
Super Crew 4x2 mm
(in)Super Crew 4x4mm
(in)
(1) Overall length5 739
(225.9)5 739
(225.9)
(2) Overall width2 030
(79.9)
12 030
(79.9)1
(3) Overall height1 878
(73.9)1 953
(76.9)
(4) Wheel base3 518
(138.5)3 518
(138.5)
(5)Track front/rear1 661
(65.4)1 661
(65.4)
1Vehicle width, including mirrors: 2 293 mm (90.3 in)
Capacities and specifications
199