2001 FORD EXPEDITION automatic transmission
[x] Cancel search: automatic transmissionPage 68 of 280
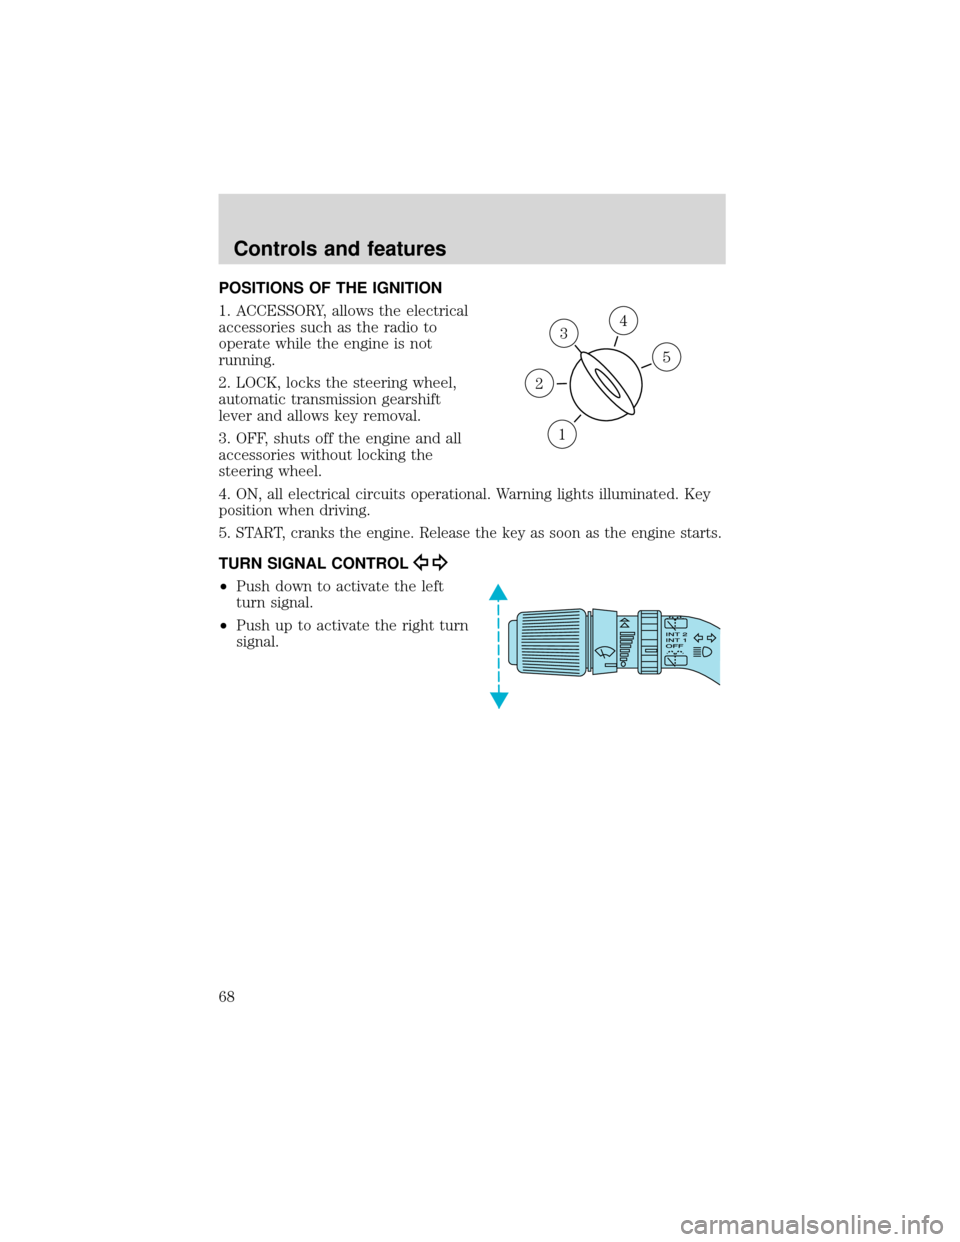
POSITIONS OF THE IGNITION
1. ACCESSORY, allows the electrical
accessories such as the radio to
operate while the engine is not
running.
2. LOCK, locks the steering wheel,
automatic transmission gearshift
lever and allows key removal.
3. OFF, shuts off the engine and all
accessories without locking the
steering wheel.
4. ON, all electrical circuits operational. Warning lights illuminated. Key
position when driving.
5.
START, cranks the engine. Release the key as soon as the engine starts.
TURN SIGNAL CONTROL
•Push down to activate the left
turn signal.
•Push up to activate the right turn
signal.
3
1
2
5
4
Controls and features
68
Page 75 of 280
OVERDRIVE CONTROL
Activating overdrive
(Overdrive) is the normal drive position for the best fuel economy.
The overdrive function allows automatic upshifts and downshifts through
all available gears.
Deactivating overdrive
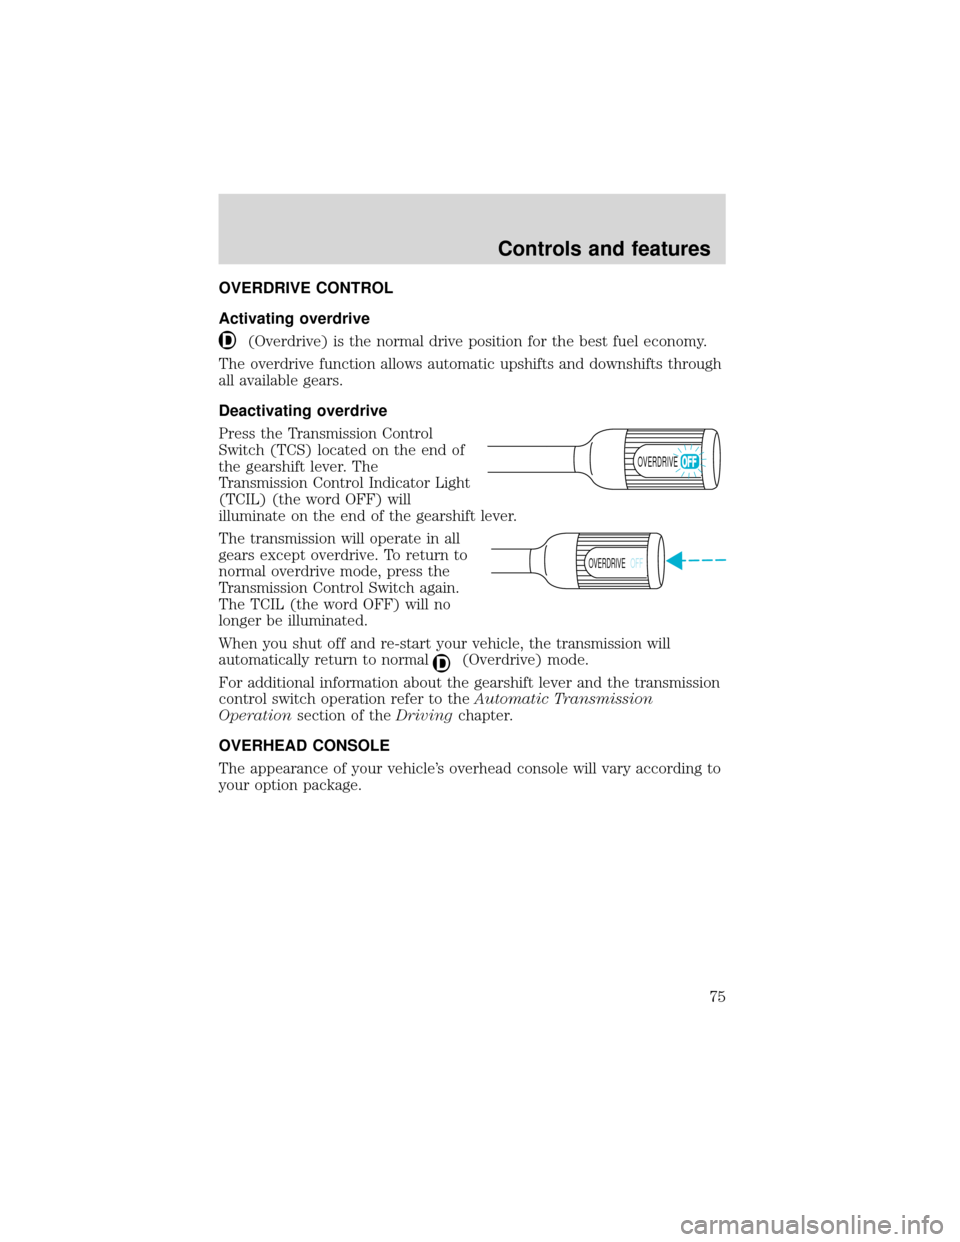
Press the Transmission Control
Switch (TCS) located on the end of
the gearshift lever. The
Transmission Control Indicator Light
(TCIL) (the word OFF) will
illuminate on the end of the gearshift lever.
The transmission will operate in all
gears except overdrive. To return to
normal overdrive mode, press the
Transmission Control Switch again.
The TCIL (the word OFF) will no
longer be illuminated.
When you shut off and re-start your vehicle, the transmission will
automatically return to normal
(Overdrive) mode.
For additional information about the gearshift lever and the transmission
control switch operation refer to theAutomatic Transmission
Operationsection of theDrivingchapter.
OVERHEAD CONSOLE
The appearance of your vehicle’s overhead console will vary according to
your option package.
OVERDRIVE
OVERDRIVEOFF
Controls and features
75
Page 108 of 280
Memory seats/rearview mirrors/adjustable pedals (if equipped)
This system allows automatic
positioning of the driver seat,
outside rearview mirrors, and
adjustable pedals to three
programmable positions.
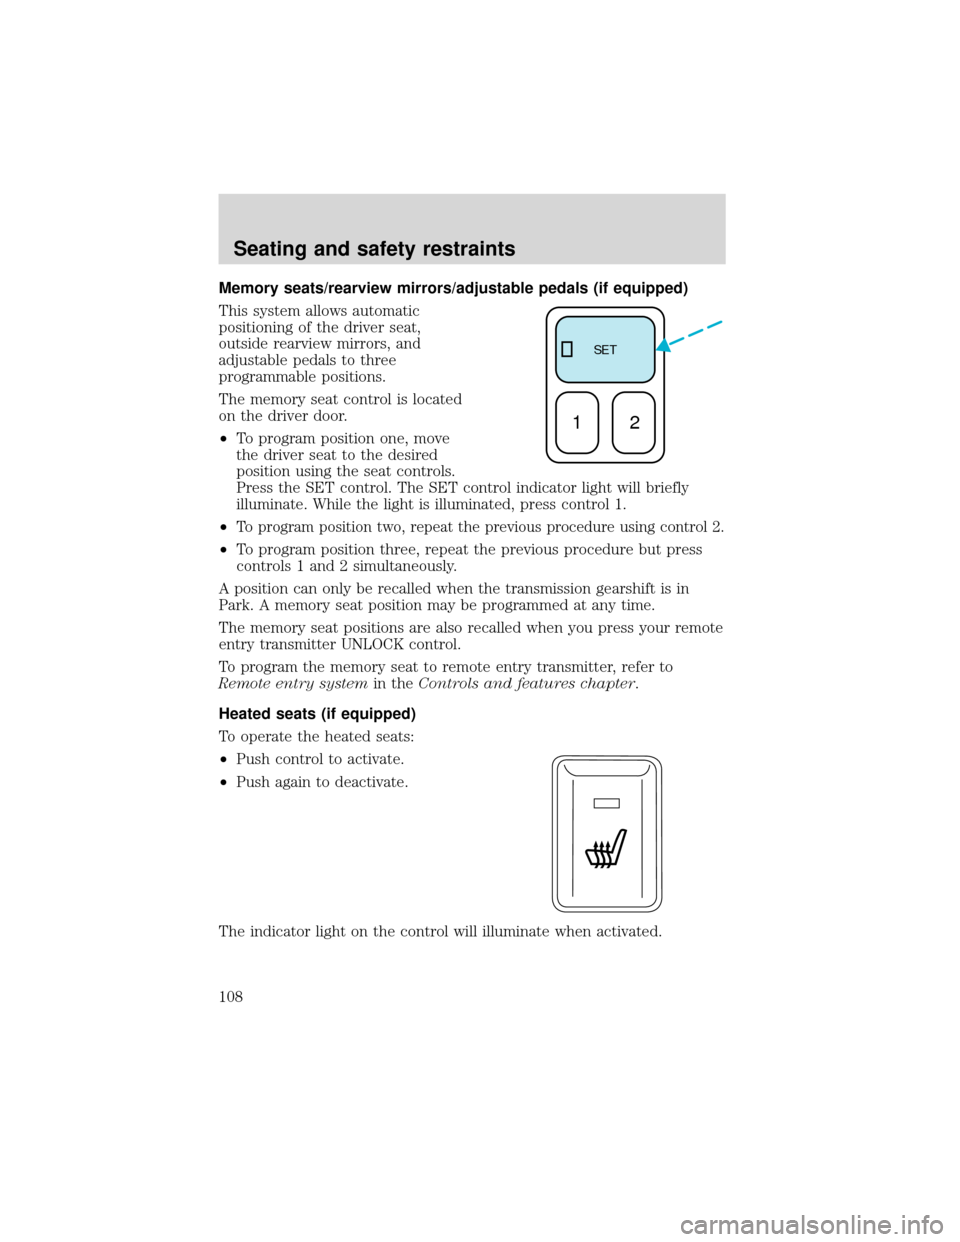
The memory seat control is located
on the driver door.
•To program position one, move
the driver seat to the desired
position using the seat controls.
Press the SET control. The SET control indicator light will briefly
illuminate. While the light is illuminated, press control 1.
•
To program position two, repeat the previous procedure using control 2.
•To program position three, repeat the previous procedure but press
controls 1 and 2 simultaneously.
A position can only be recalled when the transmission gearshift is in
Park. A memory seat position may be programmed at any time.
The memory seat positions are also recalled when you press your remote
entry transmitter UNLOCK control.
To program the memory seat to remote entry transmitter, refer to
Remote entry systemin theControls and features chapter.
Heated seats (if equipped)
To operate the heated seats:
•Push control to activate.
•Push again to deactivate.
The indicator light on the control will illuminate when activated.
SE T
12
Seating and safety restraints
108
Page 126 of 280
Do not sit on top of a buckled safety belt to avoid the Belt
Minder chime. Sitting on the safety belt will increase the risk of
injury in an accident. To disable (one-time) or deactivate the Belt
Minder feature please follow the directions stated below.
One time disable
Any time the safety belt is buckled and then unbuckled during an
ignition ON cycle, Belt Minder will be disabled for that ignition cycle
only.
Deactivating/activating the belt minder feature
Read steps1-9thoroughly before proceeding with the
deactivation/activation programming procedure.
The Belt Minder feature can be deactivated/activated by performing the
following procedure:
Before following the procedure, make sure that:
•the parking brake is set
•the gearshift is in P (Park) (automatic transmission).
•the ignition switch is in the OFF position
•all vehicle doors are closed
•the driver’s safety belt is unbuckled
•the parklamps/headlamps are in OFF position (If vehicle is equipped
with Autolamps, this will not affect the procedure.)
To reduce the risk of injury, do not deactivate/activate the Belt
Minder feature while driving the vehicle.
1. Turn the ignition switch to the RUN (or ON) position. (DO NOT
START THE ENGINE)
2. Wait until the safety belt warning light turns off. (Approximately 1–2
minutes)
•Steps 3–5 must be completed within 60 seconds or the procedure will
have to be repeated.
3. Buckle then unbuckle the safety belt three times, ending with the
safety belt unbuckled. This can be done before or during Belt Minder
warning activation.
Seating and safety restraints
126
Page 156 of 280
Speed sensitive steering
The steering in your vehicle is speed sensitive. At high speeds, steering
assist will decrease to improve steering feel.
If the amount of effort required to steer your vehicle changes while
driving at a constant vehicle speed, have the power steering system
checked by your dealer or a qualified service technician.
AIR SUSPENSION SYSTEM (IF EQUIPPED)
The air suspension system is designed to improve ride, handling and
general vehicle performance for static, on and off-road driving conditions.
•The load leveling feature of the air suspension automatically keeps the
vehicle at a constant level if a load is added or removed from the
vehicle.
•The height adjustment feature automatically controls the vehicle
height over a range of approximately 5 cm (2 inches) based on vehicle
speed, ignition position and selection of two or four-wheel drive
modes.
•The air suspension automatically puts the vehicle at its lowest height
when ignition is OFF to provide easy entry and exit. When ever a door
is opened (including the liftgate) the system memorizes and maintains
the height of the vehicle until all doors are closed or until vehicle
exceeds 16km/h (10mph).
•The air suspension system raises the vehicle to its normal ride
position when the ignition is turned on, all doors are closed and the
transmission is shifted into gear.
•In 4WD Low the air suspension system will not move to its lowest
height. In 4WD Low, the air suspension system raises the vehicle
above the normal ride height at speeds below 40 km/h (25 mph) to
improve ground clearance. In 4WD Low, do not exceed 56 km/h
(35 mph).
•When the vehicle is in motion, the air suspension system will adjust
the vehicle’s height according to ground clearance and speed to
maximize ride comfort.
•It is normal to occasionally hear a buzz or clicking from the vehicle’s
air suspension system when the ignition is turned off. The system
stays energized for 40 minutes after the ignition is turned off to
compensate for any load changes made after the vehicle is parked.
Driving
156
Page 159 of 280
AUTOMATIC TRANSMISSION OPERATION
Brake-shift interlock
This vehicle is equipped with a brake-shift interlock feature that prevents
the gearshift lever from being moved from P (Park) when the ignition is
in the ON position unless brake pedal is depressed.
If you cannot move the gearshift lever out of P (Park) with ignition in
the ON position and the brake pedal depressed:
1. Apply the parking brake, turn ignition key to LOCK, then remove the
key.
2. Insert the key and turn it to OFF. Apply the brake pedal and shift to N
(Neutral).
3. Start the vehicle.
If it is necessary to use the above procedure to move the gearshift lever,
it is possible that a fuse has blown or the vehicle’s brakelamps are not
operating properly. Refer toFuses and relaysin theRoadside
emergencieschapter.
Do not drive your vehicle until you verify that the brakelamps
are working.
If your vehicle gets stuck in mud or snow it may be rocked out by
shifting from forward and reverse gears, stopping between shifts, in a
steady pattern. Press lightly on the accelerator in each gear.
Do not rock the vehicle if the engine is not at normal operating
temperature or damage to the transmission may occur.
Do not rock the vehicle for more than a few minutes or damage
to the transmission and tires may occur or the engine may
overheat.
Always set the parking brake fully and make sure the gearshift is
latched in P (Park). Turn off the ignition whenever you leave
your vehicle.
If the parking brake is fully released, but the brake warning lamp
remains illuminated, the brakes may not be working properly.
See your dealer or a qualified service technician.
Driving
159
Page 160 of 280

Driving with a 4–speed automatic transmission
Your vehicle’s automatic transmission is equipped with a special shift
strategy that insures maximum heater performance during cold weather
operation.
When ambient temperature is–5°C (23°F) or below and the engine
coolant temperature is below 38°C (100°F), light throttle upshifts may
be slightly delayed. Once the engine coolant temperature reaches 71°C
(160°F) the normal shift strategy will resume. This is normal operation
and will not affect the function or the durability of the transmission.
If the normal shift strategy does not resume once the engine
coolant temperature reaches the normal operating temperature,
or if the downshifts and other throttle conditions do not function
normally, see your dealer or a qualified service technician as soon
as possible.
Understanding gearshift positions
To put your vehicle in gear, start the engine, depress the brake pedal,
then move gearshift lever out of P (Park).
Hold the brake pedal down while you move the gearshift lever
from P (Park) to another position. If you do not hold the brake
pedal down, your vehicle may move unexpectedly and injure someone.
P (Park)
Always come to a complete stop
before shifting into P (Park). Make
sure the gearshift lever is securely
latched in P (Park). This position
locks the transmission and prevents
the rear wheels from turning.
Always set the parking brake fully and make sure the gearshift
lever is latched in P (Park). Turn off the ignition whenever you
leave your vehicle.
Driving
160
Page 162 of 280
Each time the vehicle is started, the transmission will automatically
return to normal overdrive mode.
Every time the vehicle is shut off and restarted, you must press the
transmission control switch to cancel overdrive operation if driving in
overdrive is not desired.
2 (Second)
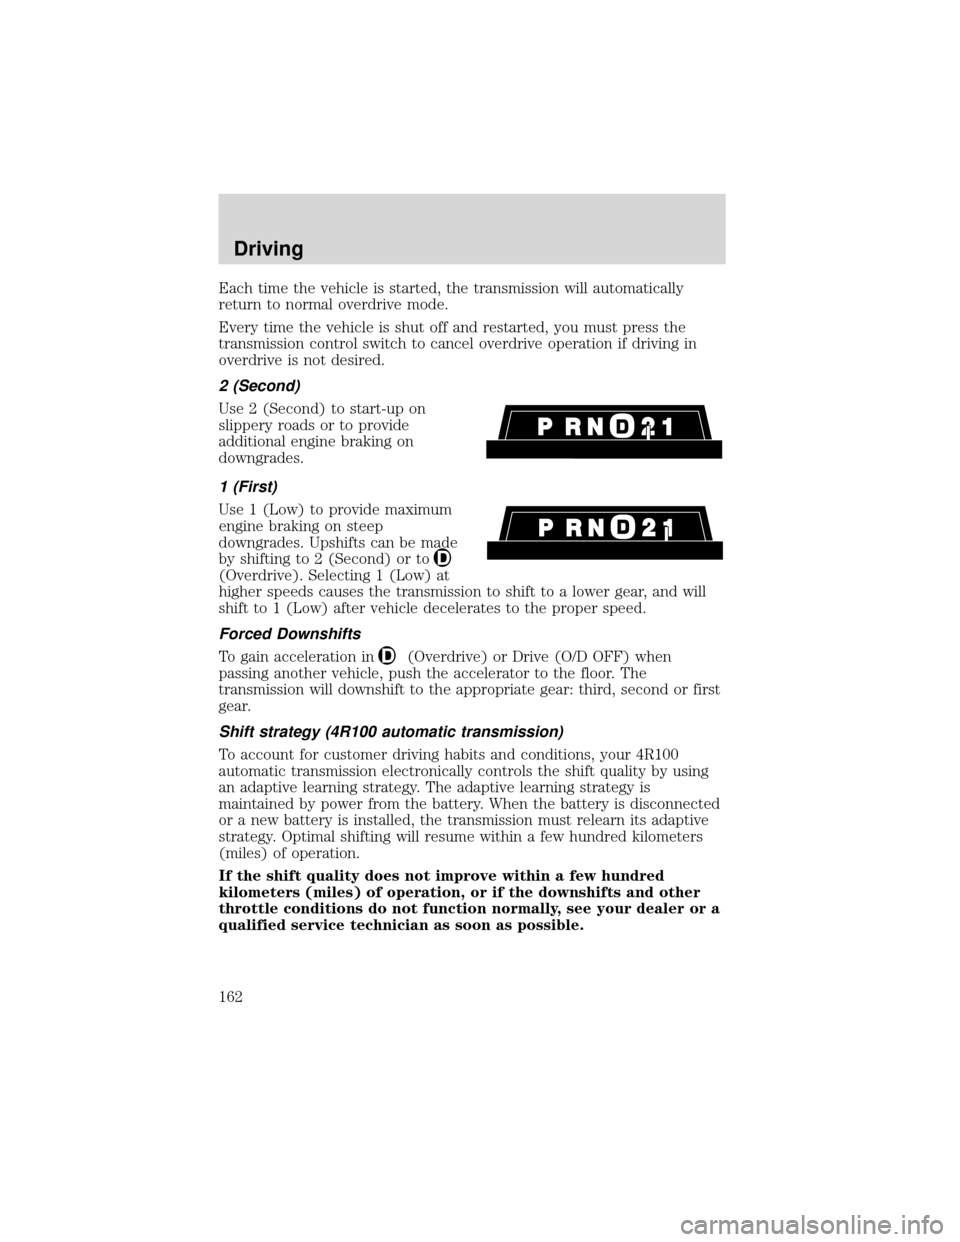
Use 2 (Second) to start-up on
slippery roads or to provide
additional engine braking on
downgrades.
1 (First)
Use 1 (Low) to provide maximum
engine braking on steep
downgrades. Upshifts can be made
by shifting to 2 (Second) or to
(Overdrive). Selecting 1 (Low) at
higher speeds causes the transmission to shift to a lower gear, and will
shift to 1 (Low) after vehicle decelerates to the proper speed.
Forced Downshifts
To gain acceleration in
(Overdrive) or Drive (O/D OFF) when
passing another vehicle, push the accelerator to the floor. The
transmission will downshift to the appropriate gear: third, second or first
gear.
Shift strategy (4R100 automatic transmission)
To account for customer driving habits and conditions, your 4R100
automatic transmission electronically controls the shift quality by using
an adaptive learning strategy. The adaptive learning strategy is
maintained by power from the battery. When the battery is disconnected
or a new battery is installed, the transmission must relearn its adaptive
strategy. Optimal shifting will resume within a few hundred kilometers
(miles) of operation.
If the shift quality does not improve within a few hundred
kilometers (miles) of operation, or if the downshifts and other
throttle conditions do not function normally, see your dealer or a
qualified service technician as soon as possible.
Driving
162