Page 83 of 216

The air bags inflate and deflate
rapidly upon activation. After air bag
deployment, it is normal to notice a
smoke-like, powdery residue or
smell the burnt propellant. This may
consist of cornstarch, talcum
powder (to lubricate the bag) or
sodium compounds (e.g., baking
soda) that result from the
combustion process that inflates the
air bag. Small amounts of sodium
hydroxide may be present which
may irritate the skin and eyes, but
none of the residue is toxic.
While the system is designed to help
reduce serious injuries, contact with
a deploying air bag may also cause abrasions, swelling or temporary
hearing loss. Because air bags must inflate rapidly and with considerable
force, there is the risk of death or serious injuries such as fractures,
facial and eye injuries or internal injuries, particularly to occupants who
are not properly restrained or are otherwise out of position at the time
of air bag deployment. Thus, it is extremely important that occupants be
properly restrained as far away from the air bag module as possible while
maintaining vehicle control.
The SRS consists of:
²driver and passenger air bag modules (which include the inflators and
air bags)
²one or more impact and safing sensors
²a readiness light and tone
²a diagnostic module
²and the electrical wiring which connects the components
The diagnostic module monitors its own internal circuits and the
supplemental air bag electrical system warning (including the impact
sensors), the system wiring, the air bag system readiness light, the air
bag back up power and the air bag ignitors.
Several air bag system components get hot after inflation. Do not
touch them after inflation.
Seating and safety restraints
83
Page 165 of 216

SNOW TIRES AND CHAINS
Snow tires must be the same size and grade as the tires you
currently have on your vehicle.
The tires on your vehicle have all weather treads to provide traction in
rain and snow. However, in some climates, you may need to use snow
tires and chains. If you need to use snow tires and chains, it is
recommended that steel wheels are used of the same size and
specifications as those originally installed.
Follow these guidelines when using snow tires and chains:
²Do not use tire chains on aluminum wheels. Chains may chip the
wheels.
²SAE Class S chains may be used on P185/65R14 tires.
²Do not use tire chains with 38 cm (15 inch) wheel/tire options. Using
chains on this size tire may cause damage to steering, suspension
and/or body components.
²Install chains securely, verifying that the chains do not touch any
wiring, brake lines or fuel lines.
²Drive cautiously. If you hear the chains rub or bang against your
vehicle, stop and re-tighten the chains. If this does not work, remove
the chains to prevent damage to your vehicle.
²If possible, avoid fully loading your vehicle.
²Remove the tire chains when they are no longer needed. Do not use
tire chains on dry roads.
²The suspension insulation and bumpers will help prevent vehicle
damage. Do not remove these components from your vehicle when
using snow tires and chains.
Maintenance and care
165
Page 176 of 216

Allow the vehicle to sit for at least eight hours without starting the
engine. Then, start the engine and complete the above driving cycle. The
engine must warm up to its normal operating temperature. Once started,
do not turn off the engine until the above driving cycle is complete.
BULBS
Replacing exterior bulbs
It is a good idea to check the operation of the following lights frequently:
²Headlamps
²Turn signals
²Foglamps (if equipped)
²High-mount brakelamp
²Tail lamps
²Brakelamps
²Backup lamps
²License plate lamp
²Hazard flashers
Do not remove lamp bulbs unless they will be replaced immediately. If a
bulb is removed for an extended period of time, contaminants may enter
the lamp housings and affect performance.
Replacing headlamp bulbs
1. Make sure that the headlamps are turned OFF.
2. Open the hood and disconnect the headlamp wiring socket from the
in-line connector. This will make it easier to change the bulb.
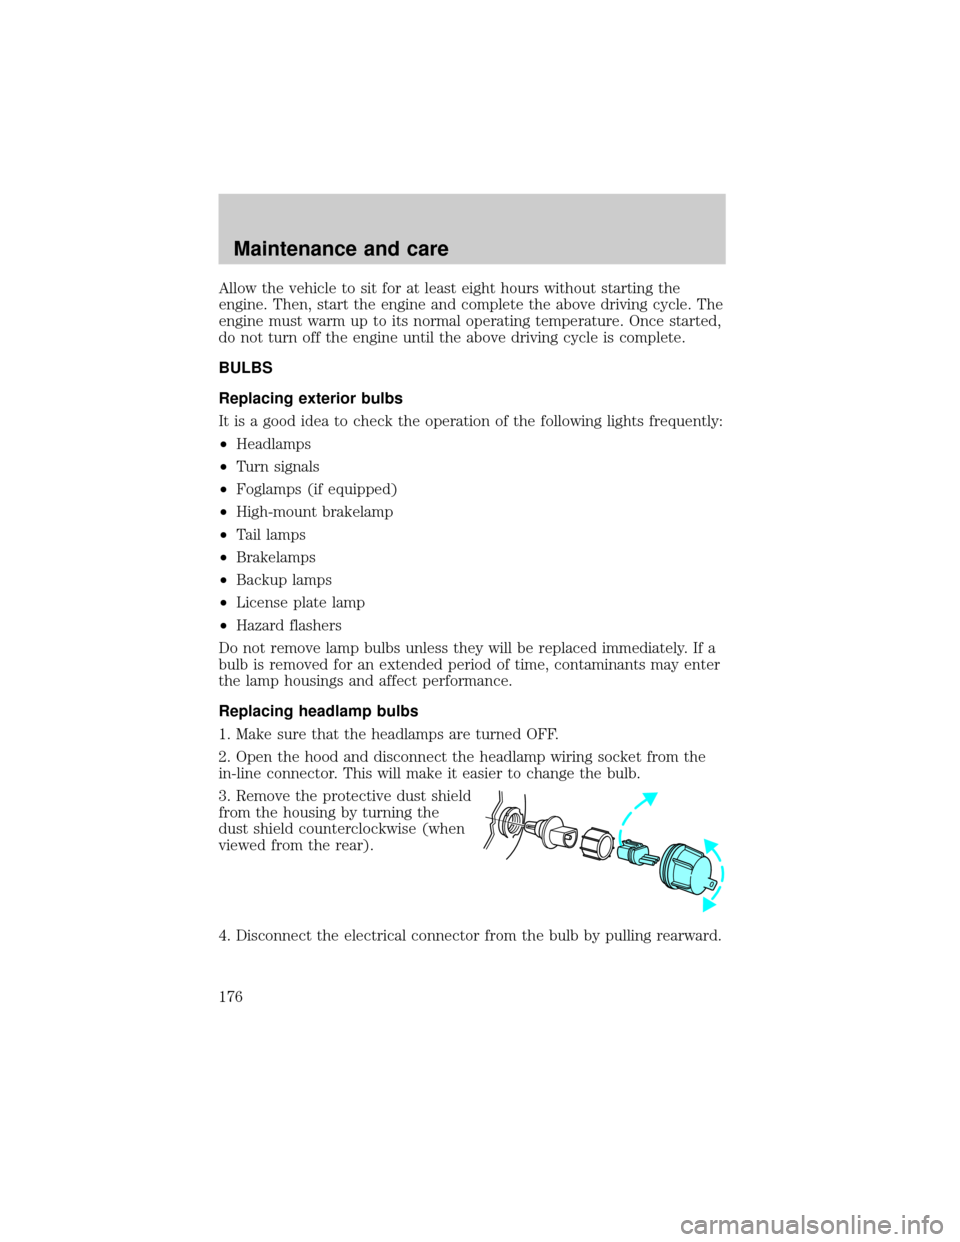
3. Remove the protective dust shield
from the housing by turning the
dust shield counterclockwise (when
viewed from the rear).
4. Disconnect the electrical connector from the bulb by pulling rearward.
Maintenance and care
176
Page 177 of 216

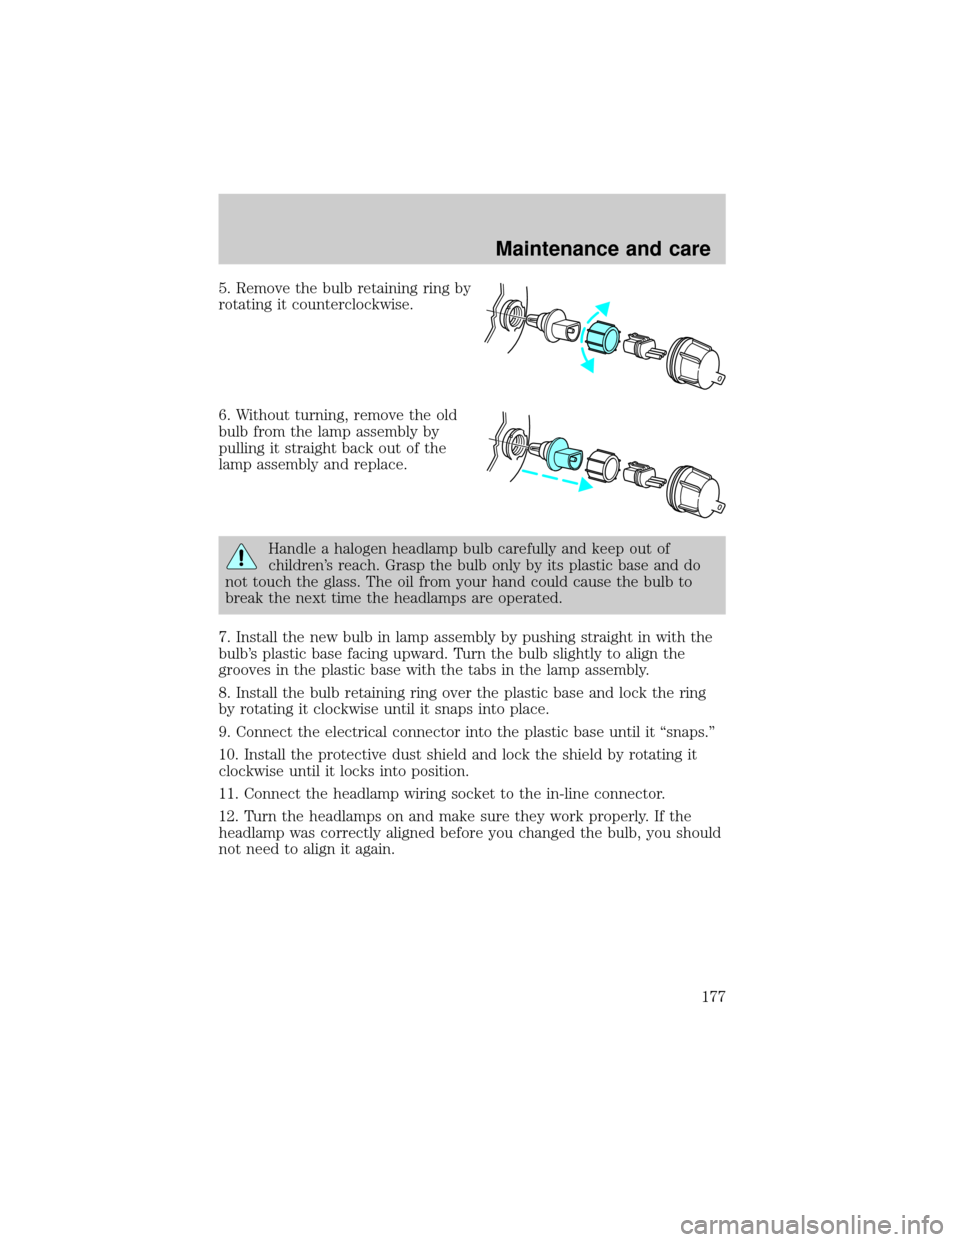
5. Remove the bulb retaining ring by
rotating it counterclockwise.
6. Without turning, remove the old
bulb from the lamp assembly by
pulling it straight back out of the
lamp assembly and replace.
Handle a halogen headlamp bulb carefully and keep out of
children's reach. Grasp the bulb only by its plastic base and do
not touch the glass. The oil from your hand could cause the bulb to
break the next time the headlamps are operated.
7. Install the new bulb in lamp assembly by pushing straight in with the
bulb's plastic base facing upward. Turn the bulb slightly to align the
grooves in the plastic base with the tabs in the lamp assembly.
8. Install the bulb retaining ring over the plastic base and lock the ring
by rotating it clockwise until it snaps into place.
9. Connect the electrical connector into the plastic base until it ªsnaps.º
10. Install the protective dust shield and lock the shield by rotating it
clockwise until it locks into position.
11. Connect the headlamp wiring socket to the in-line connector.
12. Turn the headlamps on and make sure they work properly. If the
headlamp was correctly aligned before you changed the bulb, you should
not need to align it again.
Maintenance and care
177