Page 129 of 280

When installing a child safety seat:
²Review and follow the information
presented in theAir Bag
Supplemental Restraint System
(SRS) section in this chapter.
²Use the correct safety belt buckle
for that seating position (the
buckle closest to the direction the
tongue is coming from).
²Insert the belt tongue into the
proper buckle until you hear a
snap and feel it latch. Make sure
the tongue is securely fastened in
the buckle.
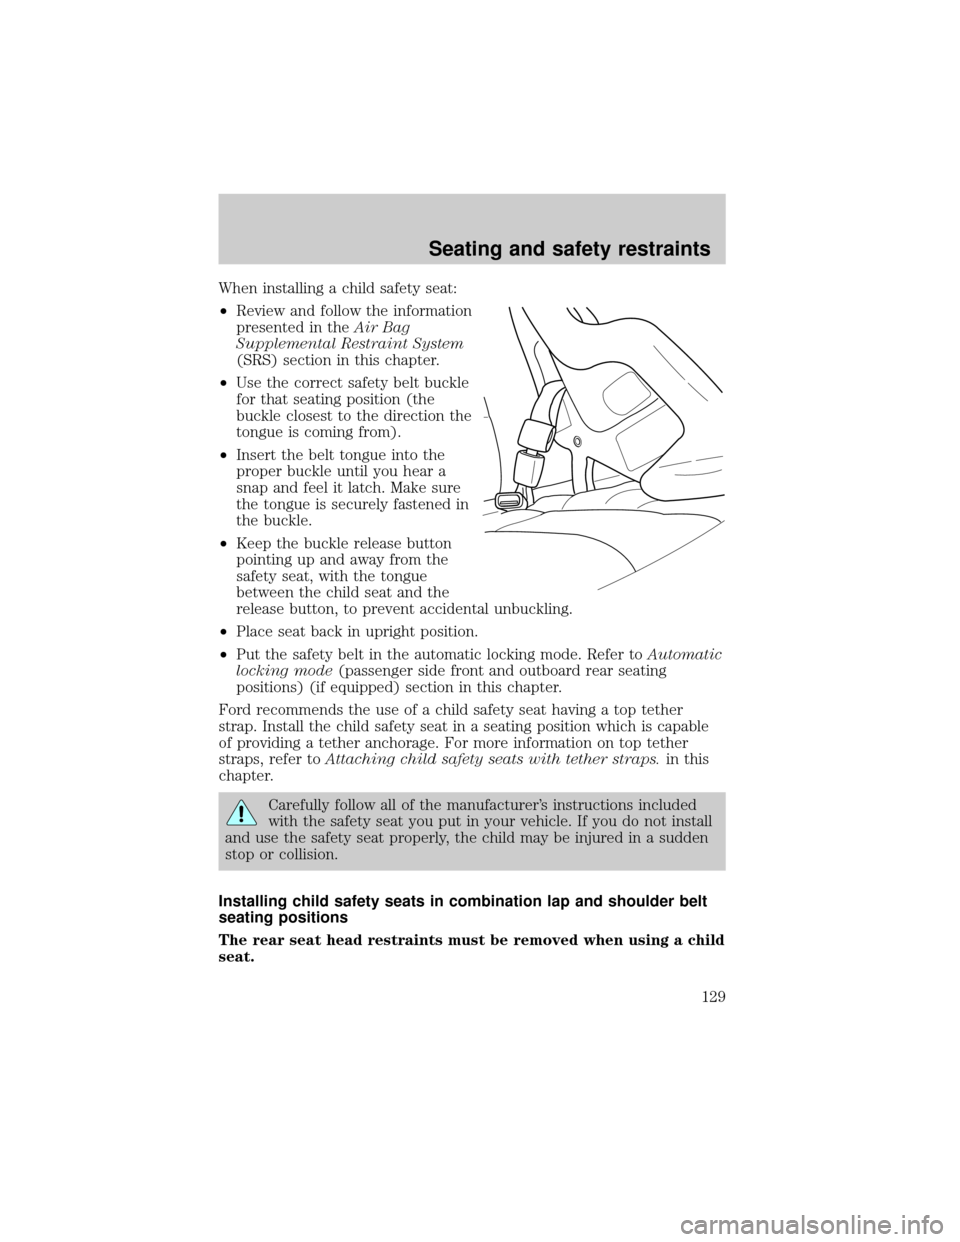
²Keep the buckle release button
pointing up and away from the
safety seat, with the tongue
between the child seat and the
release button, to prevent accidental unbuckling.
²Place seat back in upright position.
²Put the safety belt in the automatic locking mode. Refer toAutomatic
locking mode(passenger side front and outboard rear seating
positions) (if equipped) section in this chapter.
Ford recommends the use of a child safety seat having a top tether
strap. Install the child safety seat in a seating position which is capable
of providing a tether anchorage. For more information on top tether
straps, refer toAttaching child safety seats with tether straps.in this
chapter.
Carefully follow all of the manufacturer's instructions included
with the safety seat you put in your vehicle. If you do not install
and use the safety seat properly, the child may be injured in a sudden
stop or collision.
Installing child safety seats in combination lap and shoulder belt
seating positions
The rear seat head restraints must be removed when using a child
seat.
Seating and safety restraints
129
Page 131 of 280
3. While holding the shoulder and
lap belt portions together, route the
tongue through the child seat
according to the child seat
manufacturer's instructions. Be sure
the belt webbing is not twisted.
4. Insert the belt tongue into the
proper buckle (the buckle closest to
the direction the tongue is coming
from) for that seating position until
you hear a snap and feel the latch
engage. Make sure the tongue is
latched securely by pulling on it.
5. To put the retractor in the
automatic locking mode, grasp the
shoulder portion of the belt and pull
downward until all of the belt is
extracted and a click is heard.
6. Allow the belt to retract. The belt will click as it retracts to indicate it
is in the automatic locking mode.
Seating and safety restraints
131
Page 132 of 280

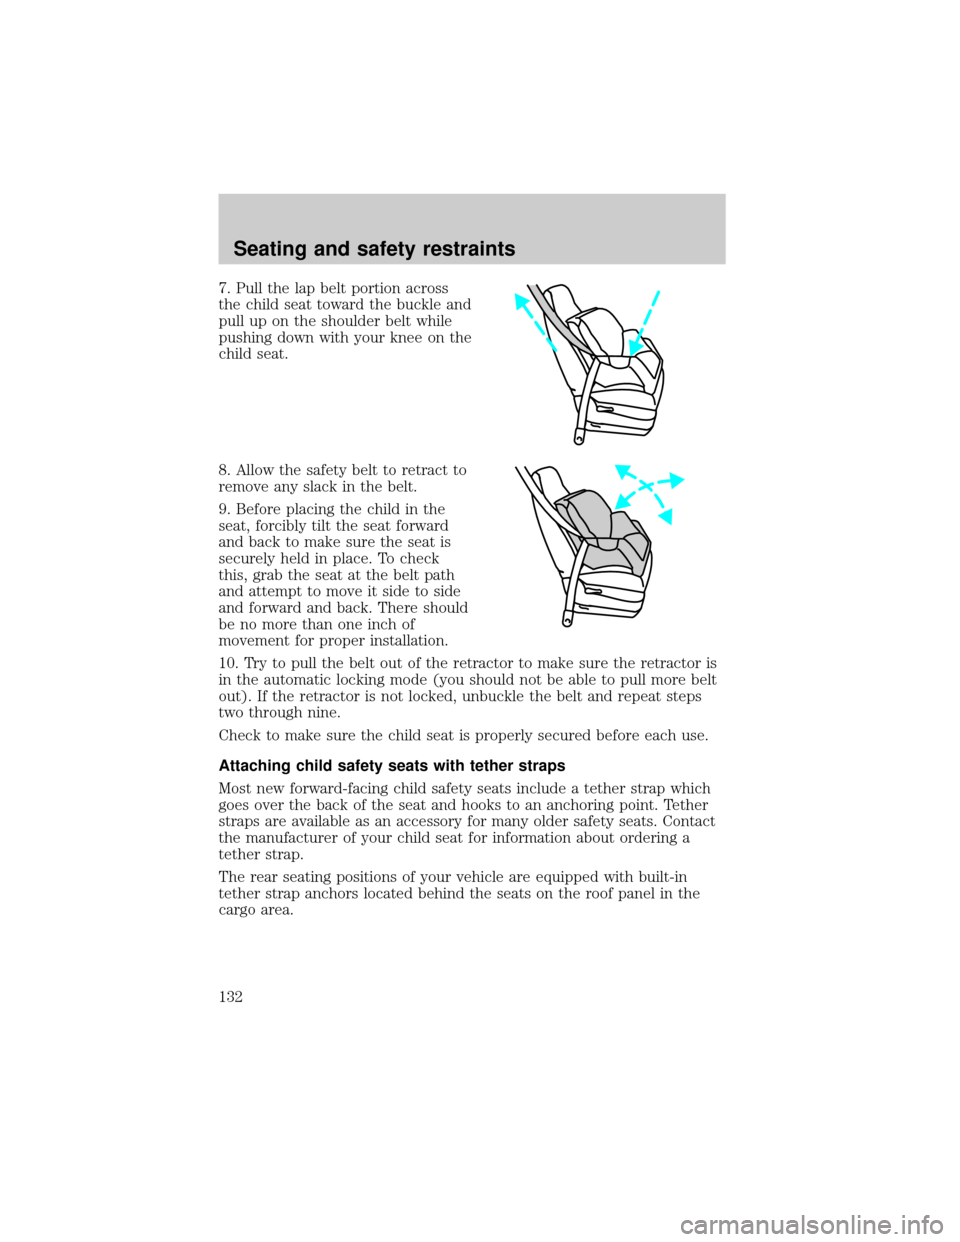
7. Pull the lap belt portion across
the child seat toward the buckle and
pull up on the shoulder belt while
pushing down with your knee on the
child seat.
8. Allow the safety belt to retract to
remove any slack in the belt.
9. Before placing the child in the
seat, forcibly tilt the seat forward
and back to make sure the seat is
securely held in place. To check
this, grab the seat at the belt path
and attempt to move it side to side
and forward and back. There should
be no more than one inch of
movement for proper installation.
10. Try to pull the belt out of the retractor to make sure the retractor is
in the automatic locking mode (you should not be able to pull more belt
out). If the retractor is not locked, unbuckle the belt and repeat steps
two through nine.
Check to make sure the child seat is properly secured before each use.
Attaching child safety seats with tether straps
Most new forward-facing child safety seats include a tether strap which
goes over the back of the seat and hooks to an anchoring point. Tether
straps are available as an accessory for many older safety seats. Contact
the manufacturer of your child seat for information about ordering a
tether strap.
The rear seating positions of your vehicle are equipped with built-in
tether strap anchors located behind the seats on the roof panel in the
cargo area.
Seating and safety restraints
132
Page 134 of 280

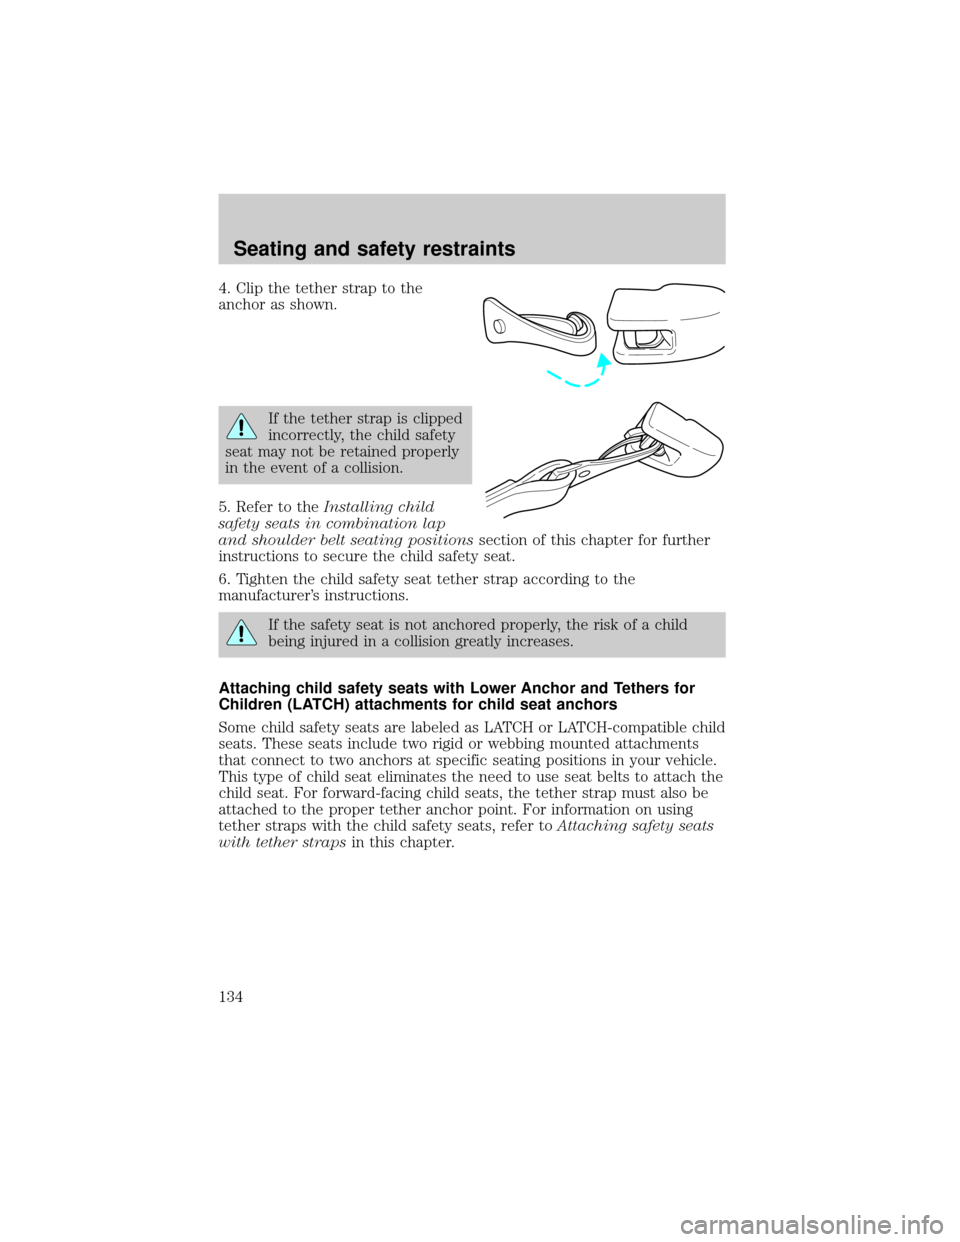
4. Clip the tether strap to the
anchor as shown.
If the tether strap is clipped
incorrectly, the child safety
seat may not be retained properly
in the event of a collision.
5. Refer to theInstalling child
safety seats in combination lap
and shoulder belt seating positionssection of this chapter for further
instructions to secure the child safety seat.
6. Tighten the child safety seat tether strap according to the
manufacturer's instructions.
If the safety seat is not anchored properly, the risk of a child
being injured in a collision greatly increases.
Attaching child safety seats with Lower Anchor and Tethers for
Children (LATCH) attachments for child seat anchors
Some child safety seats are labeled as LATCH or LATCH-compatible child
seats. These seats include two rigid or webbing mounted attachments
that connect to two anchors at specific seating positions in your vehicle.
This type of child seat eliminates the need to use seat belts to attach the
child seat. For forward-facing child seats, the tether strap must also be
attached to the proper tether anchor point. For information on using
tether straps with the child safety seats, refer toAttaching safety seats
with tether strapsin this chapter.
Seating and safety restraints
134
Page 144 of 280

Always set the parking brake fully and make sure that the
gearshift is securely latched in P (Park) (automatic
transmission) or in 1 (First Gear) (manual transmission).
The parking brake is not recommended to stop a moving vehicle.
However, if the normal brakes fail, the parking brake can be used to stop
your vehicle in an emergency. Since the parking brake applies only the
rear brakes, the vehicle's stopping distance will increase greatly and the
handling of your vehicle will be adversely affected.
To release the parking brake, the
brake handle may need to be pulled
up slightly to release pressure
before pushing in the button.
Push the button on the end of the
parking brake handle and push the
handle down as far as possible.
Driving with the parking brake
applied will cause the brakes to
wear out quickly and reduce fuel
economy.
STEERING
Your vehicle is equipped with power steering. Power steering uses energy
from the engine to help steer the vehicle.
To prevent damage to the power steering pump:
²Never hold the steering wheel to the extreme right or the extreme left
for more than a few seconds when the engine is running.
²Do not operate the vehicle with a low power steering pump fluid level
(below the MIN mark on the reservoir).
If the power steering system breaks down (or if the engine is turned
off), you can steer the vehicle manually, but it takes more effort.
If the steering wanders or pulls, the condition could be caused by any of
the following:
²underinflated tire(s) on any wheel(s)
²uneven vehicle loading
²high crown in center of road
Driving
144
Page 147 of 280

shifting will resume within a few hundred kilometers (miles) of
operation.
Your automatic overdrive transaxle
provides fully automatic operation in
either D (Overdrive) or with the
O/D OFF switch depressed. Driving
with the gearshift lever in D
(Overdrive) gives the best fuel economy for normal driving conditions.
For manual control, start in 1 (First) and then shift manually.
To put your vehicle in gear, start the
engine, depress the brake pedal,
then move gearshift lever out of P
(Park).
Understanding gearshift positions
P (Park)
Always come to a complete stop
before shifting into P (Park). Make
sure the gearshift lever is securely
latched in P (Park). This locks the
transaxle and prevents the front
wheels from rotating.
Always set the parking brake fully and make sure the gearshift is
latched in P (Park). Turn off the ignition whenever you leave
your vehicle.
R (Reverse)
With the gearshift lever in R
(Reverse), the vehicle will move
backward. You should always come
to a complete stop before shifting
into and out of R (Reverse).
OVERDRIVE
OFF/ON
R D 2 1ODO
R D 2 1ODO
R D 2 1ODO
Driving
147
Page 150 of 280

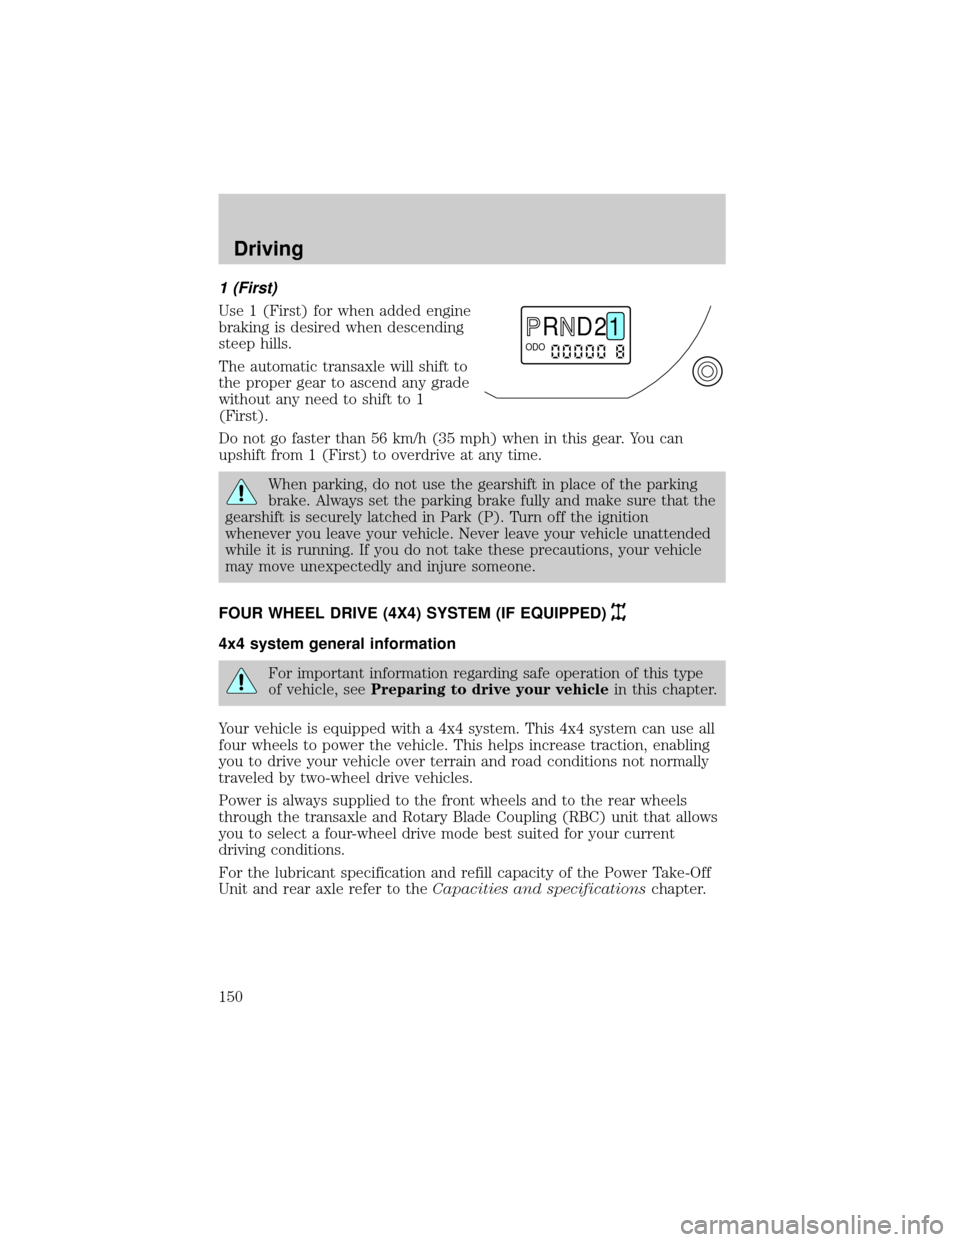
1 (First)
Use 1 (First) for when added engine
braking is desired when descending
steep hills.
The automatic transaxle will shift to
the proper gear to ascend any grade
without any need to shift to 1
(First).
Do not go faster than 56 km/h (35 mph) when in this gear. You can
upshift from 1 (First) to overdrive at any time.
When parking, do not use the gearshift in place of the parking
brake. Always set the parking brake fully and make sure that the
gearshift is securely latched in Park (P). Turn off the ignition
whenever you leave your vehicle. Never leave your vehicle unattended
while it is running. If you do not take these precautions, your vehicle
may move unexpectedly and injure someone.
FOUR WHEEL DRIVE (4X4) SYSTEM (IF EQUIPPED)
4x4 system general information
For important information regarding safe operation of this type
of vehicle, seePreparing to drive your vehiclein this chapter.
Your vehicle is equipped with a 4x4 system. This 4x4 system can use all
four wheels to power the vehicle. This helps increase traction, enabling
you to drive your vehicle over terrain and road conditions not normally
traveled by two-wheel drive vehicles.
Power is always supplied to the front wheels and to the rear wheels
through the transaxle and Rotary Blade Coupling (RBC) unit that allows
you to select a four-wheel drive mode best suited for your current
driving conditions.
For the lubricant specification and refill capacity of the Power Take-Off
Unit and rear axle refer to theCapacities and specificationschapter.
R D 2 1ODO
Driving
150
Page 162 of 280
LUGGAGE RACK
Your vehicle is equipped with a roof
rack. The maximum load for the
roof rack is 44 kg (100 lbs), evenly
distributed on the crossbars. If it is
not possible to evenly distribute the
load, position it in the center or as
far forward on the crossbars as
possible. Always use the adjustable
tie down loops to secure the load.
To adjust the cross-bar position:
1. Loosen the thumbwheel at both
ends of the cross-bar (both
cross-bars are adjustable).
2. Slide the cross-bar to the desired
location.
3. Tighten the thumbwheel at both
ends of the cross-bar.
To remove the cross-bar assembly from the roof rack side rails:
1. Loosen the thumbwheel at both
ends of the cross-bar (both
cross-bars are adjustable).
Driving
162