Page 263 of 419

4-60 Parking on Hills
CAUTION:
You really should not park your vehicle, with
a trailer attached, on a hill. If something goes
wrong, your rig could start to move. People can
be injured, and both your vehicle and the trailer
can be damaged.
But if you ever have to park your rig on a hill, here's
how to do it:
1. Apply your regular brake, but don't shift into
PARK (P) yet.
2. Have someone place chocks under the trailer wheels.
3. When the wheel chocks are in place, release the
regular brakes until the chocks absorb the load.
4. Reapply the regular brakes. Then apply your parking
brake and shift into PARK (P).
5. If you have a four
-wheel-drive vehicle, be sure the
transfer case is in a drive gear and not in NEUTRAL (N).
6. Release the regular brakes.
CAUTION:
It can be dangerous to get out of your vehicle if
the shift lever is not fully in PARK (P) with the
parking brake firmly set. Your vehicle can roll.
If you have left the engine running, the vehicle
can move suddenly. You or others could be
injured. To be sure your vehicle won't move, even
when you're on fairly level ground, use the steps
that follow.
Always put the shift lever fully in PARK (P) with
the parking brake firmly set.
If the transfer case on four-wheel drive vehicles
is in NEUTRAL, your vehicle will be free to roll,
even if your shift lever is in PARK (P). So, be
sure the transfer case is in a drive gear
-- not
in NEUTRAL.
Page 264 of 419
4-61 When You Are Ready to Leave After
Parking on a Hill
1. Apply your regular brakes and hold the pedal down
while you:
�Start your engine;
�Shift into a gear; and
�Release the parking brake.
2. Let up on the brake pedal.
3. Drive slowly until the trailer is clear of the chocks.
4. Stop and have someone pick up and store the chocks.
Maintenance When Trailer Towing
Your vehicle will need service more often when you're
pulling a trailer. See the Maintenance Schedule for more
on this. Things that are especially important in trailer
operation are automatic transmission fluid (don't overfill),
engine oil, axle lubricant, belts, belt, cooling system and
brake system. Each of these is covered in this manual, and
the Index will help you find them quickly. If you're
trailering, it's a good idea to review these sections before
you start your trip.
Check periodically to see that all hitch nuts and bolts
are tight.
Page 267 of 419
4-64
Instrument Panel Jumper Wiring Harness
This harness is included with the heavy-duty trailer
wiring package. The harness is for an electric trailer
brake controller and includes a trailer battery feed fuse.
This harness and fuse should be installed by your dealer
or a qualified service center.
Power Winches
If you wish to use a power winch on your vehicle, only
use it when your vehicle is stationary or anchored.
NOTICE:
Using a power winch with the transmission in
gear may damage the transmission. When
operating a power winch, always leave the
transmission in NEUTRAL (N).
Use the regular brakes, set the parking brake, or block
the wheels to keep your vehicle from rolling.
Step-Bumper Pad
If your vehicle has a rear step bumper, it may be
equipped with a rear step pad at the center of the bumper.
If you will be using the
bumper to tow a trailer, you
must remove the center
cutout circle to install the
trailer ball.
Page 271 of 419

5-4
1. Check the other vehicle. It must have a 12-volt
battery with a negative ground system.
NOTICE:
If the other system isn't a 12-volt system with a
negative ground, both vehicles can be damaged.
2. Get the vehicles close enough so the jumper cables
can reach, but be sure the vehicles aren't touching
each other. If they are, it could cause a ground
connection you don't want. You wouldn't be able
to start your vehicle, and the bad grounding could
damage the electrical systems.
To avoid the possibility of the vehicles rolling, set the
parking brake firmly on both vehicles involved in the
jump start procedure. Put an automatic transmission in
PARK (P) and a manual transmission in NEUTRAL
before setting the parking brake. Put the transmission
in PARK (P). If you have a four
-wheel-drive vehicle,
be sure the transfer case is not in NEUTRAL (N).3. Turn off the ignition on both vehicles. Unplug
unnecessary accessories plugged into the cigarette
lighter or accessory power outlets. Turn off all lamps
that aren't needed as well as radios. This will avoid
sparks and help save both batteries. In addition,
it could save your radio!
NOTICE:
If you leave your radio on, it could be badly
damaged. The repairs wouldn't be covered by
your warranty.
4. Open the hoods and locate the positive (+) and
negative (
-) terminal locations on the other vehicle.
Your vehicle has a remote positive (+) jump starting
terminal and a remote negative (
-) jump starting
terminal. The remote positive (+) terminal is located
behind a red plastic cover near the driver's side of the
engine accessory drive bracket. To uncover the remote
positive (+) terminal, open the red plastic cover.
The remote negative (
-) terminal is located on the
engine accessory drive bracket. This is marked
ªGNDº on V8 engines.
Page 285 of 419
5-18
Changing a Flat Tire
If a tire goes flat, avoid further tire and wheel damage
by driving slowly to a level place. Turn on your hazard
warning flashers.
CAUTION:
Changing a tire can cause an injury. The vehicle
can slip off the jack and roll over you or other
people. You and they could be badly injured.
Find a level place to change your tire. To help
prevent the vehicle from moving:
1. Set the parking brake firmly.
2. Put an automatic transmission
shift lever in PARK (P) or shift a
manual transmission to FIRST (1)
or REVERSE (R).
3. Turn off the engine.
4. Put the wheel blocks at the front and
rear of the tire farthest away from the
one being changed. That would be the
tire on the other side of the vehicle, at
the opposite end.The following steps will tell you how to use the jack and
change a tire.
Page 326 of 419

6-23
A cold fluid check can be made after the vehicle has
been sitting for eight hours or more with the engine off,
but this is used only as a reference. Let the engine run at
idle for five minutes if outside temperatures are 50�F
(10�C) or more. If it's colder than 50�F (10�C),
you may have to idle the engine longer. Should the fluid
level be low during this cold check, you must check the
fluid hot before adding fluid. Checking the fluid hot will
give you a more accurate reading of the fluid level.
Checking the Fluid Level
Prepare your vehicle as follows:
�Park your vehicle on a level place. Keep the
engine running.
�With the parking brake applied, place the shift lever
in PARK (P).
�With your foot on the brake pedal, move the shift
lever through each gear range, pausing for about
three seconds in each range. Then, position the
shift lever in PARK (P).
�Let the engine run at idle for three minutes or more.Then, without shutting off the engine, follow these steps:
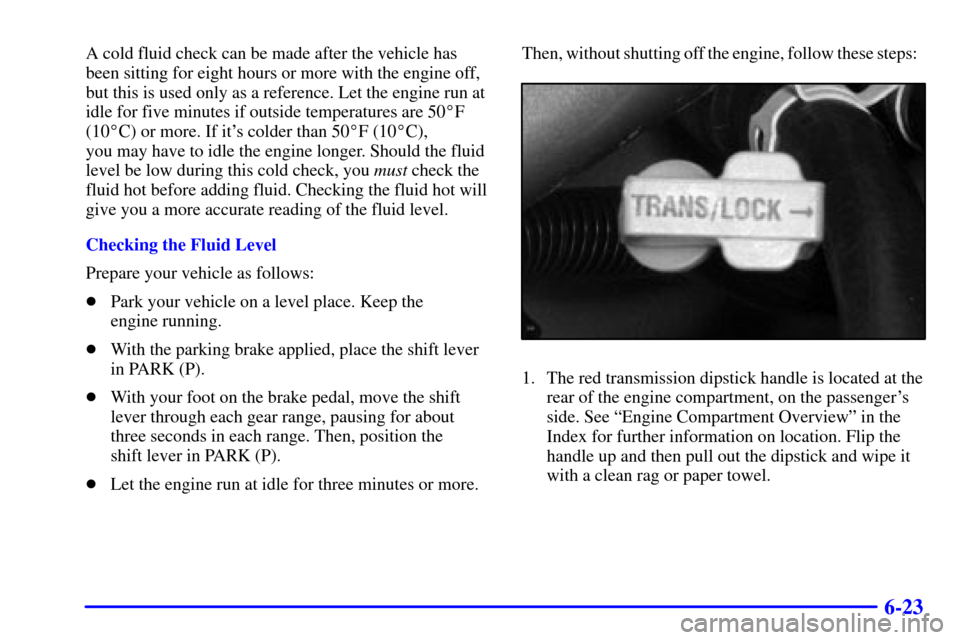
1. The red transmission dipstick handle is located at the
rear of the engine compartment, on the passenger's
side. See ªEngine Compartment Overviewº in the
Index for further information on location. Flip the
handle up and then pull out the dipstick and wipe it
with a clean rag or paper towel.
Page 368 of 419
6-65
NAME Usage
CRUISE Cruise Control, Instrument Cluster
IGN 3 Ignition, Power Seats
4WD Four
-Wheel Drive System,
Auxiliary Battery
CRANK Starting System
INT PRK Parking Lamps, Sidemarker
Lamps, Interior Lamps
L DOOR Power Door Lock Relay
BRAKE Anti
-Lock Brake System
RR WIPER Rear Window Wiper
ILLUM Interior Lamps
SEAT Power Seat Circuit Breaker
TURN Exterior Lamps, Turn Signals,
Hazard Lamps
UNLOCK Power Door Locks
HTR A/C Climate Control System
WS WPR Windshield WipersNAME Usage
IGN 1 Ignition, Instrument Panel
AIR BAG Air Bag
MIR/LOCK Power Mirrors, Power Door Locks
DR LOCK Power Door Locks
PWR WDO Power Window Circuit Breaker
UNLOCK Power Door Lock Relay
IGN 0 PRND321 Display,
Odometer, PCM
SEO IGN Special Equipment
Option, Ignition, Onstar
�
SEO ACCY Special Equipment Option
Accessory, Cellular Telephone
RAP #1 Retained Accessory Power Relay
RDO I Audio System, Onstar
�
RAP #2 Rear Power Windows,
Sunroof, Radio, Onstar�
Page 369 of 419
6-66
Center Instrument Panel Utility Block
The center instrument panel utility block is located
underneath the instrument panel, to the left of the
steering column.Relay Name Usage
SEO Special Equipment Option
HTD ST Heated Seats
HDLNR Headliner
VANITY Headliner Wiring
TRAILER Trailer Brake Wiring
PWR ST Power Seats
YE9 Not Used
UPF Upfitter
PARK LAMP Parking Lamps (Relay)
FRT PRK EXPT Not Used
SPARE 2 Not Used
PUDDLE LP Not Used
SL RIDE Not Used
SPARE 3 Not Used
INADV PWR Interior Lights Feed (Relay)
CTSY LP Courtesy Lamps (Relay)
CEL PHONE Cellular Telephone Wiring