Page 239 of 419

4-36
Freeway Driving
Mile for mile, freeways (also called thruways, parkways,
expressways, turnpikes or superhighways) are the safest
of all roads. But they have their own special rules.The most important advice on freeway driving is: Keep
up with traffic and keep to the right. Drive at the same
speed most of the other drivers are driving. Too
-fast or
too
-slow driving breaks a smooth traffic flow. Treat the
left lane on a freeway as a passing lane.
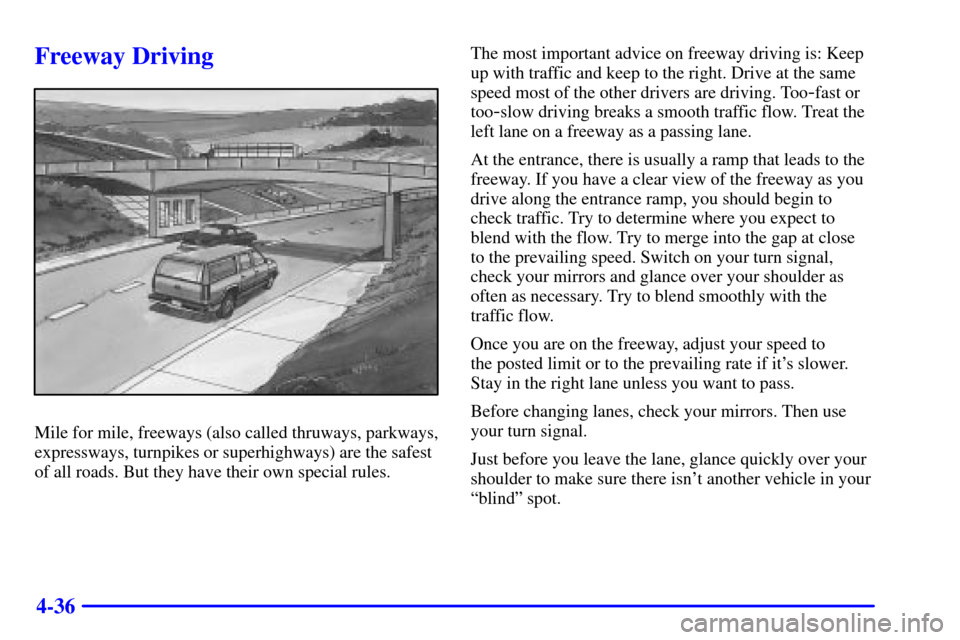
At the entrance, there is usually a ramp that leads to the
freeway. If you have a clear view of the freeway as you
drive along the entrance ramp, you should begin to
check traffic. Try to determine where you expect to
blend with the flow. Try to merge into the gap at close
to the prevailing speed. Switch on your turn signal,
check your mirrors and glance over your shoulder as
often as necessary. Try to blend smoothly with the
traffic flow.
Once you are on the freeway, adjust your speed to
the posted limit or to the prevailing rate if it's slower.
Stay in the right lane unless you want to pass.
Before changing lanes, check your mirrors. Then use
your turn signal.
Just before you leave the lane, glance quickly over your
shoulder to make sure there isn't another vehicle in your
ªblindº spot.
Page 262 of 419

4-59 Making Turns
NOTICE:
Making very sharp turns while trailering could
cause the trailer to come in contact with the
vehicle. Your vehicle could be damaged. Avoid
making very sharp turns while trailering.
When you're turning with a trailer, make wider turns than
normal. Do this so your trailer won't strike soft shoulders,
curbs, road signs, trees or other objects. Avoid jerky or
sudden maneuvers. Signal well in advance.
Turn Signals When Towing a Trailer
The arrows on your instrument panel will flash
whenever you signal a turn or lane change. Properly
hooked up, the trailer lamps will also flash, telling other
drivers you're about to turn, change lanes or stop.
When towing a trailer, the arrows on your instrument
panel will flash for turns even if the bulbs on the trailer
are burned out. Thus, you may think drivers behind you
are seeing your signal when they are not. It's important
to check occasionally to be sure the trailer bulbs are
still working.
Driving On Grades
Reduce speed and shift to a lower gear before you
start down a long or steep downgrade. If you don't shift
down, you might have to use your brakes so much that
they would get hot and no longer work well.
You can tow in DRIVE (D). You may want to shift the
transmission to THIRD (3) or, if necessary, a lower gear
selection if the transmission shifts too often (e.g., under
heavy loads and/or hilly conditions).
You may also want to activate the tow/haul mode if the
transmission shifts too often. See ªTow/Haul Modeº
in the Index.
When towing at high altitude on steep uphill grades,
consider the following: Engine coolant will boil at a
lower temperature than at normal altitudes. If you turn
your engine off immediately after towing at high altitude
on steep uphill grades, your vehicle may show signs
similar to engine overheating. To avoid this, let the
engine run while parked (preferably on level ground)
with the automatic transmission in PARK (P) for a
few minutes before turning the engine off. If you do
get the overheat warning, see ªEngine Overheatingº
in the Index.
Page 265 of 419
4-62 Trailer Wiring Harness
Your vehicle is equipped with the following wiring
harnesses for towing a trailer.
Basic Trailer Wiring Package
The trailer wiring harness, with a seven-pin connector,
is located at the rear of the vehicle and is tied to the
vehicle's frame. The harness connector can be plugged
into a seven
-pin universal heavy-duty trailer connector
available through your dealer.The seven
-wire harness contains the following
trailer circuits:
�Yellow: Left Stop/Turn Signal
�Dark Green: Right Stop/Turn Signal
�Brown: Taillamps
�White: Ground
�Light Green: Back
-up Lamps
�Red: Battery Feed
�Dark Blue: Trailer Brake
If you need to upgrade your vehicle to heavy
-duty
trailering, a brake controller harness is available from
your dealer.
Page 266 of 419
4-63
Heavy-Duty Trailer Wiring Package (If Equipped)
Your vehicle is equipped with the seven-wire trailer
towing harness. This harness with a seven
-pin universal
heavy
-duty trailer connector that is attached to a bracket
on the hitch platform (if equipped).The seven
-wire harness contains the following
trailer circuits:
�Yellow: Left Stop/Turn Signal
�Dark Green: Right Stop/Turn Signal
�Brown: Taillamps
�White: Ground
�Light Green: Back
-up Lamps
�Red: Battery Feed
�Dark Blue: Trailer Brake
A jumper harness for an electric trailer brake controller
and a trailer battery feed fuse are included with this
trailering package. (See ªInstrument Panel Jumper
Wiring Harnessº later in this section.)
If you need to tow a light
-duty trailer with a standard
four
-way round pin connector, an adapter connector
is available from your dealer.
Page 269 of 419
5-2
Hazard Warning Flashers
Your hazard warning flashers let you warn others. They
also let police know you have a problem. Your front and
rear turn signal lamps will flash on and off.
But they won't flash if you're braking.
Press the button at the top
of the steering column all
the way down to make your
front and rear turn signal
lamps flash on and off.
Your hazard warning flashers work no matter what
position your key is in, and even if the key isn't in.
To turn off the flashers, press the button until the
first click and release.
When the hazard warning flashers are on, your turn
signals won't work.
Other Warning Devices
If you carry reflective triangles, you can use them to
warn others. Set one up at the side of the road about
300 feet (100 m) behind your vehicle.
Page 342 of 419
6-39 Front Turn Signal, Sidemarker and
Daytime Running Lamps
A. Sidemarker Lamp
B. Retainer Clip
C. Front Turn Signal Lamp
D. Daytime Running Lamp1. Remove the headlamp lens assembly as
mentioned previously.
2. Press the retainer clip, located behind the turn signal
housing, towards the outside of the vehicle.
3. Pull the turn signal housing out from the vehicle.
4. Press the locking release lever, turn the bulb socket
counterclockwise and remove it from the turn signal
lens housing.
5. Remove the old bulb from the bulb socket.
6. Put the new bulb into the bulb socket. Use care
not to touch the bulb with your fingers or hands.
7. Put the bulb socket into the turn signal housing
and turn it clockwise until it locks.
8. Put the turn signal housing back onto the vehicle
placing the hook and posts on the inner side into the
alignment holes first and then the outer side into the
retainer bracket until you hear a click.
9. Put the headlamp lens assembly back into the vehicle.
Page 345 of 419
6-42 Taillamps
A. Turn Signal Lamp
B. Back
-up Lamp
C. Stoplamp
1. Use a Phillips screwdriver
to remove the two screws
from the lamp assembly.2. Remove the lamp assembly.
3. Press the release tab and turn the bulb socket
counterclockwise to remove it from the
taillamp housing.
4. Pull the old bulb straight
out from the socket.
5. Press a new bulb into the socket, insert the socket
into the taillamp housing and turn the socket
clockwise into the taillamp housing until it clicks.
6. Reinstall the rear lamp assembly and tighten
the screws.
Page 368 of 419
6-65
NAME Usage
CRUISE Cruise Control, Instrument Cluster
IGN 3 Ignition, Power Seats
4WD Four
-Wheel Drive System,
Auxiliary Battery
CRANK Starting System
INT PRK Parking Lamps, Sidemarker
Lamps, Interior Lamps
L DOOR Power Door Lock Relay
BRAKE Anti
-Lock Brake System
RR WIPER Rear Window Wiper
ILLUM Interior Lamps
SEAT Power Seat Circuit Breaker
TURN Exterior Lamps, Turn Signals,
Hazard Lamps
UNLOCK Power Door Locks
HTR A/C Climate Control System
WS WPR Windshield WipersNAME Usage
IGN 1 Ignition, Instrument Panel
AIR BAG Air Bag
MIR/LOCK Power Mirrors, Power Door Locks
DR LOCK Power Door Locks
PWR WDO Power Window Circuit Breaker
UNLOCK Power Door Lock Relay
IGN 0 PRND321 Display,
Odometer, PCM
SEO IGN Special Equipment
Option, Ignition, Onstar
�
SEO ACCY Special Equipment Option
Accessory, Cellular Telephone
RAP #1 Retained Accessory Power Relay
RDO I Audio System, Onstar
�
RAP #2 Rear Power Windows,
Sunroof, Radio, Onstar�