2001 CHEVROLET SILVERADO audio
[x] Cancel search: audioPage 5 of 468
iii
Section
3
Comfort Controls and Audio Systems
Section
4
Your Driving and the Road
Section
5
Table of Contents (cont'd)
Your Driving, the Road and Your Vehicle
Defensive Driving
Drunken Driving
Control of a Vehicle
Braking
SteeringDriving Tips for Various Road Conditions
Off-Road Driving
Recreational Vehicle Towing
Loading Your Vehicle
Towing a Trailer Heating and Air Conditioning
Setting the Radio ClockRadio/Cassette Player/CD Player
Radio Theft-Deterrent Feature (If Equipped)
Hazard Warning Flashers
Jump Starting
Towing Your VehicleEngine Overheating
Changing a Flat Tire
If You're Stuck
Problems on the Road
Page 160 of 468

2-77
OnStar Services Button: Press this button once
to contact an advisor who will be able to assist you with
these services. If you are not quickly connected, the
system will automatically reset and redial. This ensures
connection to the center; there is no additional action
required. Press the Call Answer/End button to cancel the
automatic redial.
Emergency Button: In an emergency situation,
press the emergency service button. Upon receiving the
call, an advisor at the center will locate your vehicle and
assess the situation. If necessary, the advisor will alert
the nearest emergency service provider.
Call ANSWER/END Button: Use this button
to answer a call. (If you are receiving a call, the audio
system will mute, and the ring will be heard). Press this
button at the end of a call to disconnect and return the
audio system to its previous settings. This button will
also cancel a call if one of the buttons is accidentally
pressed or if the automatic redial function is activated.
Volume Control: You can control the volume of the
OnStar System using either the volume control knob on
the radio or using the steering wheel controls, if equipped.
Telltale Light: This light will indicate the status of
the system. A solid green light will come on when you
start the vehicle to let you know that the system is on
and is ready to make or receive calls.
If the light blinks green it means that an incoming or
outgoing call is in progress. Press the Call ANSWER/END
button if you notice the light blinking and you are not
on a call.
The light will be red in the event of an OnStar system
malfunction. If this occurs press the OnStar button to
attempt to contact an advisor. If the connection is made,
the advisor will assist you with steps to take to make
sure that the system is functioning properly. If you
cannot contact the advisor, take your vehicle to your
dealership as soon as possible for assistance.
Page 164 of 468

2-81
The main components of your instrument panel are the following:
A. Dome Lamp Switch
B. Lamp Controls
C. Air Outlets
D. Automatic Transfer Case (If Equipped)/Electronic
Transfer Case (If Equipped)/Traction Assist
System (If Equipped)
E. Multifunction Lever
F. Instrument Cluster
G. Gearshift Lever (Automatic Transmission)
H. Tow/Haul Selector Switch
I. Audio System
J. Comfort Control SystemK. Glove Box
L. Passenger Air Bag Off Switch
M. Manual Selectable Ride Control (If Equipped)
N. Ashtray
O. Storage Area or Compact Disc Player (If Equipped)
P. Rear Window Defogger Switch (If Equipped)
Q. Lighter and Accessory Power Outlets
R. Parking Brake Release
S. Tilt Lever (If Equipped)
T. Center Instrument Panel Utility Block
U. Hood Release
V. Instrument Panel Fuse Block
Page 188 of 468
3-
3-1
Section 3 Comfort Controls and Audio Systems
In this section, you'll find out how to operate the comfort control and audio systems offered with your vehicle.
Be sure to read about the particular systems supplied with your vehicle.
3
-2 Comfort Controls
3
-2 Standard Comfort Controls
3
-3 Heater and Air Conditioning Comfort
Controls (If Equipped)
3
-5 Electronic Climate Control System
(If Equipped)
3
-12 Air Conditioning
3
-13 Heating
3
-13 Defogging and Defrosting
3
-13 Rear Window Defogger (If Equipped)
3
-14 Ventilation System
3
-16 Audio Systems
3
-16 Setting the Clock for Systems with
SET Button
3
-16 Setting the Clock for Systems with HR and
MN Buttons3
-16 AM-FM Stereo
3
-18 AM-FM Stereo with Cassette Tape Player
(If Equipped)
3
-20 AM-FM Stereo with Cassette Tape Player and
Automatic Tone Control (If Equipped)
3
-25 AM-FM Stereo with Compact Disc Player and
Automatic Tone Control (If Equipped)
3
-29 Remote Cassette Tape Player (If Equipped)
3
-30 Theft-Deterrent Feature (If Equipped)
3
-32 Understanding Radio Reception
3
-33 Tips About Your Audio System
3
-34 Care of Your Cassette Tape Player
3
-35 Care of Your Compact Discs
3
-35 Care of Your Compact Disc Player
3
-35 Fixed Mast Antenna
Page 203 of 468
3-16
Audio Systems
Your audio system has been designed to operate easily
and give years of listening pleasure. You will get the
most enjoyment out of it if you acquaint yourself with it
first. Find out what your audio system can do and how
to operate all its controls, to be sure you're getting the
most out of the advanced engineering that went into it.
Setting the Clock for Systems with
SET Button
Press SET. Within five seconds, press and hold the
SEEK right arrow until the correct minute appears on
the display. Press and hold the SEEK left arrow until
the correct hour appears on the display.
Setting the Clock for Systems with HR
and MN Buttons
Press and hold HR until the correct hour appears on
the display. Press and hold MN until the correct minute
appears on the display. To display the clock with the
ignition off, press RECALL or HR/MN and the time
will be displayed for a few seconds. There is an initial
two
-second delay before the clock goes into the
time
-set mode.
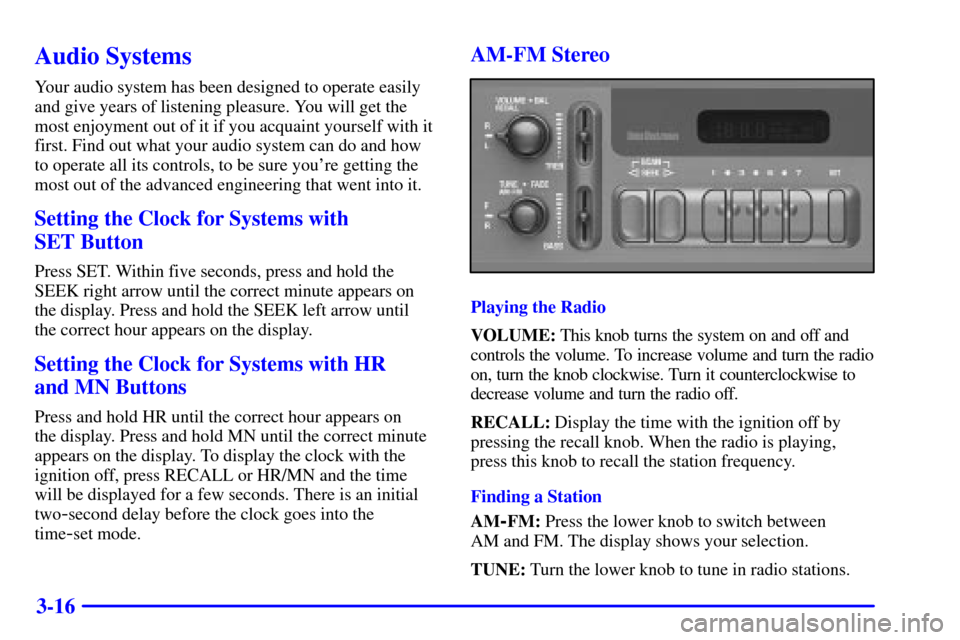
AM-FM Stereo
Playing the Radio
VOLUME: This knob turns the system on and off and
controls the volume. To increase volume and turn the radio
on, turn the knob clockwise. Turn it counterclockwise to
decrease volume and turn the radio off.
RECALL: Display the time with the ignition off by
pressing the recall knob. When the radio is playing,
press this knob to recall the station frequency.
Finding a Station
AM
-FM: Press the lower knob to switch between
AM and FM. The display shows your selection.
TUNE: Turn the lower knob to tune in radio stations.
Page 208 of 468

3-21
SCV: Your system has a feature called
Speed
-Compensated Volume (SCV). With SCV, your
audio system adjusts automatically to make up for road
and wind noise as you drive. Set the volume at the
desired level. Turn the control ring behind the upper
knob clockwise to adjust the SCV. Then, as you drive,
SCV automatically increases the volume, as necessary,
to overcome noise at any particular speed. The volume
level should always sound the same to you as you drive.
If you don't want to use SCV, turn the control all the
way down. Each notch on the control ring allows for
more volume compensation at faster vehicle speeds.
Finding a Station
AM
-FM: Press this button to switch between AM,
FM1 and FM2. The display will show your selection.
TUNE: Press this knob lightly so it extends. Turn it to
choose radio stations. Push the knob back into its stored
position when you're not using it.
SEEK: Press the right arrow to tune to the next higher
station and the left arrow to tune to the next lower station
and stay there. The sound will mute while seeking.SCAN: Press and hold SEEK for two seconds until
SCAN appears on the display. SCAN allows you to
listen to stations for a few seconds. The receiver will
continue to scan and momentarily stop at each station
until you press the button again. The sound will mute
while scanning.
PUSHBUTTONS: The six numbered pushbuttons let
you return to your favorite stations. You can set up to
18 stations (six AM, six FM1 and six FM2). Just:
1. Turn the radio on.
2. Press AM
-FM to select the band.
3. Tune in the desired station.
4. Press AUTO TONE to select the setting you prefer.
5. Press and hold one of the six pushbuttons.
The sound will mute. When it returns, release
the button. Whenever you press that numbered
button, the station you set will return and the
tone you selected will be automatically selected
for that button.
6. Repeat the steps for each pushbutton.
Page 212 of 468
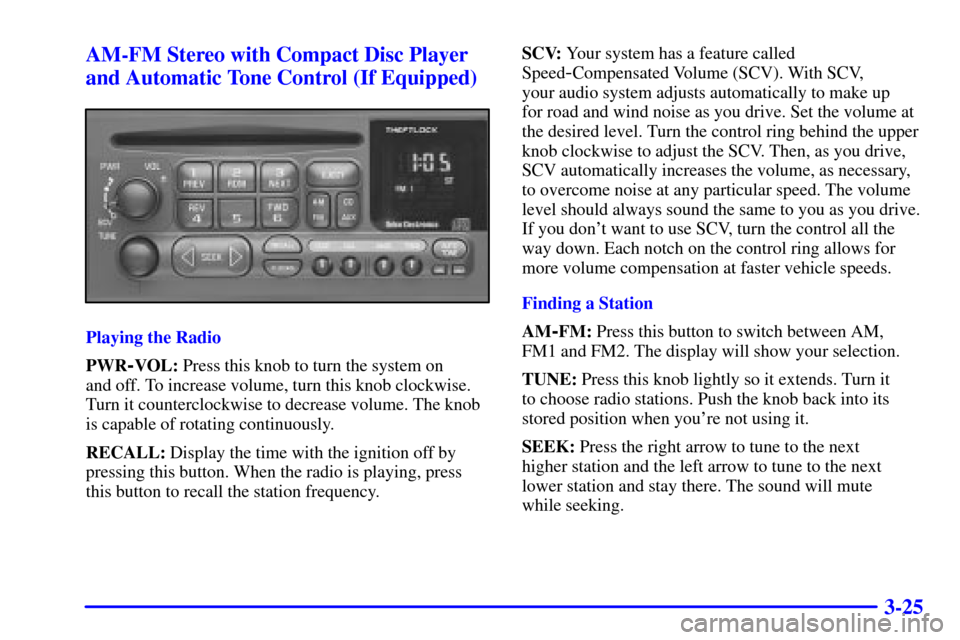
3-25 AM-FM Stereo with Compact Disc Player
and Automatic Tone Control (If Equipped)
Playing the Radio
PWR
-VOL: Press this knob to turn the system on
and off. To increase volume, turn this knob clockwise.
Turn it counterclockwise to decrease volume. The knob
is capable of rotating continuously.
RECALL: Display the time with the ignition off by
pressing this button. When the radio is playing, press
this button to recall the station frequency.SCV: Your system has a feature called
Speed
-Compensated Volume (SCV). With SCV,
your audio system adjusts automatically to make up
for road and wind noise as you drive. Set the volume at
the desired level. Turn the control ring behind the upper
knob clockwise to adjust the SCV. Then, as you drive,
SCV automatically increases the volume, as necessary,
to overcome noise at any particular speed. The volume
level should always sound the same to you as you drive.
If you don't want to use SCV, turn the control all the
way down. Each notch on the control ring allows for
more volume compensation at faster vehicle speeds.
Finding a Station
AM
-FM: Press this button to switch between AM,
FM1 and FM2. The display will show your selection.
TUNE: Press this knob lightly so it extends. Turn it
to choose radio stations. Push the knob back into its
stored position when you're not using it.
SEEK: Press the right arrow to tune to the next
higher station and the left arrow to tune to the next
lower station and stay there. The sound will mute
while seeking.
Page 216 of 468
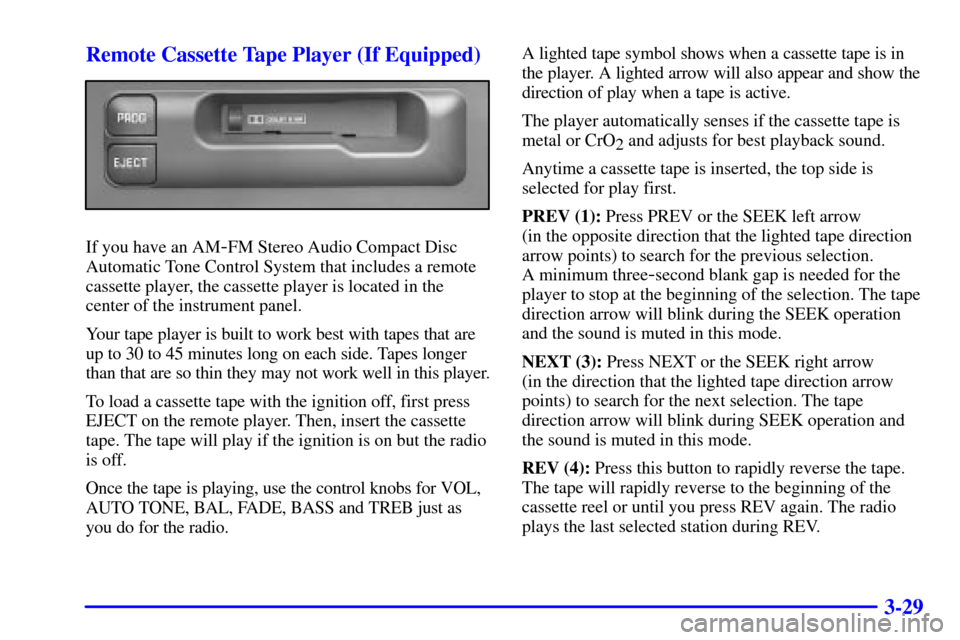
3-29 Remote Cassette Tape Player (If Equipped)
If you have an AM-FM Stereo Audio Compact Disc
Automatic Tone Control System that includes a remote
cassette player, the cassette player is located in the
center of the instrument panel.
Your tape player is built to work best with tapes that are
up to 30 to 45 minutes long on each side. Tapes longer
than that are so thin they may not work well in this player.
To load a cassette tape with the ignition off, first press
EJECT on the remote player. Then, insert the cassette
tape. The tape will play if the ignition is on but the radio
is off.
Once the tape is playing, use the control knobs for VOL,
AUTO TONE, BAL, FADE, BASS and TREB just as
you do for the radio. A lighted tape symbol shows when a cassette tape is in
the player. A lighted arrow will also appear and show the
direction of play when a tape is active.
The player automatically senses if the cassette tape is
metal or CrO
2 and adjusts for best playback sound.
Anytime a cassette tape is inserted, the top side is
selected for play first.
PREV (1): Press PREV or the SEEK left arrow
(in the opposite direction that the lighted tape direction
arrow points) to search for the previous selection.
A minimum three
-second blank gap is needed for the
player to stop at the beginning of the selection. The tape
direction arrow will blink during the SEEK operation
and the sound is muted in this mode.
NEXT (3): Press NEXT or the SEEK right arrow
(in the direction that the lighted tape direction arrow
points) to search for the next selection. The tape
direction arrow will blink during SEEK operation and
the sound is muted in this mode.
REV (4): Press this button to rapidly reverse the tape.
The tape will rapidly reverse to the beginning of the
cassette reel or until you press REV again. The radio
plays the last selected station during REV.