Page 150 of 407
2-79 Oil Pressure Gage
United States Canada
The oil pressure gage shows the engine oil pressure
in psi (pounds per square inch) when the engine is
running. Canadian vehicles indicate oil pressure
in kPa (kilopascals).
CAUTION:
Don't keep driving if the oil pressure is low.
If you do, your engine can become so hot that
it catches fire. You or others could be burned.
Check your oil as soon as possible and have your
vehicle serviced.
NOTICE:
Damage to your engine from neglected oil
problems can be costly and is not covered
by your warranty.
Oil pressure may vary with engine speed, outside
temperature and oil viscosity, but readings above the
low pressure zone indicate the normal operating range.
A reading in the low pressure zone may be caused by a
dangerously low oil level or other problems causing low
oil pressure.
Page 211 of 407

4-33
The exit speed is usually posted.
Reduce your speed according to your speedometer, not
to your sense of motion. After driving for any distance
at higher speeds, you may tend to think you are going
slower than you actually are.
Before Leaving on a Long Trip
Make sure you're ready. Try to be well rested. If you
must start when you're not fresh
-- such as after a day's
work
-- don't plan to make too many miles that first part
of the journey. Wear comfortable clothing and shoes you
can easily drive in.
Is your vehicle ready for a long trip? If you keep it
serviced and maintained, it's ready to go. If it needs
service, have it done before starting out. Of course,
you'll find experienced and able service experts in
GM dealerships all across North America. They'll be
ready and willing to help if you need it.Here are some things you can check before a trip:
�Windshield Washer Fluid: Is the reservoir full?
Are all windows clean inside and outside?
�Wiper Blades: Are they in good shape?
�Fuel, Engine Oil, Other Fluids: Have you checked
all levels?
�Lamps: Are they all working? Are the lenses clean?
�Tires: They are vitally important to a safe,
trouble-free trip. Is the tread good enough for
long
-distance driving? Are the tires all inflated to the
recommended pressure?
�Weather Forecasts: What's the weather outlook
along your route? Should you delay your trip a short
time to avoid a major storm system?
�Maps: Do you have up
-to-date maps?
Page 232 of 407

4-54 Driving On Grades
Reduce speed and shift to a lower gear before you start
down a long or steep downgrade. If you don't shift
down, you might have to use your brakes so much that
they would get hot and no longer work well.
If you have an automatic transmission, you should use
THIRD (3) when towing a trailer. Operating your
vehicle in THIRD (3) when towing a trailer will
minimize heat buildup and extend the life of your
transmission. Or, if you have a manual transmission, it's
better not to use FIFTH (5). Just drive in FOURTH (4)
(or, as you need to, a lower gear).
When towing at high altitude on steep uphill grades,
consider the following: Engine coolant will boil at a
lower temperature than at normal altitudes. If you turn
your engine off immediately after towing at high altitude
on steep uphill grades, your vehicle may show signs
similar to engine overheating. To avoid this, let the
engine run while parked (preferably on level ground)
with the automatic transmission in PARK (P) (or the
manual transmission out of gear and the parking brake
applied) for a few minutes before turning the engine off.
If you do get the overheat warning, see ªEngine
Overheatingº in the Index.
Parking on Hills
CAUTION:
You really should not park your vehicle, with a
trailer attached, on a hill. If something goes
wrong, your rig could start to move. People can
be injured, and both your vehicle and the trailer
can be damaged.
But if you ever have to park your rig on a hill, here's
how to do it:
1. Apply your regular brakes, but don't shift into
PARK (P) yet, or into gear for a manual
transmission. When parking uphill, turn your wheels
away from the curb. When parking downhill, turn
your wheels into the curb.
2. Have someone place chocks under the trailer wheels.
3. When the wheel chocks are in place, release the
regular brakes until the chocks absorb the load.
4. Reapply the regular brakes. Then apply your
parking brake, and then shift into PARK (P), or
REVERSE (R) for a manual transmission.
5. Release the regular brakes.
Page 243 of 407
5-10
Cooling System
When you decide it's safe to lift the hood, here's what
you'll see:
A. Coolant Recovery Tank
B. Radiator Pressure Cap
C. Engine Cooling Fan
If the coolant inside the coolant recovery tank is boiling,
don't do anything else until it cools down.
When the engine is cold, the coolant level should be at
least up to the ADD mark. If it isn't, you may have a
leak in the radiator hoses, heater hoses, radiator, water
pump or somewhere else in the cooling system.
Page 245 of 407

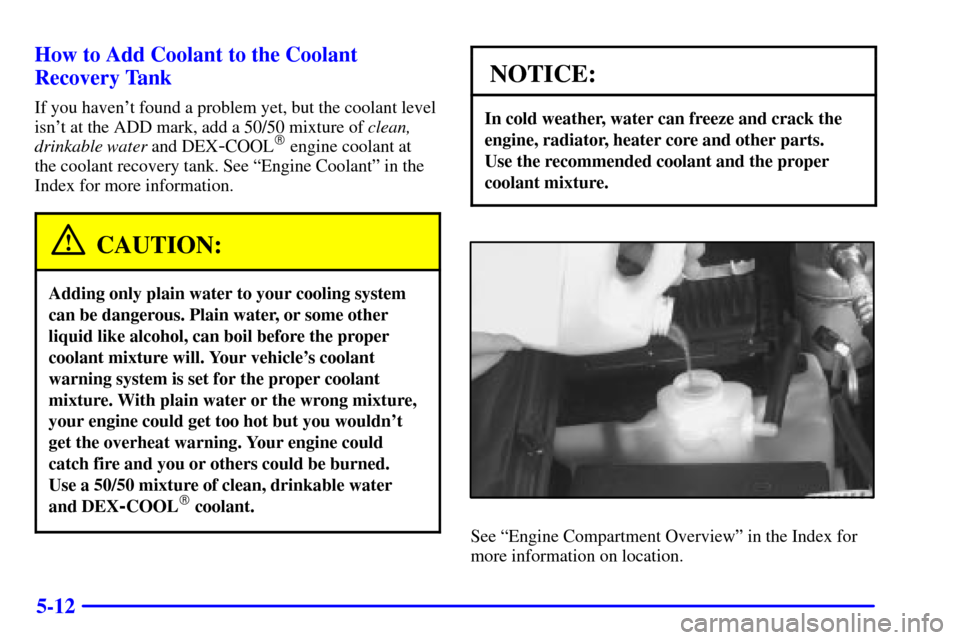
5-12 How to Add Coolant to the Coolant
Recovery Tank
If you haven't found a problem yet, but the coolant level
isn't at the ADD mark, add a 50/50 mixture of clean,
drinkable water and DEX
-COOL� engine coolant at
the coolant recovery tank. See ªEngine Coolantº in the
Index for more information.
CAUTION:
Adding only plain water to your cooling system
can be dangerous. Plain water, or some other
liquid like alcohol, can boil before the proper
coolant mixture will. Your vehicle's coolant
warning system is set for the proper coolant
mixture. With plain water or the wrong mixture,
your engine could get too hot but you wouldn't
get the overheat warning. Your engine could
catch fire and you or others could be burned.
Use a 50/50 mixture of clean, drinkable water
and DEX
-COOL� coolant.
NOTICE:
In cold weather, water can freeze and crack the
engine, radiator, heater core and other parts.
Use the recommended coolant and the proper
coolant mixture.
See ªEngine Compartment Overviewº in the Index for
more information on location.
Page 266 of 407

6-
6-1
Section 6 Service and Appearance Care
Here you will find information about the care of your vehicle. This section begins with service and fuel information,
and then it shows how to check important fluid and lubricant levels. There is also technical information about your
vehicle, and a part devoted to its appearance care.
6
-2 Service
6
-3 Fuel (Gasoline)
6
-5 Fuel E-85 (85% Ethanol)
6
-7 Fuels in Foreign Countries
6
-7 Filling Your Tank
6
-9 Filling a Portable Fuel Container
6
-10 Checking Things Under the Hood
6
-13 Engine Oil
6
-18 Engine Air Cleaner/Filter
6
-19 Automatic Transmission Fluid
6
-23 Manual Transmission Fluid
6
-24 Hydraulic Clutch
6
-25 Rear Axle
6
-26 Four-Wheel Drive
6
-27 Engine Coolant
6
-31 Radiator Pressure Cap
6
-31 Power Steering Fluid6
-32 Windshield Washer Fluid
6
-33 Brakes
6
-37 Battery
6
-38 Bulb Replacement
6
-44 Windshield Wiper Blade Replacement
6
-46 Tires
6
-55 Appearance Care
6
-55 Cleaning the Inside of Your Vehicle
6
-57 Care of Safety Belts
6
-58 Cleaning the Outside of Your Vehicle
6
-62 GM Vehicle Care/Appearance Materials Chart
6
-63 Vehicle Identification Number (VIN)
6
-63 Service Parts Identification Label
6
-64 Electrical System
6
-69 Replacement Bulbs
6
-70 Capacities and Specifications
6
-72 Normal Maintenance Replacement Parts
Page 278 of 407
6-13
Before closing the hood, be sure all the filler caps are on
properly. Then lift the hood to relieve pressure on the
hood prop.
Remove the hood prop from the slot in the hood and
return the prop to its retainer.
Then pull the hood down firmly to close. It will latch
when dropped from 10 to 12 inches (25 to 30 cm)
without pressing on the hood.
Engine Oil
Checking Engine Oil
It's a good idea to check your engine oil every time you
get fuel. In order to get an accurate reading, the oil must
be warm and the vehicle must be on level ground.
The engine oil dipstick on
the ªVORTECº 2200 L4
engine is under the fill cap.
The engine oil
dipstick handle on the
ªVORTECº 4300 V6
engine is a yellow ring.
See ªEngine Compartment Overviewº in the Index for
more information on location.
Page 279 of 407
6-14
Turn off the engine and give the oil several minutes to
drain back into the oil pan. If you don't, the oil dipstick
might not show the actual level.
Pull out the dipstick and clean it with a paper towel or
cloth, then push it back in all the way. Remove it again,
keeping the tip down, and check the level.When to Add Engine Oil
If the oil is at or below the ADD line, then you'll need
to add at least one quart of oil. But you must use the
right kind. This part explains what kind of oil to use. For
crankcase capacity, see ªCapacities and Specificationsº
in the Index.
NOTICE:
Don't add too much oil. If your engine has
so much oil that the oil level gets above the
cross
-hatched area that shows the proper
operating range, your engine could be damaged.
Be sure to fill it enough to put the level somewhere in
the proper operating range. Push the dipstick all the way
back in when you're through.