Page 113 of 411

2-42
Headlamps On Reminder
A tone will sound when your headlamps are turned on
and your ignition is in OFF, LOCK or ACCESSORY.
If you need to use your headlamps when the ignition
switch is in OFF, LOCK or ACCESSORY, the tone
can be turned off by moving the instrument panel
brightness thumbwheel next to the exterior lamp control
all the way down.
Daytime Running Lamps
Daytime Running Lamps (DRL) can make it easier
for others to see the front of your vehicle during the
day. DRL can be helpful in many different driving
conditions, but they can be especially helpful in the
short periods after dawn and before sunset. Fully
functional daytime running lamps are required on
all vehicles first sold in Canada.The DRL system will make your headlamps come on
at a reduced brightness when the following conditions
are met:
�The ignition is on,
�The exterior lamp control is off, and
�The parking brake is released.
When the DRL are on, only your headlamps will be on.
The taillamps, sidemarker and other lamps won't be on.
Your instrument panel won't be lit up either.
When it begins to get dark, your DRL indicator light is a
reminder to turn the headlamps on. The other lamps that
come on with your headlamps will also come on.
When you turn off the headlamps, the regular lamps will
go off, and your headlamps will change to the reduced
brightness of DRL.
To idle your vehicle with the engine on and the DRL off,
set the parking brake. The DRL will stay off until you
release the parking brake.
As with any vehicle, you should turn on the regular
headlamp system when you need it.
Page 114 of 411
2-43 Center High-Mounted Stoplamp
Your vehicle's center high-mounted stoplamp is located
above the rear doors at the center of the vehicle.
If items are loaded on the roof of the vehicle, as in a
luggage carrier, care should be taken not to block or
damage the center high
-mounted stoplamp unit.
Interior Lamps
Instrument Panel Brightness Control
This feature controls the brightness of the instrument
panel lights.
The thumbwheel for this feature is located to the right
of the exterior lamps control.
Turn the thumbwheel up to brighten the lights. When the
thumbwheel is moved to the first position, the radio
display and transmission selection display will go to full
intensity. The instrument panel cluster will be dimly lit.
Moving the thumbwheel up to the next position will
activate the interior dome lamps
Page 115 of 411

2-44 Dome Lamps
The dome lamps will come on when you open a door.
You can also turn the dome lamps on by moving the
instrument panel brightness thumbwheel, located next
to the exterior lamp control, all the way up to the second
position. In this position, the dome lamps will remain on
whether a door is open or closed.
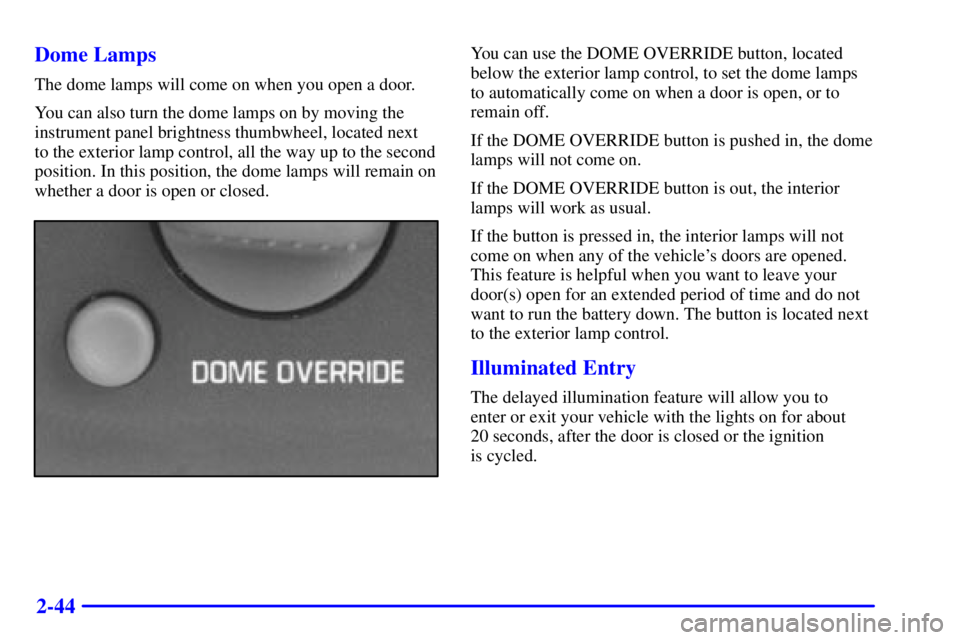
You can use the DOME OVERRIDE button, located
below the exterior lamp control, to set the dome lamps
to automatically come on when a door is open, or to
remain off.
If the DOME OVERRIDE button is pushed in, the dome
lamps will not come on.
If the DOME OVERRIDE button is out, the interior
lamps will work as usual.
If the button is pressed in, the interior lamps will not
come on when any of the vehicle's doors are opened.
This feature is helpful when you want to leave your
door(s) open for an extended period of time and do not
want to run the battery down. The button is located next
to the exterior lamp control.
Illuminated Entry
The delayed illumination feature will allow you to
enter or exit your vehicle with the lights on for about
20 seconds, after the door is closed or the ignition
is cycled.
Page 144 of 411
3-5 Rear Heater (Without Air Conditioning)
(If Equipped)
If you have a rear heater (without rear air conditioning),
the thumbwheel for this feature is located on the
instrument panel.
To increase and decrease the flow of heated air to the
rear floor vents, turn the thumbwheel marked HEAT to
the desired fan speed.
The thumbwheel has three positions. To increase the
flow of heated air, turn the thumbwheel toward HIGH.
To turn the fan off, turn the thumbwheel to OFF.
Rear Air Conditioning and Rear Heater
(If Equipped)
If your vehicle has a rear air conditioning and rear
heater system combination, controls are provided
to regulate the temperature, location and speed of
the airflow.
Front Passenger Control
To adjust the air temperature, turn the temperature knob
on the right side of the control panel.
Page 148 of 411

3-9 Ventilation System
For mild outside temperatures when little heating or cooling
is needed, use vent to direct outside air through your vehicle.
Air will flow through the instrument panel vents.
Your vehicle's flow
-through ventilation system supplies
outside air to the inside of your vehicle when it is
moving. With the side windows closed, air will flow into
the front air inlet grilles at the base of the windshield,
through the vehicle and out of the rear air exhaust valve.
Outside air will also enter the vehicle when the heater or
the air conditioning is running.
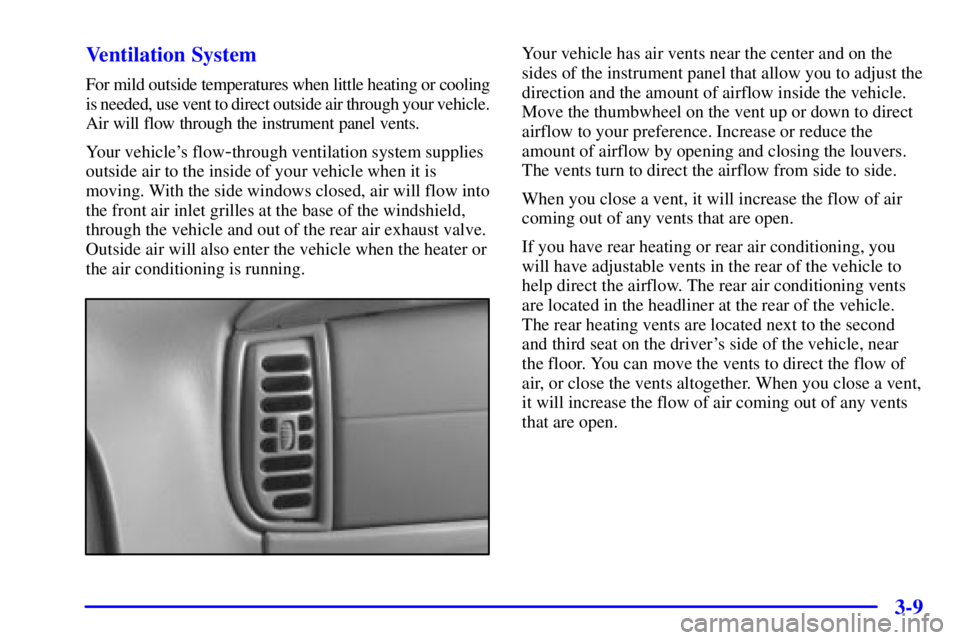
Your vehicle has air vents near the center and on the
sides of the instrument panel that allow you to adjust the
direction and the amount of airflow inside the vehicle.
Move the thumbwheel on the vent up or down to direct
airflow to your preference. Increase or reduce the
amount of airflow by opening and closing the louvers.
The vents turn to direct the airflow from side to side.
When you close a vent, it will increase the flow of air
coming out of any vents that are open.
If you have rear heating or rear air conditioning, you
will have adjustable vents in the rear of the vehicle to
help direct the airflow. The rear air conditioning vents
are located in the headliner at the rear of the vehicle.
The rear heating vents are located next to the second
and third seat on the driver's side of the vehicle, near
the floor. You can move the vents to direct the flow of
air, or close the vents altogether. When you close a vent,
it will increase the flow of air coming out of any vents
that are open.
Page 197 of 411
4-8
Let's say the road is wet and you're driving safely.
Suddenly, an animal jumps out in front of you.
You slam on the brakes and continue braking.
Here's what happens with ABS:
A computer senses that wheels are slowing down. If one
of the wheels is about to stop rolling, the computer will
separately work the brakes at each front wheel and at
both rear wheels.The anti
-lock system can change the brake pressure faster
than any driver could. The computer is programmed to
make the most of available tire and road conditions.
This can help you steer around the obstacle while
braking hard.
As you brake, your computer keeps receiving updates on
wheel speed and controls braking pressure accordingly.
Page 198 of 411

4-9
Remember: Anti-lock doesn't change the time you need
to get your foot up to the brake pedal or always decrease
stopping distance. If you get too close to the vehicle in
front of you, you won't have time to apply your brakes
if that vehicle suddenly slows or stops. Always leave
enough room up ahead to stop, even though you have
anti
-lock brakes.
Using Anti
-Lock
Don't pump the brakes. Just hold the brake pedal down
firmly and let anti
-lock work for you. You may feel the
brakes vibrate, or you may notice some noise, but this
is normal.
Braking in Emergencies
With anti-lock, you can steer and brake at the same
time. In many emergencies, steering can help you more
than even the very best braking.
Steering
Power Steering
If you lose power steering assist because the engine
stops or the system is not functioning, you can steer but
it will take much more effort.
Steering Tips
Driving on Curves
It's important to take curves at a reasonable speed.
A lot of the ªdriver lost controlº accidents mentioned on
the news happen on curves. Here's why:
Experienced driver or beginner, each of us is subject to
the same laws of physics when driving on curves. The
traction of the tires against the road surface makes it
possible for the vehicle to change its path when you turn
the front wheels. If there's no traction, inertia will keep
the vehicle going in the same direction. If you've ever
tried to steer a vehicle on wet ice, you'll understand this.
Page 199 of 411

4-10
The traction you can get in a curve depends on the
condition of your tires and the road surface, the angle
at which the curve is banked, and your speed. While
you're in a curve, speed is the one factor you
can control.
Suppose you're steering through a sharp curve.
Then you suddenly accelerate. Both control
systems
-- steering and acceleration -- have to do
their work where the tires meet the road. Adding the
sudden acceleration can demand too much of those
places. You can lose control.
What should you do if this ever happens? Ease up on the
accelerator pedal, steer the vehicle the way you want it
to go, and slow down.
Speed limit signs near curves warn that you should
adjust your speed. Of course, the posted speeds are
based on good weather and road conditions. Under less
favorable conditions you'll want to go slower.
If you need to reduce your speed as you approach a
curve, do it before you enter the curve, while your front
wheels are straight ahead.
Try to adjust your speed so you can ªdriveº through
the curve. Maintain a reasonable, steady speed. Wait to
accelerate until you are out of the curve, and then
accelerate gently into the straightaway.
Steering in Emergencies
There are times when steering can be more effective
than braking. For example, you come over a hill and
find a truck stopped in your lane, or a car suddenly pulls
out from nowhere, or a child darts out from between
parked cars and stops right in front of you. You can
avoid these problems by braking
-- if you can stop
in time. But sometimes you can't; there isn't room.
That's the time for evasive action
-- steering around
the problem.
Your vehicle can perform very well in emergencies
like these. First apply your brakes. See ªBraking in
Emergenciesº earlier in this section. It is better to
remove as much speed as you can from a possible
collision. Then steer around the problem, to the left
or right depending on the space available.