Page 66 of 363

2-8 Lockout Prevention (If Equipped)
To protect you from locking your keys in the vehicle,
this feature stops the power door locks from locking
when the keys are in the ignition and a door is open.
If the power lock switch is pressed when a door is open,
a chime will sound five times as a reminder to take the
keys out of the ignition before locking the door.
The vehicle is shipped from the factory with this feature
turned on. If you would like to turn this feature off, see
ªFeature Customizationº in the Index.
Leaving Your Vehicle
If you are leaving the vehicle, take your keys, open your
door and set the locks from inside. Then get out and
close the door.
Keyless Entry System (Option)
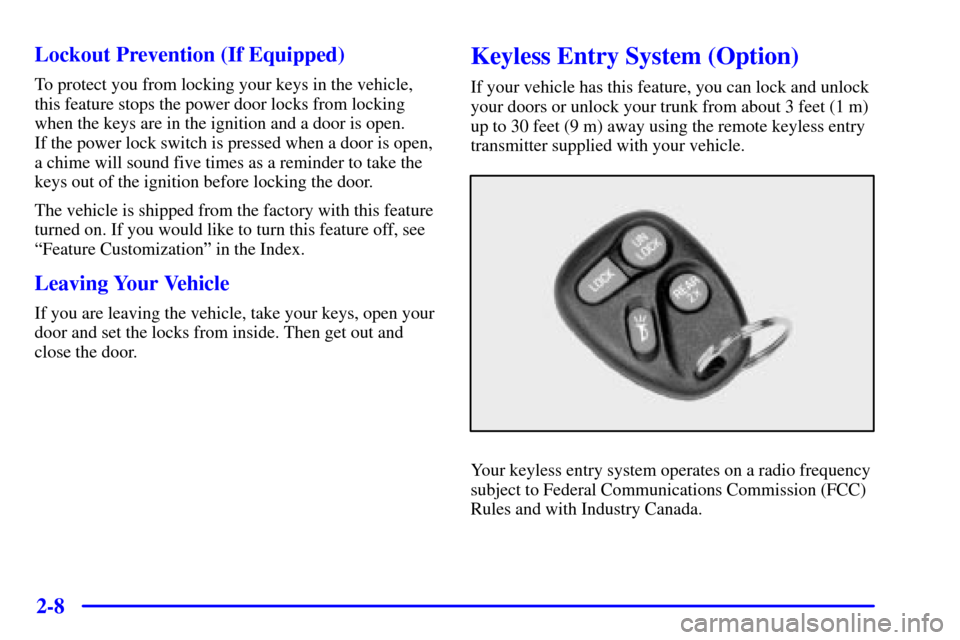
If your vehicle has this feature, you can lock and unlock
your doors or unlock your trunk from about 3 feet (1 m)
up to 30 feet (9 m) away using the remote keyless entry
transmitter supplied with your vehicle.
Your keyless entry system operates on a radio frequency
subject to Federal Communications Commission (FCC)
Rules and with Industry Canada.
Page 73 of 363

2-15 Trunk Release Handle (If Equipped)
NOTICE:
The trunk release handle was not designed to be
used to tie down the trunk lid or as an anchor
point when securing items in the trunk. Improper
use of the trunk release handle could damage it.
There is a glow-in-the-dark trunk release handle located
on the inside wall of the trunk near the floor. The handle
will be on the passenger's side. This handle will glow
following exposure to light. Pull the release handle
down to open the trunk from the inside.
Theft
Vehicle theft is big business, especially in some cities.
Although your vehicle has a number of theft
-deterrent
features, we know that nothing we put on it can make it
impossible to steal. However, there are ways you can help.
Key in the Ignition
If you leave your vehicle with the keys inside, it's an
easy target for joy riders or professional thieves
-- so
don't do it.
When you park your vehicle and open the driver's door,
you'll hear a chime reminding you to remove your key
from the ignition and take it with you. Always do this.
Your steering wheel will be locked, and so will your
ignition. If you take the key with you, and you have an
automatic transmission, it will be locked. And remember
to lock the doors.
Page 74 of 363

2-16 Parking at Night
Park in a lighted spot, close all windows and lock your
vehicle. Remember to keep your valuables out of sight.
Put them in a storage area, or take them with you.
Parking Lots
Even if you park in a lot where someone will be
watching your vehicle, it's still best to lock it up and
take your keys. But what if you have to leave your
ignition key?
�If possible, park in a busy, well
-lit area.
�Put your valuables in a storage area, like your
trunk or glove box. Be sure to close and lock the
storage area.
�Close all windows.
�Lock the glove box.
�Lock all the doors except the driver's.
�Then take the door key and remote keyless entry
transmitter with you.
Content Theft-Deterrent/Alarm
System (Option)
If your vehicle has this option, it has a theft-deterrent
alarm system. Once armed, the system will sound the
horn and flash the parking lamps if the vehicle is
broken into.
Arming the System
The alarm system can be armed to detect break-ins by
locking your vehicle with the remote keyless entry
transmitter or by locking the doors with the power door
lock switch.
Passive arming is also available if you would like the
system to arm all by itself after the doors have been
closed for a short time. When the system is armed, a
red light located on top of the instrument panel will
flash briefly once every two seconds. If you return to
your vehicle and the red light is flashing two brief
flashes every two seconds, the system is armed and the
shock sensor had triggered a two minute alarm. If the
red light is flashing three times every two seconds, the
system is armed and there was an intrusion that sounded
the alarm. Horn chirps and parking lamp flashes can be
customized to your preference. See ªFeature
Customizationº in the Index.
Page 155 of 363

3-
3-1
Section 3 Comfort Controls and Audio Systems
In this section, you'll find out how to operate the comfort control and audio systems offered with your vehicle.
Be sure to read about the particular systems supplied with your vehicle.
3
-2 Comfort Controls
3
-3 Cooling
3
-3 Heating
3
-4 Defogging and Defrosting
3
-4 Rear Window Defogger (Option)
3
-5 Ventilation System
3
-6 Audio Systems
3
-6 Setting the Clock for Systems without
Automatic Tone Control
3
-6 Setting the Clock for Systems with
Automatic Tone Control
3
-6AM-FM Stereo with Cassette Tape Player
3
-9 Monsoon� AM-FM Stereo with Cassette Tape
Player and Automatic Tone Control
(If Equipped)3
-15 Monsoon� AM-FM Stereo with Compact
Disc Player and Automatic Tone Control
(If Equipped)
3
-19 Trunk-Mounted CD Changer (If Equipped)
3
-23 Theft-Deterrent Feature (If Equipped)
3
-25 Audio Steering Wheel Controls (If Equipped)
3
-26 Understanding Radio Reception
3
-26 Tips About Your Audio System
3
-27 Care of Your Cassette Tape Player
3
-28 Care of Your Compact Discs
3
-28 Care of Your Compact Disc Player
3
-28 Fixed Mast Antenna
Page 173 of 363
3-19 Trunk-Mounted CD Changer (If Equipped)
If your vehicle has a compact disc changer, you can play
up to 12 discs continuously. Normal size discs may be
played using the trays supplied in the magazine. The
small discs (8 cm) can be played only with specially
designed trays.
NOTICE:
Place large objects in the trunk appropriately
so that they will not come into contact with the
CD changer.
You must first load the magazine with discs before you
can play a compact disc. Each of the 12 trays holds one
disc. Press the button on the back of the magazine and
pull gently on one of the trays. Load the trays from
bottom to top, placing a disc on the tray label side down.
If you load a disc label side up, the disc will not play
and an error will occur. Gently push the tray back into
the magazine slot. Repeat this procedure for loading up
to 12 discs in the magazine.
Page 176 of 363

3-22
SEEK: Press the right arrow to seek to the next
selection on the CD. Press the left arrow to search for
the previous selection on the CD. The sound will mute
while seeking.
P.SCAN: If your radio is equipped with a cassette tape
player, press this button to hear the tracks in random,
rather than sequential, order. RANDOM will appear on
the display. Press P.SCAN again to turn off random play.
TAPE AUX: Press this button if you have a disc loaded
in the changer and the radio is turned on, to play a
compact disc. Press AM FM to return to the radio when
a compact disc is playing. Press TAPE AUX to switch
between the tape and compact disc if both are loaded.
CD AUX: Press this button if you have a disc loaded in
the changer and the radio is turned on, to play a compact
disc. Press AM FM to return to the radio when a
compact disc is playing. Press CD AUX to switch
between the trunk
-mounted CD changer and compact
disc if both are loaded.
To eject the disc holder in the trunk
-mounted
CD changer, slide the CD changer door all the way open
and the disc holder will automatically eject.Compact Disc Changer Errors
If ªEº and a number appear on the display, an error has
occurred and the compact disc temporarily cannot play.
The CD changer will send an error message to the
receiver to indicate one of the following:
�E30: Disc Label Side Up
�E34: CD Changer Door Open
�E35: CD Changer Cartridge Empty
If an error occurs while trying to play a CD in the
compact disc changer, the following conditions may
have caused the error:
�The road is too rough. The disc should play when
the road is smoother.
�The disc is dirty, scratched, wet or loaded label side up.
�The air is very humid. (If so, wait about an hour
and try again.)
�The CD changer door is open. Completely close the
changer door to restore normal operation.
�An empty magazine is inserted in the CD changer. Try
the magazine again with a disc loaded on one of the trays.
If any error occurs repeatedly or if an error cannot be
corrected, please contact your dealer.
Page 242 of 363
5-22 Removing the Spare Tire and Tools
The equipment you'll need is located in the rear area
behind the trim panel on the passenger's side.
1. First you must remove the cargo cover.
See ªCargo Coverº in the Index.
On convertible models, you must also remove the
trunk access panel. It's at the upper back of the
trunk. Turn the two wing fasteners under the trunk
edge a quarter turn counterclockwise to remove
the panel.
2. Find the plastic screw heads in the trim panel over
the spare tire. See ªCompact Spare Tireº later in this
section for more information about the compact
spare. Use a coin or a key to turn the screw heads
until the slots point front and back to the unlock
position. Gently lift the trim panel front forward
edge and remove the panel.
If you have speakers in the trim panel, you may have
to disconnect the wire from the speaker. The speaker
wire may be long enough to remove the trim panel
without disconnecting the wire.
Page 252 of 363
5-32
1. Trim Panel
2. Bolt
3. Cover
4. Jack
5. Wing Nut
6. Adapter
7. Compact Spare Tire
8. Full
-Size Tire
9. Carpet Flap
10. Tire Storage Bolt
11. Trunk Access Panel (Convertible Only)
12. Knob