Page 136 of 321

4-15
Here are some tips on night driving.
�Drive defensively.
�Don't drink and drive.
�Adjust your inside rearview mirror to reduce the
glare from headlamps behind you.
�Since you can't see as well, you may need to
slow down and keep more space between you and
other vehicles.
�Slow down, especially on higher speed roads. Your
headlamps can light up only so much road ahead.
�In remote areas, watch for animals.
�If you're tired, pull off the road in a safe place
and rest.
No one can see as well at night as in the daytime. But as
we get older these differences increase. A 50
-year-old
driver may require at least twice as much light to see the
same thing at night as a 20
-year-old.
What you do in the daytime can also affect your night
vision. For example, if you spend the day in bright
sunshine you are wise to wear sunglasses. Your eyes
will have less trouble adjusting to night. But if you're
driving, don't wear sunglasses at night. They may cut
down on glare from headlamps, but they also make a
lot of things invisible.You can be temporarily blinded by approaching
headlamps. It can take a second or two, or even several
seconds, for your eyes to readjust to the dark. When
you are faced with severe glare (as from a driver who
doesn't lower the high beams, or a vehicle with misaimed
headlamps), slow down a little. Avoid staring directly
into the approaching headlamps.
Keep your windshield and all the glass on your vehicle
clean
-- inside and out. Glare at night is made much
worse by dirt on the glass. Even the inside of the glass
can build up a film caused by dust. Dirty glass makes
lights dazzle and flash more than clean glass would,
making the pupils of your eyes contract repeatedly.
Remember that your headlamps light up far less of a
roadway when you are in a turn or curve. Keep your
eyes moving; that way, it's easier to pick out dimly
lighted objects. Just as your headlamps should be
checked regularly for proper aim, so should your eyes
be examined regularly. Some drivers suffer from night
blindness
-- the inability to see in dim light -- and
aren't even aware of it.
Page 148 of 321
4-27
CAUTION:
Snow can trap exhaust gases under your vehicle.
This can cause deadly CO (carbon monoxide) gas
to get inside. CO could overcome you and kill
you. You can't see it or smell it, so you might not
know it is in your vehicle. Clear away snow from
around the base of your vehicle, especially any
that is blocking your exhaust pipe. And check
around again from time to time to be sure snow
doesn't collect there.
Open a window just a little on the side of the
vehicle that's away from the wind. This will help
keep CO out.
Run your engine only as long as you must. This saves
fuel. When you run the engine, make it go a little faster
than just idle. That is, push the accelerator slightly.
This uses less fuel for the heat that you get and it
keeps the battery (or batteries) charged. You will need a
well
-charged battery (or batteries) to restart the vehicle,
and possibly for signaling later on with your headlamps.
Let the heater run for a while.
If you have a diesel engine, you may have to run it at a
higher speed to get enough heat. Then, shut the engine
off and close the window almost all the way to preserve
the heat. Start the engine again and repeat this only
when you feel really uncomfortable from the cold.
But do it as little as possible. Preserve the fuel as long
as you can. To help keep warm, you can get out of
the vehicle and do some fairly vigorous exercises every
half hour or so until help comes.
Page 217 of 321
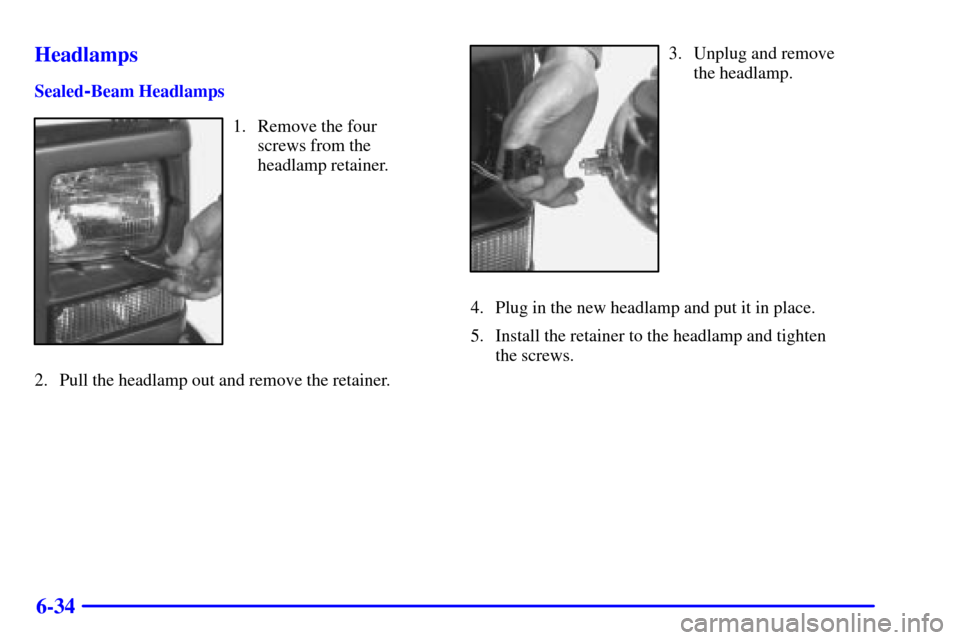
6-34 Headlamps
Sealed-Beam Headlamps
1. Remove the four
screws from the
headlamp retainer.
2. Pull the headlamp out and remove the retainer.
3. Unplug and remove
the headlamp.
4. Plug in the new headlamp and put it in place.
5. Install the retainer to the headlamp and tighten
the screws.
Page 218 of 321
6-35
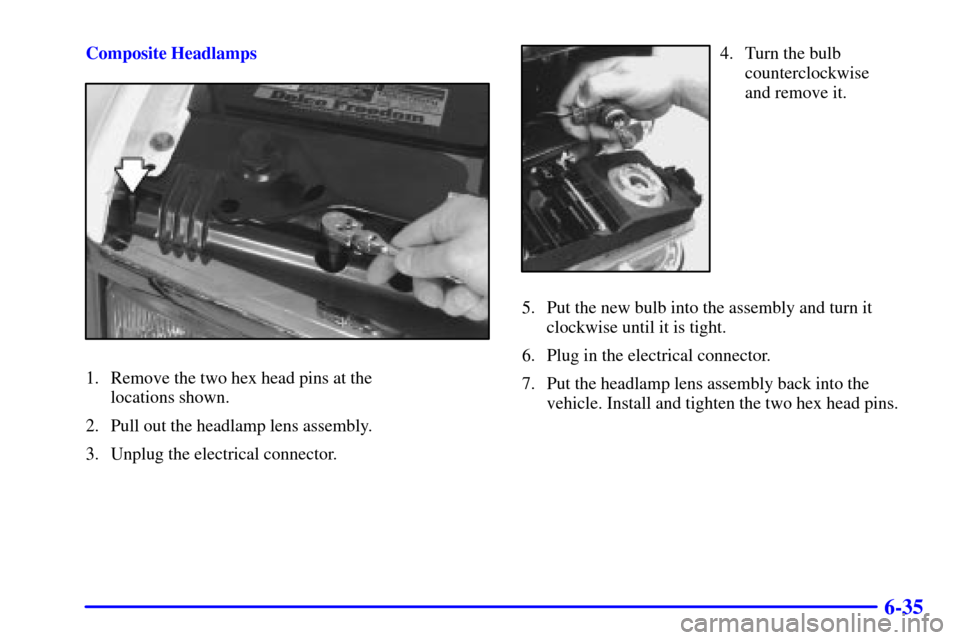
Composite Headlamps
1. Remove the two hex head pins at the
locations shown.
2. Pull out the headlamp lens assembly.
3. Unplug the electrical connector.
4. Turn the bulb
counterclockwise
and remove it.
5. Put the new bulb into the assembly and turn it
clockwise until it is tight.
6. Plug in the electrical connector.
7. Put the headlamp lens assembly back into the
vehicle. Install and tighten the two hex head pins.
Page 219 of 321
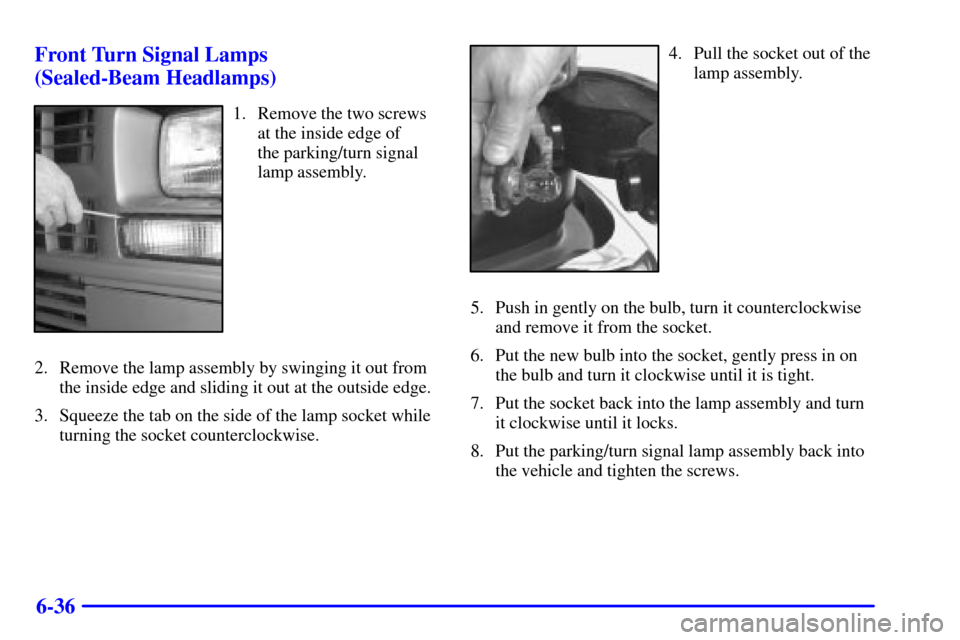
6-36 Front Turn Signal Lamps
(Sealed-Beam Headlamps)
1. Remove the two screws
at the inside edge of
the parking/turn signal
lamp assembly.
2. Remove the lamp assembly by swinging it out from
the inside edge and sliding it out at the outside edge.
3. Squeeze the tab on the side of the lamp socket while
turning the socket counterclockwise.
4. Pull the socket out of the
lamp assembly.
5. Push in gently on the bulb, turn it counterclockwise
and remove it from the socket.
6. Put the new bulb into the socket, gently press in on
the bulb and turn it clockwise until it is tight.
7. Put the socket back into the lamp assembly and turn
it clockwise until it locks.
8. Put the parking/turn signal lamp assembly back into
the vehicle and tighten the screws.
Page 220 of 321
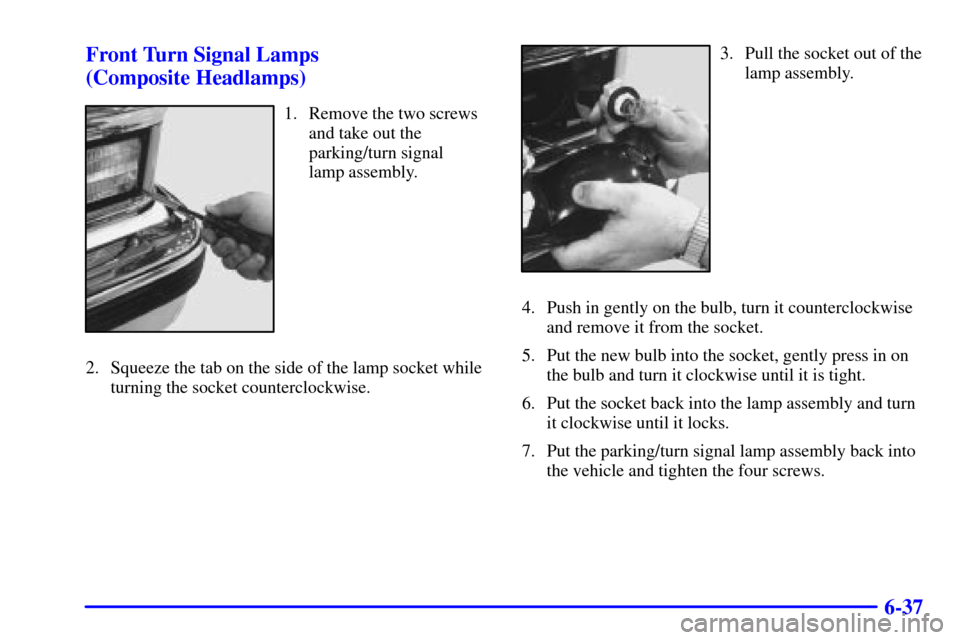
6-37 Front Turn Signal Lamps
(Composite Headlamps)
1. Remove the two screws
and take out the
parking/turn signal
lamp assembly.
2. Squeeze the tab on the side of the lamp socket while
turning the socket counterclockwise.
3. Pull the socket out of the
lamp assembly.
4. Push in gently on the bulb, turn it counterclockwise
and remove it from the socket.
5. Put the new bulb into the socket, gently press in on
the bulb and turn it clockwise until it is tight.
6. Put the socket back into the lamp assembly and turn
it clockwise until it locks.
7. Put the parking/turn signal lamp assembly back into
the vehicle and tighten the four screws.
Page 221 of 321
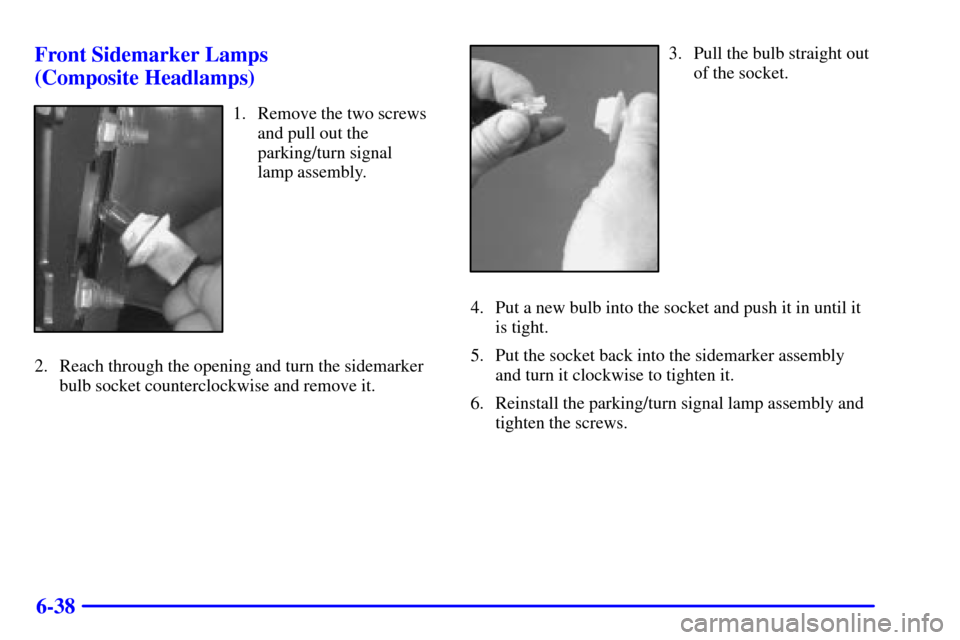
6-38 Front Sidemarker Lamps
(Composite Headlamps)
1. Remove the two screws
and pull out the
parking/turn signal
lamp assembly.
2. Reach through the opening and turn the sidemarker
bulb socket counterclockwise and remove it.
3. Pull the bulb straight out
of the socket.
4. Put a new bulb into the socket and push it in until it
is tight.
5. Put the socket back into the sidemarker assembly
and turn it clockwise to tighten it.
6. Reinstall the parking/turn signal lamp assembly and
tighten the screws.
Page 233 of 321
6-50
NOTICE:
The wrong wheel can also cause problems with
bearing life, brake cooling, speedometer or
odometer calibration, headlamp aim, bumper
height, vehicle ground clearance and tire or
tire chain clearance to the body and chassis.
Whenever a wheel, wheel bolt or wheel nut is replaced
on a dual wheel setup, check the wheel nut torque after
100, 1,000 and 6,000 miles (160, 1 600 and 10 000 km)
of driving. For proper torque, see ªWheel Nut Torqueº
in the Index. See ªTightening the Wheel Nutsº in the
Index for more information.Used Replacement Wheels
CAUTION:
Putting a used wheel on your vehicle is
dangerous. You can't know how it's been used or
how far it's been driven. It could fail suddenly
and cause an accident. If you have to replace a
wheel, use a new GM original equipment wheel.