Page 293 of 371
6-11 Engine Compartment Overview
When you open the hood, you'll see:
A. Windshield Washer Fluid
B. Power Steering Fluid
C. Engine Oil Fill Location
D. Engine Oil Dipstick LocationE. Brake Master Cylinder
F. Transaxle Dipstick/Fill Location
G. Engine Air Cleaner/Filter
H. Surge Tank/Coolant Fill Location
Before closing the hood, be sure all filler caps are on properly. Then pull the hood down and close it firmly.
Page 294 of 371

6-12
Underhood Lamp
Turn the parking lamps on to operate the underhood
lamp. The underhood lamp will come on when the hood
is opened.
Engine Oil
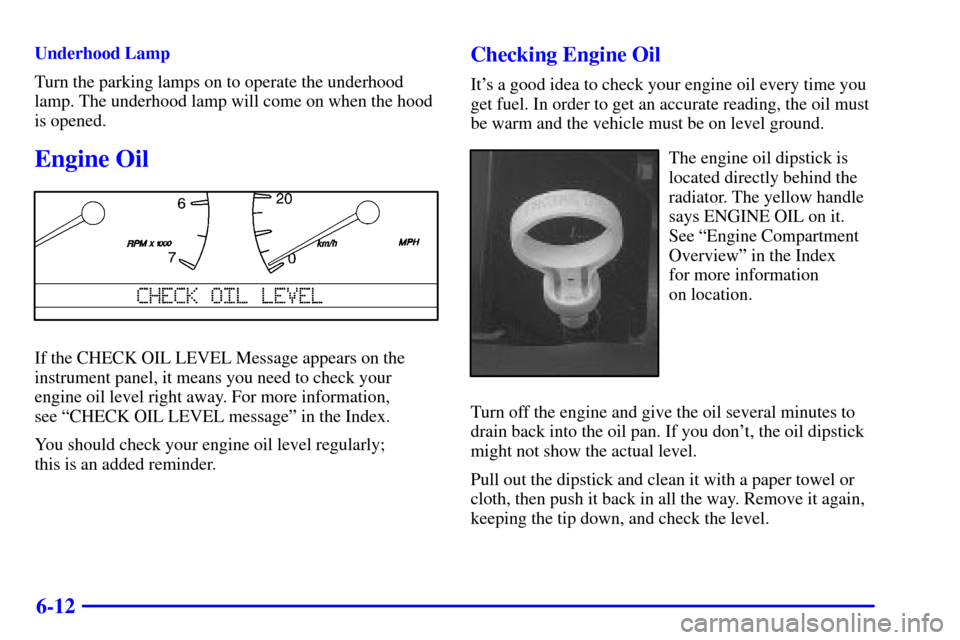
If the CHECK OIL LEVEL Message appears on the
instrument panel, it means you need to check your
engine oil level right away. For more information,
see ªCHECK OIL LEVEL messageº in the Index.
You should check your engine oil level regularly;
this is an added reminder.
Checking Engine Oil
It's a good idea to check your engine oil every time you
get fuel. In order to get an accurate reading, the oil must
be warm and the vehicle must be on level ground.
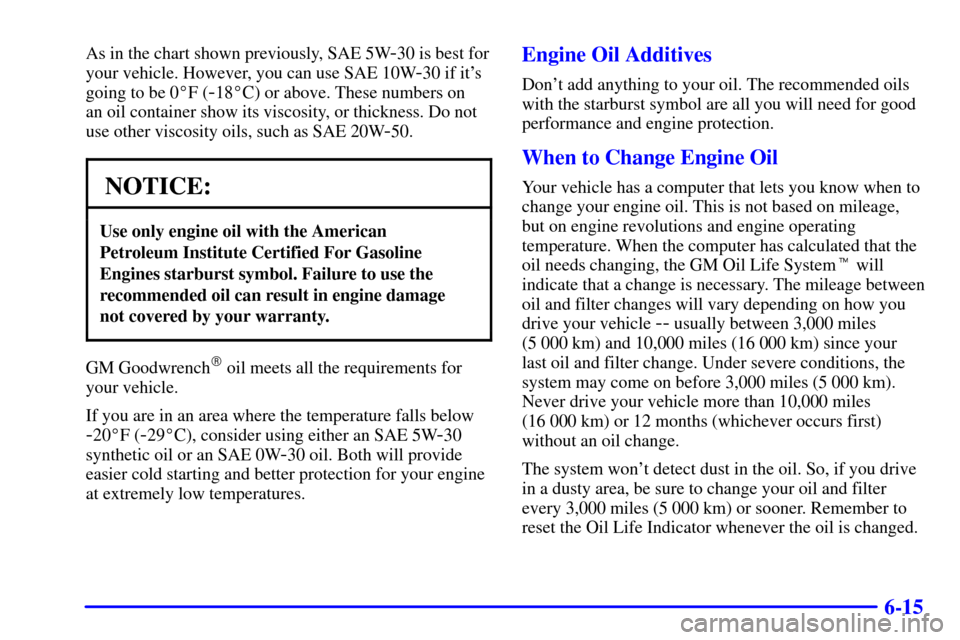
The engine oil dipstick is
located directly behind the
radiator. The yellow handle
says ENGINE OIL on it.
See ªEngine Compartment
Overviewº in the Index
for more information
on location.
Turn off the engine and give the oil several minutes to
drain back into the oil pan. If you don't, the oil dipstick
might not show the actual level.
Pull out the dipstick and clean it with a paper towel or
cloth, then push it back in all the way. Remove it again,
keeping the tip down, and check the level.
Page 295 of 371
6-13
When to Add Engine Oil
If the oil is at or below the ADD line, then you'll need
to add at least one quart of oil. But you must use the
right kind. This part explains what kind of oil to use. For
crankcase capacity, see ªCapacities and Specificationsº
in the Index.
NOTICE:
Don't add too much oil. If your engine has so
much oil that the oil level gets above the upper
mark that shows the proper operating range,
your engine could be damaged.
The engine oil fill cap is
located behind the radiator
on the passenger's side
of the engine. Turn the
cap counterclockwise
to remove it.
See ªEngine Compartment Overviewº in the Index for
more information on location.
Be sure to fill it enough to put the level somewhere in
the proper operating range. Push the dipstick all the way
back in when you're through.
Page 296 of 371
6-14 What Kind of Engine Oil to Use
Oils recommended for your vehicle can be identified by
looking for the starburst symbol.
This symbol indicates that the oil has been certified by
the American Petroleum Institute (API). Do not use any
oil which does not carry this starburst symbol.
If you change your own oil,
be sure you use oil that has
the starburst symbol on the
front of the oil container. If
you have your oil changed
for you, be sure the oil put
into your engine is
American Petroleum
Institute certified for
gasoline engines.
You should also use the proper viscosity oil for your
vehicle, as shown in the following chart:
Page 297 of 371

6-15
As in the chart shown previously, SAE 5W-30 is best for
your vehicle. However, you can use SAE 10W
-30 if it's
going to be 0�F (
-18�C) or above. These numbers on
an oil container show its viscosity, or thickness. Do not
use other viscosity oils, such as SAE 20W
-50.
NOTICE:
Use only engine oil with the American
Petroleum Institute Certified For Gasoline
Engines starburst symbol. Failure to use the
recommended oil can result in engine damage
not covered by your warranty.
GM Goodwrench� oil meets all the requirements for
your vehicle.
If you are in an area where the temperature falls below
-20�F (-29�C), consider using either an SAE 5W-30
synthetic oil or an SAE 0W
-30 oil. Both will provide
easier cold starting and better protection for your engine
at extremely low temperatures.
Engine Oil Additives
Don't add anything to your oil. The recommended oils
with the starburst symbol are all you will need for good
performance and engine protection.
When to Change Engine Oil
Your vehicle has a computer that lets you know when to
change your engine oil. This is not based on mileage,
but on engine revolutions and engine operating
temperature. When the computer has calculated that the
oil needs changing, the GM Oil Life System� will
indicate that a change is necessary. The mileage between
oil and filter changes will vary depending on how you
drive your vehicle
-- usually between 3,000 miles
(5 000 km) and 10,000 miles (16 000 km) since your
last oil and filter change. Under severe conditions, the
system may come on before 3,000 miles (5 000 km).
Never drive your vehicle more than 10,000 miles
(16 000 km) or 12 months (whichever occurs first)
without an oil change.
The system won't detect dust in the oil. So, if you drive
in a dusty area, be sure to change your oil and filter
every 3,000 miles (5 000 km) or sooner. Remember to
reset the Oil Life Indicator whenever the oil is changed.
Page 298 of 371

6-16
How to Reset the Oil Life Indicator
After the oil has been changed, display the ENGINE
OIL LIFE message by pressing the INFO button.
Then press and hold the INFO RESET button until the
display shows 100% ENGINE OIL LIFE. This resets
the oil life index. The message will remain off until the
next oil change is needed. The percentage of oil life
remaining may be checked at any time by pressing the
INFO button several times until the ENGINE OIL LIFE
message appears. For more information on the oil life
feature, see ªOil Life Indicatorº in the Index.What to Do with Used Oil
Did you know that used engine oil contains certain
elements that may be unhealthy for your skin and could
even cause cancer? Don't let used oil stay on your skin
for very long. Clean your skin and nails with soap and
water, or a good hand cleaner. Wash or properly throw
away clothing or rags containing used engine oil. See
the manufacturer's warnings about the use and disposal
of oil products.
Used oil can be a real threat to the environment. If you
change your own oil, be sure to drain all free
-flowing
oil from the filter before disposal. Don't ever dispose of
oil by putting it in the trash, pouring it on the ground,
into sewers, or into streams or bodies of water. Instead,
recycle it by taking it to a place that collects used oil.
If you have a problem properly disposing of your used
oil, ask your dealer, a service station or a local recycling
center for help.
Page 299 of 371
6-17
Engine Air Cleaner/Filter
The air cleaner is located next to the coolant surge tank
on the driver's side of the engine. See ªEngine
Compartment Overviewº in the Index for more
information on location. Be sure the engine has
cooled before following these steps to replace the
air cleaner filter:
1. With a screwdriver,
loosen the air duct
clamp, which is
located at the mass
airflow sensor end
of the air duct.
2. Disconnect the air duct from the mass airflow sensor.
Page 301 of 371

6-19
Follow these steps to reinstall the air cleaner assembly:
1. Slide the air cleaner lid into the slots in the bottom of
the air cleaner base.
2. Close the cover and make sure that both latches are
secure and fully engaged.
3. Reinstall the clean air duct over the mass airflow
sensor. Make sure that the duct is secure around
the entire outer edge of the sensor.
4. Tighten the air duct clamp.
Refer to the Maintenance Schedule to determine when to
replace the air filter.
See ªScheduled Maintenance Servicesº in the
Maintenance Schedule booklet.
CAUTION:
Operating the engine with the air cleaner/filter
off can cause you or others to be burned. The air
cleaner not only cleans the air, it stops flame if
the engine backfires. If it isn't there, and the
engine backfires, you could be burned. Don't
drive with it off, and be careful working on the
engine with the air cleaner/filter off.
NOTICE:
If the air cleaner/filter is off, a backfire can
cause a damaging engine fire. And, dirt can
easily get into your engine, which will damage it.
Always have the air cleaner/filter in place when
you're driving.