Page 178 of 392

3-10 AM-FM Stereo with Cassette Tape Player
and Automatic Tone Control (If Equipped)
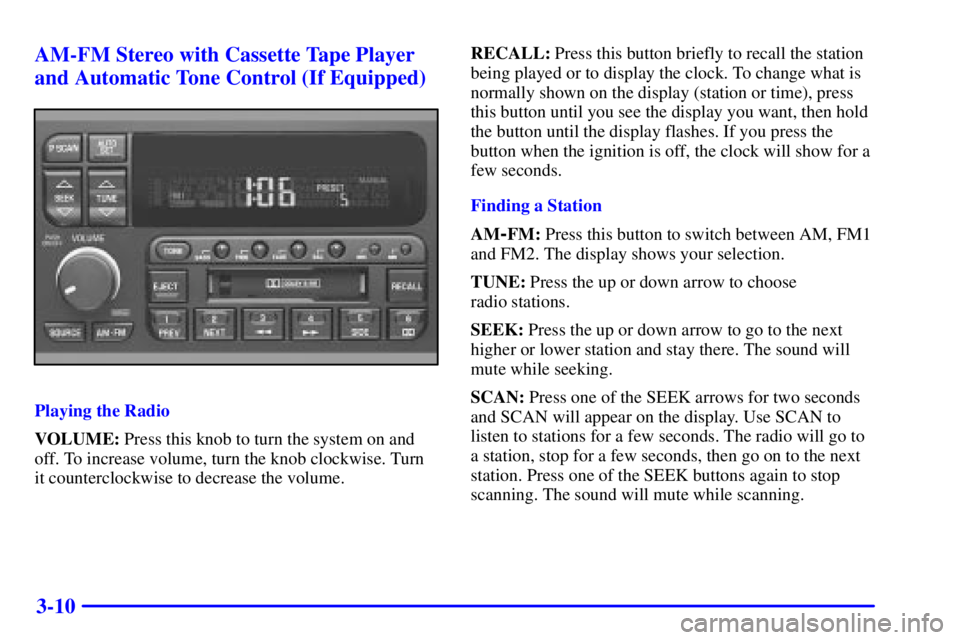
Playing the Radio
VOLUME: Press this knob to turn the system on and
off. To increase volume, turn the knob clockwise. Turn
it counterclockwise to decrease the volume.RECALL: Press this button briefly to recall the station
being played or to display the clock. To change what is
normally shown on the display (station or time), press
this button until you see the display you want, then hold
the button until the display flashes. If you press the
button when the ignition is off, the clock will show for a
few seconds.
Finding a Station
AM
-FM: Press this button to switch between AM, FM1
and FM2. The display shows your selection.
TUNE: Press the up or down arrow to choose
radio stations.
SEEK: Press the up or down arrow to go to the next
higher or lower station and stay there. The sound will
mute while seeking.
SCAN: Press one of the SEEK arrows for two seconds
and SCAN will appear on the display. Use SCAN to
listen to stations for a few seconds. The radio will go to
a station, stop for a few seconds, then go on to the next
station. Press one of the SEEK buttons again to stop
scanning. The sound will mute while scanning.
Page 182 of 392

3-14 AM-FM Stereo with Cassette Tape and
Compact Disc Player with Automatic Tone
Control (If Equipped)
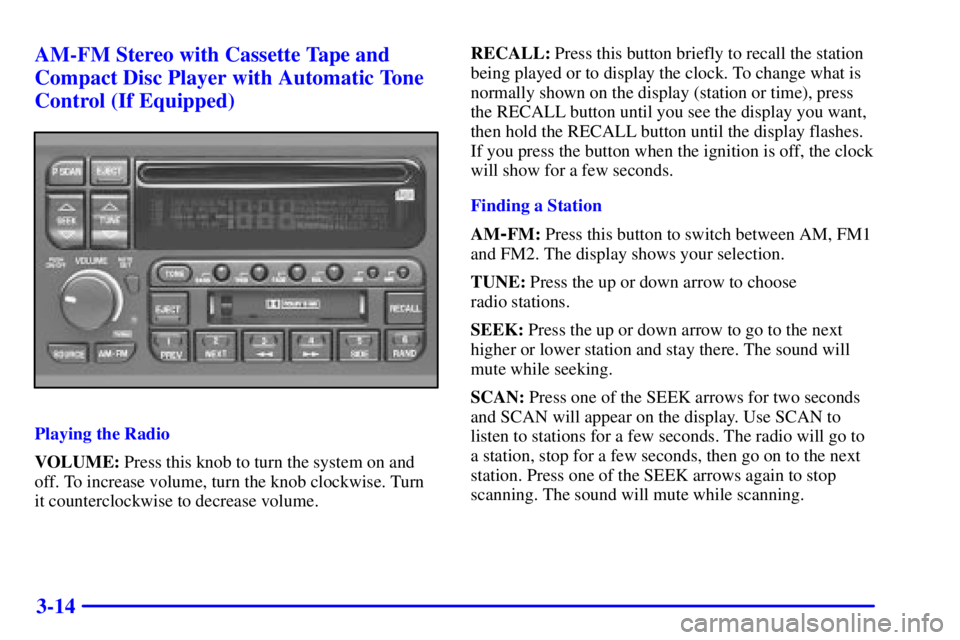
Playing the Radio
VOLUME: Press this knob to turn the system on and
off. To increase volume, turn the knob clockwise. Turn
it counterclockwise to decrease volume.RECALL: Press this button briefly to recall the station
being played or to display the clock. To change what is
normally shown on the display (station or time), press
the RECALL button until you see the display you want,
then hold the RECALL button until the display flashes.
If you press the button when the ignition is off, the clock
will show for a few seconds.
Finding a Station
AM
-FM: Press this button to switch between AM, FM1
and FM2. The display shows your selection.
TUNE: Press the up or down arrow to choose
radio stations.
SEEK: Press the up or down arrow to go to the next
higher or lower station and stay there. The sound will
mute while seeking.
SCAN: Press one of the SEEK arrows for two seconds
and SCAN will appear on the display. Use SCAN to
listen to stations for a few seconds. The radio will go to
a station, stop for a few seconds, then go on to the next
station. Press one of the SEEK arrows again to stop
scanning. The sound will mute while scanning.
Page 190 of 392

3-22
�� (3): Press and hold this button to quickly reverse
within a track. You will hear sound.
�� (4): Press and hold this button to quickly advance
within a track. You will hear sound.
SIDE (5): Press this button to select the next disc in the
magazine. Each time you press SIDE, the disc number on
the radio display will go to that of the next available CD.
If a CD cannot be played, its number will be skipped
when selecting discs while using the SIDE button.
If your vehicle is equipped with the AM
-FM Stereo
with Compact Disc Player and Automatic Tone Control,
pushbutton (5) is not labeled ªSIDE,º but still functions
as described.
RAND (6): Press this button to enter the random play
mode. RAND will appear on the display. While in this
mode, tracks and discs will be played in random order.
Press the button again to turn off the random feature and
return to normal operation.
RECALL: Press this button to see what track is
currently playing. Press RECALL again within
five seconds to see how long the track has been playing.
EL TM will appear on the display when in elapsed time
mode. When a new track starts to play, the track number
will also appear. Press RECALL a third time and the
time of day will be displayed.SOURCE: Press this button to play a CD if you have a
magazine loaded in the changer and the radio is playing.
To return to the radio while a CD is playing, press
AM
-FM. You can also press this button to switch
between a cassette tape, CD or the CD changer if all
three are loaded.
Personal Choice Radio Controls
(If Equipped)
With this feature, your vehicle will recall the latest radio
settings as adjusted the last time your vehicle was
operated. This feature allows two different drivers to
store and recall their own radio settings for AM and
FM presets, last tuned station, volume, tone and audio
source (radio, cassette or CD). The settings recalled
by the radio are determined by which transmitter
(ª1º or ª2º) was used to enter the vehicle. The number
on the back of the transmitter corresponds to driver 1 or
to driver 2. After the unlock button is pressed on the
transmitter and the ignition is in RUN, the radio settings
will automatically adjust to where they were last set by
the identified driver. The settings can also be changed by
pressing one of the MEMORY buttons (1 or 2) located
on the driver's door until you hear two beeps. When
changes are made, the new settings will be saved for
the driver.
Page 312 of 392

6-49
When the TIRE PRESSURE LOW message appears on
the Driver Information Center, you should stop as soon
as you can and check all your tires for damage. If a tire
is flat, see ªIf a Tire Goes Flatº in the Index. Also check
the tire pressure in all four tires as soon as you can.
See ªInflation
-Tire Pressureº in the Index.
Any time you adjust a tire's pressure or have one or
more tires repaired or replaced, you'll need to reset
(calibrate) the check tire pressure system. You'll also
need to reset the system whenever you rotate the tires,
buy new tires, install or remove the compact spare, and
whenever the vehicle's battery has been disconnected.
Don't reset the check tire pressure system without first
correcting the cause of the problem and checking and
adjusting the pressure in all four tires. If you reset the
system when the tire pressures are incorrect, the check
tire pressure system will not work properly and may not
alert you when a tire is low or high.To reset (calibrate) the system:
1. Turn the ignition switch to RUN.
2. Press the GAGE INFO button on the DIC until
TIRE PRESSURE appears on the display.
3. Press and hold the DIC RESET button for about
five seconds. After five seconds, the display will
show TIRE PRESSURE RESET. If TIRE
PRESSURE RESET does not appear on the display
after about five seconds, see your dealer for service.
After you release the DIC RESET button, TIRE
PRESSURE NORMAL will appear on the display.
The system completes the calibration process during
driving. Calibration time can take 45 to 90 minutes,
depending on your driving habits. After the system has
been calibrated, the system will alert the driver that a tire
is low, up to a maximum speed of 65 mph (105 km/h).
Page:
< prev 1-8 9-16 17-24