Page 221 of 351

5-4
2. Get the vehicles close enough so the jumper cables
can reach, but be sure the vehicles aren't touching
each other. If they are, it could cause a ground
connection you don't want. You wouldn't be able
to start your vehicle, and the bad grounding could
damage the electrical systems.
To avoid the possibility of the vehicles rolling,
set the parking brake firmly on both vehicles
involved in the jump start procedure. Put an
automatic transaxle in PARK (P) or a manual
transaxle in NEUTRAL (N) before setting the
parking brake.
3. Turn off the ignition on both vehicles. Unplug
unnecessary accessories plugged into the cigarette
lighter or accessory power outlet. Turn off all lamps
that aren't needed as well as radios. This will avoid
sparks and help save both batteries. In addition,
it could save your radio!
NOTICE:
If you leave your radio on, it could be badly
damaged. The repairs wouldn't be covered by
your warranty.
4. Open the hoods and locate the batteries.
(Your vehicle's battery is located toward the front of
the passenger's side of the engine, under a diagonal
brace. See ªEngine Compartment Overviewº in the
Index for more information on location.)
CAUTION:
An electric fan can start up even when the engine
is not running and can injure you. Keep hands,
clothing and tools away from any underhood
electric fan.
Page 238 of 351
5-21
Changing a Flat Tire
If a tire goes flat, avoid further tire and wheel damage
by driving slowly to a level place. Turn on your hazard
warning flashers.
CAUTION:
Changing a tire can cause an injury. The vehicle
can slip off the jack and roll over you or other
people. You and they could be badly injured.
Find a level place to change your tire. To help
prevent the vehicle from moving:
1. Set the parking brake firmly.
2. Put the shift lever in PARK (P).
3. Turn off the engine.
To be even more certain the vehicle won't move,
you can put blocks at the front and rear of the
tire farthest away from the one being changed.
That would be the tire on the other side of the
vehicle, at the opposite end.
The following steps will tell you how to use the jack and
change a tire.
Page 269 of 351

6-19
Wait at least 30 minutes before checking the transaxle
fluid level if you have been driving:
�When outside temperatures are above 90�F (32�C).
�At high speed for quite a while.
�In heavy traffic
-- especially in hot weather.
�While pulling a trailer.
To get the right reading, the fluid should be at normal
operating temperature, which is 180�F to 200�F
(82�C to 93�C).
Get the vehicle warmed up by driving about 15 miles
(24 km) when outside temperatures are above 50�F
(10�C). If it's colder than 50�F (10�C), you may
have to drive longer.
Checking the Fluid Level
Prepare your vehicle as follows:
�Park your vehicle on a level place. Keep the
engine running.
�With the parking brake applied, place the shift lever
in PARK (P).
�With your foot on the brake pedal, move the shift
lever through each gear range, pausing for about
three seconds in each range. Then, position the shift
lever in PARK (P).
�Let the engine run at idle for three to five minutes.Then, without shutting off the engine, follow these steps:
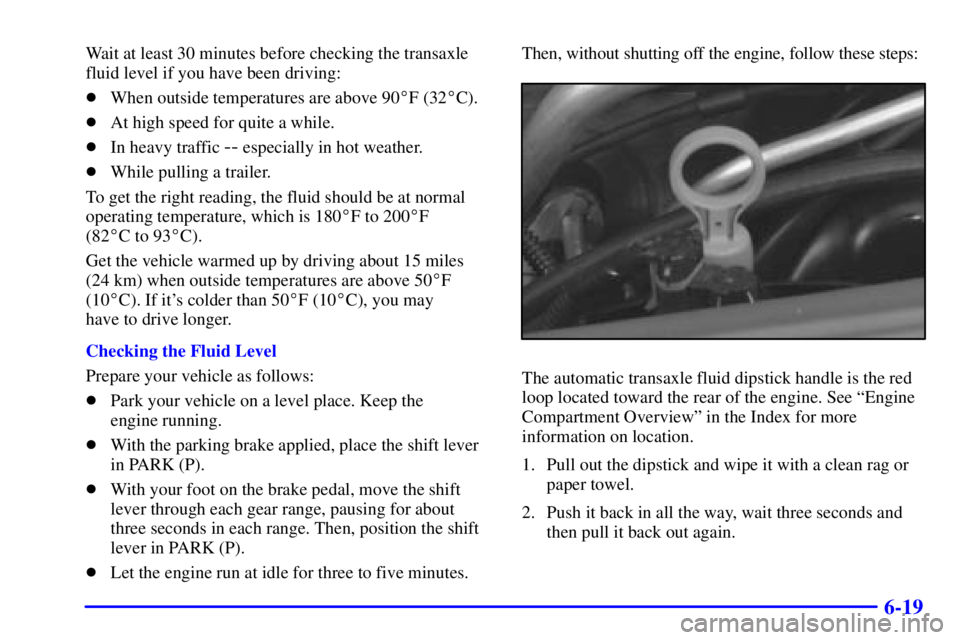
The automatic transaxle fluid dipstick handle is the red
loop located toward the rear of the engine. See ªEngine
Compartment Overviewº in the Index for more
information on location.
1. Pull out the dipstick and wipe it with a clean rag or
paper towel.
2. Push it back in all the way, wait three seconds and
then pull it back out again.
Page 311 of 351

6-61
Fuse Description
DOOR LOCKS Door Locks
TRAP ALERT Not Used
TAIL LAMPS,
LIC LAMPSTaillamps, License Lamps
RADIO Radio
HEATED MIRROR Heated Mirrors
CRUISE Cruise Control
Blank Not Used
CLUSTER Instrument Panel Cluster
CIGAR LTR Cigarette Lighter, Auxiliary
Power Connection
(Power Drop)
STOP LAMPS Stoplamps
ONSTAR OnStar
�
FRT PARK LPS Parking Lamps
POWER DROP Auxiliary Power Connection
(Power Drop): Hot in ACC
and Run
CRANK SIGNAL,
BCM, CLUSTERCrank Signal, Body Control
Module, Cluster, Powertrain
Control Module
HVAC Ignition Signal, HVAC
Control HeadFuse Description
BTSI PARK LOCK Shifter Lock Solenoid
AIR BAG Air Bag
BCM PWR Body Control Module
HAZARD Hazard Flashers
LH HEATED SEAT Driver's Heated Seat
Blank Not Used
BCM ACC Ignition Signal:
Hot in ACC and Run,
Body Control Module
Blank Not Used
LOW BLOWER Low Blower
ABS Anti
-Lock Brakes
TURN SIGNALS,
CORN LPSTurn Signals,
Cornering Lamps
RADIO, HVAC,
RFA, CLUSTERRadio, HVAC Head, Remote
Keyless Entry, Cluster
HIGH BLOWER High Blower
RH HEATED SEAT Passenger's Heated Seat
STRG WHL CONT Audio Steering
Wheel Controls
WIPER Wipers
Page 332 of 351

7-17
Starter Switch Check
CAUTION:
When you are doing this check, the vehicle could
move suddenly. If it does, you or others could be
injured. Follow the steps below.
1. Before you start, be sure you have enough room
around the vehicle.
2. Firmly apply both the parking brake and the regular
brake. See ªParking Brakeº in the Index if necessary.
NOTE: Do not use the accelerator pedal, and be
ready to turn off the engine immediately if it starts.
3. Try to start the engine in each gear. The starter
should work only in PARK (P) or NEUTRAL (N).
If the starter works in any other position, your
vehicle needs service.Automatic Transaxle Shift Lock Control System Check
CAUTION:
When you are doing this check, the vehicle could
move suddenly. If it does, you or others could be
injured. Follow the steps below.
1. Before you start, be sure you have enough room around
the vehicle. It should be parked on a level surface.
2. Firmly apply the parking brake. See ªParking Brakeº
in the Index if necessary.
NOTE: Be ready to apply the regular brake
immediately if the vehicle begins to move.
3. With the engine off, turn the key to the RUN
position, but don't start the engine. Without applying
the regular brake, try to move the shift lever out of
PARK (P) with normal effort. If the shift lever
moves out of PARK (P), your vehicle needs service.
Page 333 of 351

7-18
Ignition Transaxle Lock Check
While parked, and with the parking brake set, try to turn
the ignition key to LOCK in each shift lever position.
�The key should turn to LOCK only when the
shift lever is in PARK (P).
�The key should come out only in LOCK.
Parking Brake and Automatic Transaxle PARK (P)
Mechanism Check
CAUTION:
When you are doing this check, your vehicle
could begin to move. You or others could be
injured and property could be damaged. Make
sure there is room in front of your vehicle in case
it begins to roll. Be ready to apply the regular
brake at once should the vehicle begin to move.
Park on a fairly steep hill, with the vehicle facing
downhill. Keeping your foot on the regular brake,
set the parking brake.
�To check the parking brake's holding ability: With
the engine running and transaxle in NEUTRAL (N),
slowly remove foot pressure from the regular brake
pedal. Do this until the vehicle is held by the parking
brake only.
�To check the PARK (P) mechanism's holding
ability: With the engine running, shift to PARK (P).
Then release the parking brake followed by the
regular brake.
Underbody Flushing Service
At least every spring, use plain water to flush any
corrosive materials from the underbody. Take care to
clean thoroughly any areas where mud and other debris
can collect.
Page 335 of 351

7-20 Engine Cooling System Inspection
Inspect the hoses and have them replaced if they
are cracked, swollen or deteriorated. Inspect all pipes,
fittings and clamps; replace as needed. Clean the outside
of the radiator and air conditioning condenser. To help
ensure proper operation, a pressure test of the cooling
system and pressure cap is recommended at least
once a year.
Throttle System Inspection
Inspect the throttle system for interference or binding,
and for damaged or missing parts. Replace parts as
needed. Replace any components that have high effort
or excessive wear. Do not lubricate accelerator and
cruise control cables.
Brake System Inspection
Inspect the complete system. Inspect brake lines and
hoses for proper hook
-up, binding, leaks, cracks,
chafing, etc. Inspect disc brake pads for wear and rotors
for surface condition. Also inspect drum brake linings
for wear and cracks. Inspect other brake parts, including
drums, wheel cylinders, calipers, parking brake, etc.
Check parking brake adjustment. You may need to have
your brakes inspected more often if your driving habits
or conditions result in frequent braking.
Page:
< prev 1-8 9-16 17-24