2001 BMW Z8 lock
[x] Cancel search: lockPage 91 of 170
91n
IndexDataTechnologyRepairsCar careControlsOverview
Disc brakes Brake systemDriving notesWhen driving in heavy rain and on wet
roads it is advisable to apply light pres-
sure to the brake pedal every few miles.
Monitor traffic conditions to ensure that
this maneuver does not pose a hazard
to you or to other road users. The heat
generated in this braking process helps
dry the pads and rotors.
Maximum braking force is obtained
while the wheels are not locked, but
rather when they are still barely turning
immediately prior to locking. ABS main-
tains this state automatically. If the ABS
fails, you should revert to the staggered
braking technique (refer to page 93).
When descending steep hills and
extended grades, downshift to a gear
that will allow you to continue safely
with only a minimal amount of braking.
By minimizing the loads placed on the
brake system, this strategy helps
ensure that optimal brake system
response will remain available at all
times.
You can enhance the engine's braking
effect by engaging a lower gear, down-
shifting as far as first gear when
descending extremely steep slopes. Even if engine braking fails to slow the
vehicle sufficiently, you should still
make every effort to avoid prolonged
braking with continuous application of
low to moderate pressure at the pedal.
It is better to decelerate the vehicle by
applying a higher level of force at the
pedal (watch following traffic!) and then
subsequently pausing to allow the
brakes to cool briefly before starting on
your next braking cycle. By protecting
brake system components against
overheating, the cooling phases
afforded by this staggered, or intermit-
tent braking technique help maintain
consistent availability of optimal braking
response when it is needed.
Do not coast with the clutch
depressed, the gear-shift lever in
neutral, or, above all, with the engine
off; otherwise, the engine will provide
no braking effect if the transmission is
in neutral, and there is no braking or
steering power assist if the engine is
not running. Never allow floor mats,
carpets or any other objects to obstruct
the accelerator, clutch or brake pedals
and pose a safety hazard by reducing
their available travel range.<
Brake fluid level
The brake warning lamp comes
on with the parking brake
released:
The brake fluid level in the reser-
voir is too low, refer to page 112.
If the brake fluid level is too low
and brake pedal travel has become
noticeably longer, there may be a
defect in one of the brake system's
hydraulic circuits.
Proceed to the nearest BMW
center. Higher brake application
pressure may be necessary under these
conditions, and brake pedal travel may
be significantly longer. Please
remember to adapt your driving style
accordingly.<
Page 92 of 170

92n
Brake system Winter operationBrake pads
The warning lamp for the brake
pads comes on:
The brake pads have reached
their minimum thickness. Proceed to
the nearest BMW center as soon as
possible to have the pads replaced.
For your own safety: use only
brake pads which BMW has
approved for your specific vehicle
model. BMW cannot evaluate non-
approved brake pads to determine if
they are suited for use, and therefore
cannot ensure the operating safety of
the vehicle if they are installed.<
Winter is often accompanied by rapid
changes in weather, requiring not only
a different driving style, but also certain
preparations to the vehicle itself to
ensure that your progress through the
winter months remains safe and
trouble-free. CoolantBe sure that the coolant mixture
contains the year-round ratio of 50:50
water and antifreeze/corrosion protec-
tion. This mixture provides protection
against freezing down to approx. Ð 34 7
(Ð 37 6). LocksBMW door lock deicer can be used to
free doors if frozen. This deicer also
contains lubricant.
After using the deicer, treatment with
BMW lock cylinder grease is recom-
mended.
Rubber seals and components To prevent the weather-stripping from
freezing, apply a spray-on rubber treat-
ment or silicone spray to the door, hood
and luggage compartment lid seals.
A full range of car care products is
available from your BMW center.
on the rear wheels with approved winter
tires. Always follow the manufacturer's
safety precautions. Do not exceed a
maximum speed of 30 mph (50 km/h).
Do not activate the RDW system while
using snow chains. Malfunction warn-
ings and undetected losses in pressure
are possible when driving with snow
chains.
Starting offWhen starting off in deep snow or when
"rocking" the vehicle to free it, it may be
advisable to temporarily deactivate the
DSC system. Refer to page 65.
To maintain vehicle stability,
always drive with the system
switched on whenever possible.<
Page 93 of 170

93n
IndexDataTechnologyRepairsCar careControlsOverview
Winter operationDriving on low-traction road
surfacesDo not activate the Sport mode (refer to
page 66). Use smooth, gentle pressure
to control the accelerator pedal. Avoid
excessive engine speeds and upshift
early. Downshift well in advance when
approaching uphill or downhill
grades. Maintain an adequate distance
between yourself and the vehicle
ahead.BrakesWinter road conditions substantially
reduce the amount of traction available
between the tires and the road surface.
The resulting increases in braking
distance are considerable and should
be kept in mind at all times.
ABS is intended to prevent the wheels
from locking during brake applications,
thus helping to maintain vehicle stability
and steering response.If the ABS does not respond in a critical
braking situation and the wheels lock,
reduce the pressure on the brake pedal
until the wheels just start to roll again
while still maintaining enough force to
continue braking.
Then increase the pressure, reduce the
pressure when the wheels lock, reapply
pressure etc.
This staggered braking procedure will
reduce braking distances while helping
you maintain steering control.
You can always then attempt to steer
around hazards after you have reduced
pressure on the brake pedal.
Never downshift to exploit engine
braking when driving on slippery
road surfaces, as this could lead to a
loss of traction at the rear wheels,
impairing your ability to control the
vehicle.<
Depress the clutch during hard
braking on road surfaces that
provide only poor or uneven traction.<
Skid control Depress the clutch and release the
accelerator pedal. Countersteer care-
fully and attempt to regain control of the
vehicle.ParkingEngage first or reverse gear. Depending
on the steepness of the incline, you can
apply the parking brake as well. In order
to prevent the parking brake pads from
locking due to frost or corrosion, dry
them by gently applying the parking
brake as the vehicle is coming to a stop.
Make sure that following traffic is not
endangered.
The brake lamps do not come
on when the parking brake is
engaged.<
Page 96 of 170
96n
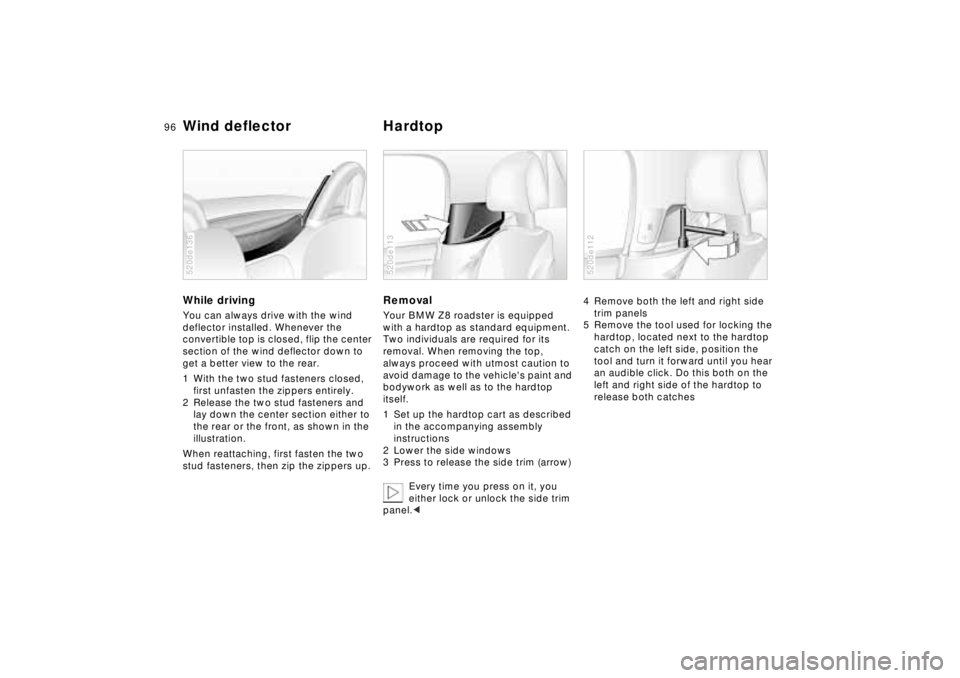
Wind deflector Hardtop While drivingYou can always drive with the wind
deflector installed. Whenever the
convertible top is closed, flip the center
section of the wind deflector down to
get a better view to the rear.
1 With the two stud fasteners closed,
first unfasten the zippers entirely.
2 Release the two stud fasteners and
lay down the center section either to
the rear or the front, as shown in the
illustration.
When reattaching, first fasten the two
stud fasteners, then zip the zippers up.520de136
RemovalYour BMW Z8 roadster is equipped
with a hardtop as standard equipment.
Two individuals are required for its
removal. When removing the top,
always proceed with utmost caution to
avoid damage to the vehicle's paint and
bodywork as well as to the hardtop
itself.
1 Set up the hardtop cart as described
in the accompanying assembly
instructions
2 Lower the side windows
3 Press to release the side trim (arrow)
Every time you press on it, you
either lock or unlock the side trim
panel.<520de113
4 Remove both the left and right side
trim panels
5 Remove the tool used for locking the
hardtop, located next to the hardtop
catch on the left side, position the
tool and turn it forward until you hear
an audible click. Do this both on the
left and right side of the hardtop to
release both catches520de112
Page 97 of 170
97n
IndexDataTechnologyRepairsCar careControlsOverview
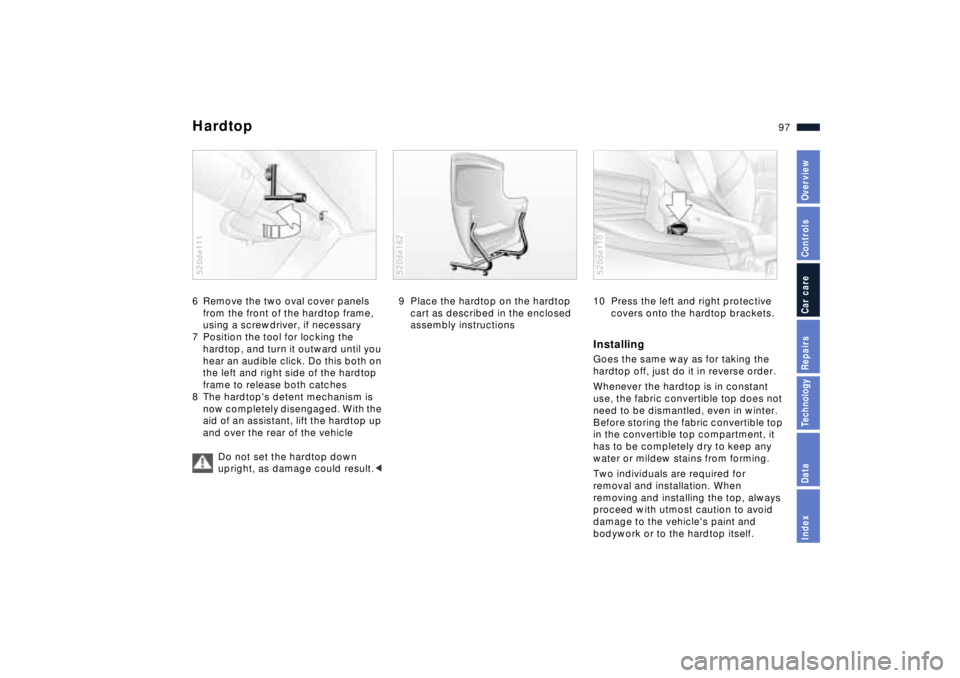
Hardtop6 Remove the two oval cover panels
from the front of the hardtop frame,
using a screwdriver, if necessary
7 Position the tool for locking the
hardtop, and turn it outward until you
hear an audible click. Do this both on
the left and right side of the hardtop
frame to release both catches
8 The hardtop's detent mechanism is
now completely disengaged. With the
aid of an assistant, lift the hardtop up
and over the rear of the vehicle
Do not set the hardtop down
upright, as damage could result.<520de111
9 Place the hardtop on the hardtop
cart as described in the enclosed
assembly instructions 520de162
10 Press the left and right protective
covers onto the hardtop brackets.InstallingGoes the same way as for taking the
hardtop off, just do it in reverse order.
Whenever the hardtop is in constant
use, the fabric convertible top does not
need to be dismantled, even in winter.
Before storing the fabric convertible top
in the convertible top compartment, it
has to be completely dry to keep any
water or mildew stains from forming.
Two individuals are required for
removal and installation. When
removing and installing the top, always
proceed with utmost caution to avoid
damage to the vehicle's paint and
bodywork or to the hardtop itself.520de110
Page 105 of 170
105n
IndexDataTechnologyRepairsCar careControlsOverview
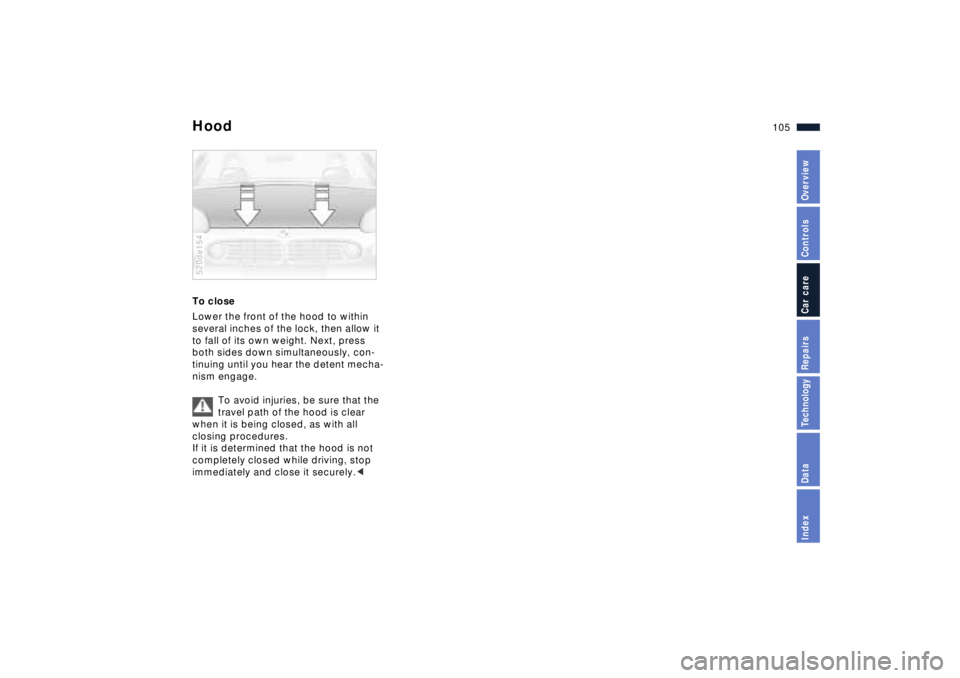
HoodTo close
Lower the front of the hood to within
several inches of the lock, then allow it
to fall of its own weight. Next, press
both sides down simultaneously, con-
tinuing until you hear the detent mecha-
nism engage.
To avoid injuries, be sure that the
travel path of the hood is clear
when it is being closed, as with all
closing procedures.
If it is determined that the hood is not
completely closed while driving, stop
immediately and close it securely.<520de154
Page 112 of 170

112n
Coolant Brake fluidAdding coolant To guard against the possibility of
scalding injuries, always wait until the
engine cools (temperature gauge
needle in blue sector) before
unscrewing the cap on the expansion
tank.
1 Turn the cap slightly counterclock-
wise in order to allow accumulated
pressure to escape, then continue
turning to remove.
2 If the coolant is low, slowly add
coolant until the correct level is
reached Ð do not overfill.
The coolant is a mixture of water and
extended-duty antifreeze with corrosion
inhibitor. Always maintain the
prescribed all-season 50:50 mixture
ratio for year-round protection against
internal corrosion. No other additives
are required.
Replace the coolant every three years.The brake warning lamp comes on and
the parking brake has been released:
Check the brake fluid level. Fill it to the
top mark ("MAX") if necessary.
For adding brake fluid or for deter-
mining and correcting the cause of
brake fluid loss, consult your BMW
center. Your BMW center is familiar
with the specifications for factory-
approved brake fluids (DOT 4).
Brake fluid loss can increase brake
pedal travel. For this type of situation,
refer to the notes on page 91.
520de157
Brake fluid is hygroscopic, that is,
it absorbs moisture from the air
over time.
In order to ensure the safety and reli-
ability of the brake system, have the
brake fluid changed every two years by
a BMW center. Refer also to the Service
and Warranty Information Booklet (US
models) or the Warranty and Service
Guide Booklet (Canadian models).
Brake fluid is toxic and attacks the
vehicle's paintwork. You should always
store it in its original container and in a
location that is inaccessible to children.
Do not spill the fluid and do not fill the
brake fluid reservoir beyond the "MAX"
mark. The brake fluid could ignite upon
contact with hot engine parts and
cause serious burns.<
Comply with the applicable envi-
ronmental laws regulating the
disposal of brake fluid.<
Page 131 of 170
131n
IndexDataTechnologyRepairsCar careControlsOverview
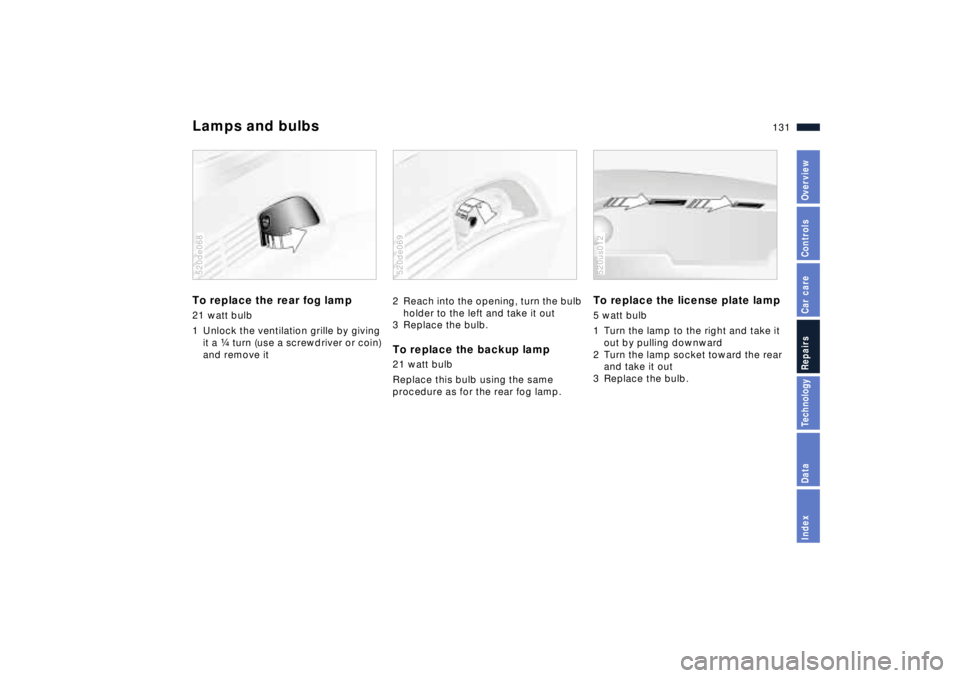
Lamps and bulbsTo replace the rear fog lamp 21 watt bulb
1 Unlock the ventilation grille by giving
it a f turn (use a screwdriver or coin)
and remove it520de068
2 Reach into the opening, turn the bulb
holder to the left and take it out
3 Replace the bulb.To replace the backup lamp 21 watt bulb
Replace this bulb using the same
procedure as for the rear fog lamp.520de069
To replace the license plate lamp5 watt bulb
1 Turn the lamp to the right and take it
out by pulling downward
2 Turn the lamp socket toward the rear
and take it out
3 Replace the bulb.520us012