Page 137 of 238

Index
Data
Technology
Repairs
Car care
Controls
Overview
137nRoof-mounted luggage rack
Mounting points
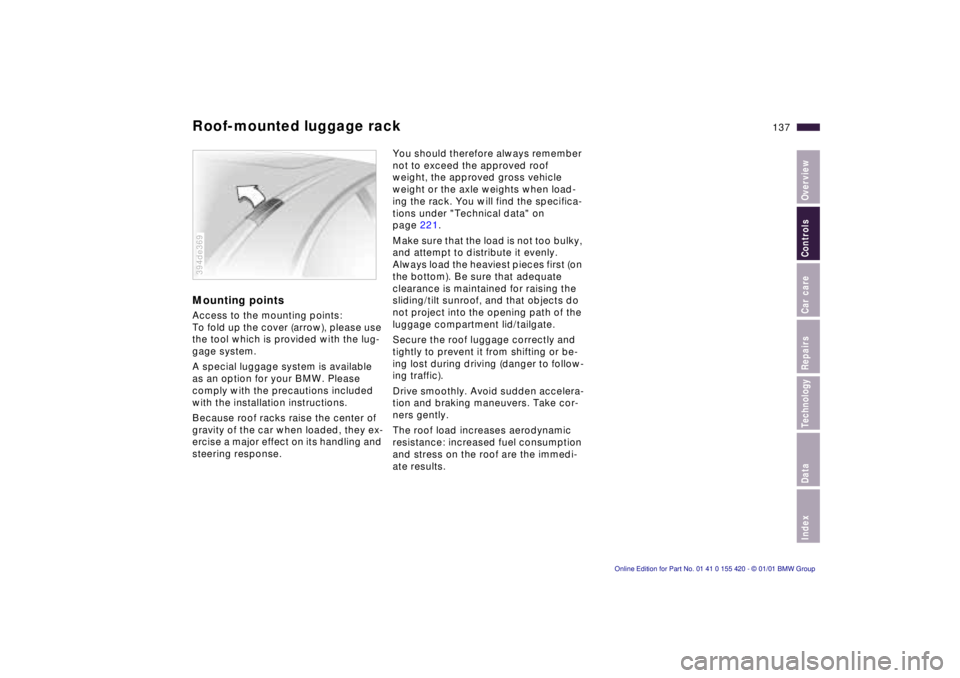
Access to the mounting points:
To fold up the cover (arrow), please use
the tool which is provided with the lug-
gage system.
A special luggage system is available
as an option for your BMW. Please
comply with the precautions included
with the installation instructions.
Because roof racks raise the center of
gravity of the car when loaded, they ex-
ercise a major effect on its handling and
steering response.
394de369
You should therefore always remember
not to exceed the approved roof
weight, the approved gross vehicle
weight or the axle weights when load-
ing the rack. You will find the specifica-
tions under "Technical data" on
page 221.
Make sure that the load is not too bulky,
and attempt to distribute it evenly.
Always load the heaviest pieces first (on
the bottom). Be sure that adequate
clearance is maintained for raising the
sliding/tilt sunroof, and that objects do
not project into the opening path of the
luggage compartment lid/tailgate.
Secure the roof luggage correctly and
tightly to prevent it from shifting or be-
ing lost during driving (danger to follow-
ing traffic).
Drive smoothly. Avoid sudden accelera-
tion and braking maneuvers. Take cor-
ners gently.
The roof load increases aerodynamic
resistance: increased fuel consumption
and stress on the roof are the immedi-
ate results.
Page 147 of 238

Index
Data
Technology
Repairs
Car care
Controls
Overview
147nWinter operation
Rubber seals and components
In order to prevent the weather-strip-
ping from freezing, apply BMW rubber
treatment or silicone spray to the seals
on the doors, hood and luggage com-
partment lid/tailgate.
A full range of car-care products is
available from your BMW center. <
Snow chains
BMW snow chains* can be mounted on
both summer and winter tires. Mount
them in pairs on the rear wheels only
and comply with the manufacturer's
safety precautions. Do not exceed a
maximum speed of 30 mph (50 km/h).
For maximum traction, we recommend
that you manually deactivate the
ASC+T/DSC
* when driving with snow
chains mounted. Refer to page 102.
Starting off
We recommend that you use the
manual control switch to deactivate
ASC+T/ DSC
* when starting off in deep
snow or when rocking the car to free it
(refer to page 102).
Driving on low-traction road
surfaces
Use smooth, gentle pressure to control
the accelerator pedal. Avoid excessive
engine speeds and shift to the next
higher gear at an early point. Adapt
your speed and driving style when ap-
proaching grades or slopes. Maintain
an adequate distance between yourself
and the vehicle ahead.
Brakes
Winter road conditions substantially
reduce the amount of traction available
between the tires and the road surface.
The resulting increases in braking dis-
tance are considerable and should be
kept in mind at all times.
ABS is intended to prevent the wheels
from locking during brake applications,
thus helping to maintain vehicle stability
and steering response. If the ABS does not respond in a critical
braking situation and the wheels lock:
reduce the pressure on the brake pedal
until the wheels just start to roll again
while still maintaining enough force to
continue braking.
Following that, increase pedal pressure
again. Reduce the pressure as the
wheels lock, then reapply pressure.
Repeat this procedure.
This type of staggered braking will
reduce the braking distance, and the
vehicle still remains responsive to
steering.
You can then attempt to steer around
hazards after you have reduced pres-
sure on the brake pedal.
Do not shift down on slick road
surfaces. Doing so could cause
the rear wheels to lose traction and
skid, which could result in the loss of
vehicle control. <
Depress the clutch during hard
braking on road surfaces which
provide only poor or uneven traction. <
Page 181 of 238
Index
Data
Technology
Repairs
Car care
Controls
Overview
Overview
Controls and features Operation, care
and maintenance
Owner service procedures
Technical dataIndex
Advanced technology
181
n
Replacement procedures:
Onboard tool kit 182
Wiper blades 182
Lamps and bulbs 183
Changing a wheel 190
Battery 193
Fuses 196
In case of electrical
malfunction:
Fuel filler door 198
Sliding/Tilt sunroof 198
Tailgate 199
Assistance, giving and
receiving:
Jump-starting 200
Towing the vehicle 201
Page 182 of 238
182n
Attached to the underside of the
luggage compartment lid/tailgate.
Unscrew the wingnut for access.
394de080
Front
1 Pull the wiper arm up slightly and hold it firmly.
2 Press back the release (arrow) and pull the wiper blade back toward the
base of the wiper arm.
3 Install the new blade and slide the release back into position.
390de097
Rear*
1 Hold the wiper blade on the window and remove/unclip the wiper arm at
the articulated joint (arrow).
2 Insert a new wiper blade and press it on/clip it into the wiper arm.
Use only wiper blades approved
by BMW. <
392de173
Onboard tool kit Wiper blades
Page 187 of 238

Index
Data
Technology
Repairs
Car care
Controls
Overview
187nLamps and bulbs
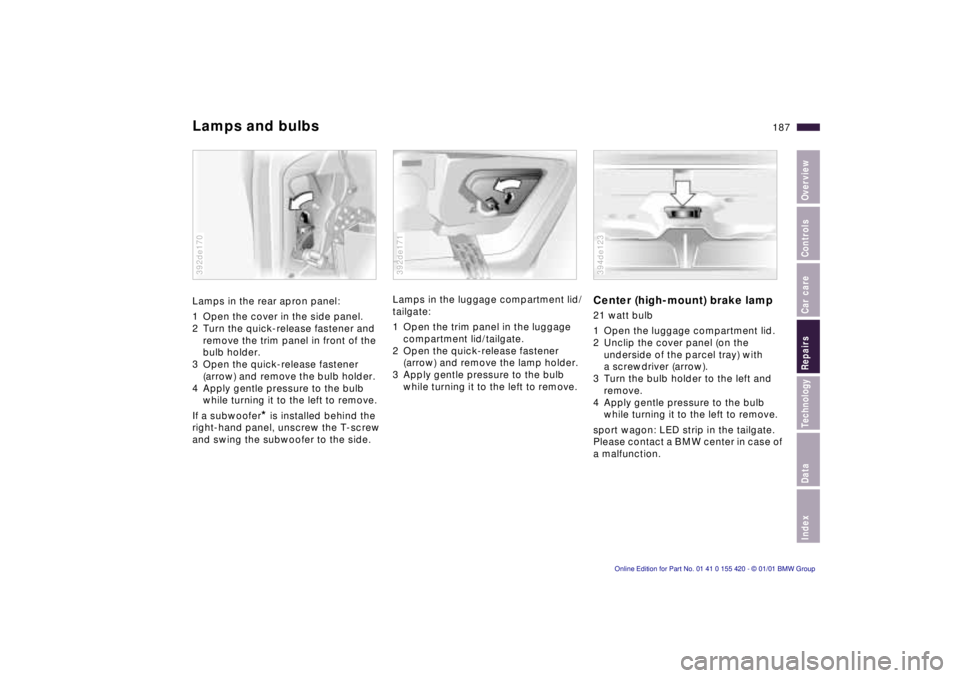
Lamps in the rear apron panel:
1 Open the cover in the side panel.
2 Turn the quick-release fastener and
remove the trim panel in front of the
bulb holder.
3 Open the quick-release fastener (arrow) and remove the bulb holder.
4 Apply gentle pressure to the bulb while turning it to the left to remove.
If a subwoofer
* is installed behind the
right-hand panel, unscrew the T-screw
and swing the subwoofer to the side.
392de170
Lamps in the luggage compartment lid/
tailgate:
1 Open the trim panel in the luggage compartment lid/tailgate.
2 Open the quick-release fastener (arrow) and remove the lamp holder.
3 Apply gentle pressure to the bulb while turning it to the left to remove.
392de171
Center (high-mount) brake lamp
21 watt bulb
1 Open the luggage compartment lid.
2 Unclip the cover panel (on the underside of the parcel tray) with
a screwdriver (arrow).
3 Turn the bulb holder to the left and remove.
4 Apply gentle pressure to the bulb while turning it to the left to remove.
sport wagon: LED strip in the tailgate.
Please contact a BMW center in case of
a malfunction.
394de123
Page 189 of 238
Index
Data
Technology
Repairs
Car care
Controls
Overview
189nLamps and bulbs
Footwell lamps
5 watt bulb
1 Use a screwdriver to press the lens
out to the side.
2 Replace the bulb.
Glove compartment lamp
5 watt bulb
1 Apply a screwdriver to the recess to pry the lamp out.
2 Remove the reflector.
3 Replace the bulb.
Luggage compartment lamps –
sedan
Lamp on the underside of the rear
parcel tray: halogen lamp, 10 watt
Lamp in the luggage compartment lid:
10 watt bulb
1 Apply a screwdriver to the recess to pry the lamp out.
2 Remove the reflector.
3 Replace the bulb.
Luggage compartment lamps –
sport wagon
Headliner lamps: 10 watt bulbs
1 Use a screwdriver to push the lens to the side.
2 Replace the bulbs.
Lamps on the apron of the tailgate:
10 watt bulb
1 Use a screwdriver to pry out the lamp at the upper edge.
2 Remove the reflector.
3 Replace the bulb.
Page 199 of 238
Index
Data
Technology
Repairs
Car care
Controls
Overview
199nTailgate
Manual release – sport wagon
In the event of an electrical malfunction,
you can release the tailgate manually:
1 From inside the luggage compart-
ment, open the two side covers
(arrow). Remove the covers.
392de166
2 Release the two quick-release fasteners of the cover for the onboard
tool kit in the tailgate. Raise the
cover.
3 Remove the plastic plugs (arrow) and pull toward the interior. The tailgate
will be released.
4 Open the tailgate. Press the plugs back into place and close the cover
with the quick-release fasteners.
5 Position the two side covers and close them.
392de301
Page 230 of 238

Everything from A to Z
Door locks, care146
Doors
emergency release38
manual operation38
t
remote control40
unlocking and locking38
DOT Quality Grades151
Drive belts224
Driving in winter146
Driving notes141
Driving through water141
DSC (Dynamic Stability
Control)24, 102, 208
DSP sound system211
refer also to the Radio
Owner's Manual
Dynamic Brake Control
(DBC)23, 100, 145
Dynamic Stability Control
(DSC)24, 102, 208
E
Electric power seat52
Electric power windows49
Electrical defect
fuel filler door198
t
sliding/tilt sunroof198
t
tailgate199
Electrical heating, exterior
mirror57
Electrical steering wheel,
adjusting56Electrical system224
Electronic vehicle
immobilizer37
Elements of operation16
Emergency operation
doors38
t
fuel filler door198
t
luggage compartment lid/
tailgate43, 199
t
sliding/tilt sunroof198
t
Energy control84
Engine
compartment160
coolant167
Engine oil
consumption165
grades166
level23
pressure22
specifications166
t
Engine specifications218
Error indicators86
Estimated time of arrival97
Exterior finish172
Exterior mirror56
electrical heating57
Exterior mirror with
automatic dimming
feature211
F
Failure messages86
t
Failure of an electrical
accessory196
t
Failure warnings86
t
Filler cap cover28
Filling capacities223
Filling the washer
reservoir164
t
First-aid kit27
t
Fittings, tow-starting and
towing201
t
Flashlight124
Flat tire150, 190
t
Fog lamp, bulb
replacement185
t
Footbrake144
Footwell lamps107
bulb replacement189
t
Forward/backward
adjustment, seats52, 55
Front fog lamps106
Front seat adjustment52
Frost protection,
radiator167
Fuel29
gauge84
quality29
tank capacity223
Fuel consumption97
average97
indicator84Fuel filler door, release after
electrical fault198
t
Fuses196
t
, 197
G
Gasoline29
gauge84
quality29
Glove compartment124
bulb replacement189
t
Gross vehicle weight221
H
Handbrake23, 70
Hands-free system125
Hazard warning
flashers27
t
Hazard warning
triangle27
t
Head restraints53
Headlamp covers,
care171
t
, 183
t
Headlamp flasher78
Headlamp washer
system164
Heated seats119
Heated steering wheel120
Heating and
ventilation108, 114
Heating while stopped118
Heating, rapid113
Heavy loads136