Page 64 of 195

64n
Rollover protection system In the event of an accident or some
other critical driving situation (extreme
tilting in the longitudinal or transverse
axis, loss of contact with the ground),
the rollover protection system will be
automatically activated. The protective
bars located in the rear head restraints
extend upward within fractions of a
second.
In addition to the integrated rollover bar
in the windshield frame, the rollover
protection system can help provide all
the vehicle occupants with necessary
headroom in certain rollover accidents.
Always keep the travel path clear
for the rollover protection system.
Never attach any type of protective
coverings to the head restraints.
In the event of less serious accidents,
the safety belt will protect you and,
depending on the nature and severity of
the accident, the safety belt tensioner
and the multi-stage airbag restraint
system will as well.<
If, after being automatically triggered,
the protective function is not needed,
then the rollover protection system can
be lowered back into place. No special
tool is needed for this.
1 Using a screwdriver from the on-
board tool kit, remove the cover
panel; to do this, position the screw-
driver under the notch (arrow)
2 Pull up on the lever (arrow) toward
the front of the vehicle and keep it in
this position
Page 79 of 195

79n
IndexDataTechnologyRepairsCar careControlsOverview
The conceptThe PDC assists you when you back
into a parking space. A signal warns
you of the distance to an obstacle.
To do this, four ultrasonic sensors in
the rear bumper measure the distance
to the nearest object. The range for the
sensors located at both rear corners
ends approx. 2 ft. (60 cm) behind
the bumpers. The range for the two
middle sensors is approx. 4.9 feet
(1.50 meters).
The system is activated automatically
about one second after you engage
reverse with the ignition key in
position 2. PDC is deactivated when
you shift back out of reverse.
Acoustic signalsThe distance to the nearest object is
indicated by a tone sounding at various
intervals. As the distance between
vehicle and object decreases, the inter-
vals between the tones become
shorter. A continuous tone indicates the
presence of an object less than 1 ft.
(30 cm) away.
The warning signal is interrupted after
approx. three seconds if the distance to
the obstacle remains constant during
this time (if you are moving parallel to
a wall, for instance).
System malfunctions will be indicated
by a continuous high-pitched tone
when the system is activated the first
time. Please refer the problem to your
BMW center.The PDC does not remove the
driver's personal responsibility for
evaluating the distance between the
vehicle and any obstacles. Even when
sensors are involved, there is a blind
spot in which objects cannot be
detected. This applies especially in
those cases where the system
approaches the physical limits of ultra-
sonic measurement, as occurs with tow
bars and trailer couplings, and in the
vicinity of thin and painted objects.
Certain sources of sound, such as a
loud radio, could drown out the PDC
signal tone.<
Keep the sensors clean and free
of ice or snow in order to ensure
that they continue to operate effec-
tively.
Do not apply high pressure spray to the
sensors for a prolonged period of time.
Always maintain a distance of more
than 4 in (10 cm).<
Park Distance Control (PDC)
*
Page 99 of 195
99n
IndexDataTechnologyRepairsCar careControlsOverview
Ski bag
*
5 Secure the cover panel on the rear
panel with the magnetic retainers and
pull out the ski bag.
Securing the load
Secure the skis or other objects in
the bag by tightening the strap
with the buckle.<
Please be sure that your skis are clean
before loading them into the bag. Avoid
damage from sharp edges during
loading.
Stowing the ski bagWhen stowing the ski bag, proceed in
the reverse order of loading.
When remounting the center
piece, guide the two bars into the
strip and press back the center piece.
Secure the safety belts in their holders
again.<
Page 146 of 195

146n
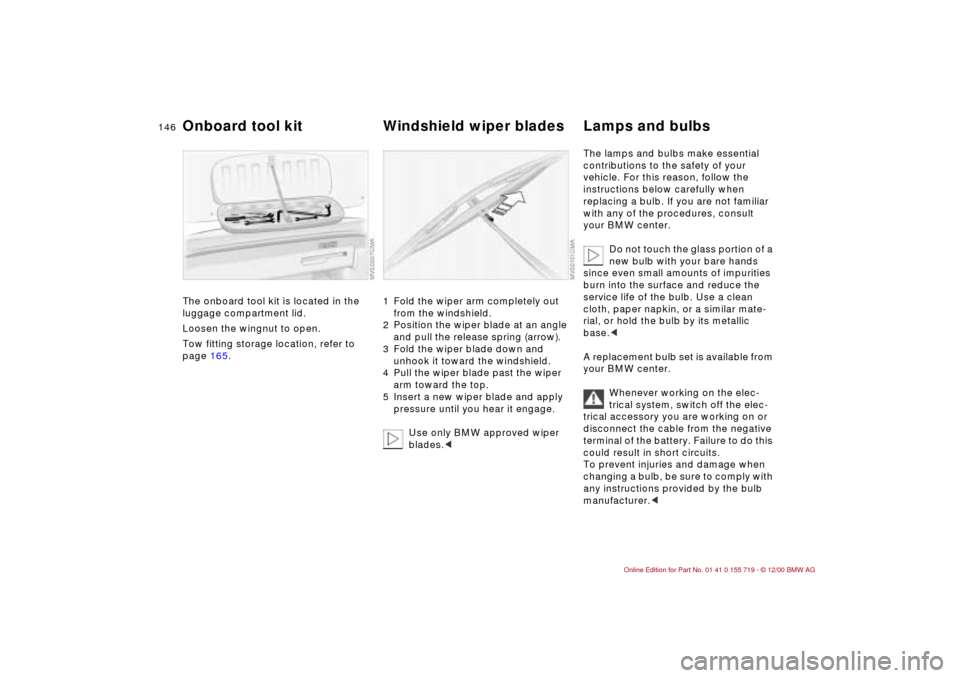
The onboard tool kit is located in the
luggage compartment lid.
Loosen the wingnut to open.
Tow fitting storage location, refer to
page 165.
1 Fold the wiper arm completely out
from the windshield.
2 Position the wiper blade at an angle
and pull the release spring (arrow).
3 Fold the wiper blade down and
unhook it toward the windshield.
4 Pull the wiper blade past the wiper
arm toward the top.
5 Insert a new wiper blade and apply
pressure until you hear it engage.
Use only BMW approved wiper
blades.<
The lamps and bulbs make essential
contributions to the safety of your
vehicle. For this reason, follow the
instructions below carefully when
replacing a bulb. If you are not familiar
with any of the procedures, consult
your BMW center.
Do not touch the glass portion of a
new bulb with your bare hands
since even small amounts of impurities
burn into the surface and reduce the
service life of the bulb. Use a clean
cloth, paper napkin, or a similar mate-
rial, or hold the bulb by its metallic
base.<
A replacement bulb set is available from
your BMW center.
Whenever working on the elec-
trical system, switch off the elec-
trical accessory you are working on or
disconnect the cable from the negative
terminal of the battery. Failure to do this
could result in short circuits.
To prevent injuries and damage when
changing a bulb, be sure to comply with
any instructions provided by the bulb
manufacturer.<
Onboard tool kit Windshield wiper blades Lamps and bulbs