2001 BMW 540I SEDAN spare wheel
[x] Cancel search: spare wheelPage 104 of 238

104n
Tire Pressure Control (RDC)
*
Loss of tire pressureIf, after a certain period of time, the air
pressure has gone down significantly
(which is normal for any tire), the yellow
indicator lamp comes on or the mes-
sage "CHECK TIRE PRESSURE" ap-
pears in the Check Control.
This alerts you that you should have the
tires inflated to the specified pressures
as soon as possible.
If you are prompted to check the
tire pressure shortly after a cor-
rection has been made, this indicates
that the corrected values were not ac-
curate. Please check the inflation pres-
sure again and make corrections ac-
cording to the inflation pressure table.<
Flat tireIf there is a tire failure with a loss of air
pressure, the red indicator lamp comes
on or the message "TIRE DEFECT" ap-
pears in the Check Control. In addition,
a gong sounds.
If this occurs, reduce vehicle speed im-
mediately and stop the vehicle in a safe
location. Avoid hard brake applications.
Do not oversteer. Replace the flat tire.
The spare tire which is available in
your vehicle as standard equip-
ment is equipped with the electronics
required for RDC and, following activa-
tion of the system, is also monitored af-
ter it is mounted.<
The RDC cannot alert you to se-
vere and sudden tire damage
caused by external factors.<
Have the tires changed by your
authorized BMW center.
Your BMW center has the information
needed for working with RDC and is
equipped with the necessary special
tools.<
System interferenceDuring the period of the malfunction,
the yellow indicator lamp comes on
or the message "TIRECONTROL
INACTIVE" appears in the Check
Control.
You will also see the same message
>in the event of a system fault
>if a wheel is mounted without the
RDC electronics
>if, in addition to the spare tire,
additional wheels with RDC
electronics are on board.
Please contact your BMW center for
additional information.
Page 190 of 238

190nChanging a wheel
Safety measures in the event of a
flat tire or wheel change:
Stop the vehicle as far as possible from
passing traffic. Park on a firm, flat,
surface. Switch on the hazard warning
flashers.
Turn the steering wheel to the straight-
ahead position, remove the key and
engage the steering lock. Shift into 1st
or reverse (selector lever in Park with
automatic transmission) and engage
the parking brake.
All passengers should be outside the
vehicle and well away from your imme-
diate working area (behind a guardrail,
for instance).
If necessary, set up your warning trian-
gle or portable hazard warning lamp on
the roadside at an appropriate distance
from the rear of the vehicle. Comply
with all safety guidelines and regula-
tions.
Change the wheel only on a level, firm
surface which is not slippery. Avoid
jacking the vehicle on a soft or slippery
support surface (snow, ice, loose
gravel, etc.), since it could slide side-
ways.Position the jack on a firm support
surface.
Do not place wooden blocks or similar
objects under the jack. If this is done,
the jack might not be able to reach its
full support capacity because of the
limited height.
Do not lie under the vehicle or start the
engine when the vehicle is supported
by the jack – risk of fatal injury. <
What you will need
In order to avoid rattling noises later,
note the position of the tools when you
remove them and return them to their
original position when you are through
using them.
> Car jack
sedan: fold back the luggage com-
partment floor mat for access, then
unscrew the wingnut to release the
jack (arrow).
sport wagon: raise the floor panel
and spare tire cover (refer to
page 134).
When you have completed work,
screw the jack all the way back
down. Fold the handle back and in-
sert it in its holder
> Wedge (wheel chock)
Located next to the jack. Loosen the
wing nut to remove it
394de090
Page 191 of 238

Index
Data
Technology
Repairs
Car care
Controls
Overview
191nChanging a wheel
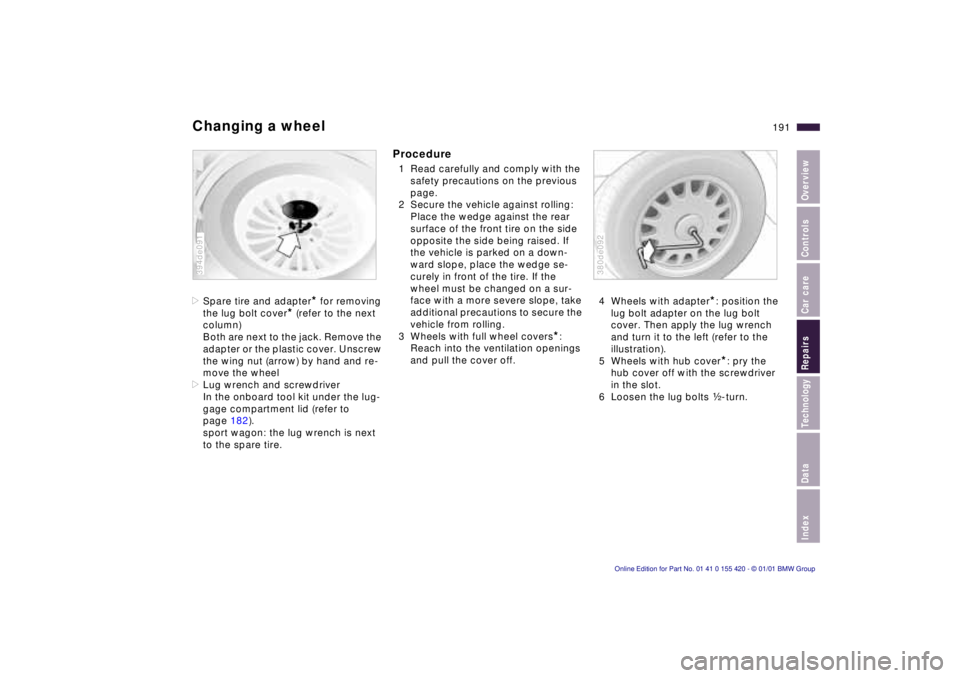
>Spare tire and adapter* for removing
the lug bolt cover
* (refer to the next
column)
Both are next to the jack. Remove the
adapter or the plastic cover. Unscrew
the wing nut (arrow) by hand and re-
move the wheel
> Lug wrench and screwdriver
In the onboard tool kit under the lug-
gage compartment lid (refer to
page 182).
sport wagon: the lug wrench is next
to the spare tire.
394de091
Procedure
1 Read carefully and comply with the safety precautions on the previous
page.
2 Secure the vehicle against rolling: Place the wedge against the rear
surface of the front tire on the side
opposite the side being raised. If
the vehicle is parked on a down-
ward slope, place the wedge se-
curely in front of the tire. If the
wheel must be changed on a sur-
face with a more severe slope, take
additional precautions to secure the
vehicle from rolling.
3 Wheels with full wheel covers
*:
Reach into the ventilation openings
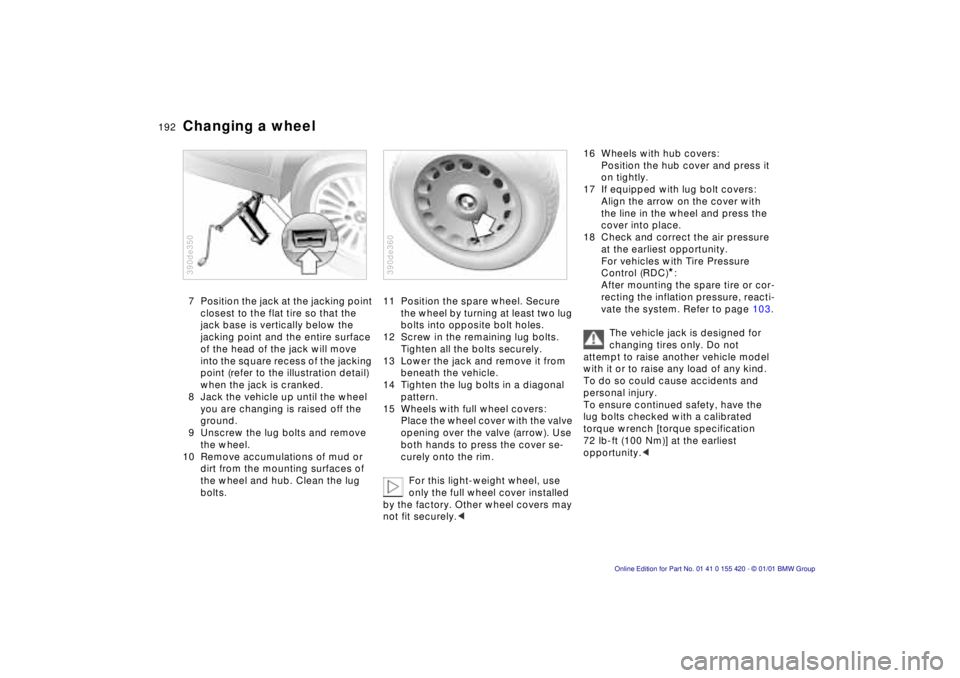
and pull the cover off. 4 Wheels with adapter
*: position the
lug bolt adapter on the lug bolt
cover. Then apply the lug wrench
and turn it to the left (refer to the
illustration).
5 Wheels with hub cover
*: pry the
hub cover off with the screwdriver
in the slot.
6 Loosen the lug bolts g-turn.
380de092
Page 192 of 238

192nChanging a wheel
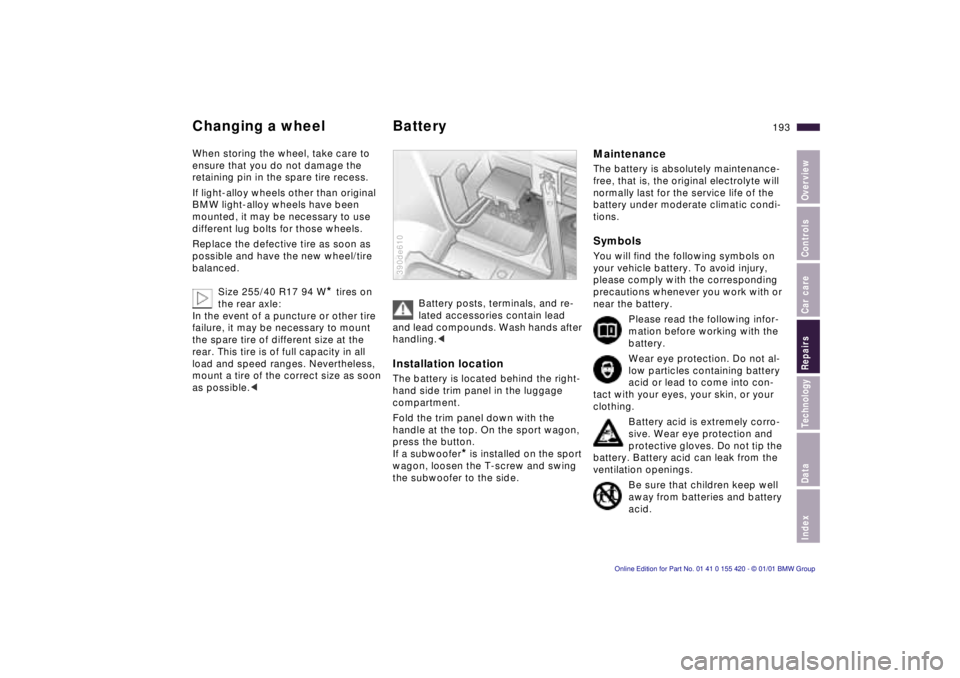
7 Position the jack at the jacking point
closest to the flat tire so that the
jack base is vertically below the
jacking point and the entire surface
of the head of the jack will move
into the square recess of the jacking
point (refer to the illustration detail)
when the jack is cranked.
8 Jack the vehicle up until the wheel you are changing is raised off the
ground.
9 Unscrew the lug bolts and remove the wheel.
10 Remove accumulations of mud or
dirt from the mounting surfaces of
the wheel and hub. Clean the lug
bolts.
390de350
11 Position the spare wheel. Secure the wheel by turning at least two lug
bolts into opposite bolt holes.
12 Screw in the remaining lug bolts. Tighten all the bolts securely.
13 Lower the jack and remove it from beneath the vehicle.
14 Tighten the lug bolts in a diagonal pattern.
15 Wheels with full wheel covers: Place the wheel cover with the valve
opening over the valve (arrow). Use
both hands to press the cover se-
curely onto the rim.
For this light-weight wheel, use
only the full wheel cover installed
by the factory. Other wheel covers may
not fit securely. <
390de360
16 Wheels with hub covers:
Position the hub cover and press it
on tightly.
17 If equipped with lug bolt covers: Align the arrow on the cover with
the line in the wheel and press the
cover into place.
18 Check and correct the air pressure at the earliest opportunity.
For vehicles with Tire Pressure
Control (RDC)
*:
After mounting the spare tire or cor-
recting the inflation pressure, reacti-
vate the system. Refer to page 103.
The vehicle jack is designed for
changing tires only. Do not
attempt to raise another vehicle model
with it or to raise any load of any kind.
To do so could cause accidents and
personal injury.
To ensure continued safety, have the
lug bolts checked with a calibrated
torque wrench [torque specification
72 lb-ft (100 Nm)] at the earliest
opportunity. <
Page 193 of 238

Index
Data
Technology
Repairs
Car care
Controls
Overview
193nChanging a wheel Battery
When storing the wheel, take care to
ensure that you do not damage the
retaining pin in the spare tire recess.
If light-alloy wheels other than original
BMW light-alloy wheels have been
mounted, it may be necessary to use
different lug bolts for those wheels.
Replace the defective tire as soon as
possible and have the new wheel/tire
balanced.
Size 255/40 R17 94 W
* tires on
the rear axle:
In the event of a puncture or other tire
failure, it may be necessary to mount
the spare tire of different size at the
rear. This tire is of full capacity in all
load and speed ranges. Nevertheless,
mount a tire of the correct size as soon
as possible. <
Battery posts, terminals, and re-
lated accessories contain lead
and lead compounds. Wash hands after
handling. <
Installation location
The battery is located behind the right-
hand side trim panel in the luggage
compartment.
Fold the trim panel down with the
handle at the top. On the sport wagon,
press the button.
If a subwoofer
* is installed on the sport
wagon, loosen the T-screw and swing
the subwoofer to the side.
390de610
Maintenance
The battery is absolutely maintenance-
free, that is, the original electrolyte will
normally last for the service life of the
battery under moderate climatic condi-
tions.
Symbols
You will find the following symbols on
your vehicle battery. To avoid injury,
please comply with the corresponding
precautions whenever you work with or
near the battery.
Please read the following infor-
mation before working with the
battery.
Wear eye protection. Do not al-
low particles containing battery
acid or lead to come into con-
tact with your eyes, your skin, or your
clothing.
Battery acid is extremely corro-
sive. Wear eye protection and
protective gloves. Do not tip the
battery. Battery acid can leak from the
ventilation openings.
Be sure that children keep well
away from batteries and battery
acid.