Page 152 of 203
152n
The onboard tool kit is stowed under
the cargo area floor panel.
To raise the cargo area floor panel,
refer to page 109.
463de034
Windshield1 Move the wiper to a fold-out position.
2 Position the wiper blade at an angle
and pull the release spring (arrow).
3 Fold the wiper blade down and
unhook it toward the windshield.
4 Pull the wiper blade past the wiper
arm toward the top.
5 Insert a new wiper blade and apply
pressure until you hear it engage.
Use only BMW approved wiper
blades.<460de056
Rear window 1 Move the wiper to a fold-out position.
2 Remove the wiper blade (arrow).
3 Insert a new wiper blade and apply
pressure until you hear it engage.463de037
Onboard tool kit Windshield wiper blades
Page 154 of 203

154n
Lamps and bulbsXenon lamps
*
The service life of these bulbs is very
long and the probability of a failure is
very low, provided that they are not
switched on and off an unusual number
of times. If one of these bulbs should
nevertheless fail, it is possible to con-
tinue driving with great caution using
the fog lamps, provided traffic laws in
your area do not prohibit this.
Because of the extremely high
voltages involved, any work on
the xenon lighting system and bulb
replacement should be performed only
by technicians with the appropriate
qualifications. Failure to comply with
this creates a risk of fatal injury.<
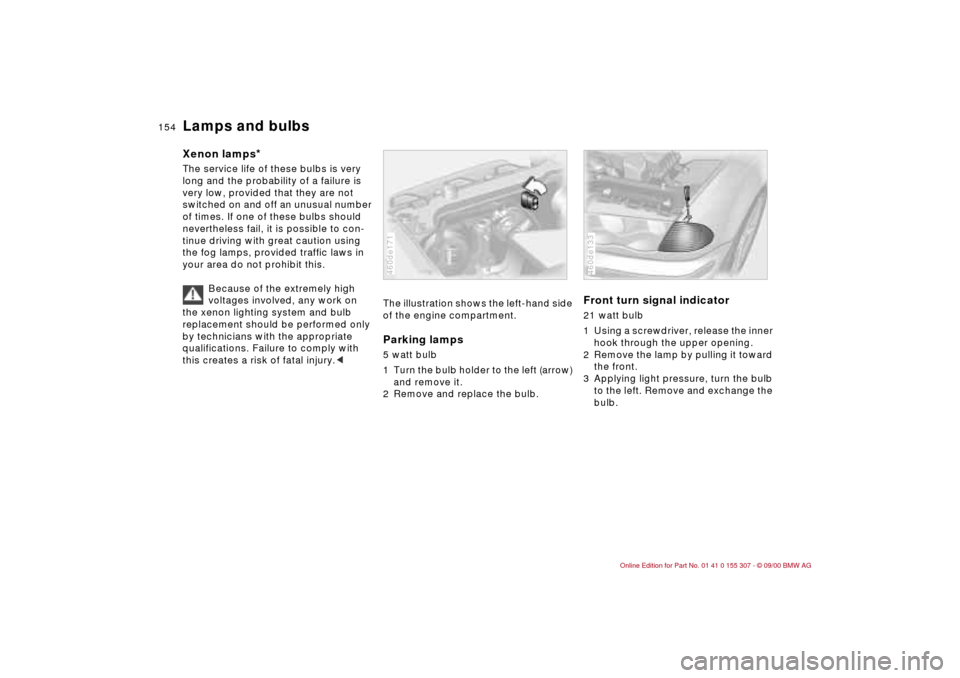
The illustration shows the left-hand side
of the engine compartment.Parking lamps5 watt bulb
1 Turn the bulb holder to the left (arrow)
and remove it.
2 Remove and replace the bulb.460de171
Front turn signal indicator 21 watt bulb
1 Using a screwdriver, release the inner
hook through the upper opening.
2 Remove the lamp by pulling it toward
the front.
3 Applying light pressure, turn the bulb
to the left. Remove and exchange the
bulb.460de133
Page 157 of 203
157n
IndexDataTechnologyRepairsCar careControlsOverview
Lamps and bulbs2 Rotate the trim downward. Release
the bulb holder and remove it.
3 Applying light pressure, turn the bulb
to the left. Remove and exchange the
bulb.
4 Press the bulb holder into position
until you hear it engage.
5 Press the trim into position until you
hear it engage.Center (high-mount) brake lamp
LED strip on the rear window.
Please contact a BMW center in the
event of a malfunction.463de054
License plate lamps 5 watt bulb
1 Place a screwdriver in the slot and
press toward the left (arrow) to
release the lens.
2 Replace the bulb.460de047
Tailgate lamp 5 watt bulb
1 Remove lamp socket (arrow).
2 Replace the bulb.463de052
Page 158 of 203
158n
Lamps and bulbsInterior lamps The illustration provides an example of
the interior lamps when equipped with
reading lamps.
Interior lamps (2 x 5 watt bulbs)
1 Using a screwdriver, press the lamp
out toward the front.
2 Remove the lens and pull the bulb
out of the contact studs.
Interior lamps (6 watt bulb) with reading
lamps
* (2 x 6 watt bulbs)
1 Using a screwdriver, press the lamp
out toward the front.
2 Turn the bulb holder to the left and
remove it.
3 Remove and replace the bulb.
460de182
Lighted vanity mirrors
*
10 watt bulb
1 Remove the bulb housing Ð use a
screwdriver if necessary.
2 Replace the bulb.460de181
Footwell lamps
*
5 watt bulb
1 Press the lamp out using a screw-
driver.
2 Replace the bulb.Glove compartment lamp 5 watt bulb
1 Press the lamp out using a screw-
driver.
2 Replace the bulb.Luggage compartment lamps One lamp each in rear tailgate section:
10 watt bulbs
1 Apply a screwdriver to the recess and
remove the lens.
2 Replace the bulb.
Page 165 of 203
165n
IndexDataTechnologyRepairsCar careControlsOverview
Fuses Microfilter/Activated-charcoal filterA list of the fuses, their respective am-
pere ratings and the equipment in their
circuits, is provided below the fuse
holder.
To close the fuse holder, snap it into
position at the top and turn the two
fasteners inward.
Do not attempt to repair a burned-
out fuse or replace it with a fuse
with a different color or ampere rating.
Doing this could cause a fire in the
vehicle resulting from a circuit over-
load.<
If the fuse continues to burn out, have
the problem corrected by a BMW
center.
1 Open the hood.
2 Release the three hooks (arrow) with
a f turn.
3 Remove the filter cover.460de156
4 Remove the filter by pulling toward
the front and install a new one.
5 Position the filter cover and secure it
with the three fasteners.460de157
Page 168 of 203

168n
Towing the vehicleTow fittingThe screw-in tow fitting is stored in the
onboard tool kit; be sure that it remains
in the vehicle at all times. This fitting
is designed for installation in the tow
sockets located at the front and rear of
the vehicle. It is intended for towing on
paved road surfaces only. This fitting
should not be used to pull a vehicle out
of deep snow, mud, sand, etc.
Always observe all applicable towing
laws and regulations. Access to tow socketFront:
Using a screwdriver, press out the cover
panel on the top part of the recess.460de063
Rear:
Using a screwdriver, press out the cover
panel on the top part of the recess.
Screw the tow fitting in until it
bottoms firmly. If this is not done,
the threads could be damaged.
Do not tow the vehicle by any compo-
nents of the running gear, or lash them
down in any way. If you do, the compo-
nents could be damaged, leading to
possible accidents.<463de007
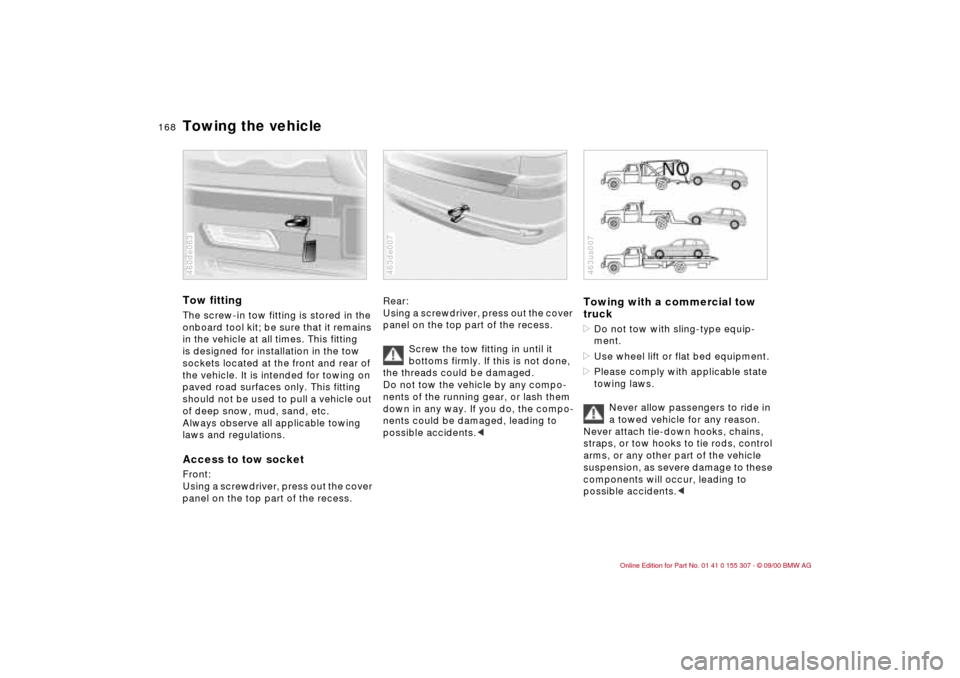
Towing with a commercial tow
truck>Do not tow with sling-type equip-
ment.
>Use wheel lift or flat bed equipment.
>Please comply with applicable state
towing laws.
Never allow passengers to ride in
a towed vehicle for any reason.
Never attach tie-down hooks, chains,
straps, or tow hooks to tie rods, control
arms, or any other part of the vehicle
suspension, as severe damage to these
components will occur, leading to
possible accidents.c463us007
Page 169 of 203
169n
IndexDataTechnologyRepairsCar careControlsOverview
Towing the vehicleBMW 325xi: tow the vehicle with
one raised axle1 Place the gearshift lever or selector
lever in "Neutral."
2 Switch off the engine.
3 Towing speed:
Maximum 30 mph (50 km/h).
4 Towing distance:
Maximum 95 miles (150 km).
Remove the rear driveshaft for
longer towing distances with the
front axle lifted; remove the front drive-
shaft for towing over longer distances
with the rear axle lifted. Failure to
comply with this will result in damage to
the transfer box.<
Page 193 of 203

Everything from A to Z
193n
IndexDataTechnologyRepairsCar careControlsOverview
Changing a wheel159
Charge indicator lamp20
Check air pressure28
Check Control75
Check engine oil level135
Child restraint
systems54,60
Child-safety locks58
Child's seat54
Cigarette lighter104
Cleaning windshield68
Clock75
refer also to the Radio or
Computer Owner's Manual
Cockpit16
Coin holder102
Combination switch68
Compression184
Computer76
Configure settings52
Consumption77
display74
Contents10
Control elements20
Coolant121,137,187
antifreeze121
Coolant temperature
gauge74
Cooling system187
Copyright4
Cornering Brake Control
(CBC)21,117 Cruise control71
Cruising range77
Cup holder, refer to
beverage holder102
Curb weight186
Current check indicator20
D
Dashboard16
Data
dimensions185
engine184
technical184
weights186
Daytime-driving lamp
switch87
DBC (Dynamic Brake
Control)118
Defrost position94,98
Defrostable rear window99
Defrosting
rear window92
windows94,98
Digital clock75
Dimensions185
Dipstick, engine oil135
Disc brakes118
Displacement184
Display lighting87
Displays18
Distance warning78 Diversity Antenna
system174
Door key32,35
Door locks, care121
Doors
child-safety locks58
emergency operation34
unlocking and locking34
DOT Quality Grades125
Draft-free ventilation93
Drive belts188
Driving hints115
Driving in winter121
Driving lamps87
DSC (Dynamic Stability
Control)81,173
Dynamic Brake Control
(DBC)118
Dynamic Stability Control
(DSC)22,81,173
E
Electric power seat48
Electric power windows43
Electrical accessories,
failure164
Electrical system188
Electronic vehicle
immobilizer33
Elements of operation16 Emergency operation,
doors34
Energy Control73
Engine
coolant137,187
data184
starting61
Engine oil
capacity187
consumption135
pressure20
quality136
specifications136
viscosity136
Engine speed184
Exterior mirrors51
F
Failure messages75
Fault displays75
Fault, ABS117
Filler cap cover27
Filling capacities187
Filling the washer
reservoir187
First-aid kit26
Fittings, tow starting and
towing168
Flashlight101
Flat tire124,159
Fog lamps88