2001 BMW 330i TOURING Car care
[x] Cancel search: Car carePage 39 of 203
39n
IndexDataTechnologyRepairsCar careControlsOverview
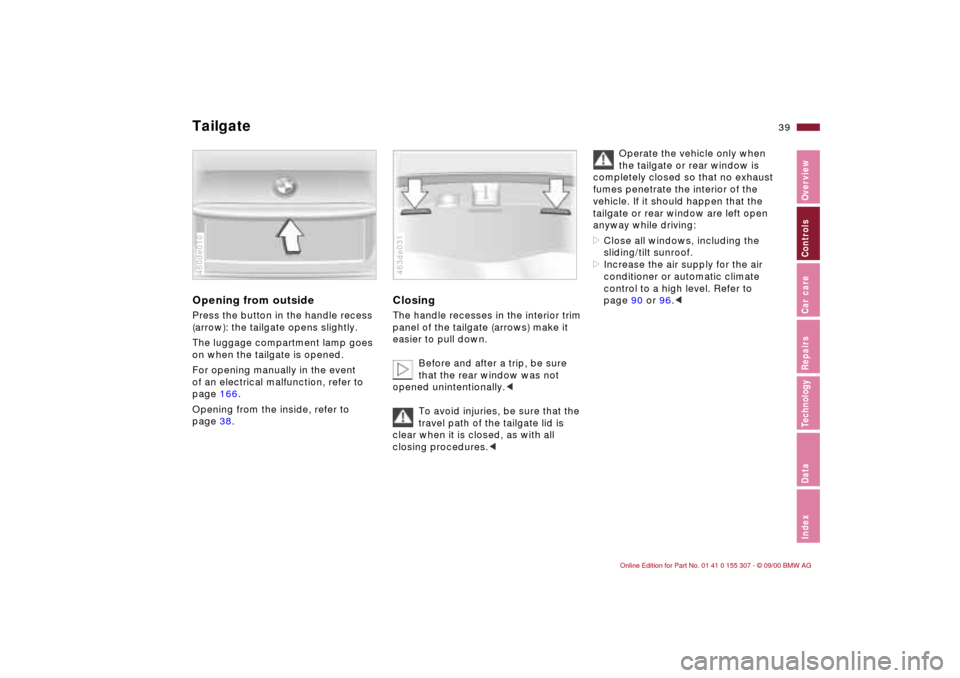
TailgateOpening from outsidePress the button in the handle recess
(arrow): the tailgate opens slightly.
The luggage compartment lamp goes
on when the tailgate is opened.
For opening manually in the event
of an electrical malfunction, refer to
page 166.
Opening from the inside, refer to
page 38.460de010
ClosingThe handle recesses in the interior trim
panel of the tailgate (arrows) make it
easier to pull down.
Before and after a trip, be sure
that the rear window was not
opened unintentionally.<
To avoid injuries, be sure that the
travel path of the tailgate lid is
clear when it is closed, as with all
closing procedures.<463de031
Operate the vehicle only when
the tailgate or rear window is
completely closed so that no exhaust
fumes penetrate the interior of the
vehicle. If it should happen that the
tailgate or rear window are left open
anyway while driving:
>Close all windows, including the
sliding/tilt sunroof.
>Increase the air supply for the air
conditioner or automatic climate
control to a high level. Refer to
page 90 or 96.<
Page 41 of 203

41n
IndexDataTechnologyRepairsCar careControlsOverview
Alarm system
*
The conceptThe vehicle alarm system responds:
>When a door, the hood or the tailgate
is opened.
>To movement inside the vehicle
(interior motion sensor).
>To a change of the vehicle's tilt Ð if
someone attempts to steal the wheels
or tow the vehicle without authoriza-
tion, for example.
>To interruption of battery voltage.
The system responds to unauthorized
vehicle entry and attempted theft by
simultaneously activating the following:
>Sounding an acoustical alarm for
30 seconds.
>Activating the hazard warning flashers
for approx. five minutes.
>Flashing the high beams flash on and
off in rhythm with the hazard warning
flashers.
To activate and deactivate the
alarm systemWhen the vehicle is locked or unlocked
by using a key or the remote control,
the alarm system is also armed or
disarmed at the same time.
The interior motion sensor and tilt alarm
sensor are activated 30 seconds after
the last locking operation.
If the alarm system has been armed
correctly, the hazard warning flashers
flash once.
You can have one signal set as
acknowledgment when arming
and disarming.<
You can also open the rear window
when the system is armed by pressing
button 3 of the remote control (refer to
page 37). When it is closed, the rear
window is once again secured.
Indicator lamp displaysThe indicator lamp is located under the
inside rearview mirror.
>The indicator lamp flashes
continuously: the system is armed.
>The indicator lamp flashes when it
is armed: doors, the hood, tailgate
or rear window have not been prop-
erly closed. Even if you do not close
the alerted area, the remaining areas
are deadlocked, and the indicator
lamp flashes continuously after
10 seconds. However, the interior
motion sensor is not activated.
>The indicator lamp goes out when the
system is disarmed: no manipulation
or attempted intrusions have been
detected in the period since the
system was armed.463us010
Page 43 of 203
43n
IndexDataTechnologyRepairsCar careControlsOverview
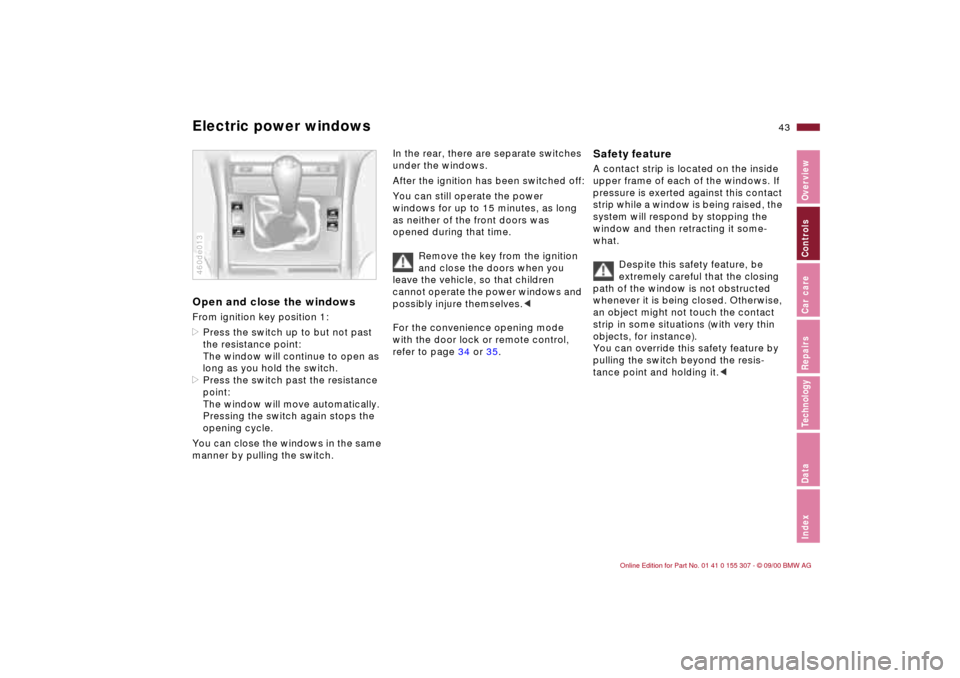
Electric power windowsOpen and close the windowsFrom ignition key position 1:
>Press the switch up to but not past
the resistance point:
The window will continue to open as
long as you hold the switch.
>Press the switch past the resistance
point:
The window will move automatically.
Pressing the switch again stops the
opening cycle.
You can close the windows in the same
manner by pulling the switch.460de013
In the rear, there are separate switches
under the windows.
After the ignition has been switched off:
You can still operate the power
windows for up to 15 minutes, as long
as neither of the front doors was
opened during that time.
Remove the key from the ignition
and close the doors when you
leave the vehicle, so that children
cannot operate the power windows and
possibly injure themselves.<
For the convenience opening mode
with the door lock or remote control,
refer to page 34 or 35.
Safety feature A contact strip is located on the inside
upper frame of each of the windows. If
pressure is exerted against this contact
strip while a window is being raised, the
system will respond by stopping the
window and then retracting it some-
what.
Despite this safety feature, be
extremely careful that the closing
path of the window is not obstructed
whenever it is being closed. Otherwise,
an object might not touch the contact
strip in some situations (with very thin
objects, for instance).
You can override this safety feature by
pulling the switch beyond the resis-
tance point and holding it.<
Page 44 of 203

44n
Electric power windows Sliding/tilt sunroof
*
Safety switch
With the safety switch, you can prevent
the rear windows from being opened or
closed via the switch in the rear
passenger area
* (by children, for
instance).
Press the safety switch whenever
children are riding in the rear of
the vehicle. Careless use of the power
windows can lead to injury.<
460de014
Exercise care when closing the
sliding/tilt sunroof and keep it in
your field of vision until it is completely
closed. Failure to do so can result in
injuries.
Always remove the key from the ignition
and lock the doors when you leave the
vehicle so that, for instance, children
cannot operate the sunroof and
possibly injure themselves.<
You can avoid a vacuum or drafts in the
passenger compartment whenever the
sunroof is open or raised if you keep the
air vents in the dashboard open and
increase the air supply as needed. Refer
to pages 92 or 99.
If the sunroof is completely open, air
disturbances may be caused in the
vehicle when you are driving at higher
speeds. Close the roof as far as is
necessary until this natural phenom-
enon ceases.
For the convenience opening mode
with the door lock or the remote
control, refer to page 34 or 35.
Lifting Ð opening Ð closingFrom ignition key position 1, press the
switch or slide it to the desired direction
until you feel resistance.
When lifting, the headliner retracts
several inches.
Do not use force to closethe
headliner when the sunroof is
open, or you could damage the
mechanism.<
After the ignition has been switched off,
you can still operate the sunroof for up
to 15 minutes, as long as neither of the
front doors was opened during that
time.460de015
Page 45 of 203
45n
IndexDataTechnologyRepairsCar careControlsOverview
Sliding/tilt sunroofAutomatic opening and closing>Press the switch past the resistance
point: the sunroof travels to either the
fully-closed or fully-opened position.
>With the sunroof open, press the
switch briefly toward "Raise": the roof
will move into the end "Raise" posi-
tion.
Pressing the switch again stops opera-
tion immediately.
Safety featureIf the sliding/tilt sunroof encounters
resistance at a point roughly past the
middle of its travel when it is closing,
the closing cycle is interrupted and the
sunroof will open again slightly.
Despite this safety feature, be
extremely careful that the closing
path of the sunroof is not obstructed
whenever it is closed. Otherwise, trig-
gering the closing-force limitation may
not be ensured in some situations (with
very thin objects, for instance).
You can disable this safety feature by
pressing the switch beyond the pres-
sure point and holding it.<
Power loss or malfunctionIn the event of an electrical system
malfunction, the sliding/tilt sunroof can
be operated manually. Refer to
page 166.
Page 47 of 203
47n
IndexDataTechnologyRepairsCar careControlsOverview
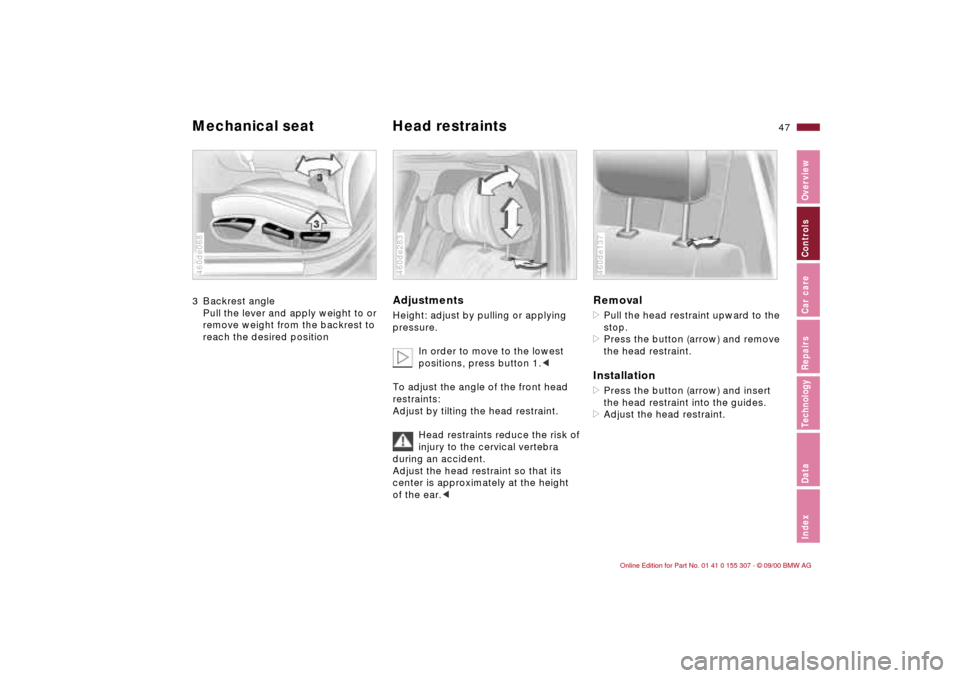
Mechanical seat Head restraints 3 Backrest angle
Pull the lever and apply weight to or
remove weight from the backrest to
reach the desired position460de068
Adjustments Height: adjust by pulling or applying
pressure.
In order to move to the lowest
positions, press button 1.<
To adjust the angle of the front head
restraints:
Adjust by tilting the head restraint.
Head restraints reduce the risk of
injury to the cervical vertebra
during an accident.
Adjust the head restraint so that its
center is approximately at the height
of the ear.<460de283
Removal>Pull the head restraint upward to the
stop.
>Press the button (arrow) and remove
the head restraint.Installation>Press the button (arrow) and insert
the head restraint into the guides.
>Adjust the head restraint.460de137
Page 49 of 203
49n
IndexDataTechnologyRepairsCar careControlsOverview
Power seat
*
Seat and mirror memory
*
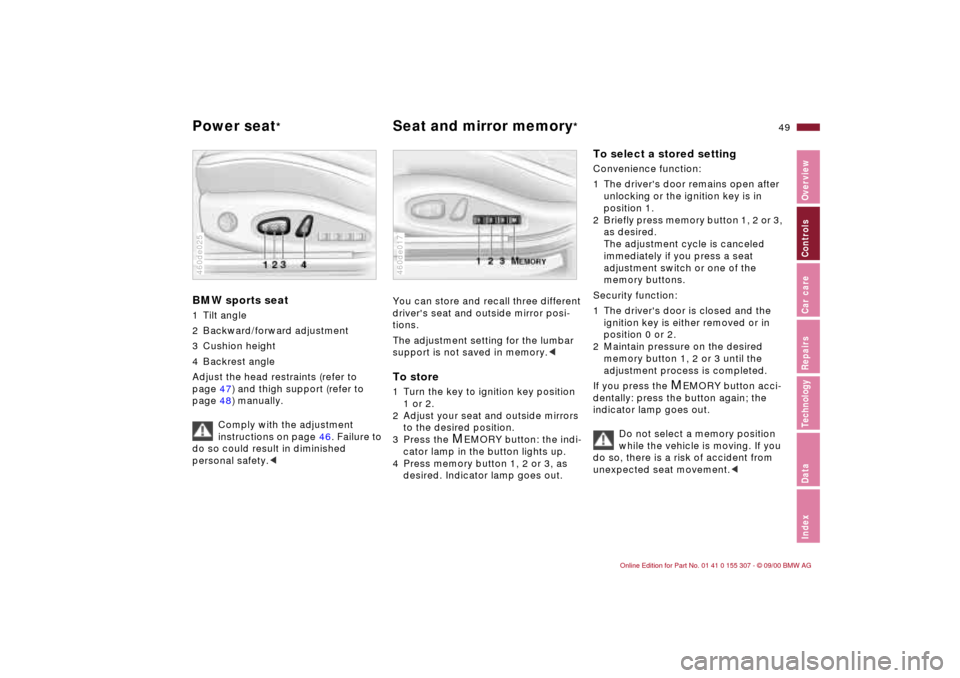
BMW sports seat1 Tilt angle
2 Backward/forward adjustment
3 Cushion height
4 Backrest angle
Adjust the head restraints (refer to
page 47) and thigh support (refer to
page 48) manually.
Comply with the adjustment
instructions on page 46. Failure to
do so could result in diminished
personal safety.<460de025
You can store and recall three different
driver's seat and outside mirror posi-
tions.
The adjustment setting for the lumbar
support is not saved in memory.
2 Adjust your seat and outside mirrors
to the desired position.
3 Press the
M
EMORY button: the indi-
cator lamp in the button lights up.
4 Press memory button 1, 2 or 3, as
desired. Indicator lamp goes out.
460de017
To select a stored settingConvenience function:
1 The driver's door remains open after
unlocking or the ignition key is in
position 1.
2 Briefly press memory button 1, 2 or 3,
as desired.
The adjustment cycle is canceled
immediately if you press a seat
adjustment switch or one of the
memory buttons.
Security function:
1 The driver's door is closed and the
ignition key is either removed or in
position 0 or 2.
2 Maintain pressure on the desired
memory button 1, 2 or 3 until the
adjustment process is completed.
If you press the
M
EMORY button acci-
dentally: press the button again; the
indicator lamp goes out.
Do not select a memory position
while the vehicle is moving. If you
do so, there is a risk of accident from
unexpected seat movement.<
Page 51 of 203
51n
IndexDataTechnologyRepairsCar careControlsOverview
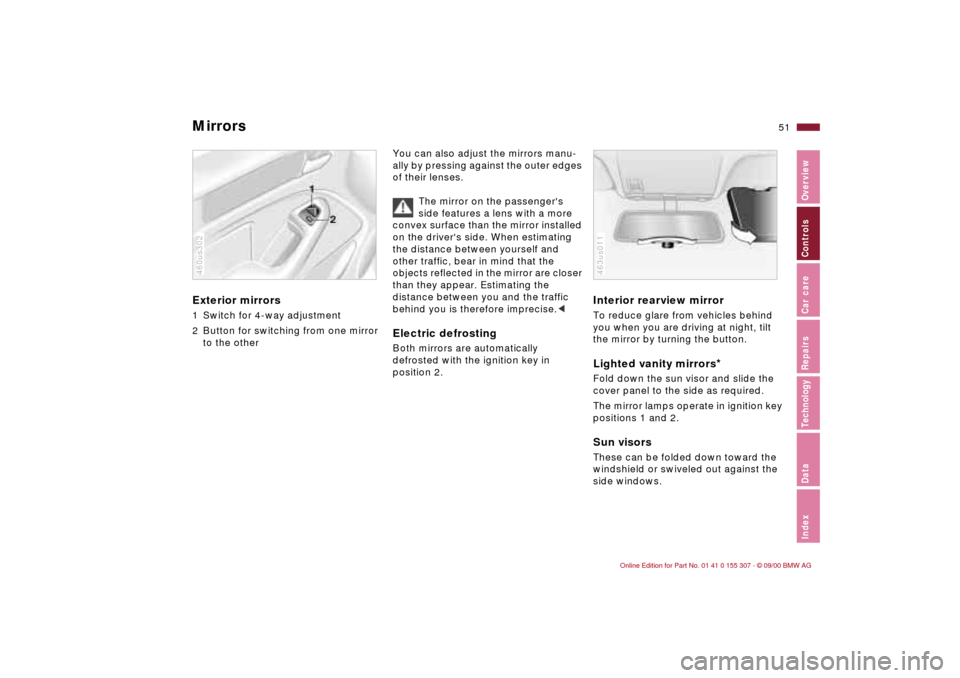
Mirrors Exterior mirrors1 Switch for 4-way adjustment
2 Button for switching from one mirror
to the other460us302
You can also adjust the mirrors manu-
ally by pressing against the outer edges
of their lenses.
The mirror on the passenger's
side features a lens with a more
convex surface than the mirror installed
on the driver's side. When estimating
the distance between yourself and
other traffic, bear in mind that the
objects reflected in the mirror are closer
than they appear. Estimating the
distance between you and the traffic
behind you is therefore imprecise.
position 2.
Interior rearview mirror To reduce glare from vehicles behind
you when you are driving at night, tilt
the mirror by turning the button.Lighted vanity mirrors
*
Fold down the sun visor and slide the
cover panel to the side as required.
The mirror lamps operate in ignition key
positions 1 and 2.Sun visorsThese can be folded down toward the
windshield or swiveled out against the
side windows.463us011