2001 BMW 330i TOURING ESP
[x] Cancel search: ESPPage 46 of 203

46n
For maximum safety when adjusting
the seat position, please observe the
following:
Never try to adjust your seat while
driving the vehicle. The seat could
respond with an unexpected move-
ment, and the ensuing loss of vehicle
control could lead to an accident.
Be sure that the safety belt remains
firmly against your body at all times. In
the event of a frontal impact, a loose lap
belt could slide over the hips, leading to
abdominal injury. In addition, the safety
belt's restraint effectiveness is reduced
if the belt is worn loosely.
While driving, do not recline the back-
rest too far (this applies to the
passenger side especially), because
otherwise there is the danger of sliding
underneath the safety belt during an
accident, thereby negating the safety
belt's protection.<
Correct sitting postureTo reduce strain on the spinal column,
sit all the way back in the seat and rest
your back fully against the backrest.
The ideal sitting posture is when your
head forms a straight line with your
spine.
For long-distance driving, you may wish
to increase the backrest angle slightly
to reduce muscular tension. You should
be able to grasp the steering wheel at
its highest point with your arms slightly
bent.
After a seat adjustment, adjust the
height of the safety belt also. Refer to
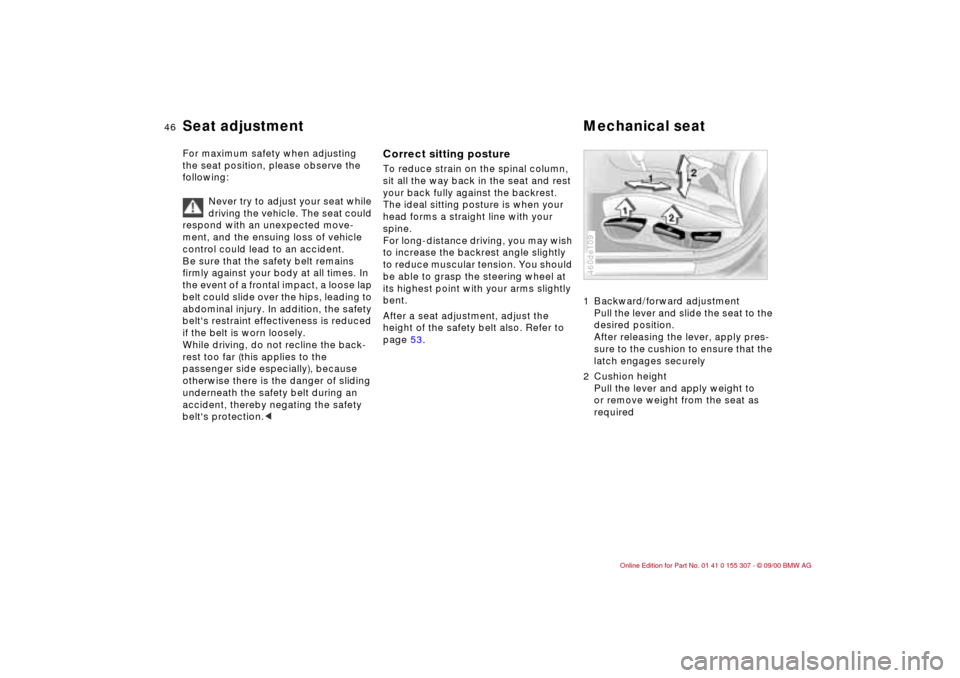
page 53.1 Backward/forward adjustment
Pull the lever and slide the seat to the
desired position.
After releasing the lever, apply pres-
sure to the cushion to ensure that the
latch engages securely
2 Cushion height
Pull the lever and apply weight to
or remove weight from the seat as
required
460de109
Seat adjustment Mechanical seat
Page 52 of 203

52n
Mirrors Car Memory, Key Memory Interior rearview mirror with
automatic dimming feature
*
By responding to the effects of ambient
light and the glare from following traffic,
this mirror automatically dims through
an infinitely-variable range.
The mirror switches to its clear,
undimmed mode whenever the trans-
mission is placed in reverse gear
(selector lever in "Reverse").
For proper functioning of the mirror, be
sure that the two photocells are unob-
structed and clean. One of the photo-
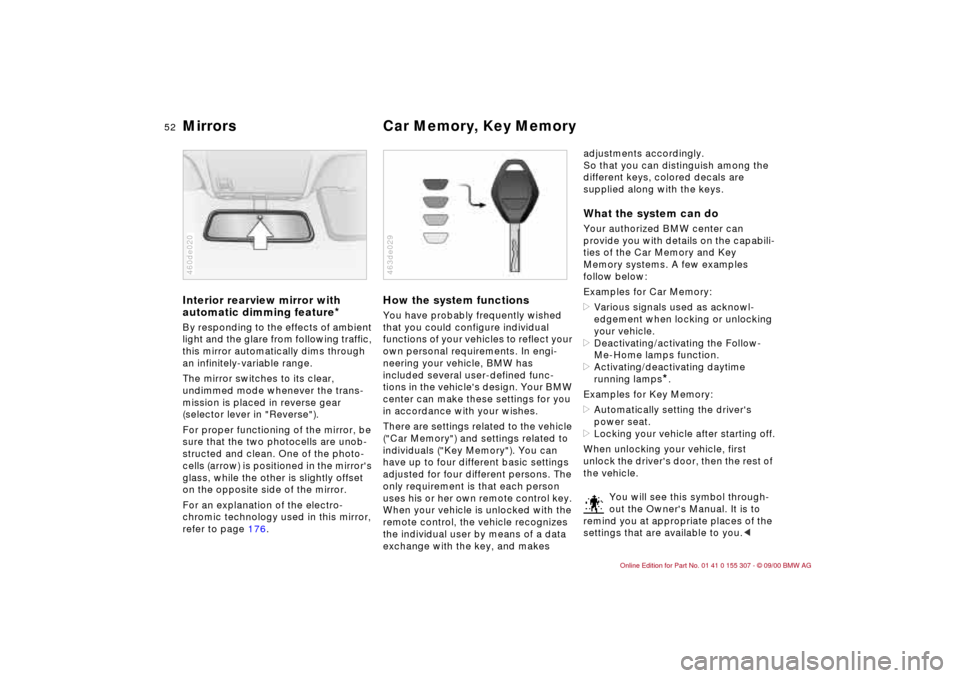
cells (arrow) is positioned in the mirror's
glass, while the other is slightly offset
on the opposite side of the mirror.
For an explanation of the electro-
chromic technology used in this mirror,
refer to page 176.460de020
How the system functionsYou have probably frequently wished
that you could configure individual
functions of your vehicles to reflect your
own personal requirements. In engi-
neering your vehicle, BMW has
included several user-defined func-
tions in the vehicle's design. Your BMW
center can make these settings for you
in accordance with your wishes.
There are settings related to the vehicle
("Car Memory") and settings related to
individuals ("Key Memory"). You can
have up to four different basic settings
adjusted for four different persons. The
only requirement is that each person
uses his or her own remote control key.
When your vehicle is unlocked with the
remote control, the vehicle recognizes
the individual user by means of a data
exchange with the key, and makes 463de029
adjustments accordingly.
So that you can distinguish among the
different keys, colored decals are
supplied along with the keys.What the system can doYour authorized BMW center can
provide you with details on the capabili-
ties of the Car Memory and Key
Memory systems. A few examples
follow below:
Examples for Car Memory:
>Various signals used as acknowl-
edgement when locking or unlocking
your vehicle.
>Deactivating/activating the Follow-
Me-Home lamps function.
>Activating/deactivating daytime
running lamps
*.
Examples for Key Memory:
>Automatically setting the driver's
power seat.
>Locking your vehicle after starting off.
When unlocking your vehicle, first
unlock the driver's door, then the rest of
the vehicle.
You will see this symbol through-
out the Owner's Manual. It is to
remind you at appropriate places of the
settings that are available to you.<
Page 55 of 203

55n
IndexDataTechnologyRepairsCar careControlsOverview
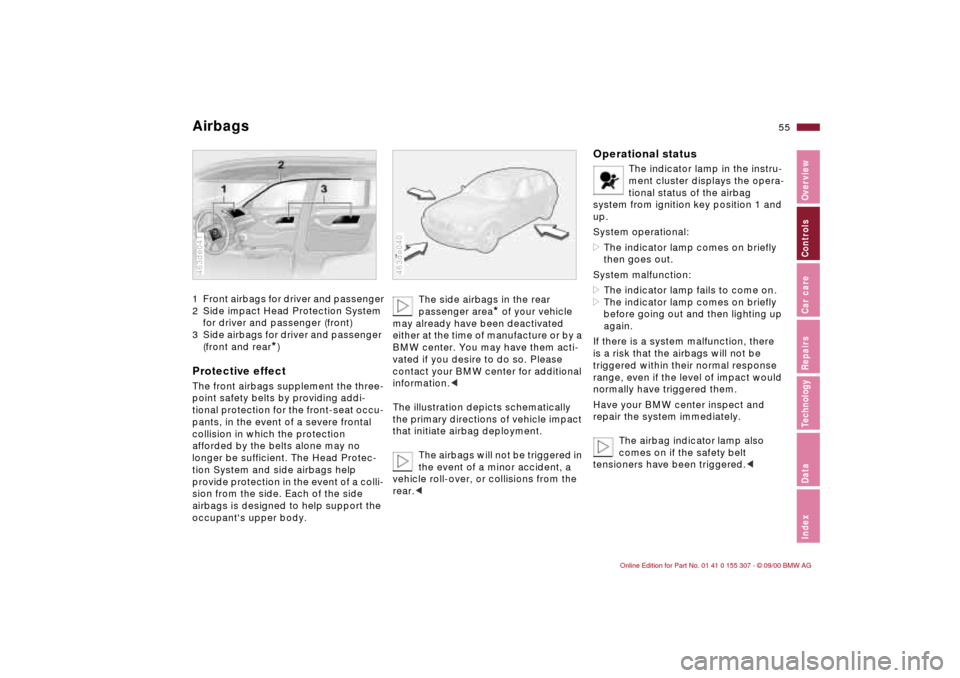
Airbags1 Front airbags for driver and passenger
2 Side impact Head Protection System
for driver and passenger (front)
3 Side airbags for driver and passenger
(front and rear
*)
Protective effectThe front airbags supplement the three-
point safety belts by providing addi-
tional protection for the front-seat occu-
pants, in the event of a severe frontal
collision in which the protection
afforded by the belts alone may no
longer be sufficient. The Head Protec-
tion System and side airbags help
provide protection in the event of a colli-
sion from the side. Each of the side
airbags is designed to help support the
occupant's upper body.463de041
The side airbags in the rear
passenger area
* of your vehicle
may already have been deactivated
either at the time of manufacture or by a
BMW center. You may have them acti-
vated if you desire to do so. Please
contact your BMW center for additional
information.<
The illustration depicts schematically
the primary directions of vehicle impact
that initiate airbag deployment.
The airbags will not be triggered in
the event of a minor accident, a
vehicle roll-over, or collisions from the
rear.c
463de040
Operational status
The indicator lamp in the instru-
ment cluster displays the opera-
tional status of the airbag
system from ignition key position 1 and
up.
System operational:
>The indicator lamp comes on briefly
then goes out.
System malfunction:
>The indicator lamp fails to come on.
>The indicator lamp comes on briefly
before going out and then lighting up
again.
If there is a system malfunction, there
is a risk that the airbags will not be
triggered within their normal response
range, even if the level of impact would
normally have triggered them.
Have your BMW center inspect and
repair the system immediately.
The airbag indicator lamp also
comes on if the safety belt
tensioners have been triggered.<
Page 59 of 203

59n
IndexDataTechnologyRepairsCar careControlsOverview
Transporting children safelyCommercially available child seats
complying with the legal standard are
designed to be secured with a lap belt
or with the lap belt portion of a combi-
nation lap/shoulder belt.
Improperly or inadequately installed
restraint systems can increase the risk
of injury to children. Always read and
follow the instructions that come with
the system.
If you use a child restraint system with a
tether strap, three additional tether
anchorage points (refer to the arrows in
the illustration) have been provided.
Depending on the location selected for
seating in the rear passenger area,
attach the tether strap to the corre-
sponding anchorage point to secure the
child restraint system. Remove the
cover first on the middle location.392au001
If the respective seating position is
fitted with a headrest, lift the headrest
and pass the tether strap between the
headrest and the seat back.
Adjust the tether strap according to the
child restraint manufacturer's instruc-
tions.
Before installing any child restraint
device or child seat, please read
the following:
Never install a rear-facing child restraint
system in the front passenger seat of
this vehicle.
Your vehicle is equipped with an airbag
supplemental restraint system for the
front passenger. Because the backrest
on any rear-facing child restraint system
(of the kind designed for infants under
1 year and 20 lbs./9 kg) would be within
the airbag's deployment range, you
should never mount such a device in
the front passenger seat, since the
impact of the airbag against the child
restraint's backrest could lead to
serious or fatal injuries.
If it is necessary for a child (not an
infant) to ride in the front seat, certain
precautions should be taken. First,
move the passenger seat as far away
from the dashboard as possible. This
important precaution is intended to
maximize the distance between the
airbag and the child. Older children
should be tightly secured with the
safety belt. Younger children should be
secured in an appropriate forward-
facing child restraint system that has
first been properly secured with a safety
belt.
Never install a rear-facing child restraint
system in the front passenger seat.
We strongly urge you to carefully read
and comply with the instructions for
installation and use provided by the
child restraint's manufacturer when-
ever you use such a device.
Be sure that all occupants (of all ages)
remain properly and securely restrained
at all times.c
All rear seating positions in your vehicle
meet the recommendations of SAE
J1819, an industry recommended prac-
tice for securing child restraint systems
in motor vehicles.
Page 64 of 203

64n
Manual transmission Completely depress the clutch pedal
each time you shift, pressing the
manual-shift gear lever into its respec-
tive end position.
Also depress the clutch when starting
the vehicle, as otherwise lockout will
prevent the engine from starting.
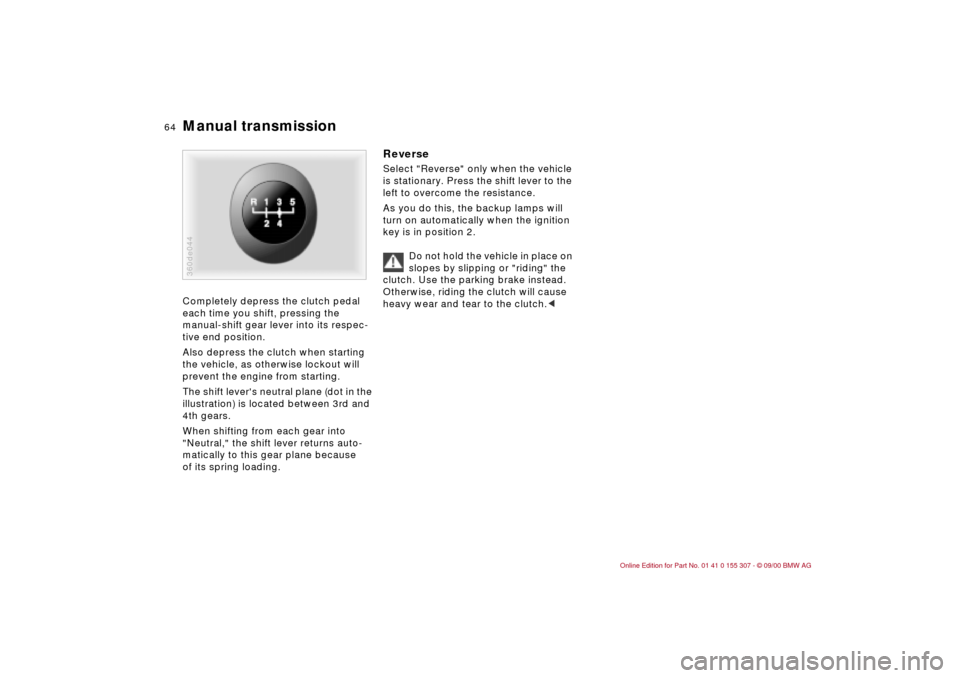
The shift lever's neutral plane (dot in the
illustration) is located between 3rd and
4th gears.
When shifting from each gear into
"Neutral," the shift lever returns auto-
matically to this gear plane because
of its spring loading.360de044
Reverse Select "Reverse" only when the vehicle
is stationary. Press the shift lever to the
left to overcome the resistance.
As you do this, the backup lamps will
turn on automatically when the ignition
key is in position 2.
Do not hold the vehicle in place on
slopes by slipping or "riding" the
clutch. Use the parking brake instead.
Otherwise, riding the clutch will cause
heavy wear and tear to the clutch.<
Page 69 of 203

69n
IndexDataTechnologyRepairsCar careControlsOverview
Washer/Wiper system1 Intermittent mode or rain
sensor
*
Intermittent mode:
You can use rotary dial 6 to select from
four wipe intervals.
In addition, the wipe interval automati-
cally adapts to variations in road speed.
Rain sensor:
The rain sensor is positioned on the
windshield, directly ahead of the inte-
rior rearview mirror. When the rain
sensor is activated, the windshield
wiper is controlled automatically,
depending on the degree of wetness of
the windshield (in both snow and rain).
You do not have to be concerned with
switching the windshield wiper on or off
or adjusting the wipe interval between
intermittent and full wipe. Instead, you 463de010
can concentrate fully on the traffic
conditions. This is especially important
under adverse weather conditions.
To activate the rain sensor:
From ignition key position 1 and up,
move the lever to position 1. The wipers
travel once across the windshield,
regardless of the weather.
You can leave the lever permanently in
position 1. It is then only necessary to
activate the rain sensor from ignition
key position 1 and up. To do this,
>turn rotary dial 6 briefly or
>use cleaning windshield 5.
To modify the sensitivity of the rain
sensor:
Turn rotary dial 6.
Deactivating the rain sensor:
Put lever in position 0.
Turn the rain sensor off when
passing through an automatic car
wash. Failure to do so could result in
damage caused by undesired wiper
activation.<
2 Normal wiper speedWhen the vehicle is stationary, the
wipers switch automatically to intermit-
tent wipe (not on vehicles with rain
sensor).3 Fast wiper speedWhen the vehicle is stationary, the
wipers operate at normal speed (not on
vehicles with rain sensor).5 Cleaning windshieldThe system sprays washer fluid against
the windshield and activates the wipers
for a brief period.
If you only pull the lever briefly, the
system sprays washer fluid onto the
windshield without activating the
wipers.
Page 74 of 203

74n
Fuel gauge
Coolant temperature gauge
Service Interval Display
When you switch on the ignition, the
indicator lamp lights up briefly as a
function check.
Once the indicator lamp stays on
continuously, there are still approx.
2 gallons (8 liters) of fuel left in the fuel
tank.
For fuel tank capacity, refer to page 187.
If the tilt of the vehicle varies (extended
driving in mountainous areas, for
example), there may be slight fluctua-
tions of the needle.
Please refuel early, since driving
to the last drop of fuel can result
in damage to the engine and/or cata-
lytic converter.<460us081
BlueThe engine is still cold. Drive at
moderate engine and vehicle speeds.RedWhen you switch on the ignition, the
warning lamp comes on briefly as a
function check.
If the lamp comes on while operating
the vehicle, the engine has over-
heated. Switch the engine off immedi-
ately and allow it to cool down.Between the blue and red zonesNormal operating range. It is not
unusual for the needle to rise as far as
the edge of the red zone in response
to high outside temperatures or severe operating conditions. Checking
coolant level: refer to page 13 7.460de082
Remaining distance for serviceThe displays shown in the illustration
appear for a few seconds when the
ignition key is in position 1 or after the
engine is started.
The next service due appears with the
message OIL SERVICE or INSPECTION,
together with the remaining distance
before scheduled service.
The computer bases its calculations
of the remaining distance on the rate of
fuel consumption in the period immedi-
ately preceding your data request.
A flashing display and a "Ð" in front of
the number indicate that service is past
due by the number of kilometers/miles
displayed. Please contact your BMW
center for an appointment.460us112
Page 78 of 203

78n
The conceptThe PDC assists you when you are
parking. A signal warns you of the real
distance to an obstacle. To do this, four
ultrasonic sensors in the rear bumper
measure the distance to the nearest
object. The range for the sensors at the
two rear corners ends approx. 2 ft
(60 cm) from the bumper. The range for
the two center sensors is approx. 4.9 ft
(1.50 meters) wide.
The system starts to operate automati-
cally about one second after you select
"Reverse" with the ignition key in posi-
tion 2. PDC is deactivated when you shift
back out of reverse.
Acoustical signalsThe distance to the nearest object is
indicated by a tone sounding at various
intervals. As the distance between
vehicle and object decreases, the inter-
vals between the tones become shorter.
If the distance between the vehicle and
a detected object is less than 1ft
(30 cm), then a continuous tone will go
off.
The warning signal is canceled after
approx. three seconds if the distance to
the obstacle remains constant during
this time (if you are moving parallel to
a wall, for instance).
System malfunctions will be indicated
by a continuous high-pitched tone
when the system is activated the first
time. Please refer the problem to your
BMW center.The PDC does not remove the
driver's personal responsibility for
evaluating the distance between the
vehicle and any obstacles. Even when
sensors are involved, there is a blind
spot in which objects cannot be
detected. This applies especially in
those cases where the system
approaches the physical limits of ultra-
sonic measurement, as occurs with tow
bars and trailer couplings, and in the
vicinity of thin and painted objects.
Certain sources of sound, such as a
loud radio, could drown the PDC signal
tone.<
Keep the sensors clean and free
of ice or snow in order to ensure
that they continue to operate effec-
tively.
Do not apply high-pressure spray to the
sensors for a prolonged period of time.
Maintain a distance of more than 4 in
(10 cm).<
Park Distance Control (PDC)
*