2001 BMW 330i TOURING Car care
[x] Cancel search: Car carePage 149 of 203

149n
IndexDataTechnologyRepairsCar careControlsOverview
OBD interface socket The interface socket for onboard diag-
nostics is located on the driver's side at
the left-hand bottom of the dashboard
and under a cover. The cover has the
letters "OBD" on it.
The purpose of the OBD system is to
ensure proper emission control system
operation for the vehicle's lifetime by
monitoring emission-related compo-
nents and systems for deterioration
and malfunction.460us250
An illuminated indicator informs
you of the need for service, not
that you need to stop the
vehicle. Your system should be
checked, however, at the earliest possi-
ble opportunity.
If the indicator blinks or flashes, this
indicates a high level of engine misfire.
Reduce speed and contact your near-
est BMW center immediately. Severe
engine misfire over even a short period
of time can seriously damage emission
control components, especially the
catalytic converter.
Service Engine Soon warning
lamp for Canadian models.
If the fuel filler cap is not properly
tightened, the OBD system can
detect leaking vapor and the indicator
will light up. If the fuel filler cap is then
tightened, the indicator will usually go
out after a short period of time.<
Page 151 of 203

Overview
Controls and features
Operation, care
and maintenance
Owner service procedures
Technical data
Index Advanced technology
151n
IndexDataTechnologyRepairsCar careControlsOverview
Replacement procedures:
Onboard tool kit152
Windshield wiper blades152
Lamps and bulbs153
Changing a wheel159
Battery162
Fuses164
Microfilter/Activated-charcoal
filter165
In case of electrical
malfunction:
Fuel filler door166
Sliding/Tilt sunroof166
Tailgate166
Assistance, giving and
receiving:
Jump-starting167
Towing the vehicle168
Repairs
Page 153 of 203
153n
IndexDataTechnologyRepairsCar careControlsOverview
Lamps and bulbs The lamps and bulbs are essential
factors contributing to the safety of your
vehicle. Therefore, comply fully with the
following instructions during bulb
replacement. If you are not familiar with
any of the procedures, consult your
BMW center.
Do not touch the glass portion of
a new bulb with your bare hands
since even small amounts of impurities
burn into the surface and reduce the
service life of the bulb. Use a clean
cloth, paper napkin, or a similar mate-
rial, or hold the bulb by its metallic
base.<
A replacement bulb set is available from
your BMW center.
Whenever working on the
electrical system, switch off the
electrical accessory you are working on
or disconnect the cable from the nega-
tive terminal of the battery. Failure to do
this could result in short circuits.
To prevent injuries and damage,
comply with any instructions provided
by the bulb manufacturer.<
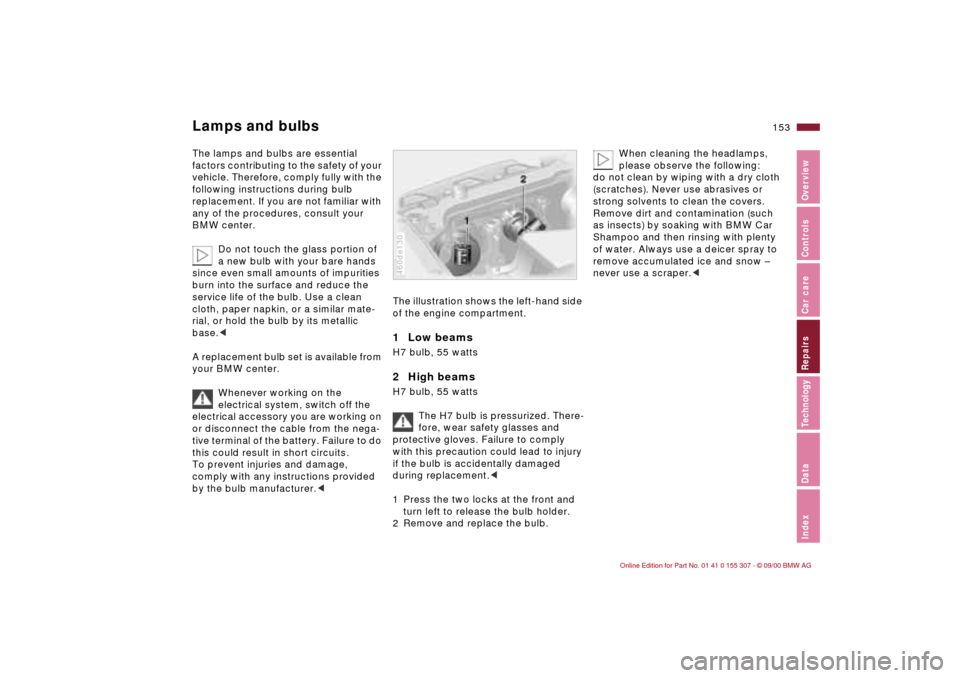
The illustration shows the left-hand side
of the engine compartment.1 Low beams H7 bulb, 55 watts2 High beamsH7 bulb, 55 watts
The H7 bulb is pressurized. There-
fore, wear safety glasses and
protective gloves. Failure to comply
with this precaution could lead to injury
if the bulb is accidentally damaged
during replacement.<
1 Press the two locks at the front and
turn left to release the bulb holder.
2 Remove and replace the bulb.460de130
When cleaning the headlamps,
please observe the following:
do not clean by wiping with a dry cloth
(scratches). Never use abrasives or
strong solvents to clean the covers.
Remove dirt and contamination (such
as insects) by soaking with BMW Car
Shampoo and then rinsing with plenty
of water. Always use a deicer spray to
remove accumulated ice and snow Ð
never use a scraper.<
Page 155 of 203
155n
IndexDataTechnologyRepairsCar careControlsOverview
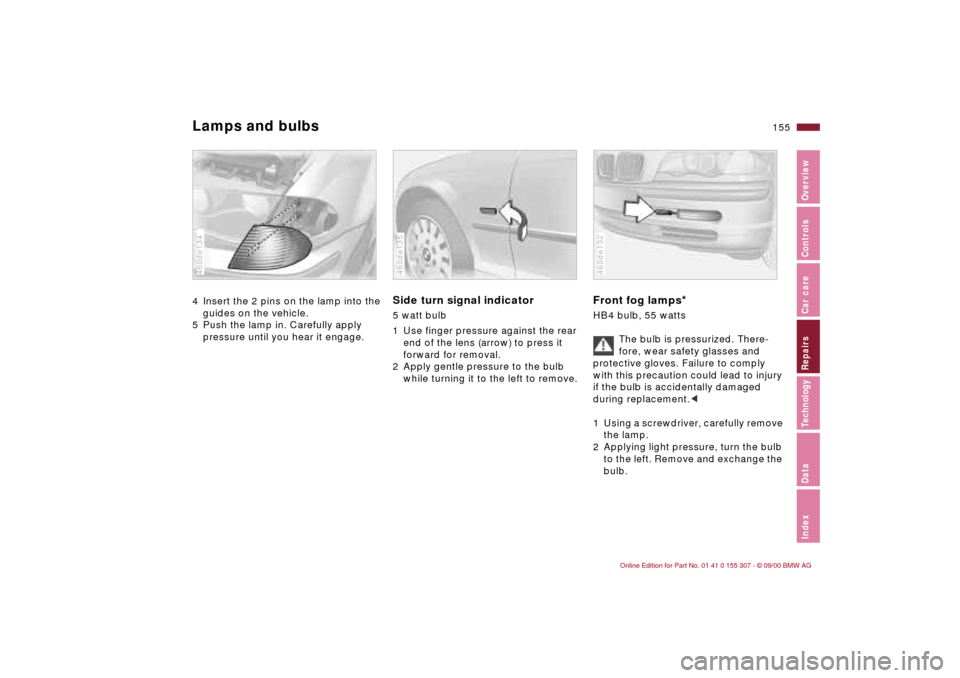
Lamps and bulbs4 Insert the 2 pins on the lamp into the
guides on the vehicle.
5 Push the lamp in. Carefully apply
pressure until you hear it engage.460de134
Side turn signal indicator5 watt bulb
1 Use finger pressure against the rear
end of the lens (arrow) to press it
forward for removal.
2 Apply gentle pressure to the bulb
while turning it to the left to remove.460de135
Front fog lamps
*
HB4 bulb, 55 watts
The bulb is pressurized. There-
fore, wear safety glasses and
protective gloves. Failure to comply
with this precaution could lead to injury
if the bulb is accidentally damaged
during replacement.<
1 Using a screwdriver, carefully remove
the lamp.
2 Applying light pressure, turn the bulb
to the left. Remove and exchange the
bulb.460de132
Page 157 of 203
157n
IndexDataTechnologyRepairsCar careControlsOverview
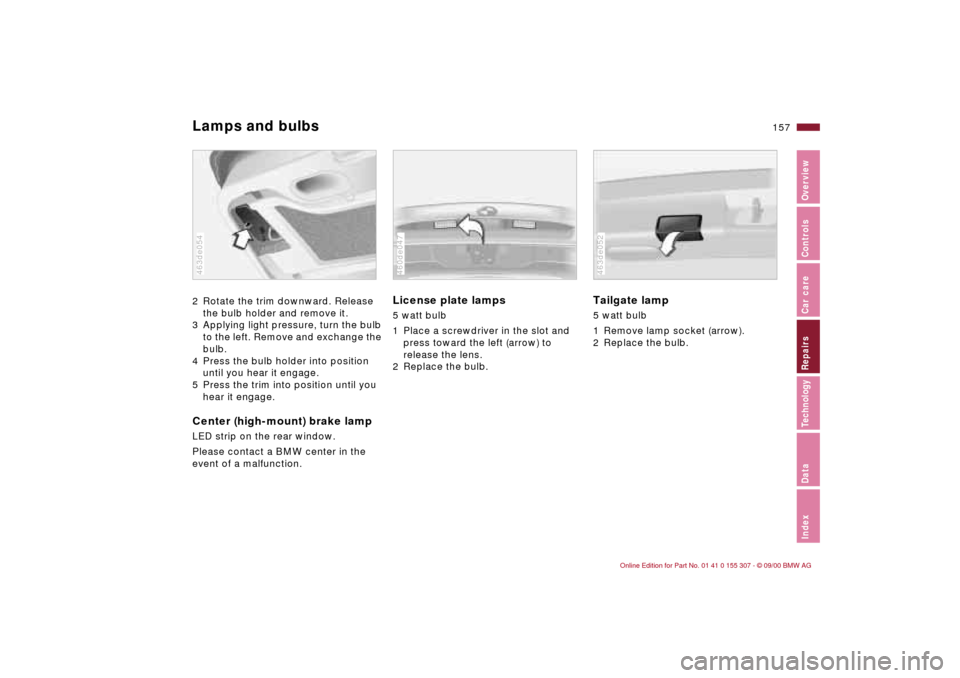
Lamps and bulbs2 Rotate the trim downward. Release
the bulb holder and remove it.
3 Applying light pressure, turn the bulb
to the left. Remove and exchange the
bulb.
4 Press the bulb holder into position
until you hear it engage.
5 Press the trim into position until you
hear it engage.Center (high-mount) brake lamp
LED strip on the rear window.
Please contact a BMW center in the
event of a malfunction.463de054
License plate lamps 5 watt bulb
1 Place a screwdriver in the slot and
press toward the left (arrow) to
release the lens.
2 Replace the bulb.460de047
Tailgate lamp 5 watt bulb
1 Remove lamp socket (arrow).
2 Replace the bulb.463de052
Page 159 of 203
159n
IndexDataTechnologyRepairsCar careControlsOverview
Changing a wheel
Take these precautionary mea-
sures if you have either a flat tire or
are changing a wheel.
Stop the vehicle as far as possible from
passing traffic. Park on a firm, flat
surface. Switch on the hazard warning
flashers. Turn the steering wheel to the
straight-ahead position, remove the key
and engage the steering lock. Shift into
1st gear or reverse (selector lever in
"Park" with automatic transmission)
and engage the parking brake.
All passengers should be outside the
vehicle and well away from your imme-
diate working area (behind a guardrail,
for instance).
If a warning triangle or portable hazard
warning lamp is available, set it up on
the roadside at an appropriate distance
from the rear of the vehicle. Comply with
all safety guidelines and regulations.
Change the wheel only on a level, firm
surface that is not slippery. Avoid jack-
ing the vehicle on a soft or slippery
support surface (snow, ice, loose gravel,
etc.), as it could slide sideways.
Position the jack on a firm support
surface.
Do not place wooden blocks or similar
objects under the jack, otherwise, the
jack might not be able to reach its full
support capacity because of the limited
height.
Do not lie under the vehicle or start the
engine when the vehicle is supported by
the jack. Failure to comply with this
creates a risk of fatal injury.<
Your BMW has either a spare tire or
space-saver tire for temporary use to
ensure your mobility.
To remove the spare wheel, lift out
the floor panel in the luggage
compartment completely (refer to
page 109.<
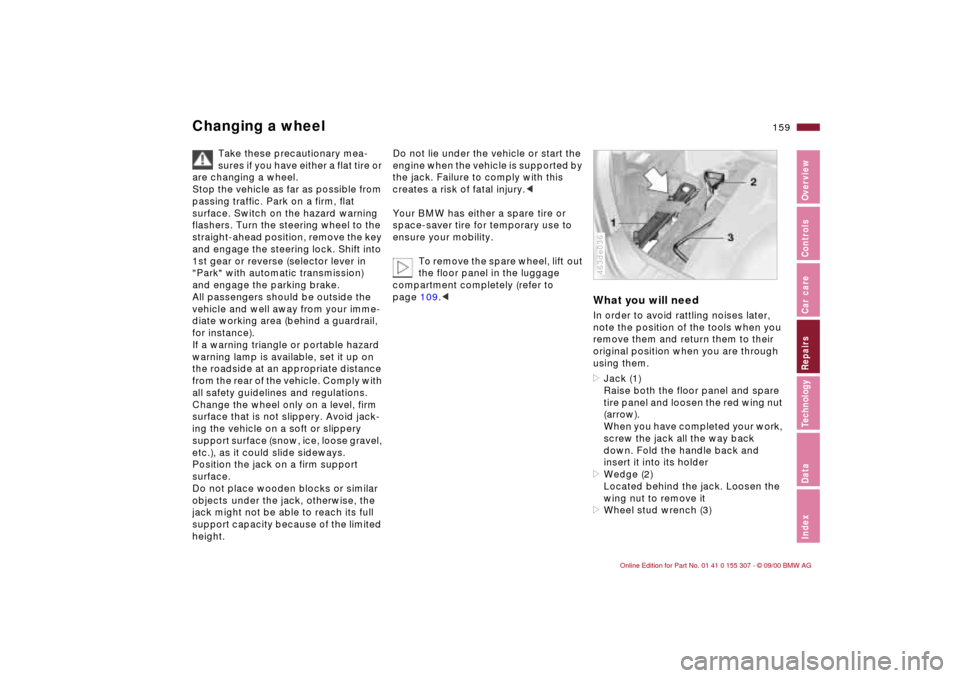
What you will needIn order to avoid rattling noises later,
note the position of the tools when you
remove them and return them to their
original position when you are through
using them.
>Jack (1)
Raise both the floor panel and spare
tire panel and loosen the red wing nut
(arrow).
When you have completed your work,
screw the jack all the way back
down. Fold the handle back and
insert it into its holder
>Wedge (2)
Located behind the jack. Loosen the
wing nut to remove it
>Wheel stud wrench (3) 463de036
Page 161 of 203
161n
IndexDataTechnologyRepairsCar careControlsOverview
Changing a wheel8 Remove mud or dirt accumulation
from the mounting surfaces of the
wheel and hub. Clean the lug bolts.
9 Position the new wheel or the
space-saver tire on the hub and
screw at least two lug bolts finger-
tight into opposite bolt holes.
10 Screw in the remaining lug bolts.
Tighten all the bolts snugly.
11 Lower the jack and remove it from
beneath the vehicle.
12 Tighten the lug bolts in a diagonal
pattern.
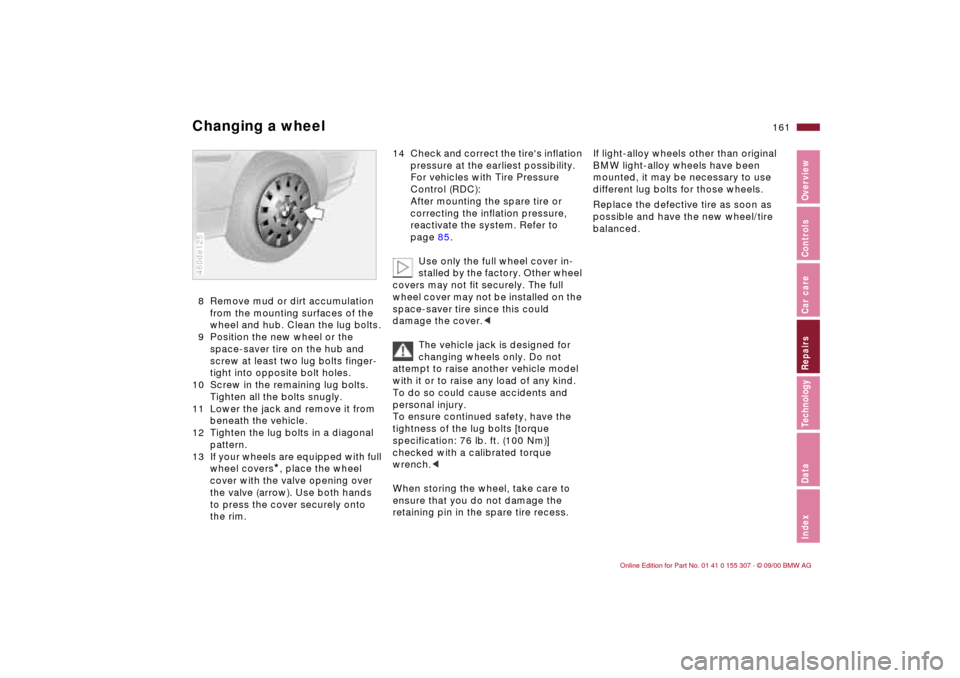
13 If your wheels are equipped with full
wheel covers
*, place the wheel
cover with the valve opening over
the valve (arrow). Use both hands
to press the cover securely onto
the rim.
460de125
14 Check and correct the tire's inflation
pressure at the earliest possibility.
For vehicles with Tire Pressure
Control (RDC):
After mounting the spare tire or
correcting the inflation pressure,
reactivate the system. Refer to
page 85.
Use only the full wheel cover in-
stalled by the factory. Other wheel
covers may not fit securely. The full
wheel cover may not be installed on the
space-saver tire since this could
damage the cover.<
The vehicle jack is designed for
changing wheels only. Do not
attempt to raise another vehicle model
with it or to raise any load of any kind.
To do so could cause accidents and
personal injury.
To ensure continued safety, have the
tightness of the lug bolts [torque
specification: 76 lb. ft. (100 Nm)]
checked with a calibrated torque
wrench.<
When storing the wheel, take care to
ensure that you do not damage the
retaining pin in the spare tire recess.
If light-alloy wheels other than original
BMW light-alloy wheels have been
mounted, it may be necessary to use
different lug bolts for those wheels.
Replace the defective tire as soon as
possible and have the new wheel/tire
balanced.
Page 163 of 203
163n
IndexDataTechnologyRepairsCar careControlsOverview
BatteryBattery careThe battery is completely maintenance-
free. That means that the original acid
will normally last for the service life of
the battery under temperate climatic
conditions.
For all questions that regard the
battery, please consult your BMW
center. Since the battery is absolutely
maintenance-free, the following is for
your information only.
please be cautious whenever you work
with or near the battery.
Before handling the battery,
please read the following infor-
mation.
Wear eye protection. Do not al-
low particles containing battery
acid or lead to come into con-
tact with your eyes, your skin, or your
clothing.
Battery acid is extremely corro-
sive. Wear eye protection and
protective gloves. Do not tip the
battery. Battery acid can leak from the
ventilation openings.
Do not allow children to have
access to batteries and battery
acid.
Never allow sparks or open
flame near the battery. Do
not smoke in the vicinity of the
battery. Avoid sparks from electrical
cables or electrical equipment. Turn the
key to position 0 in the steering lock
when disconnecting or connecting the
battery. Never short-circuit the battery
terminals. This creates a risk of injury
from high-energy sparks.
A highly explosive gas is gener-
ated when the battery is
charged.
If you happen to get acid in
your eyes, rinse thoroughly for
15 minutes with clear water.
Consult a physician immediately. If you
get acid spray on your skin or clothing,
rinse with plenty of water. If acid is
accidentally swallowed, consult a
physician immediately.
In order to protect the battery
case from ultraviolet radiation,
do not place it in direct sunlight.
A discharged battery can freeze. Store
the battery in areas where temperature
remains above freezing.
Removal and installation
Do not disconnect the battery
while the engine is running.
Disconnecting the battery cable when
the engine is running will cause a
voltage surge which will damage the
vehicle's onboard electronics.
Do not make any modifications in the
wires to the positive terminal. If you do
so, the protective function of the safety
battery terminal is no longer ensured.
Repairs and disposal may only be per-
formed by specially trained personnel.<
When removing the battery, disconnect
the cable on the negative terminal first,
then the cable on the positive terminal.
Loosen the center adjusting screw on
the battery retaining strap (use the
screwdriver included with the onboard
tool kit) and disconnect the strap.
When installing a battery, connect the
positive terminal first, then connect the
negative terminal.
When installing a battery, be sure
that it is mounted properly and that
the retaining strap is installed using the
center adjustment screw, otherwise, the
battery will not be secure enough in
case of an accident.<