2001 BMW 330Ci COUPE light
[x] Cancel search: lightPage 57 of 203

57n
IndexDataTechnologyRepairsCar careControlsOverview
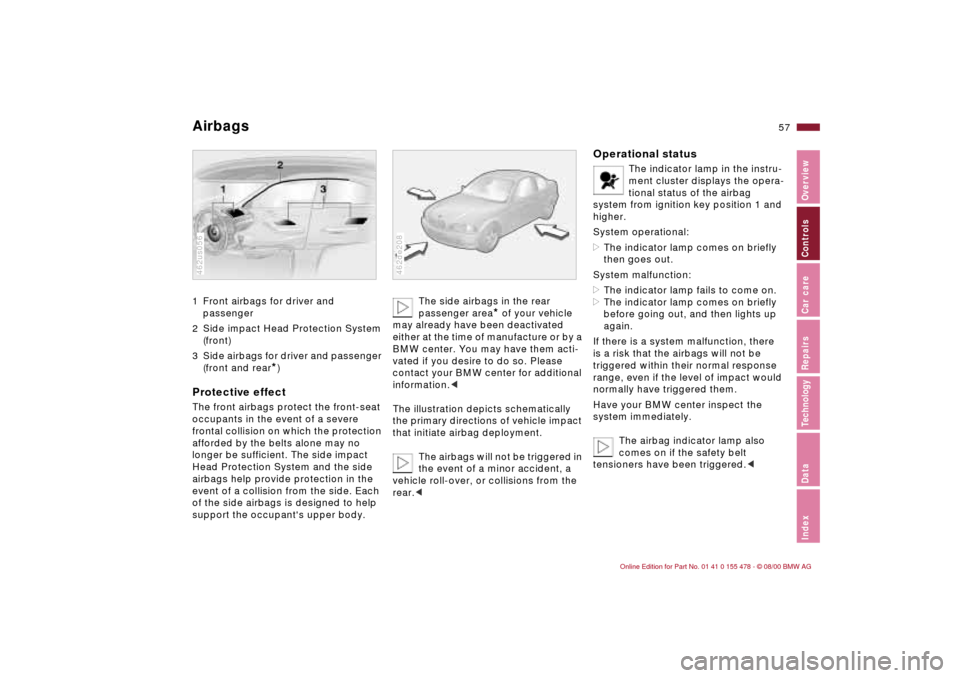
Airbags 1 Front airbags for driver and
passenger
2 Side impact Head Protection System
(front)
3 Side airbags for driver and passenger
(front and rear
*)
Protective effectThe front airbags protect the front-seat
occupants in the event of a severe
frontal collision on which the protection
afforded by the belts alone may no
longer be sufficient. The side impact
Head Protection System and the side
airbags help provide protection in the
event of a collision from the side. Each
of the side airbags is designed to help
support the occupant's upper body.462us056
The side airbags in the rear
passenger area
* of your vehicle
may already have been deactivated
either at the time of manufacture or by a
BMW center. You may have them acti-
vated if you desire to do so. Please
contact your BMW center for additional
information.<
The illustration depicts schematically
the primary directions of vehicle impact
that initiate airbag deployment.
The airbags will not be triggered in
the event of a minor accident, a
vehicle roll-over, or collisions from the
rear.c
462de208
Operational status
The indicator lamp in the instru-
ment cluster displays the opera-
tional status of the airbag
system from ignition key position 1 and
higher.
System operational:
>The indicator lamp comes on briefly
then goes out.
System malfunction:
>The indicator lamp fails to come on.
>The indicator lamp comes on briefly
before going out, and then lights up
again.
If there is a system malfunction, there
is a risk that the airbags will not be
triggered within their normal response
range, even if the level of impact would
normally have triggered them.
Have your BMW center inspect the
system immediately.
The airbag indicator lamp also
comes on if the safety belt
tensioners have been triggered.<
Page 63 of 203

63n
IndexDataTechnologyRepairsCar careControlsOverview
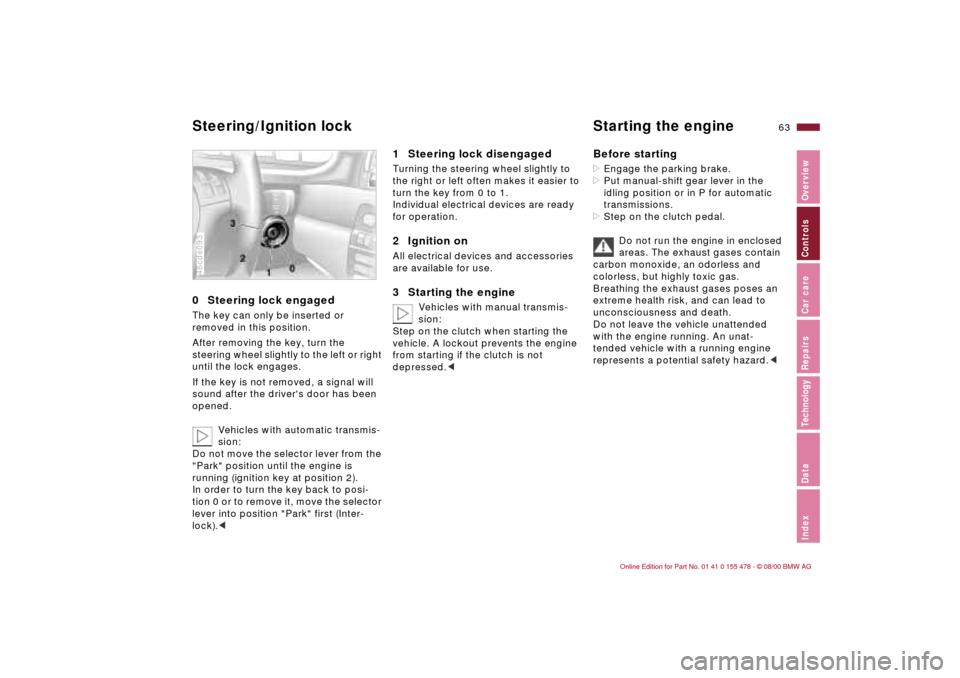
0 Steering lock engaged The key can only be inserted or
removed in this position.
After removing the key, turn the
steering wheel slightly to the left or right
until the lock engages.
If the key is not removed, a signal will
sound after the driver's door has been
opened.
Vehicles with automatic transmis-
sion:
Do not move the selector lever from the
"Park" position until the engine is
running (ignition key at position 2).
In order to turn the key back to posi-
tion 0 or to remove it, move the selector
lever into position "Park" first (Inter-
lock).<46cde093
1 Steering lock disengaged Turning the steering wheel slightly to
the right or left often makes it easier to
turn the key from 0 to 1.
Individual electrical devices are ready
for operation.2 Ignition onAll electrical devices and accessories
are available for use.3 Starting the engine
Vehicles with manual transmis-
sion:
Step on the clutch when starting the
vehicle. A lockout prevents the engine
from starting if the clutch is not
depressed.<
Before starting>Engage the parking brake.
>Put manual-shift gear lever in the
idling position or in P for automatic
transmissions.
>Step on the clutch pedal.
Do not run the engine in enclosed
areas. The exhaust gases contain
carbon monoxide, an odorless and
colorless, but highly toxic gas.
Breathing the exhaust gases poses an
extreme health risk, and can lead to
unconsciousness and death.
Do not leave the vehicle unattended
with the engine running. An unat-
tended vehicle with a running engine
represents a potential safety hazard.<
Steering/Ignition lock Starting the engine
Page 65 of 203

65n
IndexDataTechnologyRepairsCar careControlsOverview
Parking brake To engageThe parking brake is designed primarily
to prevent the vehicle from rolling when
it is parked. It operates against the rear
wheels.
The lock engages automatically when
you lift the lever, and the indicator lamp
in the instrument panel comes on when
the ignition key is in position 2. Refer to
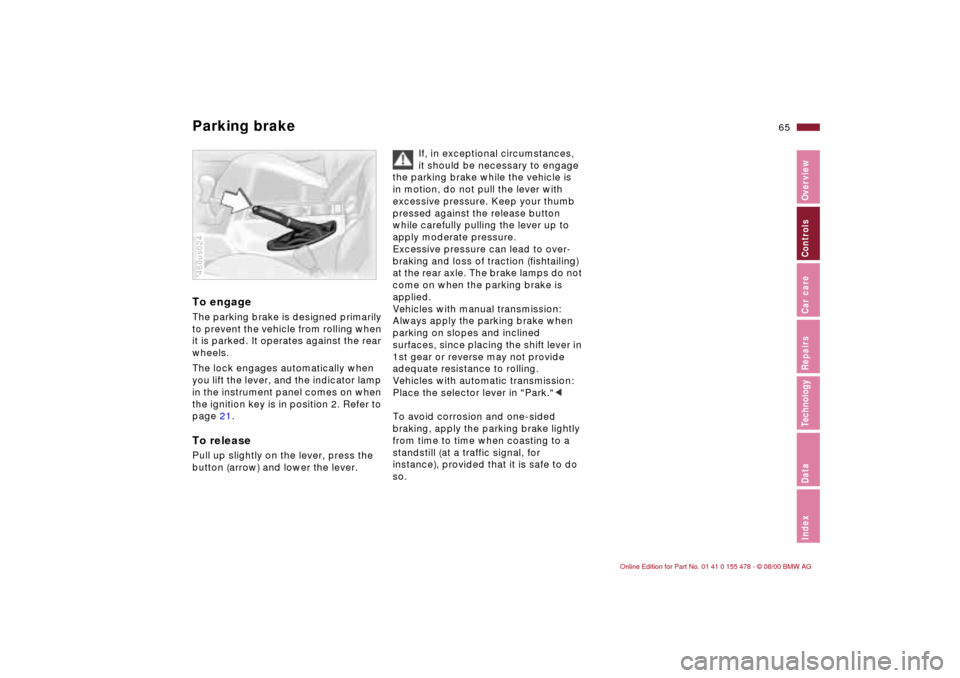
page 21.To releasePull up slightly on the lever, press the
button (arrow) and lower the lever.460us024
If, in exceptional circumstances,
it should be necessary to engage
the parking brake while the vehicle is
in motion, do not pull the lever with
excessive pressure. Keep your thumb
pressed against the release button
while carefully pulling the lever up to
apply moderate pressure.
Excessive pressure can lead to over-
braking and loss of traction (fishtailing)
at the rear axle. The brake lamps do not
come on when the parking brake is
applied.
Vehicles with manual transmission:
Always apply the parking brake when
parking on slopes and inclined
surfaces, since placing the shift lever in
1st gear or reverse may not provide
adequate resistance to rolling.
Vehicles with automatic transmission:
Place the selector lever in "Park."<
To avoid corrosion and one-sided
braking, apply the parking brake lightly
from time to time when coasting to a
standstill (at a traffic signal, for
instance), provided that it is safe to do
so.
Page 66 of 203

66n
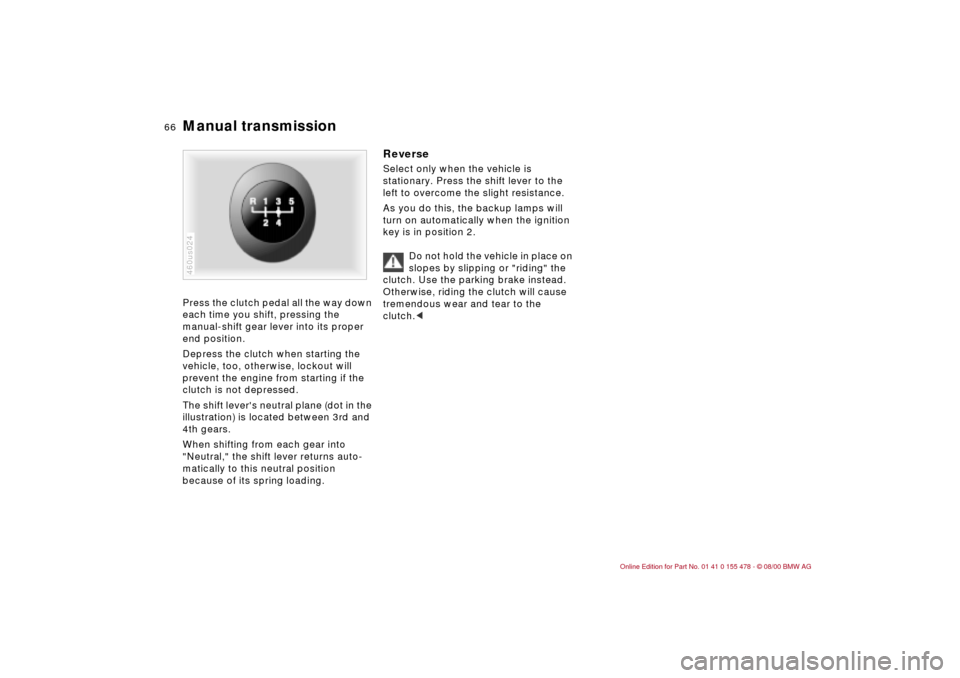
Manual transmission Press the clutch pedal all the way down
each time you shift, pressing the
manual-shift gear lever into its proper
end position.
Depress the clutch when starting the
vehicle, too, otherwise, lockout will
prevent the engine from starting if the
clutch is not depressed.
The shift lever's neutral plane (dot in the
illustration) is located between 3rd and
4th gears.
When shifting from each gear into
"Neutral," the shift lever returns auto-
matically to this neutral position
because of its spring loading.460us024
Reverse Select only when the vehicle is
stationary. Press the shift lever to the
left to overcome the slight resistance.
As you do this, the backup lamps will
turn on automatically when the ignition
key is in position 2.
Do not hold the vehicle in place on
slopes by slipping or "riding" the
clutch. Use the parking brake instead.
Otherwise, riding the clutch will cause
tremendous wear and tear to the
clutch.<
Page 72 of 203

72n
Washer/Wiper system Rear window defroster Cleaning headlamps
*
When the vehicle's lighting system is
switched on, the headlamps will also be
cleaned every fifth timecleaning wind-
shield is activated.
Do not use the washers if there
is any danger that the fluid will
freeze on the windshield. If you do so,
your vision could be obscured. Use an
antifreeze agent. Refer to page 134.
Do not use the washers if the reservoir
is empty, otherwise, the washer pump
could be damaged.
automatically when the ignition key is in
position 2.The illustration shows the button set-up
for vehicles equipped with automatic
climate control. For other layouts, refer
to page 90.To activatePress the button: as long as the indi-
cator lamp remains on, the rear window
defroster continues at high output
(rapid thaw).
After the indicator lamp goes out, the
defroster continues operating at
reduced power for a limited period
before deactivating automatically. 462us036
To deactivatePress the button if the indicator lamp is
on.
Page 76 of 203

76n
Fuel gauge Temperature gauge Service Interval Display When you switch on the ignition, the
indicator lamp comes on briefly to
confirm that the system is operational.
Once the indicator lamp stays on
continuously, there are still approx.
2 gallons (8 liters) of fuel remaining in
the fuel tank.
For fuel tank capacity, refer to page 187.
If the tilt of the vehicle varies (extended
driving in mountainous areas, for
example), there may be slight fluctua-
tions of the needle.
Fill the fuel tank well before it is
empty. Driving to the last drop of
fuel can result in damage to the engine
and/or the catalytic converter.<462us020
BlueThe engine is still cold. Drive at
moderate engine and vehicle speeds.RedWhen you switch on the ignition, the
indicator lamp comes on briefly to
confirm that the system is operational.
If the lamp comes on while operating
the vehicle: the engine is overheated.
Stop and switch the engine off immedi-
ately and allow it to cool down.Between the blue and red zonesNormal operating range. It is not
unusual for the needle to rise as far as
the edge of the red zone in response to
high outside temperatures or severe
operating conditions. Checking coolant
level: refer to page 137.460de082
Remaining distance for serviceThe displays shown in the illustration
appear for a few seconds when the
ignition key is in position 1 or after the
engine is started.
The next service due appears with the
message OILSERVICE or INSPECTION,
together with the distance remaining
before the next scheduled service.
The computer bases its calculations of
the remaining distance on the previous
driving style.
A flashing message and a "Ð" in front of
the number mean that the service
interval has already been exceeded by
the distance shown on the display.
Please contact your BMW center for an
appointment.46cus006
Page 77 of 203

77n
IndexDataTechnologyRepairsCar careControlsOverview
The following information and/or condi-
tions are indicated using symbols,
starting with the ignition key position 2,
until the condition has been corrected.
1 Inspect the low beam and high beam
headlamps, as well as the side lamps
2 Door open
3 Luggage compartment lid open
4 Check brake and tail lamps.
When you open the driver's door after
stopping with the lights still on, a
warning signal sounds for LIGHTS ON.462de272
Mode selectionFrom ignition key position 1 on, you can
call up information from the computer
using the button in the turn signal lever.
Every time you press the button briefly
in the direction of the steering column,
you can call up a new function for
display.
The displays appear in the following
order:
Time, outside temperature, average fuel
consumption, cruising range, average
vehicle speed.
From ignition key position 1 on, the last
active setting is displayed.46cde096
Check Control Computer
Page 81 of 203

81n
IndexDataTechnologyRepairsCar careControlsOverview
The conceptThe PDC assists you when you back
into a parking space. A signal warns
you of the distance to an obstacle. To
do this, four ultrasonic sensors in the
rear bumper measure the distance to
the nearest object. The range for the
sensors located at both rear corners
ends approx. 2 ft (60 cm) behind the
bumpers. The range for the two middle
sensors is slightly less than 4.9 ft
(1.50 meters).
The system starts to operate automati-
cally about one second after you select
reverse with the ignition key in posi-
tion 2. PDC is deactivated when you
shift back out of reverse.
Acoustical signalsThe distance to the nearest object is
indicated by a tone sounding at various
intervals. As the distance between
vehicle and object decreases, the
intervals between the tones become
shorter. A continuous tone indicates
the presence of an object less than 1 ft
(30 cm) away.
The warning signal is canceled after
approx. three seconds if the distance to
the obstacle remains constant during
this time (if you are moving parallel to
a wall, for instance).
System malfunctions will be indicated
by a continuous high-pitched tone
when the system is activated the first
time. Please refer the problem to your
BMW center.The PDC does not remove the
driver's personal responsibility for
evaluating the distance between the
vehicle and any obstacles. Even when
sensors are involved, there is a blind
spot in which objects cannot be
detected. This applies especially in
those cases where the system
approaches the physical limits of ultra-
sonic measurement, as occurs with tow
bars and trailer couplings, and in the
vicinity of thin and painted objects.
Certain sources of sound, such as a
loud radio, could drown the PDC signal
tone.<
Keep the sensors clean and free
of ice or snow in order to ensure
that they continue to operate effec-
tively.
Do not subject the sensors to high-
pressure washers for a prolonged
period of time. Always maintain a
distance of more than 4 in (10 cm).<
Park Distance Control (PDC)
*