2001 BMW 330Ci COUPE Luggage compartment lid
[x] Cancel search: Luggage compartment lidPage 39 of 203

39n
IndexDataTechnologyRepairsCar careControlsOverview
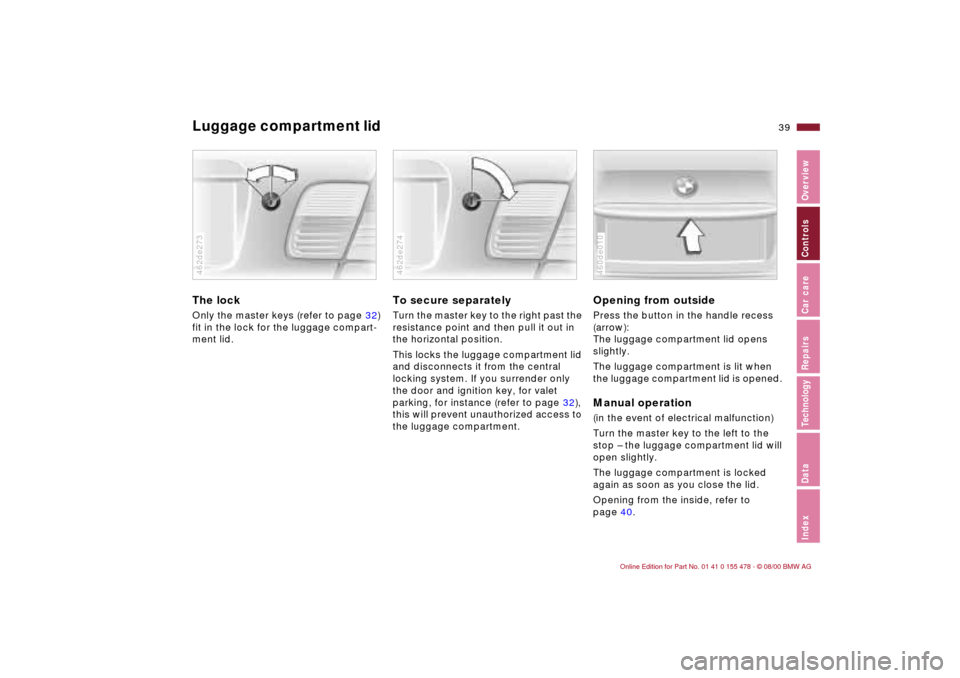
Luggage compartment lid The lock Only the master keys (refer to page 32)
fit in the lock for the luggage compart-
ment lid.462de273
To secure separatelyTurn the master key to the right past the
resistance point and then pull it out in
the horizontal position.
This locks the luggage compartment lid
and disconnects it from the central
locking system. If you surrender only
the door and ignition key, for valet
parking, for instance (refer to page 32),
this will prevent unauthorized access to
the luggage compartment.46cde001462de274
Opening from outsidePress the button in the handle recess
(arrow):
The luggage compartment lid opens
slightly.
The luggage compartment is lit when
the luggage compartment lid is opened. Manual operation(in the event of electrical malfunction)
Turn the master key to the left to the
stop Ð the luggage compartment lid will
open slightly.
The luggage compartment is locked
again as soon as you close the lid.
Opening from the inside, refer to
page 40.06cde010460de010
Page 40 of 203

40n
Luggage compartment lidOpening from the inside
*
If the luggage compartment lid has not
been locked separately, you can open it
with this button in the footwell on the
driver's side when the vehicle is
stationary.460de011
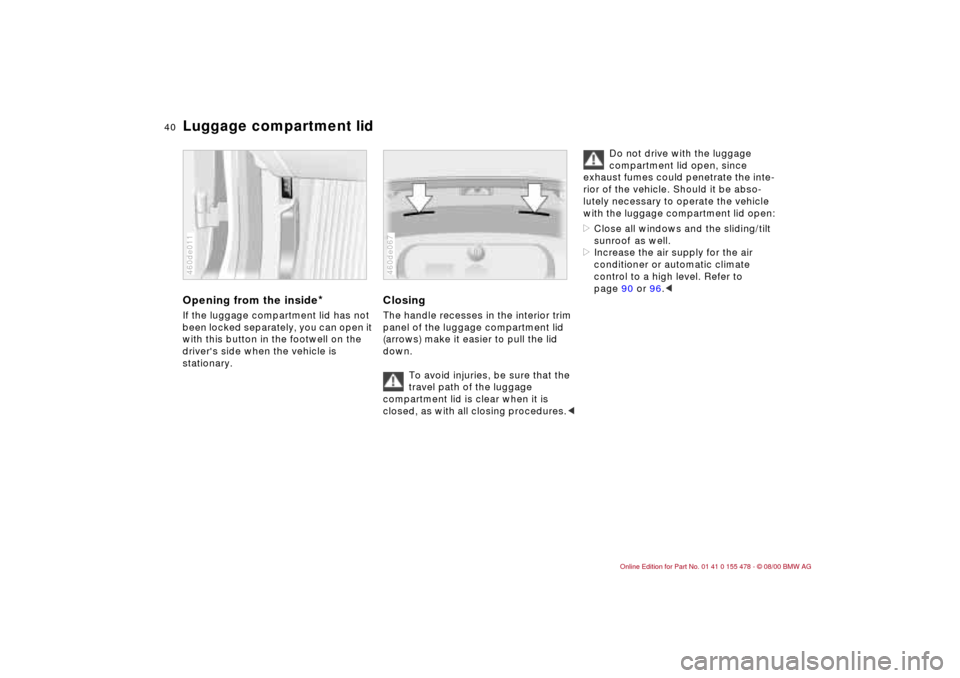
ClosingThe handle recesses in the interior trim
panel of the luggage compartment lid
(arrows) make it easier to pull the lid
down.
To avoid injuries, be sure that the
travel path of the luggage
compartment lid is clear when it is
closed, as with all closing procedures.<460de067
Do not drive with the luggage
compartment lid open, since
exhaust fumes could penetrate the inte-
rior of the vehicle. Should it be abso-
lutely necessary to operate the vehicle
with the luggage compartment lid open:
>Close all windows and the sliding/tilt
sunroof
as well.
>Increase the air supply for the air
conditioner or automatic climate
control to a high level. Refer to
page 90 or 96.<
Page 42 of 203

42n
Alarm system
*
The conceptThe vehicle alarm system responds:
>When a door, the hood or the
luggage compartment lid is opened.
>To movement inside the vehicle
(interior motion sensor).
>To a change of the vehicle's tilt Ð if
someone attempts to steal the
wheels or tow the vehicle without
authorization, for example.
>If there is an interruption in battery
voltage.
The system responds to unauthorized
vehicle entry and attempted theft by
simultaneously activating the following:
>Sounding an alarm for 30 seconds.
>The hazard warning flashers are acti-
vated for approx. five minutes.
>The high beams flash on and off in
sync with the hazard warning flashers.
To activate and deactivate the
alarm systemWhen the vehicle is locked or unlocked
by using a key or with the remote
control, the alarm system is also simul-
taneously armed or disarmed.
The interior motion sensor and the tilt
alarm sensor are activated approx.
30 seconds after you have finished
locking the vehicle.
If the alarm system has been armed
correctly, the hazard warning flashers
flash once.
You can have a signal set as
acknowledgment for both arming
and disarming the alarm system.<
You can also open the luggage
compartment lid when the system is
armed by pressing button 3 of the
remote control (refer to page 37). When
it is closed, the lid is once again
secured.
Indicator lamp displaysThe indicator lamp is located under the
interior rearview mirror.
>When the indicator lamp flashes
continuously: the system is armed.
>If the indicator lamp flashes during
arming of the system: the door(s), the
hood or luggage compartment lid are
not properly closed. Even if you do
not close the indicated area, the
system begins to monitor the
remaining areas, and the indicator
lamp flashes continuously after
>10 seconds. However, the interior
motion sensor is not activated.
>If the indicator lamp goes out when
the system is disarmed: no manipula-
tion or attempted intrusions have
been detected in the period since the
system was armed.463us010
Page 77 of 203

77n
IndexDataTechnologyRepairsCar careControlsOverview
The following information and/or condi-
tions are indicated using symbols,
starting with the ignition key position 2,
until the condition has been corrected.
1 Inspect the low beam and high beam
headlamps, as well as the side lamps
2 Door open
3 Luggage compartment lid open
4 Check brake and tail lamps.
When you open the driver's door after
stopping with the lights still on, a
warning signal sounds for LIGHTS ON.462de272
Mode selectionFrom ignition key position 1 on, you can
call up information from the computer
using the button in the turn signal lever.
Every time you press the button briefly
in the direction of the steering column,
you can call up a new function for
display.
The displays appear in the following
order:
Time, outside temperature, average fuel
consumption, cruising range, average
vehicle speed.
From ignition key position 1 on, the last
active setting is displayed.46cde096
Check Control Computer
Page 109 of 203

109n
IndexDataTechnologyRepairsCar careControlsOverview
Cargo loading Roof-mounted luggage rack
*
Always position and secure the
load correctly. If you do not, it can
endanger the passengers during
braking or evasive maneuvers.
Do not exceed the permissible gross
weight and axle loads (refer to
page 186), otherwise the vehicle's oper-
ating safety is no longer assured and
you are in violation of the law.
Do not stow heavy or hard objects in
the passenger compartment without
securing them. Otherwise they would
be thrown around during braking and
evasive maneuvers and endanger the
occupants.<
AnchorsAccess to the anchors:
To open the cover (arrow) please use
the tool included with the roof-rack
system.
A special roof-rack system is available
for your BMW as an optional extra.
Please comply with the precautions
included with the installation instruc-
tions.
Because roof racks raise the center of
gravity of the vehicle when loaded, they
exercise a major effect on its handling
and steering response.
You should therefore always remember
not to exceed the approved roof
weight, the approved gross vehicle
weight or the axle loads when loading
the rack. Pertinent specifications are 462de271
listed under "Technical Data,"
page 186.
Make sure that the load is not too
heavy, and attempt to distribute it
evenly.
Always load the heaviest pieces first (on
the bottom). Be sure that adequate
clearance is maintained for raising the
sliding/tilt sunroof, and that objects do
not project into the opening path of the
luggage compartment lid.
Secure the roof luggage correctly and
securely to prevent it from shifting or
being lost during driving (danger to
following traffic).
Drive smoothly and avoid sudden
acceleration or braking. Do not corner
at high speeds.
The roof load increases aerodynamic
resistance, which in turn increases fuel
consumption and places additional
stress on the vehicle itself.
Page 119 of 203

119n
IndexDataTechnologyRepairsCar careControlsOverview
Winter operationThe onset of winter is often accompa-
nied by rapid changes in weather.
Adaptations in driving style should be
accompanied by preparations on the
vehicle itself to ensure that your
progress through the winter remains
safe and trouble-free.CoolantBe sure that the coolant mixture
contains the year-round ratio of 50:50
water and extended-duty antifreeze/
corrosion protection. This mixture
provides protection against freezing
down to approx. Ð34 7 (Ð37 6).
Replace the coolant every four years.LocksBMW door lock deicer can be used to
free them if frozen. This deicer also
contains lubricant.
After using the deicer, we recommend
you treat the door lock with BMW lock
cylinder lubricant.
Rubber seals and components To prevent the weather-stripping from
freezing, apply a spray-on rubber treat-
ment or silicone spray to the door, hood
and luggage compartment lid seals.
A full range of car care products is
available from your BMW center.
BMW snow chains can be mounted on
both summer and winter tires. Mount
them in pairs on the rear wheels only
and comply with the manufacturer's
safety precautions. Do not exceed a
maximum speed of 30 mph (50 km/h).
In this rare situation, it may be effective
to deactivate the ASC+T/DSC system
for a brief period of time. Refer to
page 82.
Starting offWhen starting up from a full stop in
deep snow or when "rocking" the
vehicle to free it, it may be effective to
deactivate the ASC+T/DSC system for
a brief period of time. Refer to page 82.Driving on low-traction road
surfacesUse smooth, gentle pressure to control
the accelerator pedal. Avoid excessive
engine speeds and shift to the next
higher gear at an early point. On down-
hill grades or slopes, shift down to the
next lower gear at an early point. Main-
tain an adequate distance between
yourself and the vehicle ahead.
Page 152 of 203

152n
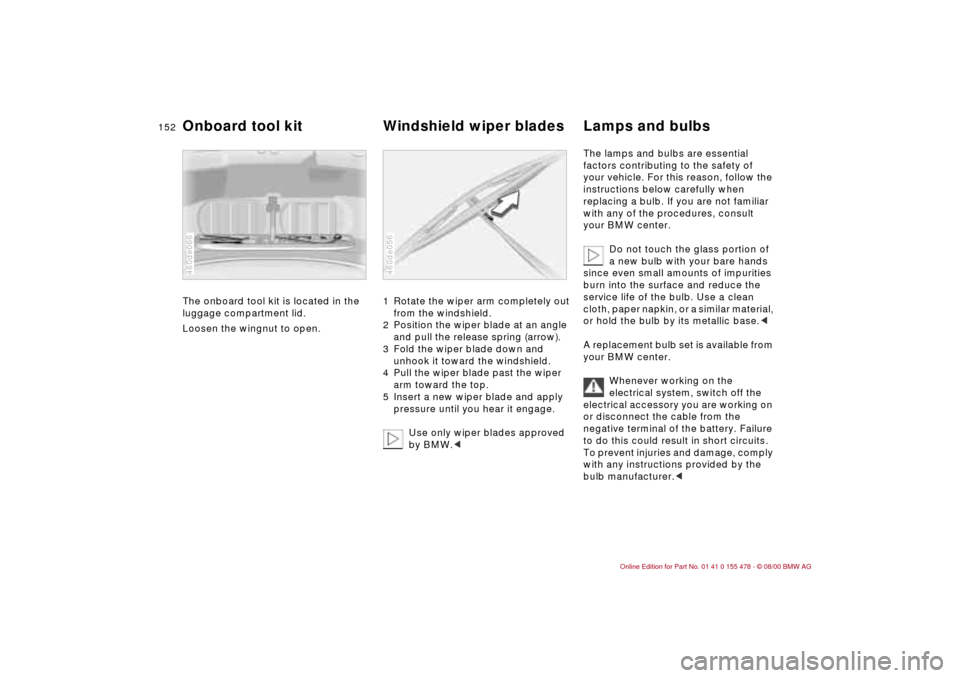
The onboard tool kit is located in the
luggage compartment lid.
Loosen the wingnut to open.
460de066
1 Rotate the wiper arm completely out
from the windshield.
2 Position the wiper blade at an angle
and pull the release spring (arrow).
3 Fold the wiper blade down and
unhook it toward the windshield.
4 Pull the wiper blade past the wiper
arm toward the top.
5 Insert a new wiper blade and apply
pressure until you hear it engage.
Use only wiper blades approved
by BMW.<460de056
The lamps and bulbs are essential
factors contributing to the safety of
your vehicle. For this reason, follow the
instructions below carefully when
replacing a bulb. If you are not familiar
with any of the procedures, consult
your BMW center.
Do not touch the glass portion of
a new bulb with your bare hands
since even small amounts of impurities
burn into the surface and reduce the
service life of the bulb. Use a clean
cloth, paper napkin, or a similar material,
or hold the bulb by its metallic base.<
A replacement bulb set is available from
your BMW center.
Whenever working on the
electrical system, switch off the
electrical accessory you are working on
or disconnect the cable from the
negative terminal of the battery. Failure
to do this could result in short circuits.
To prevent injuries and damage, comply
with any instructions provided by the
bulb manufacturer.<
Onboard tool kit Windshield wiper blades Lamps and bulbs
Page 156 of 203

156n
Lamps and bulbsThe illustration shows the right-hand
luggage compartment opening.
Bulbs in the fender:
All of the bulbs are integrated in a
central bulb holder.
1 Release the bulb holder (arrow,
partial view) and remove.
2 Unplug the power supply receptacle.
Set the bulb holder aside (on the
luggage compartment floor, for
example).
3 Applying light pressure, turn the bulb
to the left. Remove and exchange the
bulb.
4 Plug in the power supply receptacle.
5 Position the bulb holder for reinstalla-
tion. Apply gentle pressure on the
button (arrow, partial view) until you
hear it engage.460de057
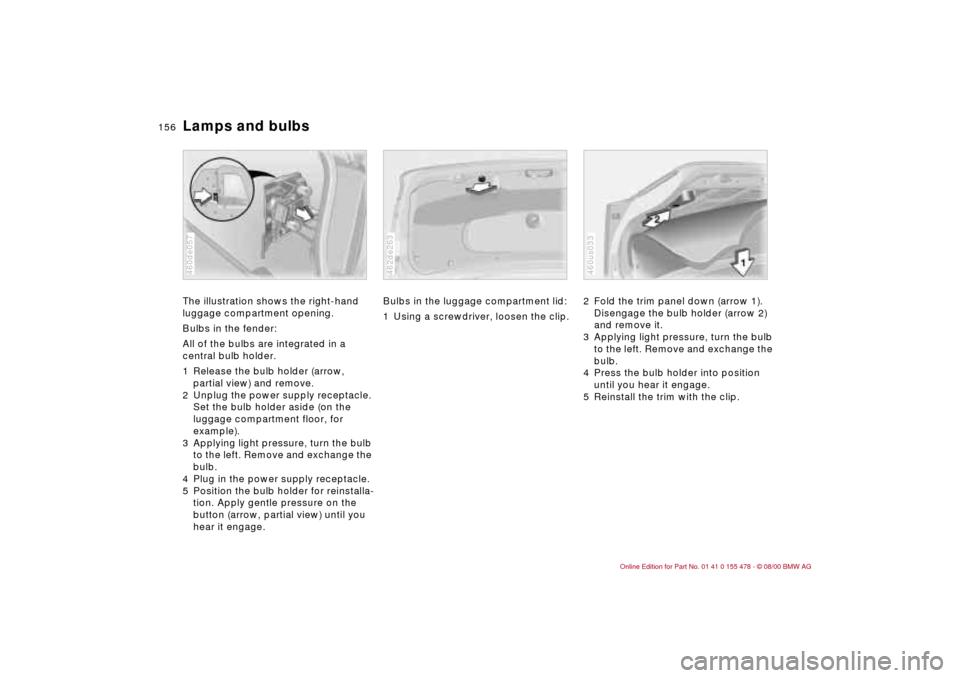
Bulbs in the luggage compartment lid:
1 Using a screwdriver, loosen the clip.462de263
2 Fold the trim panel down (arrow 1).
Disengage the bulb holder (arrow 2)
and remove it.
3 Applying light pressure, turn the bulb
to the left. Remove and exchange the
bulb.
4 Press the bulb holder into position
until you hear it engage.
5 Reinstall the trim with the clip.460us033