Page 10 of 203

Contents
Overview
Controls and features
Cockpit16
Instrument cluster18
Indicator and warning lamps20
Multifunction steering wheel
(MFL)24
Hazard warning flashers25
Warning triangle25
First-aid kit25
Refueling26
Fuel specifications27
Tire inflation pressure28
Opening and closing:
Keys32
Electronic vehicle
immobilizer33
Central locking system34
Opening and closing Ð from the
outside34
Opening and closing Ð from the
inside38
Luggage compartment lid39
Luggage compartment41
Alarm system42
Electric power windows44
Sliding/Tilt sunroof45
Adjusting:
Seats47
Seat and mirror memory51
Steering wheel52
Mirrors52
Car Memory, Key Memory54
Passenger safety systems:
Safety belts55
Airbags57
Transporting children safely60
Driving:
Steering/Ignition lock63
Starting the engine63
Switching off the engine64
Parking brake65
Manual transmission66
Automatic transmission with
Steptronic67
Turn signal indicator/Headlamp
flasher70
Washer/Wiper system70
Rear window defroster72
Cruise control73
Everything under control:
Odometer75
Tachometer75
Energy Control75
Fuel gauge76
Temperature gauge76
Service Interval Display76
Check Control77
Computer77
Technology for driving comfort
and safety:
Park Distance Control (PDC)81
Automatic Stability Control plus
Traction (ASC+T)82
Dynamic Stability Control
(DSC)83
Tire Pressure Control (RDC)85
Contents
Page 15 of 203
Overview
Controls and features
Operation, care
and maintenance
Owner service procedures
Technical data
Index Advanced technology
15n
IndexDataTechnologyRepairsCar careControlsOverview
Cockpit16
Instrument cluster18
Indicator and warning lamps20
Multifunction steering wheel
(MFL)24
Hazard warning flashers25
Warning triangle25
First-aid kit25
Refueling26
Fuel specifications27
Tire inflation pressure28
Overview
Page 18 of 203
18n
Instrument cluster 462us034
Page 19 of 203

19n
IndexDataTechnologyRepairsCar careControlsOverview
Instrument cluster
1 Fuel gauge with indicator lamp
for fuel reserve76
2 Indicator lamp for turn signal
indicator23
3 Speedometer
4 Indicator lamp for:
>
Battery charge current20
>
High beams23
>
Engine oil pressure/Engine oil
level20, 22
5 Tachometer and Energy control75
6 Engine coolant temperature gauge
with "Coolant temperature too high"
indicator76
7 Indicator and warning lamps
(clockwise) for:
>
Parking brake/Brake hydraulic
system/Cornering Brake Control
(CBC/DBC)20
>
Antilock Brake System (ABS)22 > Brake pads22
>
Tire Pressure Control
(RDC)
*
20, 22
>
Airbags21
>
Please fasten safety belts21
>
Cruise control23
8 Set button for the clock789 Program display for automatic
transmission
*
69
Indicator lamp for automatic
transmission
*
21, 69
10 Indicator lamp for Automatic
Stability Control plus Traction
(ASC+T)/Dynamic Stability Control
(DSC)
*
and ADB22
11 Indicator for:
>
Odometer75
>
Trip odometer75
>
Clock78
>
Service Interval76
Indicator for computer, operation
using the turn signal lever, refer to
page 77:
>
Clock
>
Outside temperature
>
Average fuel consumption
> Range >
Average speed
12 Indicator for Check Control77
13 Trip odometer, reset to zero7514 Indicator and warning lamps
(clockwise) for:
>
Front fog lamps23
>
Add washer fluid22
>
Coolant level23
>
Electronic Throttle Control
(EML)
*
23
>
Service Engine Soon22
You can display the outside
temperature and distance driven
in different units of measurement.
<
Page 68 of 203

68n
Automatic transmission with Steptronic
*
D Drive (automatic shift program)This position is designed for driving
under all normal operating conditions.
All forward gears are available, the
Adaptive Transmission Control (ATC) is
fully operational."Kickdown"In the "Kickdown" mode, you achieve
maximum performance. To activate this
mode, depress the accelerator pedal
beyond the full-throttle position, at
which a resistance point must be
overcome.
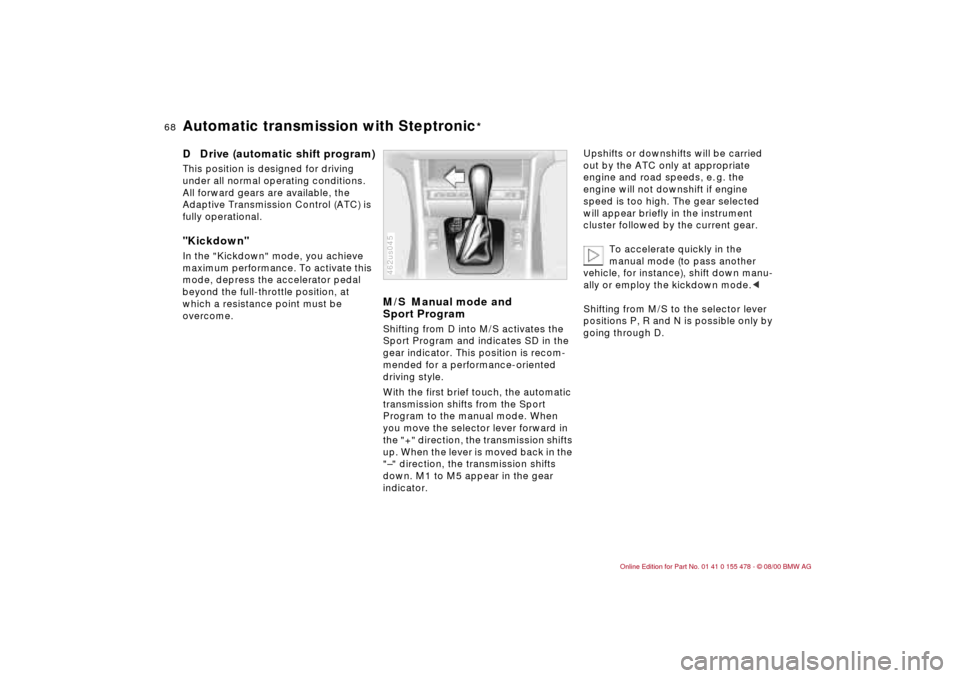
M/S Manual mode and
Sport ProgramShifting from D into M/S activates the
Sport Program and indicates SD in the
gear indicator. This position is recom-
mended for a performance-oriented
driving style.
With the first brief touch, the automatic
transmission shifts from the Sport
Program to the manual mode. When
you move the selector lever forward in
the "+" direction, the transmission shifts
up. When the lever is moved back in the
"Ð" direction, the transmission shifts
down. M1 to M5 appear in the gear
indicator.462us045
Upshifts or downshifts will be carried
out by the ATC only at appropriate
engine and road speeds, e. g. the
engine will not downshift if engine
speed is too high. The gear selected
will appear briefly in the instrument
cluster followed by the current gear.
To accelerate quickly in the
manual mode (to pass another
vehicle, for instance), shift down manu-
ally or employ the kickdown mode.<
Shifting from M/S to the selector lever
positions P, R and N is possible only by
going through D.
Page 73 of 203

73n
IndexDataTechnologyRepairsCar careControlsOverview
Cruise controlStarting at about 20 mph (30 km/h), you
can maintain and store any vehicle
speed that you specify.
Do not use cruise control on
twisting roads, when high traffic
density prevents driving at a constant
speed, when the road surface is slick
(snow, rain, ice), or when the road
surface is loose (rocks, sand).
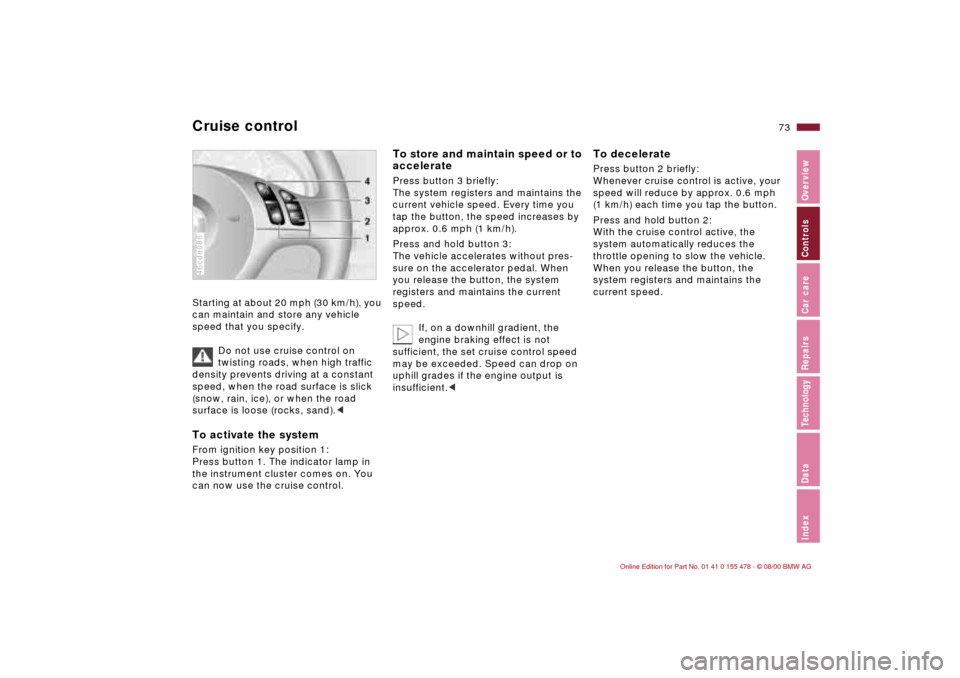
Press button 1. The indicator lamp in
the instrument cluster comes on. You
can now use the cruise control.46cde086
To store and maintain speed or to
acceleratePress button 3 briefly:
The system registers and maintains the
current vehicle speed. Every time you
tap the button, the speed increases by
approx. 0.6 mph (1 km/h).
Press and hold button 3:
The vehicle accelerates without pres-
sure on the accelerator pedal. When
you release the button, the system
registers and maintains the current
speed.
If, on a downhill gradient, the
engine braking effect is not
sufficient, the set cruise control speed
may be exceeded. Speed can drop on
uphill grades if the engine output is
insufficient.<
To deceleratePress button 2 briefly:
Whenever cruise control is active, your
speed will reduce by approx. 0.6 mph
(1 km/h) each time you tap the button.
Press and hold button 2:
With the cruise control active, the
system automatically reduces the
throttle opening to slow the vehicle.
When you release the button, the
system registers and maintains the
current speed.
Page 75 of 203
75n
IndexDataTechnologyRepairsCar careControlsOverview
1 Odometer You can activate the displays shown in
the illustration with the ignition key in
position 0 by pressing the button in the
instrument cluster (arrow).2 Trip odometerTo reset the trip odometer to zero,
press the button (arrow) with the igni-
tion key in position 1 and up.462us005
Avoid engine speeds in the red warning
zone of the gauge.
To protect the engine, the fuel supply is
automatically interrupted in this zone;
you will notice a loss of power.462us017
Indicates current fuel consumption in
mpg (in l/100 km on Canadian vehicles).
You can check your current driving
style to see whether it is conducive to
economy and minimum exhaust emis-
sions.
When the vehicle is stationary, the
display goes to "Maximum" (zero on
Canadian vehicles).462us018
Odometer Tachometer Energy Control
Page 78 of 203
78n
ComputerClockIf you wish to have a permanent time
display, you can make this adjustment
in the radio display (refer to the Radio
Owner's Manual).
You can adjust the clock and the time
display in the car radio as follows.
Adjustments From ignition key position 1:
To set ahead: turn the right button to
the right.
To set back: turn the right button to the
left.
The adjustment speed will increase the
longer you hold the button down.
To change the display mode: press the
knob briefly.
Every time you press the knob, the
clock display alternates between the
12-hour or 24-hour mode.
In ignition key position 0: the time is
displayed for a few seconds after you
press the left button (refer to "Odom-
eter" on page 75).46cus007
Outside temperature You can change the units of measure
(6/7) for the outside temperature
display by pressing the right-hand reset
button in the instrument cluster while
the temperature display is active.46cus008