2001 BMW 330Ci CONVERTIBLE tow
[x] Cancel search: towPage 58 of 215

58n
MirrorsYou can also adjust the mirrors manu-
ally by pressing against the outer edges
of their lenses.
The mirror on the passenger's
side features a lens with a more
convex surface than the mirror installed
on the driver's side. When estimating
the distance between yourself and
other traffic, bear in mind that the
objects reflected in the mirror are closer
than they appear. Estimations of the
distance to following traffic should
therefore not be regarded as precise.
Interior rearview mirror To reduce glare from vehicles behind
you when driving at night, tilt the mirror
by turning the rotary button.Sun visorsThese can be folded down toward the
windshield and swiveled out against the
side window.46cus034
Interior rearview mirror with
automatic dimming feature
*
By responding to the effects of ambient
light and the glare from following traffic,
this mirror automatically dims through
an infinitely-variable range.
The mirror switches to its clear,
undimmed mode whenever the trans-
mission is placed in reverse gear
(selector lever in "Reverse").
To ensure that the mirror continues to
operate properly, keep the two photo-
cells clean and unobstructed. One
photocell (arrow) is in the mirror glass,
while the other is offset somewhat on
the other side of the mirror.
For addition information on the electro-
chromic technology used in this mirror,
refer to page 191.46cde023
Page 67 of 215

67n
IndexDataTechnologyRepairsCar careControlsOverview
Rollover protection systemIn the event of an accident or some
other critical driving situation (extreme
tilting in the longitudinal or transverse
axis, loss of contact with the ground),
the rollover protection system will be
automatically activated. The protective
bars located in the rear headrests
extend within fractions of a second.
In addition to the integrated rollover bar
in the windshield frame, the rollover
protection system gives all the vehicle
occupants the necessary headroom.
Always keep the travel path clear
for the rollover protection system.
Under no circumstances should you
cover the headrests.
In the event of less serious accidents,
the safety belt will protect you and,
depending on the severity of the acci-
dent, so will the safety belt tensioner
and the multi-stage airbag restraint
system.c
If, after being automatically triggered,
the protective function is not needed,
then the rollover protection system can
be lowered back into place. No special
tool is needed for this.
1 Using a screwdriver from the on-
board tool kit, remove the cover
panel; to do this, position the screw-
driver under the notch (arrow).46cde007
2Pull the lever (arrow) toward the front
of the car and hold it in this position.46cde006
Page 75 of 215

75n
IndexDataTechnologyRepairsCar careControlsOverview
Automatic transmission with Steptronic
*
In the following situations, the Step-
tronic "thinks" for you in the manual
mode:
>In order to prevent the engine from
overrevving, the transmission shifts
automatically to the next higher gear
just before the RPM cutoff point.
>At low speeds, the transmission
shifts down automatically and you do
not have to act
>In the "kickdown" mode, the trans-
mission shifts down to the lowest
gear which is possible, depending on
the engine speed.
>Depending on the situation Ñ when
driving in adverse winter conditions,
for example Ñ you may also start out
in 2nd or 3rd gear.
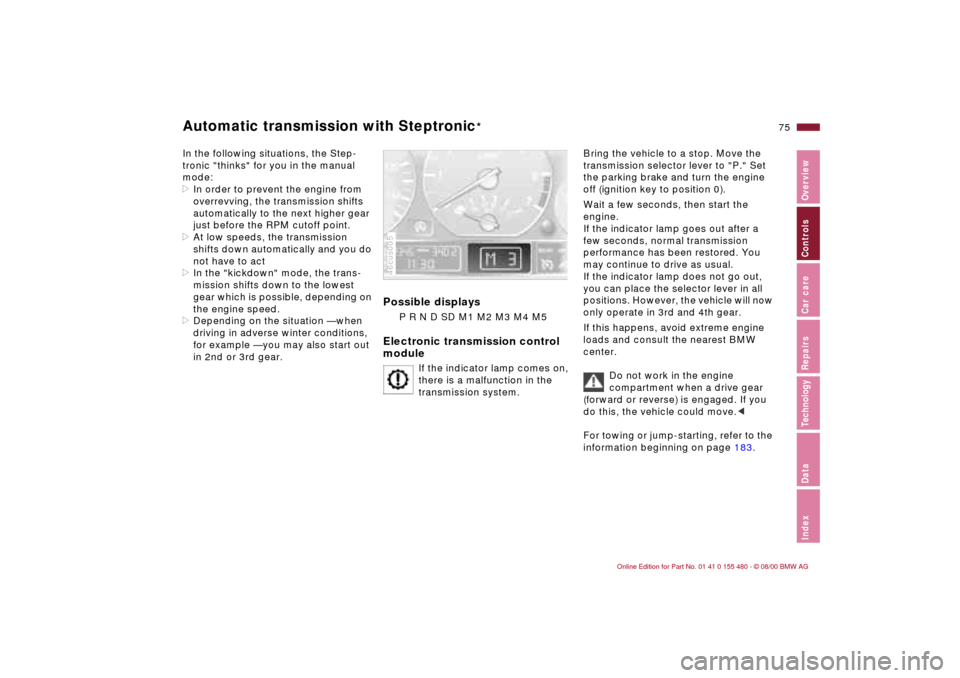
Possible displays
P R N D SD M1 M2 M3 M4 M5
Electronic transmission control
module
If the indicator lamp comes on,
there is a malfunction in the
transmission system.
46cus005
Bring the vehicle to a stop. Move the
transmission selector lever to "P." Set
the parking brake and turn the engine
off (ignition key to position 0).
Wait a few seconds, then start the
engine.
If the indicator lamp goes out after a
few seconds, normal transmission
performance has been restored. You
may continue to drive as usual.
If the indicator lamp does not go out,
you can place the selector lever in all
positions. However, the vehicle will now
only operate in 3rd and 4th gear.
If this happens, avoid extreme engine
loads and consult the nearest BMW
center.
Do not work in the engine
compartment when a drive gear
(forward or reverse) is engaged. If you
do this, the vehicle could move.<
For towing or jump-starting, refer to the
information beginning on page 183.
Page 87 of 215

87n
IndexDataTechnologyRepairsCar careControlsOverview
The conceptThe PDC assists you when you back
into a parking space. A signal warns
you of the distance to an obstacle. To
do this, four ultrasonic sensors in the
rear bumper measure the distance to
the nearest object. The range for the
sensors located at both rear corners
ends approx. 2 ft (60 cm) behind the
bumpers. The two center sensors
cover a distance of approx. 4.9 ft
(1.50 meters).
The system starts to operate automati-
cally about one second after you select
reverse with the ignition key in posi-
tion 2. PDC is deactivated when you
shift back out of reverse.
Acoustical signalsThe distance to the nearest object is
indicated by a tone sounding at various
intervals. As the distance between
vehicle and object decreases, the
intervals between the tones become
shorter. A continuous tone indicates
the presence of an object less than 1 ft
(30 cm) away.
The warning signal is canceled after
approx. three seconds if the distance to
the obstacle remains constant during
this time (if you are moving parallel to
a wall, for instance).
System malfunctions will be indicated
by a continuous high-pitched tone
when the system is activated the first
time. Please refer the problem to your
BMW center.The PDC does not remove the
driver's personal responsibility for
evaluating the distance between the
vehicle and any obstacles. Even when
sensors are involved, there is a blind
spot in which objects cannot be
detected. This applies especially in
those cases where the system
approaches the physical limits of ultra-
sonic measurement, as occurs with tow
bars and trailer couplings, and in the
vicinity of thin and painted objects.
Certain sources of sound, such as a
loud radio, could drown the PDC signal
tone.<
Keep the sensors clean and free
of ice or snow in order to ensure
that they continue to operate effec-
tively.
Do not subject the sensors to high-
pressure washers for a prolonged
period of time. Always maintain a
distance of more than 4 in (10 cm).<
Park Distance Control (PDC)
*
Page 97 of 215

97n
IndexDataTechnologyRepairsCar careControlsOverview
Air conditioner1 Air onto the windshield and onto the
side windows
2 Air for the upper body area
The side rotary dials open and close
the air supply through an infinitely-
variable range; the levers will change
the direction of the air flow. The
center rotary dial controls the
temperature of the air as it flows out.
Refer to page 98
3 Air for the front footwell
There are also vent outlets for the
rear footwell as well
4 Air supply
Heating and ventilation are available
starting with position 1. Refer to
page 98
5 Temperature98
6 Air distribution toward
>the windows
>the upper body
>the footwell
All intermediate settings are possible.
Refer to page 98
7 Rear window defroster98
8 Air conditioner98
9 Recirculated-air mode98
Page 98 of 215

98n
Air conditionerAir supply
You can select blower speeds
from 1 to 4. The heating and
ventilation become more and
more effective as the air
supply settings are increased. In posi-
tion 0, the blower and the heater are
switched off. By using position 0, you
can totally block the interior ventilation
outlets by pressing the button for the
recirculated-air mode.
Temperature
In order to increase the
temperature of the passenger
compartment, turn it to the
right (red). Temperature regu-
lation will keep the interior temperature
you have selected constant.
Air distribution
You can direct air to flow onto
the windows , toward the
upper body and into the
footwell . All intermediate
settings are possible. In the setting,
there is a low flow of air onto the
windows to keep them free of conden-
sation. The "6 o'clock" setting is recom-
mended as a normal setting (refer also
to the illustration and overview on
page 96).
Rear window defroster
When the rear window defroster
is activated, the indicator lamp
comes on. The rear window defroster
switches off automatically. Refer to
page 78.
Air conditioner
The air is cooled and dehumidi-
fied and Ð depending on the
temperature setting Ð rewarmed when
the air conditioner is switched on.
Depending on the weather, the wind-
shield may fog over briefly when the
engine is started.
Use the button to switch the air condi-
tioner off at outside temperatures
below approx. 41 7 (+5 6). This will
help to prevent the windows from
fogging up.
If the windows fog over after switching
the air conditioner off, switch it back
on.
Condensation forms in the air
conditioner system during opera-
tion, which then exits under the vehicle.
Traces of condensed water of this kind
are thus normal.
<< < <
Recirculated-air mode
You can respond to unpleasant
external odors by temporarily
blocking the outside air. The system
then recirculates the air already within
the vehicle.
If the windows fog over in the
recirculated air mode, switch this
mode off and increase the air supply as
required.<< < <
Page 104 of 215

104n
Automatic climate control
*
Tips for pleasant drivingUse the automatic system (switch on
AUTO-button 7). Select an interior
temperature that is comfortable for
you Ñ e. g. 72 7 (+22 6). Whenever
the outside temperature is above 41 7
(+5 6), you can also use the air condi-
tioner 12. This will dry the air as well as
preventing condensation on the
window surfaces Ð if there are passen-
gers with damp clothing, for example.
Set the air outlets 2 so that the air flows
past you and is not directed straight at
you. Set the rotary dial between the air
outlets 2 for the upper body to a
medium position, since air that is some-
what cooler promotes driving without
fatigue.
Detailed setting options are described
for you in the following section.
Automatic air distribution
The AUTO program assumes
the adjustment of the air distri-
bution and the air supply for you and in
addition adapts the temperature to
external influences (summer, winter) to
meet preferences you can specify. This
program maintains a comfortable in-car
climate regardless of the season. Select
an interior temperature that is comfort-
able for you Ñ e. g. 72 7 (+22 6). The
temperature selected and AUTO for
the air supply appear in display 10,
refer to the overview on page 102.
Open the air outlets for the upper body
area. Switch on the air conditioner in
warm weather. The maximum cooling
capacity is achieved when you set
rotary dial 3 (refer to page 106) to cold.
Individual air distribution
You can cancel the AUTO
program by selecting specific
distribution patterns to suit your
own individual requirements.
You can direct air to flow onto the
windows , toward the upper body
, and into the footwell .
Temperature
The figures in the display
provide a general indication of
interior temperature. We recommend
72 7 (+22 6) as a comfortable
setting, even if the air conditioner is on.
When you start the vehicle, the system
ensures that the selected temperature
is reached as quickly as possible. It
then maintains this temperature,
regardless of the season.
Set rotary dial 3 (refer to "Draft-free
ventilation" on page 106) to a medium
setting, since air that is somewhat
cooler promotes driving without fatigue.
You can use this setting for mixing air to
make minor comfort modifications.
You can set uncontrolled heater
output up to 90 7 (+32 6). The
air conditioner is at full cooling output
at 60 7 (+16 6).<
Page 114 of 215

114n
Ski bag
*
Cargo loading
When reattaching the filler piece,
guide both bars into the guide and
press the filler piece back into place.
Secure the safety belts in their holders
again.<
46cde067
Stowing cargo If you are transporting a load in your
BMW:
>Load heavy cargo as far forward as
possible Ð directly behind the back-
rests or the luggage compartment
partition Ð and as low as possible.
>Cover sharp edges and corners.46cde063
With the convertible top closed,
you can increase the space in
your luggage compartment. Refer to
page 41.
We recommend that you always fold
the convertible top compartment panel
down as soon as you have removed
your cargo from the luggage compart-
ment. This way, you can be sure that
you can always operate the convertible
top at any time.
Conversely, when the convertible top is
closed, raise the convertible top
compartment panel before stowing
your cargo in the luggage compartment
to avoid any damage to the convertible
top compartment or your load.<