2001 BMW 325i TOURING light
[x] Cancel search: lightPage 61 of 203

61n
IndexDataTechnologyRepairsCar careControlsOverview
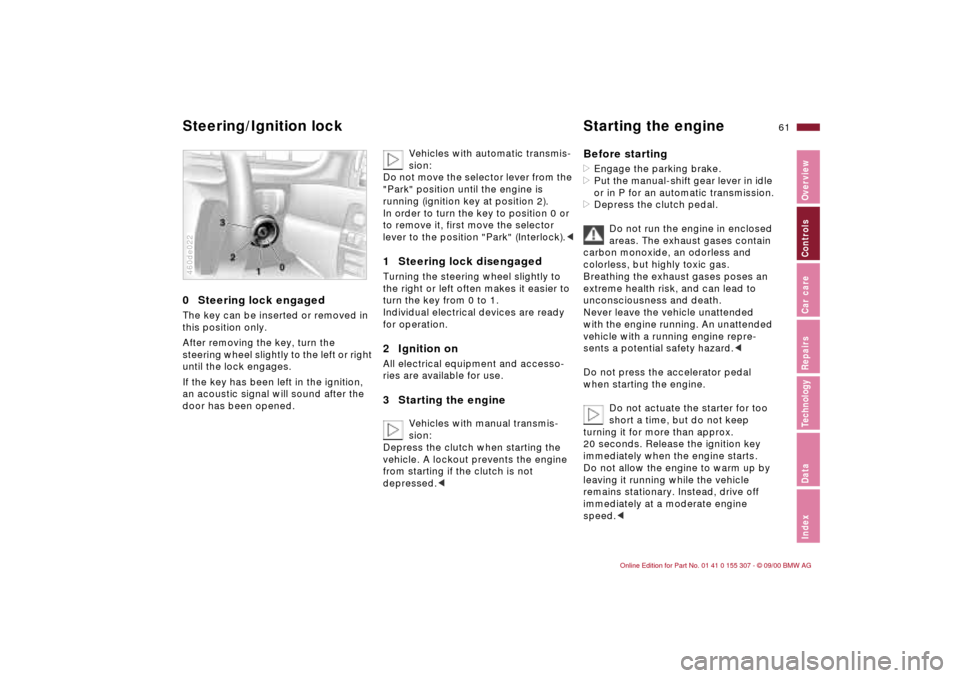
0 Steering lock engaged The key can be inserted or removed in
this position only.
After removing the key, turn the
steering wheel slightly to the left or right
until the lock engages.
If the key has been left in the ignition,
an acoustic signal will sound after the
door has been opened.460de022
Vehicles with automatic transmis-
sion:
Do not move the selector lever from the
"Park" position until the engine is
running (ignition key at position 2).
In order to turn the key to position 0 or
to remove it, first move the selector
lever to the position "Park" (Interlock).<
1 Steering lock disengaged Turning the steering wheel slightly to
the right or left often makes it easier to
turn the key from 0 to 1.
Individual electrical devices are ready
for operation.2 Ignition onAll electrical equipment and accesso-
ries are available for use.3 Starting the engine
Vehicles with manual transmis-
sion:
Depress the clutch when starting the
vehicle. A lockout prevents the engine
from starting if the clutch is not
depressed.<
Before starting>Engage the parking brake.
>Put the manual-shift gear lever in idle
or in P for an automatic transmission.
>Depress the clutch pedal.
Do not run the engine in enclosed
areas. The exhaust gases contain
carbon monoxide, an odorless and
colorless, but highly toxic gas.
Breathing the exhaust gases poses an
extreme health risk, and can lead to
unconsciousness and death.
Never leave the vehicle unattended
with the engine running. An unattended
vehicle with a running engine repre-
sents a potential safety hazard.<
Do not press the accelerator pedal
when starting the engine.
Do not actuate the starter for too
short a time, but do not keep
turning it for more than approx.
20 seconds. Release the ignition key
immediately when the engine starts.
Do not allow the engine to warm up by
leaving it running while the vehicle
remains stationary. Instead, drive off
immediately at a moderate engine
speed.<
Steering/Ignition lock Starting the engine
Page 63 of 203

63n
IndexDataTechnologyRepairsCar careControlsOverview
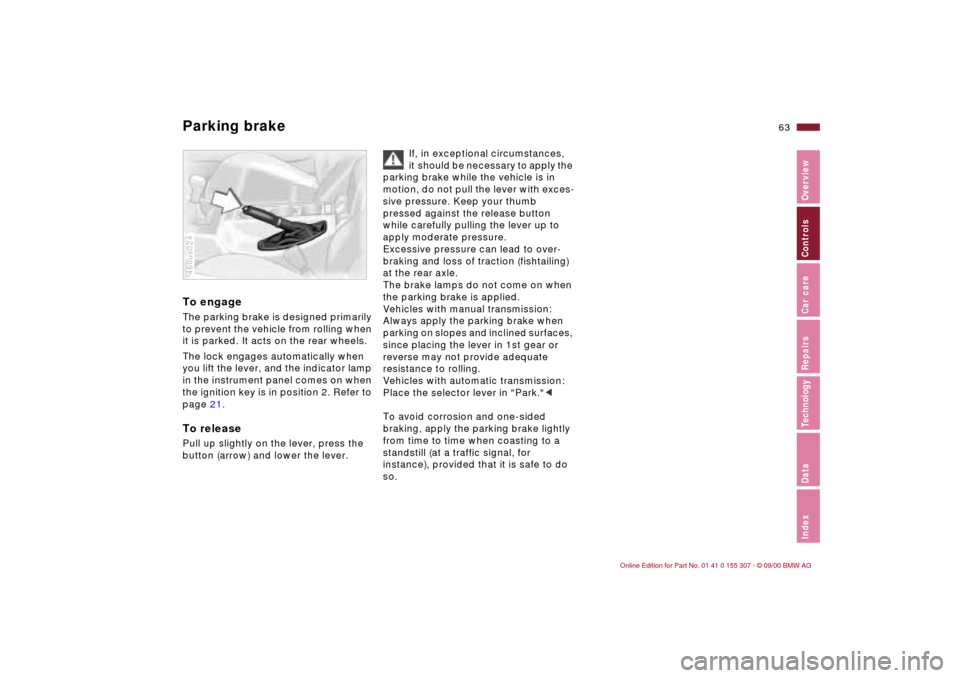
Parking brake To engageThe parking brake is designed primarily
to prevent the vehicle from rolling when
it is parked. It acts on the rear wheels.
The lock engages automatically when
you lift the lever, and the indicator lamp
in the instrument panel comes on when
the ignition key is in position 2. Refer to
page 21.To releasePull up slightly on the lever, press the
button (arrow) and lower the lever.460us024
If, in exceptional circumstances,
it should be necessary to apply the
parking brake while the vehicle is in
motion, do not pull the lever with exces-
sive pressure. Keep your thumb
pressed against the release button
while carefully pulling the lever up to
apply moderate pressure.
Excessive pressure can lead to over-
braking and loss of traction (fishtailing)
at the rear axle.
The brake lamps do not come on when
the parking brake is applied.
Vehicles with manual transmission:
Always apply the parking brake when
parking on slopes and inclined surfaces,
since placing the lever in 1st gear or
reverse may not provide adequate
resistance to rolling.
Vehicles with automatic transmission:
Place the selector lever in "Park."<
To avoid corrosion and one-sided
braking, apply the parking brake lightly
from time to time when coasting to a
standstill (at a traffic signal, for
instance), provided that it is safe to do
so.
Page 74 of 203

74n
Fuel gauge
Coolant temperature gauge
Service Interval Display
When you switch on the ignition, the
indicator lamp lights up briefly as a
function check.
Once the indicator lamp stays on
continuously, there are still approx.
2 gallons (8 liters) of fuel left in the fuel
tank.
For fuel tank capacity, refer to page 187.
If the tilt of the vehicle varies (extended
driving in mountainous areas, for
example), there may be slight fluctua-
tions of the needle.
Please refuel early, since driving
to the last drop of fuel can result
in damage to the engine and/or cata-
lytic converter.<460us081
BlueThe engine is still cold. Drive at
moderate engine and vehicle speeds.RedWhen you switch on the ignition, the
warning lamp comes on briefly as a
function check.
If the lamp comes on while operating
the vehicle, the engine has over-
heated. Switch the engine off immedi-
ately and allow it to cool down.Between the blue and red zonesNormal operating range. It is not
unusual for the needle to rise as far as
the edge of the red zone in response
to high outside temperatures or severe operating conditions. Checking
coolant level: refer to page 13 7.460de082
Remaining distance for serviceThe displays shown in the illustration
appear for a few seconds when the
ignition key is in position 1 or after the
engine is started.
The next service due appears with the
message OIL SERVICE or INSPECTION,
together with the remaining distance
before scheduled service.
The computer bases its calculations
of the remaining distance on the rate of
fuel consumption in the period immedi-
ately preceding your data request.
A flashing display and a "Ð" in front of
the number indicate that service is past
due by the number of kilometers/miles
displayed. Please contact your BMW
center for an appointment.460us112
Page 75 of 203

75n
IndexDataTechnologyRepairsCar careControlsOverview
Graphic display
The following information and/or condi-
tions are indicated using symbols,
starting with the ignition key position 2,
until the condition has been corrected:
1 Inspect the low-beam and high-beam
headlamps, as well as the side lamps
2 Door open
3 Tailgate open
4 Check brake and brake lamps
When you open the driver's door after
stopping with the lights still on, a
warning signal sounds for LIGHTS ON.460de083
If you wish to have a permanent time
display, you can make this adjustment
in the radio display (refer to the Radio
Owner's Manual).
You can adjust the clock and the time
display in the car radio as follows.
AdjustmentsFrom ignition key position 1
To set ahead: turn the right button to
the right.
To set back: turn the right button to the
left.
The adjustment speed will increase the
longer you continue to hold the button
turned to the left.
To change the display mode: press the
knob briefly.
Every time you press the knob, the
clock display alternates between the
12-hour or 24-hour mode.
In ignition key position 0:
The time is displayed for a few seconds
after you press the left button (refer to
"Odometer" on page 73).460us078
Check Control
Clock
Page 81 of 203

81n
IndexDataTechnologyRepairsCar careControlsOverview
DSC
* Ð BMW 325i
The concept DSC helps maintain vehicle stability,
even in critical driving situations.
The system optimizes vehicle stability
during acceleration and when starting
from a full stop, as well as optimizing
traction. In addition, the system recog-
nizes unstable vehicle conditions
(understeering or oversteering, for
example) and helps hold the vehicle on
a sure course by intervening via the
engine and by braking intervention at
the individual wheels.
The DSC is operational every time you
start the engine. DSC contains the
functions of ADB and CBC, refer to
page 117.
The ADB (Automatic Differential
Braking) copies the function of conven-
tional differential and transverse lock
through brake intervention, and
increases traction whenever conditions
merit, e. g. when driving on snow-
covered roads.
If the DSC is switched off the ADB will
still be in ready mode.
Indicator lamp
The indicator lamp in the instru-
ment cluster goes out shortly
after you switch on the ignition.
Refer to pages 21 and 22.
Indicator lamp flashes:
DSC is active and governs the drive
force and braking force.
The indicator lamp lights up continu-
ously:
The DSC has been turned off via the
switch; ADB is ready to use.
ADB intervention is not indicated.
The indicator lamp and the
brake warning lamp lights up
continuously:
The DSC, ADB and DBC have
been switched off via the button
or are defective.
Indicator and warning lamps for
Canadian models.
You can continue to drive the vehicle
normally, but without DSC. Please
consult your BMW center in the event
of a malfunction, refer to pages 21
and 22.
Deactivate DSC/activate ADBPress the DSC button briefly, the indi-
cator lamp lights up continuously.
The DSC has been switched off; ADB is
operational.
In the following exceptional circum-
stances, it may be effective to deacti-
vate the ADB for a short period:
>When rocking the vehicle or starting
off in deep snow or on loose
surfaces.
>When driving on snow-covered
grades, in deep snow, or on a snow-
covered surface that has been
packed down from being driven on.
>When driving with snow chains.
Refer also to page 121.
The gain in traction is achieved by a
reduction in stabilizing intervention.460de313
Page 85 of 203

85n
IndexDataTechnologyRepairsCar careControlsOverview
Tire Pressure Control (RDC)
*
The conceptThe RDC monitors the tire pressures at
all four wheels, even when the vehicle
is moving. The system provides an alert
whenever the inflation pressure drops
significantly below the specified pres-
sure in one or more tires.
In order for the RDC system to "learn"
the correct tire inflation pressure, first
check the tire inflation pressure in all
tires. Then compare these pressures
with the tire inflation pressure chart
(page 29) and adjust if necessary. Then
activate the system.
This indicator lamp in the instru-
ment cluster informs you when-
ever the tire pressure is not
normal.
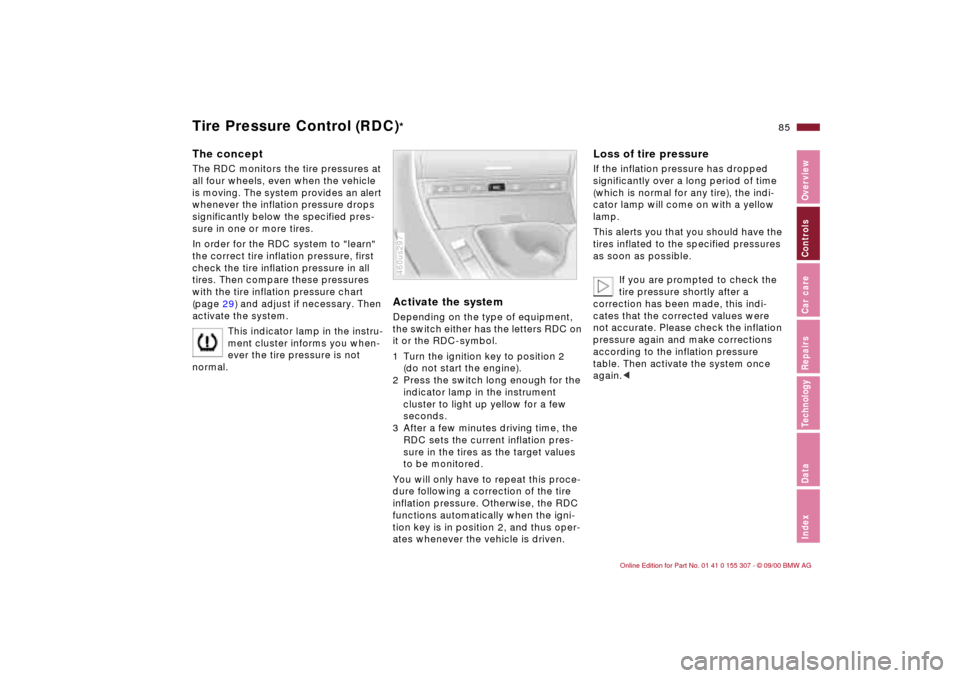
Activate the system Depending on the type of equipment,
the switch either has the letters RDC on
it or the RDC-symbol.
1 Turn the ignition key to position 2
(do not start the engine).
2 Press the switch long enough for the
indicator lamp in the instrument
cluster to light up yellow for a few
seconds.
3 After a few minutes driving time, the
RDC sets the current inflation pres-
sure in the tires as the target values
to be monitored.
You will only have to repeat this proce-
dure following a correction of the tire
inflation pressure. Otherwise, the RDC
functions automatically when the igni-
tion key is in position 2, and thus oper-
ates whenever the vehicle is driven.460us297
Loss of tire pressureIf the inflation pressure has dropped
significantly over a long period of time
(which is normal for any tire), the indi-
cator lamp will come on with a yellow
lamp.
This alerts you that you should have the
tires inflated to the specified pressures
as soon as possible.
If you are prompted to check the
tire pressure shortly after a
correction has been made, this indi-
cates that the corrected values were
not accurate. Please check the inflation
pressure again and make corrections
according to the inflation pressure
table. Then activate the system once
again.<
Page 87 of 203

87n
IndexDataTechnologyRepairsCar careControlsOverview
Side lamps
With the switch in this position,
the front, rear and side vehicle
lighting comes on. As an addi-
tional feature, you can illuminate your
vehicle on either side for parking, refer
to page 88.
Low beam headlamps
When you switch the ignition off
with the low beam headlamps
on, only the parking lamps will
remain on.
460us035
"Follow-Me-Home" lamps:
If you actuate the headlamp
flasher after you have turned the vehicle
off, the low beams will come on for a
brief period. You may also have this
function deactivated if you wish.<
"LAMPS ON" warningWhen you open the driver's door after
turning the ignition key to position 0, an
acoustic signal will go off for a few
seconds to remind you when the head-
lamps have not been switched off
.
Daytime running lamps
*
If you desire, the lamp switch can be
left in the second position:
When the ignition is switched off, the
external lighting is also switched off.
Turn the rotary dial to adjust the illumi-
nation intensity.460us036
Side lamps/Low beams Instrument lighting
Page 100 of 203

100n
Automatic climate control
*
Seat heating
*
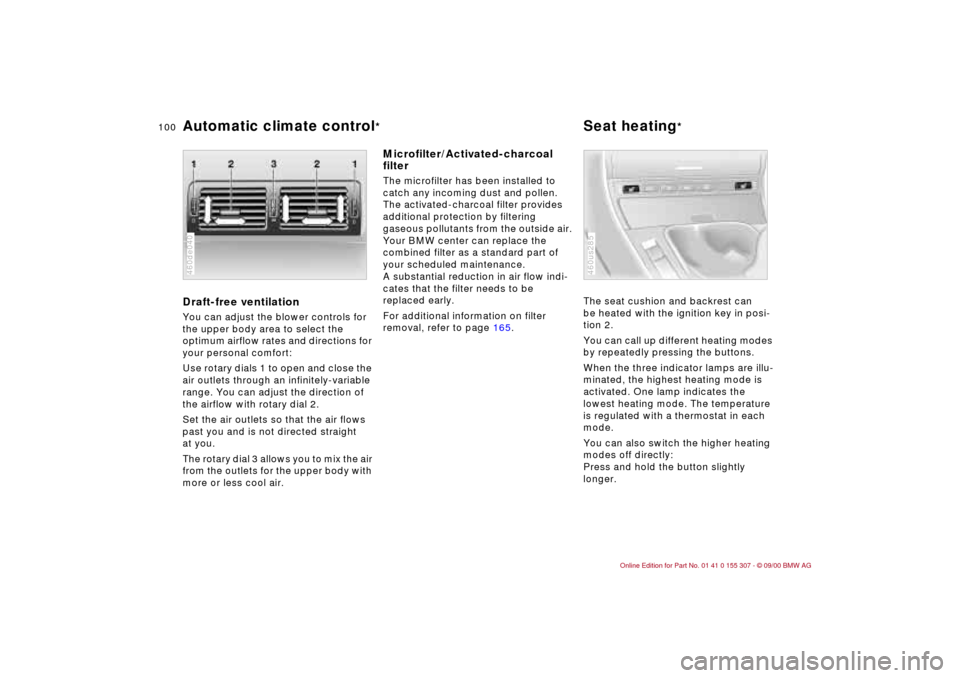
Draft-free ventilation You can adjust the blower controls for
the upper body area to select the
optimum airflow rates and directions for
your personal comfort:
Use rotary dials 1 to open and close the
air outlets through an infinitely-variable
range. You can adjust the direction of
the airflow with rotary dial 2.
Set the air outlets so that the air flows
past you and is not directed straight
at you.
The rotary dial 3 allows you to mix the air
from the outlets for the upper body with
more or less cool air.460de040
Microfilter/Activated-charcoal
filterThe microfilter has been installed to
catch any incoming dust and pollen.
The activated-charcoal filter provides
additional protection by filtering
gaseous pollutants from the outside air.
Your BMW center can replace the
combined filter as a standard part of
your scheduled maintenance.
A substantial reduction in air flow indi-
cates that the filter needs to be
replaced early.
For additional information on filter
removal, refer to page 165.The seat cushion and backrest can
be heated with the ignition key in posi-
tion 2.
You can call up different heating modes
by repeatedly pressing the buttons.
When the three indicator lamps are illu-
minated, the highest heating mode is
activated. One lamp indicates the
lowest heating mode. The temperature
is regulated with a thermostat in each
mode.
You can also switch the higher heating
modes off directly:
Press and hold the button slightly
longer.
460us285