2001 BMW 325i TOURING roof
[x] Cancel search: roofPage 42 of 203

42n
Alarm system
*
>The indicator lamp flashes for
10 seconds when the system is
disarmed: an attempted entry has
been detected in the period since the
system was armed.
Following triggering of an alarm, the
indicator lamp will flash continuously.
Avoiding unintentional alarmsThe tilt alarm sensor and interior motion
sensor may be switched off at the same
time. Doing this prevents a false alarm
from being triggered (in garages with
elevator ramps, for instance), or when
the vehicle is transported by trailer or
train:
Lock the vehicle (= arm the system)
twice. Press button 2 on the remote
control twice in succession or lock the
vehicle twice with the key (refer to
page 36).
The indicator lamp lights up briefly and
then flashes continuously. The tilt alarm
sensor and the interior motion sensor
are deactivated as long as the system is
armed.
Reset the alarm system in order to
reactivate both the tilt sensor alarm
system and interior motion sensor.
Interior motion sensorThe transmitter and receiver of the inte-
rior motion sensor are located in a trim
panel in the vehicle's roof.
In order for the interior motion sensor
to function properly, the windows and
sliding/tilt sunroof must be completely
closed.
However, be sure to deactivate the
interior motion sensor (refer to the
previous column "Avoiding uninten-
tional alarms"), when you wish to leave
the windows or the tilt/sunroof open.460de159
Page 44 of 203

44n
Electric power windows Sliding/tilt sunroof
*
Safety switch
With the safety switch, you can prevent
the rear windows from being opened or
closed via the switch in the rear
passenger area
* (by children, for
instance).
Press the safety switch whenever
children are riding in the rear of
the vehicle. Careless use of the power
windows can lead to injury.<
460de014
Exercise care when closing the
sliding/tilt sunroof and keep it in
your field of vision until it is completely
closed. Failure to do so can result in
injuries.
Always remove the key from the ignition
and lock the doors when you leave the
vehicle so that, for instance, children
cannot operate the sunroof and
possibly injure themselves.<
You can avoid a vacuum or drafts in the
passenger compartment whenever the
sunroof is open or raised if you keep the
air vents in the dashboard open and
increase the air supply as needed. Refer
to pages 92 or 99.
If the sunroof is completely open, air
disturbances may be caused in the
vehicle when you are driving at higher
speeds. Close the roof as far as is
necessary until this natural phenom-
enon ceases.
For the convenience opening mode
with the door lock or the remote
control, refer to page 34 or 35.
Lifting Ð opening Ð closingFrom ignition key position 1, press the
switch or slide it to the desired direction
until you feel resistance.
When lifting, the headliner retracts
several inches.
Do not use force to closethe
headliner when the sunroof is
open, or you could damage the
mechanism.<
After the ignition has been switched off,
you can still operate the sunroof for up
to 15 minutes, as long as neither of the
front doors was opened during that
time.460de015
Page 45 of 203

45n
IndexDataTechnologyRepairsCar careControlsOverview
Sliding/tilt sunroofAutomatic opening and closing>Press the switch past the resistance
point: the sunroof travels to either the
fully-closed or fully-opened position.
>With the sunroof open, press the
switch briefly toward "Raise": the roof
will move into the end "Raise" posi-
tion.
Pressing the switch again stops opera-
tion immediately.
Safety featureIf the sliding/tilt sunroof encounters
resistance at a point roughly past the
middle of its travel when it is closing,
the closing cycle is interrupted and the
sunroof will open again slightly.
Despite this safety feature, be
extremely careful that the closing
path of the sunroof is not obstructed
whenever it is closed. Otherwise, trig-
gering the closing-force limitation may
not be ensured in some situations (with
very thin objects, for instance).
You can disable this safety feature by
pressing the switch beyond the pres-
sure point and holding it.<
Power loss or malfunctionIn the event of an electrical system
malfunction, the sliding/tilt sunroof can
be operated manually. Refer to
page 166.
Page 56 of 203

56n
AirbagsSitting correctly with airbags
For your safety, comply with the
following instructions for the
airbags. If you do not, the airbags may
not be able to provide their maximum
protection. All passengers in the vehicle
should be aware of and comply with
this information:
The airbags are supplemental restraint
devices designed to provide extra
protection; they are not a substitute for
safety belts. Wear your safety belt at all
times. The airbags will not be triggered
in the event of a minor accident, a
vehicle roll-over, or collisions from the
rear. In these instances, the safety belt
provides optimal protection.
Airbags are located under cover panels
in the steering wheel, in the dashboard,
in the side trim panels in the front and
rear*, in the roof panels, and in the
sides of the inside roof lining.
Adjust your seat to a position that
provides maximum distance between
you and the steering wheel, the instru-
ment panel and the door while still allo-
wing comfortable and safe access to all
vehicle controls.
To avoid sustaining hand and arm inju-
ries, always grasp the steering wheel
on the rim with the hands at the 9 and
3 o'clock positions. Do not place your
hands on the center pad.
Never allow any objects to obstruct the
area between the airbag and an occu-
pant.
Do not use the cover panel above the
passenger-side airbag as a storage
area.
Do not apply adhesive materials to the
cover panels of the airbags, cover them
or modify them in any other way.
Do not install a rear-facing child
restraint system in the front passenger
seat of this car.
Children under 13 years of age and
children less than 5 feet (150 cm) tall
should only ride in the rear seat.
Infants or small children should never
be held on the lap of a passenger.
If your car is equipped with side airbags
in the rear passenger area
*, be sure
that child restraints are mounted
correctly and provided with the grea-
test-possible distance between the
airbags in the side trim panels. Do not
allow children to lean out of the child's
seat in the direction of the side trim
panels. If they do so, serious injuries
can occur if the airbag is triggered.
(infants and small children in appro-
priate child restraint systems; larger
children and adults using the safety
belts). Never let an occupant's head
rest near or on a side airbag, because
as the inflating airbag could cause a
serious or fatal injury. Please note that
the word "Airbag" imprinted on the door
trim panel indicates the airbag's loca-
tion.
Accident research shows that the
safest place for children in an
automobile is in the rear seat. However,
a child sitting in the rear seat and not
properly restrained may place his or her
head on or near the airbag, if so
equipped. For example, a child Ñ even
though belted Ñ may fall asleep with his
or her head against the side airbag. It
may be difficult for a driver to ensure
that children in the rear seat will remain
properly positioned at all times and not
place their heads on or near the side
airbag. Therefore, we recommend that
the rear seat side airbags, if so
equipped, be deactivated if children will
travel in the rear seat.
The rear seat side airbags may already
have been deactivated, either at the
time of manufacture or by a BMW
Page 108 of 203

108n
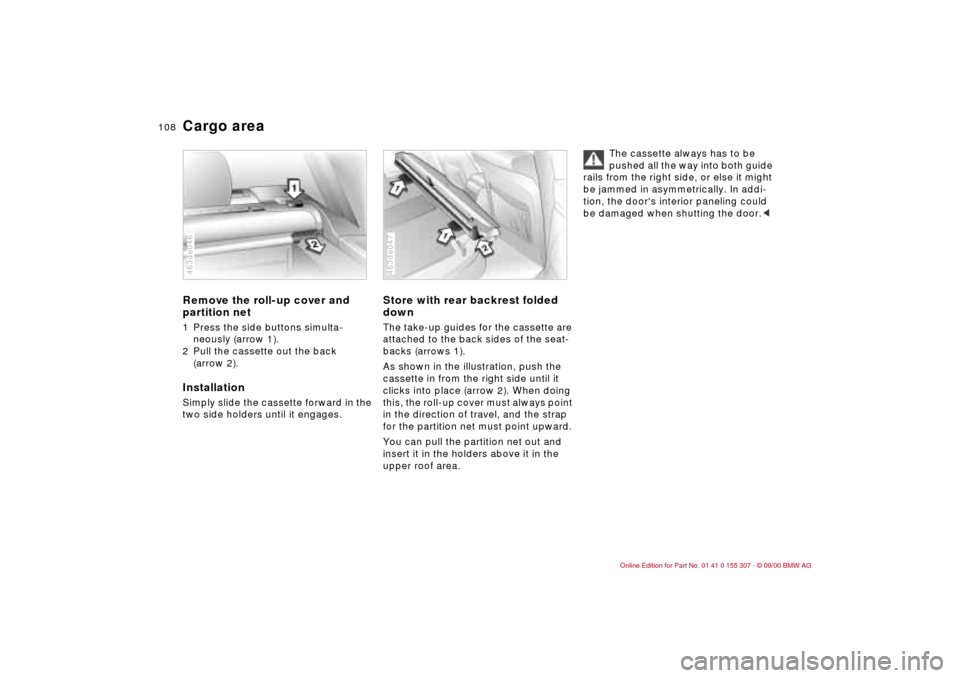
Cargo areaRemove the roll-up cover and
partition net1 Press the side buttons simulta-
neously (arrow 1).
2 Pull the cassette out the back
(arrow 2).InstallationSimply slide the cassette forward in the
two side holders until it engages.463de046
Store with rear backrest folded
downThe take-up guides for the cassette are
attached to the back sides of the seat-
backs (arrows 1).
As shown in the illustration, push the
cassette in from the right side until it
clicks into place (arrow 2). When doing
this, the roll-up cover must always point
in the direction of travel, and the strap
for the partition net must point upward.
You can pull the partition net out and
insert it in the holders above it in the
upper roof area.463de047
The cassette always has to be
pushed all the way into both guide
rails from the right side, or else it might
be jammed in asymmetrically. In addi-
tion, the door's interior paneling could
be damaged when shutting the door.<
Page 111 of 203

111n
IndexDataTechnologyRepairsCar careControlsOverview
Roof-mounted luggage rack
*
Mounting pointsAccess to the mounting points:
To fold up the cover (arrow), please use
the tool which is provided with the
luggage system.
A special luggage system is available
as an option for your BMW. Please
observe the precautions included with
the installation instructions.
Because roof racks raise the center of
gravity of the vehicle when loaded, they
exercise a major effect on its handling
and steering response.
You should therefore always remember
not to exceed the approved roof weight,
the approved gross vehicle weight or
the axle weights when loading the rack.
You will find the specifications under
"Technical Data" on page 186.463de045
Make sure that the load is not too heavy,
and attempt to distribute it evenly.
Always load the heaviest pieces first
(on the bottom). Be sure that adequate
clearance is maintained for raising the
sliding/tilt sunroof, and that objects do
not project into the opening path of the
tailgate.
Secure the roof luggage correctly and
tightly to prevent it from shifting or
being lost during driving (danger to
following traffic).
Drive smoothly and avoid sudden
acceleration or braking. Do not corner
at high speeds.
The roof load increases aerodynamic
resistance, resulting in increased fuel
consumption and additional stresses
on the vehicle's body.
Page 140 of 203

140n
The BMW Maintenance System has
been designed as a reliable means for
providing maximum driving and operat-
ing safety Ð and as cost effectively as
possible for you.
Please keep in mind that regular main-
tenance is not only necessary for the
safety of your vehicle, but also plays a
significant role in maintaining the resale
value of the vehicle.
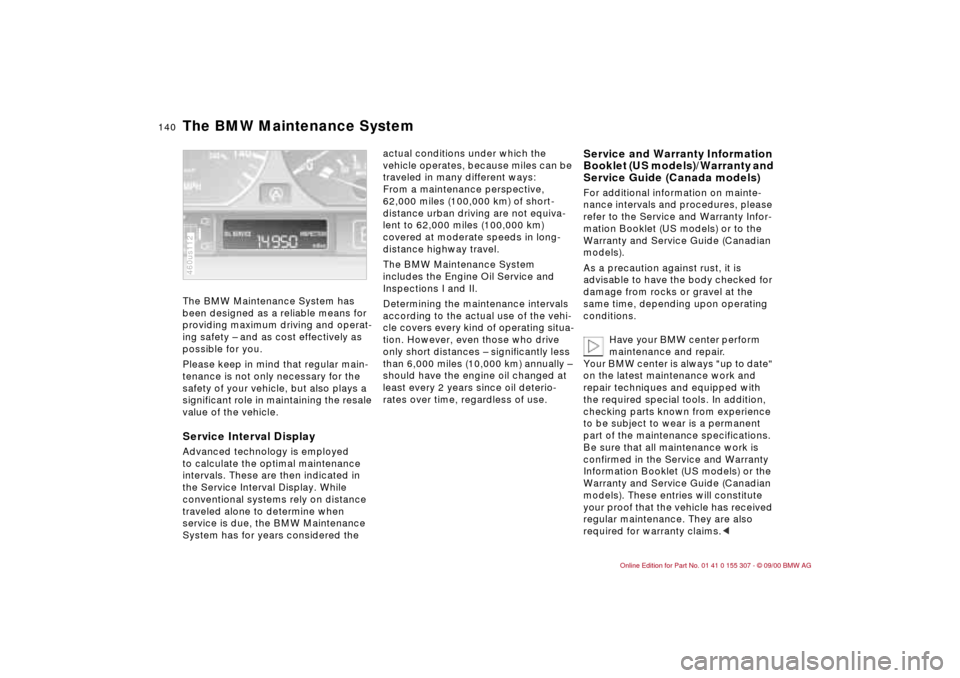
Service Interval DisplayAdvanced technology is employed
to calculate the optimal maintenance
intervals. These are then indicated in
the Service Interval Display. While
conventional systems rely on distance
traveled alone to determine when
service is due, the BMW Maintenance
System has for years considered the 460us112
actual conditions under which the
vehicle operates, because miles can be
traveled in many different ways:
From a maintenance perspective,
62,000 miles (100,000 km) of short-
distance urban driving are not equiva-
lent to 62,000 miles (100,000 km)
covered at moderate speeds in long-
distance highway travel.
The BMW Maintenance System
includes the Engine Oil Service and
Inspections I and II.
Determining the maintenance intervals
according to the actual use of the vehi-
cle covers every kind of operating situa-
tion. However, even those who drive
only short distances Ð significantly less
than 6,000 miles (10,000 km) annually Ð
should have the engine oil changed at
least every 2 years since oil deterio-
rates over time, regardless of use.
Service and Warranty Information
Booklet (US models)/Warranty and
Service Guide (Canada models)For additional information on mainte-
nance intervals and procedures, please
refer to the Service and Warranty Infor-
mation Booklet (US models) or to the
Warranty and Service Guide (Canadian
models).
As a precaution against rust, it is
advisable to have the body checked for
damage from rocks or gravel at the
same time, depending upon operating
conditions.
Have your BMW center perform
maintenance and repair.
Your BMW center is always "up to date"
on the latest maintenance work and
repair techniques and equipped with
the required special tools. In addition,
checking parts known from experience
to be subject to wear is a permanent
part of the maintenance specifications.
Be sure that all maintenance work is
confirmed in the Service and Warranty
Information Booklet (US models) or the
Warranty and Service Guide (Canadian
models). These entries will constitute
your proof that the vehicle has received
regular maintenance. They are also
required for warranty claims.<
The BMW Maintenance System
Page 147 of 203

147n
IndexDataTechnologyRepairsCar careControlsOverview
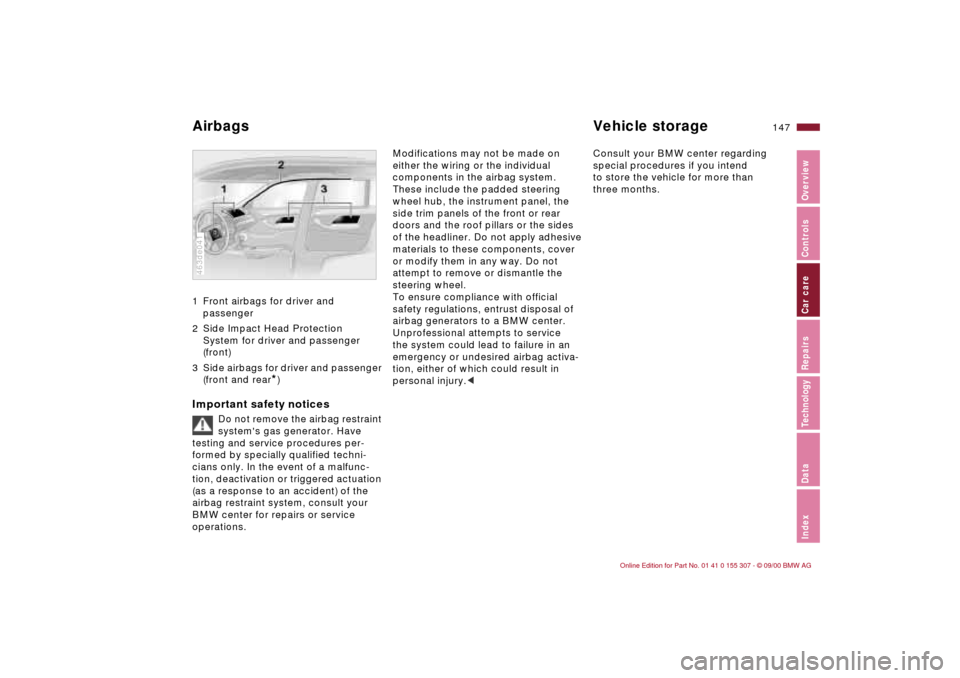
Airbags Vehicle storage1 Front airbags for driver and
passenger
2 Side Impact Head Protection
System for driver and passenger
(front)
3 Side airbags for driver and passenger
(front and rear
*)
Important safety notices
Do not remove the airbag restraint
system's gas generator. Have
testing and service procedures per-
formed by specially qualified techni-
cians only. In the event of a malfunc-
tion, deactivation or triggered actuation
(as a response to an accident) of the
airbag restraint system, consult your
BMW center for repairs or service
operations.
463de041
Modifications may not be made on
either the wiring or the individual
components in the airbag system.
These include the padded steering
wheel hub, the instrument panel, the
side trim panels of the front or rear
doors and the roof pillars or the sides
of the headliner. Do not apply adhesive
materials to these components, cover
or modify them in any way. Do not
attempt to remove or dismantle the
steering wheel.
To ensure compliance with official
safety regulations, entrust disposal of
airbag generators to a BMW center.
Unprofessional attempts to service
the system could lead to failure in an
emergency or undesired airbag activa-
tion, either of which could result in
personal injury.
to store the vehicle for more than
three months.