2001 BMW 325i SEDAN fuel consumption
[x] Cancel search: fuel consumptionPage 19 of 211
19n
IndexDataTechnologyRepairsCar careControlsOverview
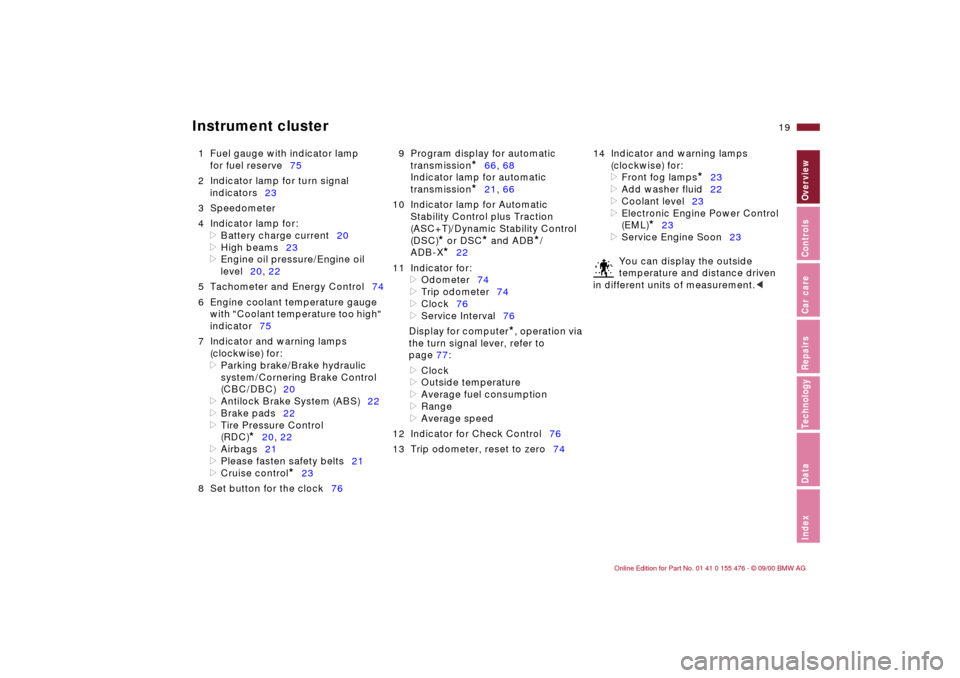
Instrument cluster
1 Fuel gauge with indicator lamp
for fuel reserve75
2 Indicator lamp for turn signal
indicators23
3 Speedometer
4 Indicator lamp for:
>
Battery charge current20
>
High beams23
>
Engine oil pressure/Engine oil
level20, 22
5 Tachometer and Energy Control74
6 Engine coolant temperature gauge
with "Coolant temperature too high"
indicator75
7 Indicator and warning lamps
(clockwise) for:
>
Parking brake/Brake hydraulic
system/Cornering Brake Control
(CBC/DBC)20
>
Antilock Brake System (ABS)22
>
Brake pads22
>
Tire Pressure Control
(RDC)
*
20, 22
>
Airbags21
>
Please fasten safety belts21
>
Cruise control
*
23
8 Set button for the clock769 Program display for automatic
transmission
*
66, 68
Indicator lamp for automatic
transmission
*
21, 66
10 Indicator lamp for Automatic
Stability Control plus Traction
(ASC+T)/Dynamic Stability Control
(DSC)
*
or DSC
*
and ADB
*
/
ADB-X
*
22
11 Indicator for:
>
Odometer74
>
Trip odometer74
>
Clock76
>
Service Interval76
Display for computer
*
, operation via
the turn signal lever, refer to
page 77:
>
Clock
>
Outside temperature
>
Average fuel consumption
>
Range
>
Average speed
12 Indicator for Check Control76
13 Trip odometer, reset to zero7414 Indicator and warning lamps
(clockwise) for:
>
Front fog lamps
*
23
>
Add washer fluid22
>
Coolant level23
>
Electronic Engine Power Control
(EML)
*
23
>
Service Engine Soon23
You can display the outside
temperature and distance driven
in different units of measurement.
<
Page 74 of 211
74n
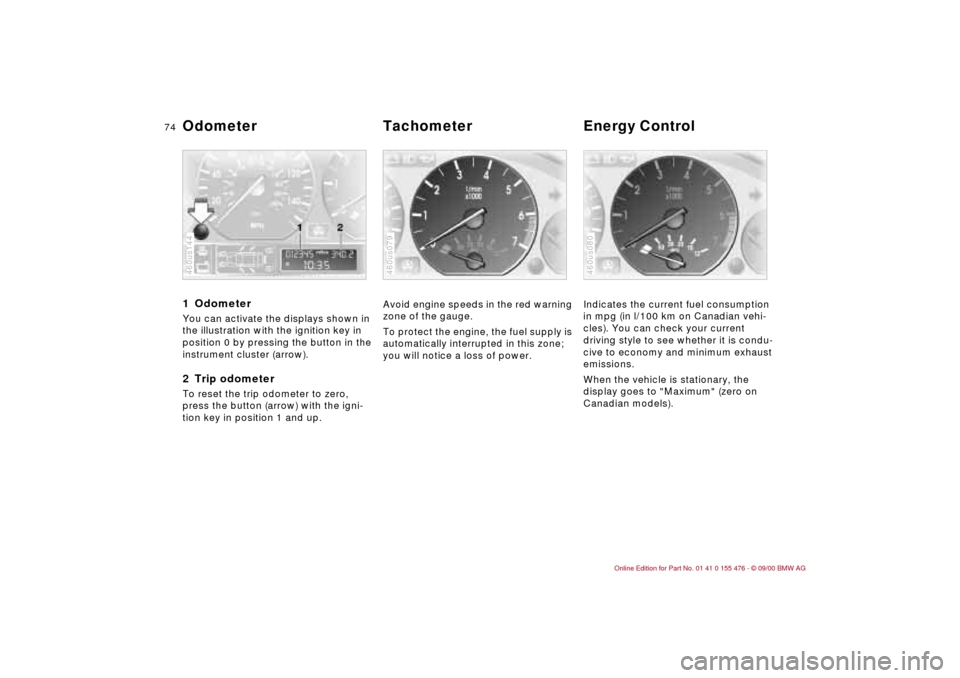
1 Odometer You can activate the displays shown in
the illustration with the ignition key in
position 0 by pressing the button in the
instrument cluster (arrow).2 Trip odometerTo reset the trip odometer to zero,
press the button (arrow) with the igni-
tion key in position 1 and up.460us144
Avoid engine speeds in the red warning
zone of the gauge.
To protect the engine, the fuel supply is
automatically interrupted in this zone;
you will notice a loss of power.460us079
Indicates the current fuel consumption
in mpg (in l/100 km on Canadian vehi-
cles). You can check your current
driving style to see whether it is condu-
cive to economy and minimum exhaust
emissions.
When the vehicle is stationary, the
display goes to "Maximum" (zero on
Canadian models).460us080
Odometer Tachometer Energy Control
Page 77 of 211
77n
IndexDataTechnologyRepairsCar careControlsOverview
Computer
*
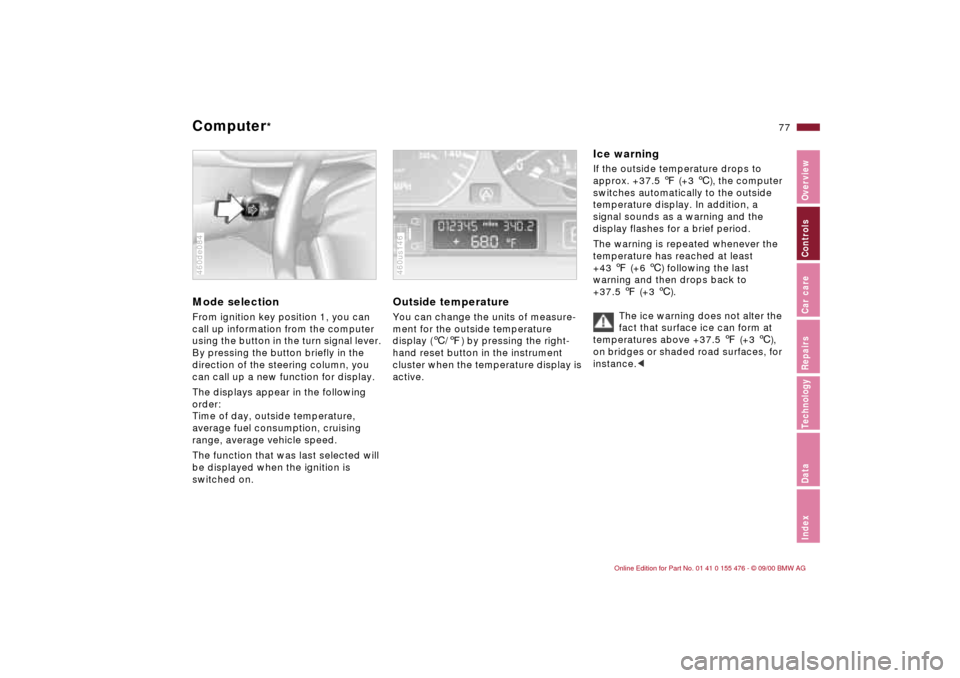
Mode selection
From ignition key position 1, you can
call up information from the computer
using the button in the turn signal lever.
By pressing the button briefly in the
direction of the steering column, you
can call up a new function for display.
The displays appear in the following
order:
Time of day, outside temperature,
average fuel consumption, cruising
range, average vehicle speed.
The function that was last selected will
be displayed when the ignition is
switched on.460de084
Outside temperature
You can change the units of measure-
ment for the outside temperature
display (
6
/
7
) by pressing the right-
hand reset button in the instrument
cluster when the temperature display is
active.
460us146
Ice warning
If the outside temperature drops to
approx. +37.5
7
(+3
6
), the computer
switches automatically to the outside
temperature display. In addition, a
signal sounds as a warning and the
display flashes for a brief period.
The warning is repeated whenever the
temperature has reached at least
+43
7
(+6
6
) following the last
warning and then drops back to
+37.5
7
(+3
6
).
The ice warning does not alter the
fact that surface ice can form at
temperatures above +37.5
7
(+3
6
),
on bridges or shaded road surfaces, for
instance.
<
Page 78 of 211
78n
Computer
*
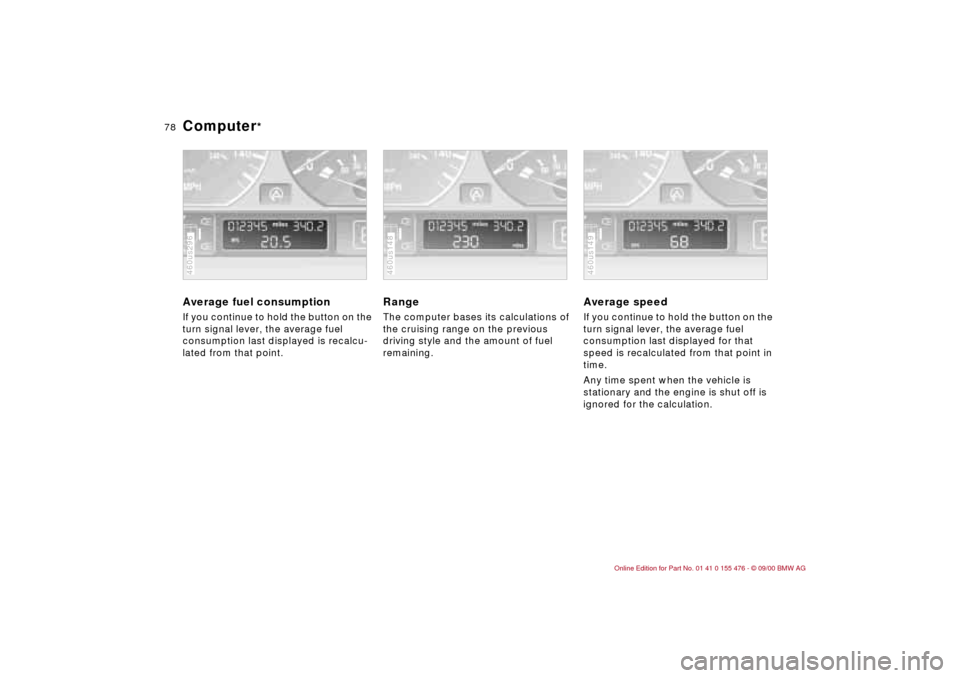
Average fuel consumption If you continue to hold the button on the
turn signal lever, the average fuel
consumption last displayed is recalcu-
lated from that point.460us296
Range The computer bases its calculations of
the cruising range on the previous
driving style and the amount of fuel
remaining.460us148
Average speed If you continue to hold the button on the
turn signal lever, the average fuel
consumption last displayed for that
speed is recalculated from that point in
time.
Any time spent when the vehicle is
stationary and the engine is shut off is
ignored for the calculation.460us149
Page 113 of 211

113n
IndexDataTechnologyRepairsCar careControlsOverview
Cargo loading Roof-mounted luggage rack
*
Always position and secure the
load correctly. If you do not, it can
endanger the passengers during brak-
ing or evasive maneuvers.
Do not exceed the permissible gross
vehicle weight and the permissible axle
loads (refer to page 194). If you do, the
operating safety of the vehicle is no
longer ensured and you are in violation
of the law.
Do not carry hard or heavy objects
unsecured in the passenger compart-
ment. If you do so, they may be
projected through the air during braking
and evasive maneuvers, thus
endangering vehicle occupants.<
AnchorsAccess to the anchors:
To open the cover (arrow), please use
the tool included with the luggage rack
system.
A special roof-rack system is available
for your BMW as an optional extra.
Please comply with the precautions in-
cluded with the installation instructions.
Because roof racks raise the center of
gravity of the vehicle when loaded, they
exercise a major effect on its handling
and steering response.
You should therefore always remember
not to exceed the approved roof weight,
the approved gross vehicle weight or
the axle weights when loading the rack.
You will find the specifications under
"Technical Data" on page 194.462de271
Make sure that the load is not too heavy,
and attempt to distribute it evenly.
Always load the heaviest pieces first (on
the bottom). Be sure that adequate
clearance is maintained for raising the
sliding/tilt sunroof, and that objects do
not project into the opening path of the
luggage compartment lid.
Secure the roof luggage correctly and
securely to prevent it from shifting or
being lost during driving (danger to
following traffic).
Drive smoothly and avoid sudden ac-
celeration or braking. Do not corner at
high speeds.
The roof load increases the aerody-
namic resistance. Increased fuel
consumption and additional stresses
on the vehicle's body result from this.
Page 139 of 211
139n
IndexDataTechnologyRepairsCar careControlsOverview
Engine oilChecking the oil level 1 Park the vehicle on a level surface.
2 Shut the engine off after it has
reached normal operating tempera-
ture.
3 After approx. 5 minutes, pull the
dipstick out and wipe it off with a
clean lint-free cloth, paper towel, or
similar material.
4 Carefully push the dipstick all the way
into the guide tube and pull it out
again.
5 The oil level should be between the
two graduations on the dipstick.
As with fuel economy, oil consumption
is directly influenced by your driving
style and vehicle operating conditions.462de244
The space between the two marks on
the dipstick corresponds to approx.
1.1 US quarts (1 liter). Do not fill beyond
the upper mark on the dipstick. Excess
oil will damage the engine.460de189
To add oil Wait until the level has dropped to just
above the lower mark before adding oil.
However, never let the oil drop below
the lower mark.
BMW engines are designed to
operate without oil additives; the
use of additives could lead to damage
in some cases. This is also true for the
manual transmission, the automatic
transmission, the differential, and the
power steering system.<462de245
Page 202 of 211

Everything from A to ZFootwell lamps89
bulb replacement164
Four-wheel drive182
Front fog lamps89
bulb replacement161
Frost protection,
radiator142
Fuel28
Fuel consumption78
Fuel consumption
display75
Fuel filler door
releasing following an
electrical malfunction172
Fuel gauge75
Fuel injection192
Fuel quality28
Fuel reserve indicator
lamp75
Fuel specifications28
Fuel tank capacity195
Fuel tank gauge75
Functional status187
Fuses170 G
Gasoline28
Gasoline gauge75
Glove compartment104 Glove compartment lamp,
bulb replacement164
Gross vehicle weight194
H
Handbrake64
Handsfree system107
Hazard warning flashers26
Hazard warning triangle26
Head restraints48
Headlamp covers,
care146,159
Headlamp flasher69,89
Headlamp washer
system138,195
Headlamp washers71
Headlamps88
Heated seats103
Heating, rapid96
Heavy loads112
Height193
HiFi system Ð harman
kardon104
High beams23,69,89
bulb replacement159
High Performance Synthetic
Oils140
High-mount brake lamp163
Hood release134 Horn17
Hubcap166
Hydraulic Brake assistant,
refer to DBC
I
Ice warning77
Icy roads77
Identification, tires128
Ignition key32
Ignition lock62
Imprint4
Indicator lamps20
Inflated pressure28,125
Inflation pressure
monitoring86,186
INSPECTION75
Instrument cluster18
Instrument panel18
Interaxle tire rotation127
Interface socket108
for Onboard
Diagnostics154
Interference
cellular phone124
Interior lamps36,89
bulb replacement163
remote control36
Interior motion sensor42 Interior rearview mirror52
automatic dimming
feature53,184
Interlock62
Intermittent wipe69
J
Jack165
Jump-starting173 K
Key Memory53
Keys32
with remote control32 L
Lamps and bulbs158
LAMPS ON warning88
Lashing eyes112
LATCH attachment of the
child seat59
Leather care150
Length193
License plate lamp, bulb
replacement163
Light switch88
Light-alloy wheels130
Lighter108
Load-securing devices112
Page 203 of 211

Everything from A to Z
203n
IndexDataTechnologyRepairsCar careControlsOverview
Louvers92,98
Low beam headlamps88
Low beams, bulb
replacement159
Lug bolts166
Lug wrench165
Luggage compartment41
capacity194
floor mat41
floor panel41
remote control37
Luggage compartment
lamps, bulb
replacement164
Luggage compartment
lid39
emergency release39
securing separately39
Luggage compartment
lighting39
Luggage rack113
Lumbar support49 M
M+S tires129
Maintenance75,145
Malfunction displays76
Manual transmission65
Manually controlled
recirculated-air101
Memory50 MFL (Multifunction steering
wheel)24
Microfilter95,171
Mirror memory50
Mirrors52
Mobile phone124
Modifications,
technical6,153
Motion sensor, interior42
Multifunction steering wheel
(MFL)24
N
Neckrest48 O
OBD interface socket154
Obstruction protection44
Odometer74
Oil
capacity195
consumption139
dipstick139
quality140
specifications140
viscosity140
Oil additives139
Oil change intervals, see the
Service and Warranty
Information Booklet
Oil filter change195 Oil level
check139
indicator lamp20
Oil pressure, indicator
lamp20
OILSERVICE75
Onboard tool kit158
Opening and closing Ð from
the inside38
Opening and closing Ð from
the outside34
Outside temperature
display77
Owner service
procedures206
P
Paint blemishes147
Paint, care147
Paintwork, minor
repairs148
Paintwork, waxing148
Park Distance Control
(PDC)79
Parking brake64
Parking help79
Parking lamps89
Parking, winter123
PDC (Park Distance
Control)79
Performance192
Phone, mobile124 Pocket flashlight104
Pollen95,102
Power seat49
Power steering123
Power windows44
safety switch45
Pressure monitoring,
tires86,186
Pressure, tires28,125
R
Radiator195
Radio Data System
(RDS)181
Radio reception124,181
Radio, refer to the separate
Owner's Manual
Rain sensor69,185
RDC (Tire Pressure
Control)86,186
RDS (Radio Data
System)181
Reading lamps90
Rear backrest, folding109
Rear lamps161
Rear window
defroster71,94,102
Rearview mirror52
Recirculated air mode94
Reclining seat47
Refueling27
Remote control35