2001 BMW 325Ci CONVERTIBLE towing
[x] Cancel search: towingPage 12 of 215

Contents
Repairs
Advanced technology
Technical data
Replacement procedures:
Onboard tool kit166
Windshield wiper blades166
Lamps and bulbs166
Changing a wheel173
Battery176
Fuses179
Microfilter/Activated-charcoal
filter180
In case of electrical
malfunction:
Fuel filler door180
Convertible top181
Assistance, giving and
receiving:
Jump-starting183
Towing the vehicle184Adaptive Transmission Control
(ATC)188
Airbags189
Automatic Stability Control plus
Traction (ASC+T)/Dynamic
Stability Control (DSC)189
Radio reception190
Safety belt tensioner190
Interior rearview mirror with
automatic dimming
feature191
Rain sensor191
Tire Pressure Control (RDC)192
Self-diagnostics192
Rollover protection system193
Xenon lamps193Engine data196
Dimensions197
Weights198
Capacities199
Electrical system200
Drive belts200
Page 75 of 215

75n
IndexDataTechnologyRepairsCar careControlsOverview
Automatic transmission with Steptronic
*
In the following situations, the Step-
tronic "thinks" for you in the manual
mode:
>In order to prevent the engine from
overrevving, the transmission shifts
automatically to the next higher gear
just before the RPM cutoff point.
>At low speeds, the transmission
shifts down automatically and you do
not have to act
>In the "kickdown" mode, the trans-
mission shifts down to the lowest
gear which is possible, depending on
the engine speed.
>Depending on the situation Ñ when
driving in adverse winter conditions,
for example Ñ you may also start out
in 2nd or 3rd gear.
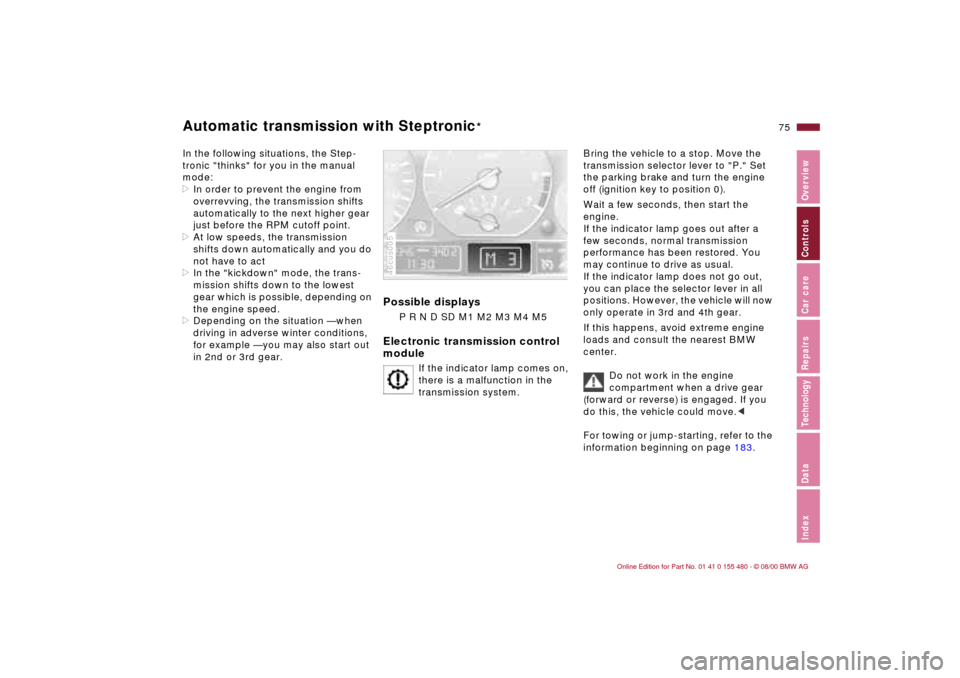
Possible displays
P R N D SD M1 M2 M3 M4 M5
Electronic transmission control
module
If the indicator lamp comes on,
there is a malfunction in the
transmission system.
46cus005
Bring the vehicle to a stop. Move the
transmission selector lever to "P." Set
the parking brake and turn the engine
off (ignition key to position 0).
Wait a few seconds, then start the
engine.
If the indicator lamp goes out after a
few seconds, normal transmission
performance has been restored. You
may continue to drive as usual.
If the indicator lamp does not go out,
you can place the selector lever in all
positions. However, the vehicle will now
only operate in 3rd and 4th gear.
If this happens, avoid extreme engine
loads and consult the nearest BMW
center.
Do not work in the engine
compartment when a drive gear
(forward or reverse) is engaged. If you
do this, the vehicle could move.<
For towing or jump-starting, refer to the
information beginning on page 183.
Page 114 of 215

114n
Ski bag
*
Cargo loading
When reattaching the filler piece,
guide both bars into the guide and
press the filler piece back into place.
Secure the safety belts in their holders
again.<
46cde067
Stowing cargo If you are transporting a load in your
BMW:
>Load heavy cargo as far forward as
possible Ð directly behind the back-
rests or the luggage compartment
partition Ð and as low as possible.
>Cover sharp edges and corners.46cde063
With the convertible top closed,
you can increase the space in
your luggage compartment. Refer to
page 41.
We recommend that you always fold
the convertible top compartment panel
down as soon as you have removed
your cargo from the luggage compart-
ment. This way, you can be sure that
you can always operate the convertible
top at any time.
Conversely, when the convertible top is
closed, raise the convertible top
compartment panel before stowing
your cargo in the luggage compartment
to avoid any damage to the convertible
top compartment or your load.<
Page 120 of 215

120n
To ensure that your vehicle provides
maximum economy throughout a long
service life, we request that you comply
with the following recommendations:
Engine and differentialUp to 1,200 miles (2,000 km):
Drive at varying engine and road
speeds, but do not exceed 4,500 rpm
or a speed of 100 mph (160 km/h):
Obey your local and state maximum
speed limits.
Always avoid using the full throttle or
"kickdown" position for the accelerator.
Once you have driven 1,200 miles
(2,000 km), engine speed and vehicle
speed can be gradually increased.
Follow the same break-in procedure if
either the engine or the differential is
replaced in the future.
TiresDue to technical factors associated
with their manufacture, tires do not
achieve their full traction potential until
an initial break-in period has elapsed.
For this reason drive cautiously during
the initial 200 miles (300 km).
Obey your local and state maximum
speed limits.
When the vehicle is operated on
wet or slushy roads, a wedge of
water may form between the tire and
the road surface. This phenomenon is
referred to as aquaplaning, or hydro-
planing, and can lead to partial or
complete loss of traction, vehicle
control and braking effectiveness.
Reduce your speed on wet roads.<
Brake systemApproximately 300 miles (500 km) must
elapse before the brake pads and discs
achieve the optimal pad-surface and
wear patterns required for trouble-free
operation and long service life later on.
To break-in the separate parking brake
drums, apply the parking brake lightly
when coasting to a standstill (at a traffic
signal, for instance), provided that
traffic conditions allow you to do so.
To avoid corrosion, repeat this proce-
dure from time to time.
The brake lamps do not come on
when the parking brake is set.
Vacuum for the brake system servo unit
on your BMW is available only when the
engine is running. When you move the
vehicle with the engine off Ð when
towing, for example Ð substantially
higher levels of pedal force will be
required to brake the vehicle.
(500 km). Engage the gears carefully
during the break-in period.
Break-in procedures
Page 165 of 215

Overview
Controls and features
Operation, care
and maintenance
Owner service procedures
Technical data
Index Advanced technology
165n
IndexDataTechnologyRepairsCar careControlsOverview
Replacement procedures:
Onboard tool kit166
Windshield wiper blades166
Lamps and bulbs166
Changing a wheel173
Battery176
Fuses179
Microfilter/Activated-charcoal
filter180
In case of electrical
malfunction:
Fuel filler door180
Convertible top181
Assistance, giving and
receiving:
Jump-starting183
Towing the vehicle184
Repairs
Page 184 of 215

184n
Towing the vehicleTow fittingThe screw-in tow fitting is stored in the
onboard tool kit; be sure that it remains
in the vehicle at all times. This fitting is
designed for installation in the towing
sockets located at the front and rear of
the vehicle. It is intended for towing on
paved road surfaces only. This fitting
should not be used to pull a vehicle out
of deep snow, mud, sand, etc.
Always comply with all applicable
towing laws and regulations.Access to towing socketFront:
Use a screwdriver to press out the
cover at the top of the recess.462de254
Rear:
Use a screwdriver to press out the
cover at the top of the recess.
Screw the tow fittings in
completely and tightly. If you do
not, the threads could be damaged.
Do not tow the vehicle by any compo-
nents of the running gear, or lash them
down in any way. If you do so, the
components could be damaged,
leading to possible accidents.<462de255
Towing with a commercial tow
truck>Do not tow with sling-type equip-
ment.
>Use wheel lift or flat bed equipment.
>Please comply with applicable state
towing laws.
Never allow passengers to ride in
a towed vehicle for any reason.
Never attach tie-down hooks, chains,
straps, or towing hooks to tie rods,
control arms, or any other part of the
vehicle suspension, as severe damage
to these components will occur, leading
to possible accidents.c46cus031
Page 206 of 215

Everything from A to ZEngine
compartment142,143
Engine coolant147,199
Engine data196
Engine oil145
adding145
capacity199
consumption145
disposal147
level check145
pressure20
quality146
specifications146
viscosity146
Engine speed196
Engine, starting69
Engine, switching off70
Enlarging the luggage
compartment41
Enter the rear55
Entry to the rear55
Exterior mirrors57
Eyelets, towing184 F
Failure messages83
Fault, ABS123
Filler cap cover26
Filling capacities199
Filling the washer
reservoir199
First-aid kit25 Fittings, towing and tow
starting184
Flashlight107
Flat tire132,173
Fog lamps94
bulb replacement169
Follow-Me-Home lamps93
Footbrake125
Footwell lamps94
bulb replacement172
Front seat adjusting52
Frost protection,
radiator147
Fuel27
consumption85
gauge82
preparation196
quality27
reserve indicator85
specifications27
tank capacity199
Fuel filler door
unlock in case of electrical
fault180
Functional status of
electrical and electronic
systems192
Fuses179
replacing179
G
Garage-door opener108
Gasoline27
Gasoline gauge82
Glove compartment107
Glove compartment lamp,
bulb replacement172
Gross vehicle weight198 H
Handbrake71
Handsfree system111
Hazard warning flashers25
Hazard warning triangle25
Head restraints53
Headlamp cover,
care151,167
Headlamp flasher76,94
Headlamp washer
system78,144,199
Heated seats107
Heating, rapid100
Heavy loads114
Height197
High beams23,76,94
bulb replacement167
High Performance Synthetic
Oils146
High-mount brake lamp171
Hood, release140
Horn17 Hubcap174
Hydraulic Brake assistant,
refer to DBC
I
Ice warning85
Identification, tires135
Ignition key32
Ignition lock69
Imprint4
Indicator lamps20
Inflation pressure27,132
monitoring91,192
INSPECTION82
Instrument cluster18
Instrument panel16,18
lighting93
Interaxle tire rotation134
Interface socket for Onboard
Diagnostics162
Interference
cellular phones129
Interior lamps36,94
bulb replacement171
remote control36
Interior motion
sensor36,43
Interior rearview mirror58
automatic dimming
feature58,191
Page 209 of 215

Everything from A to Z
209n
IndexDataTechnologyRepairsCar careControlsOverview
Temperature
adjusting98,104
layering99,106
Temperature display
outside temperature84
Thigh support, adjusting54
Third brake lamp171
Tilt sensor alarm
system36,43
remote control36
Tire changing173
Tire codes135
Tire condition27,132
Tire damage132
Tire inflation
pressure27,132
Tire pressure
monitoring91,192
Tire Pressure Control
(RDC)91,192
Tire Quality Grading133
Tire replacement133,134
Tire rotation134
Tire specifications137
Tire tread132
Tools166
Torque196
Towing eyelets184
Towing the vehicle184
Track197
Traction Control System,
refer to DSC88 Transmission72
Transmitter key32
Transporting children
safely64
Tread depth, tires132
Tread wear indicator132
Trip odometer81
Trunk, refer to luggage
compartment39
Turn signal indicator23,76
bulb replacement168
Turning radius197
Two-way radios129
U
Uniform Tire Quality
Grading133
Used batteries,
disposal178 V
Vacuum cleaner,
connecting112
V-belts200
Vehicle battery176,200
Vehicle care
exterior152
interior154
Vehicle Identification
Number (VIN)149
Vehicle immobilizer33 Vehicle painting152
Vehicle start69
Vehicle storage160
Vehicle vacuum cleaner,
attaching112
Vehicle weight198
Ventilation96,99,102
draft-free99,106
Vinyl upholstery, care154
W
Warning flashers25
Warning lamps20
Warning messages83
Warning triangle25
Warranty and Service Guide
Booklet150
Washer fluids144,199
Washer nozzles144
Washer reservoir, filling144
Washer system76
Washing your vehicle151
Water on roadways121
Waxing, paintwork153
Wear indicator in the
tires132
Weights198
Wheel changing173
Wheel lug wrench173
Wheel rims135
Wheel specifications137
Wheelbase197 Wheels and tires135,137
Width197
Windows
convenience operation34
remote control35
remove
condensation105
Windshield washer,
automatic77
Windshield washer nozzle
adjustment144
Windshield washer reservoir,
filling144,199
Windshield wiper76
blade replacement166
Winter operation127
Winter tires135,136
Wiper blade,
replacement166
Wiper system76
Work in the engine
compartment140
X
Xenon lamps167,193