2001 BMW 325Ci CONVERTIBLE door lock
[x] Cancel search: door lockPage 42 of 215

42n
Alarm system
*
The conceptThe vehicle alarm system responds:
>When a door, the hood or the
luggage compartment lid is opened.
>To movement inside the vehicle
(interior motion sensor).
>To a change of the vehicle's tilt Ð if
someone attempts to steal the
wheels or tow the vehicle without
authorization, for example.
>If there is an interruption in battery
voltage.
The system responds to unauthorized
vehicle entry and attempted theft by
simultaneously activating the following:
>Sounding an alarm for 30 seconds.
>The hazard warning flashers are acti-
vated for approx. five minutes.
>The high beams flash on and off in the
same rhythm.
To activate and deactivate the
alarm systemWhen the vehicle is locked or unlocked
by using a key or with the remote
control, the alarm system is also simul-
taneously armed or disarmed.
The interior motion sensor and the tilt
alarm sensor are activated approx.
30 seconds after you have finished
locking the vehicle.
If the alarm system has been armed
correctly, the hazard warning flashers
flash once.
You can have a signal set as
acknowledgment for both arming
and disarming the alarm system.<
You can also open the luggage
compartment lid when the system is
armed by pressing button 3 of the
remote control (refer to page 36). When
it is closed, the lid is once again
secured.
Indicator lamp displaysThe indicator lamp is located under the
interior rearview mirror.
>The indicator lamp flashes continu-
ously: the system is armed.
>The indicator lamp flashes while the
system is being armed: the door(s),
the hood or luggage compartment lid
are not completely closed. Even if
you do not close the alerted area(s),
the remaining areas are secure, and
the indicator lamp will flash continu-
ously after 10 seconds. However, the
interior motion sensor is not acti-
vated.
>The indicator lamp goes out when the
system is disarmed: no manipulation
or attempted intrusions have been
detected in the period since the
system was armed.46cus033
Page 44 of 215

44n
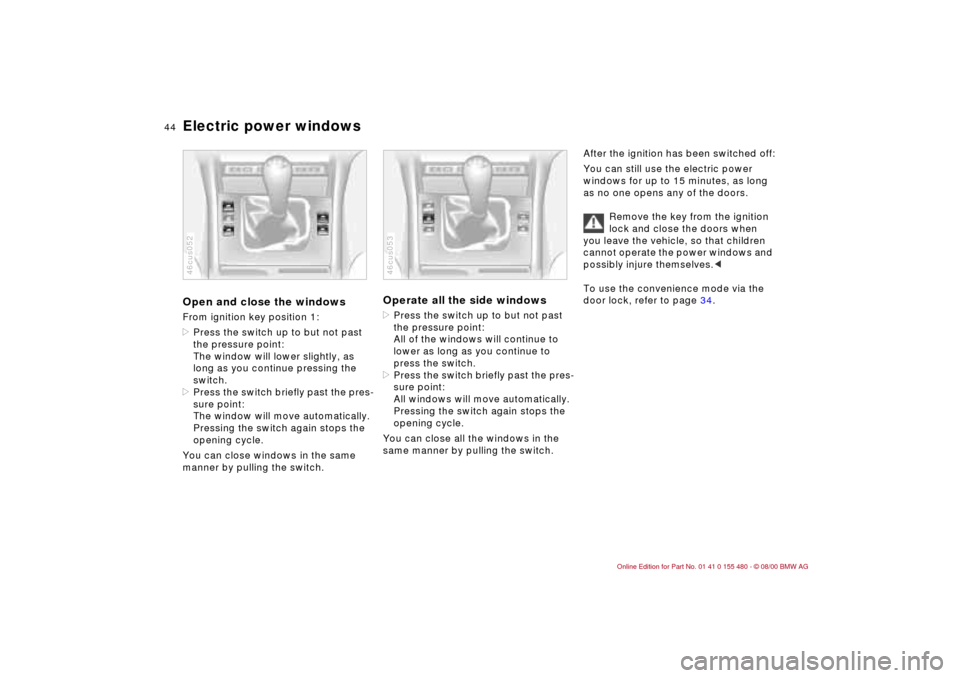
Electric power windowsOpen and close the windowsFrom ignition key position 1:
>Press the switch up to but not past
the pressure point:
The window will lower slightly, as
long as you continue pressing the
switch.
>Press the switch briefly past the pres-
sure point:
The window will move automatically.
Pressing the switch again stops the
opening cycle.
You can close windows in the same
manner by pulling the switch.46cus052
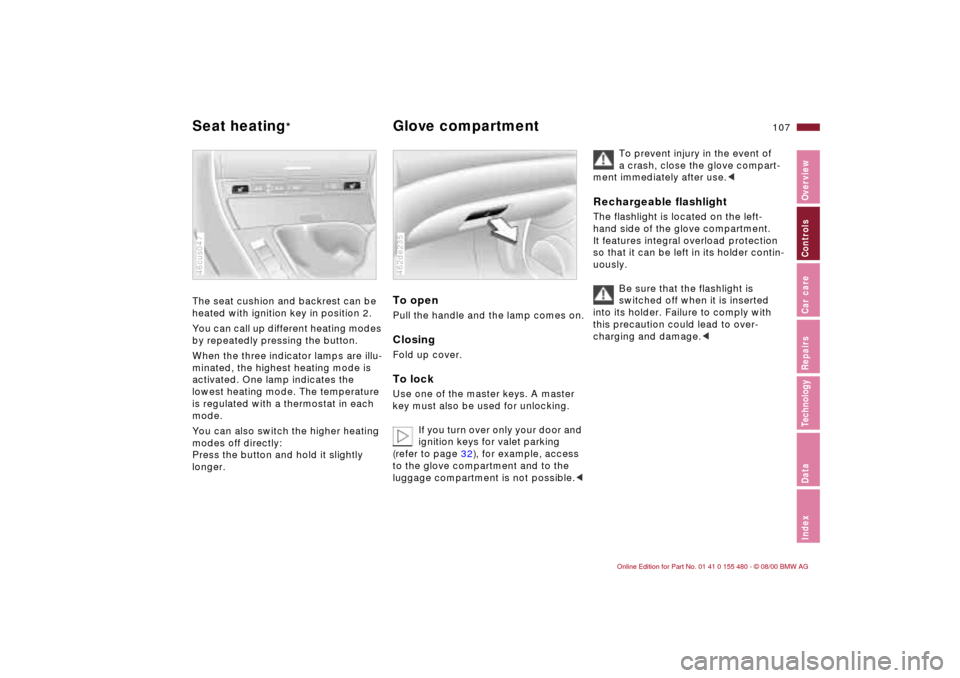
Operate all the side windows>Press the switch up to but not past
the pressure point:
All of the windows will continue to
lower as long as you continue to
press the switch.
>Press the switch briefly past the pres-
sure point:
All windows will move automatically.
Pressing the switch again stops the
opening cycle.
You can close all the windows in the
same manner by pulling the switch.46cus053
After the ignition has been switched off:
You can still use the electric power
windows for up to 15 minutes, as long
as no one opens any of the doors.
Remove the key from the ignition
lock and close the doors when
you leave the vehicle, so that children
cannot operate the power windows and
possibly injure themselves.<
To use the convenience mode via the
door lock, refer to page 34.
Page 50 of 215

50n
The fully automatic convertible top
*
Wind deflector
*
While the convertible top is in
motion, the side windows will
lower slightly. Do not close the side
power windows using the switches if
the convertible top has been inter-
rupted while it is in motion.
In certain cases, the luggage compart-
ment lid cannot be opened if the
opening or closing operation has been
interrupted.
Never store the convertible top while it
is wet to avoid permanent damage from
moisture.
While the convertible top is in motion,
the rear window will move toward the
passenger compartment and will gently
press the heads of the passengers
sitting in the rear forward. Normally, this
is not dangerous. To avoid possibly
being pinched, passengers in the back
seat should lean their heads slightly
forward while the convertible top is in
motion.<
Convenient operation from the
driver-side door lock>To open: with the door closed, turn
and hold the key in the "Unlock" posi-
tion.
>To close: with the door closed, turn
and hold the key to the "Lock" posi-
tion.
Letting go of the key will stop the
motion.
In order to keep the closing process in
view, it is not possible to use the
convenient operation via the remote
control for safety reasons.
At higher speeds, the ensuing
vacuum in the passenger
compartment can cause the convertible
top to begin fluttering. Increase the air
supply via the ventilation controls so
that a vacuum does not occur in the
vehicle.<
The wind deflector keeps air movement
in the passenger compartment to a
minimum, thus providing you with a
pleasant drive, even at higher speeds.
The wind deflector comes in a protec-
tive sleeve, and because of its slim
dimensions, can be easily stored in the
luggage compartment.Installing1 Take the wind deflector out of its
protective sleeve.
Page 56 of 215

56n
Seat and mirror memory*You can store and recall three different
driver's seat and exterior mirror posi-
tions. The illustration shows the buttons
on the driver's seat for making these
adjustments.
The headrest setting is stored in
the memory, but the lumbar
support is not.
exterior mirror positions.
3 Press the
M
EMORY button: the indi-
cator lamp in the button lights up.
4 Press memory button 1, 2 or 3, as
desired: the indicator lamp goes out.
46cde014
To select a stored settingConvenience function:
1 Open the driver's door after
unlocking or turn the ignition key in
position 1.
2 Briefly press memory button 1, 2 or 3,
as desired.
The adjustment cycle is canceled
immediately if you press a seat
adjustment switch or one of the
memory buttons.
Security function:
1 With the driver's door closed and the
ignition key either removed or in posi-
tion 0 or 2.
2 Maintain pressure on the desired
memory button (1, 2 or 3) until the
adjustment process is completed.
If you accidentally press the
M
EMORY
button: press the button again; the
indicator lamp goes out.
Do not select a memory position
while the vehicle is moving. If you
do so, there is a risk of accident from
unexpected seat movement.<
Your BMW center can adjust your
vehicle's systems in such a
manner that your personalized settings
are automatically set for the seat, head-
rest and exterior mirror positions when
you unlock the vehicle with your
personal remote control.<
If you make use of this method of
adjustment, be sure that the foot-
well behind the driver's seat is unob-
structed before unlocking the vehicle.
If you fail to do so, persons or objects
could be injured or damaged if the seat
should move backward.<
Page 59 of 215

59n
IndexDataTechnologyRepairsCar careControlsOverview
Car Memory, Key Memory How the system functionsYou have probably frequently wished
that you could configure individual
functions of your vehicle to reflect your
own personal requirements. In engi-
neering your vehicle, BMW has
included several user-defined func-
tions in the vehicle's design. Your BMW
center can make these settings for you
in accordance with your wishes.
There are settings related to the vehicle
("Car Memory") and settings related to
individuals ("Key Memory"). You can
have up to four different basic settings
adjusted for four different persons. The
only requirement is that each person
uses his or her own remote control key. 463de029
When your vehicle is unlocked with the
remote control, the vehicle recognizes
the individual user by means of a data
exchange with the key, and makes
adjustments accordingly.
In order for you to distinguish between
different keys, colored decals are
supplied together with the keys.
What the system can doYour BMW center can provide you with
details on the capabilities of the Car
Memory and Key Memory systems.
A few examples follow below:
Examples for Car Memory:
>Various signals used as acknowl-
edgement when locking or unlocking
your vehicle.
>Deactivating/activating the Follow-
Me-Home lamps function.
>Activating/deactivating daytime
running lamps
*.
Examples for Key Memory:
>Automatic adjustment of the driver's
power seat.
>Locking your vehicle after starting off.
>When unlocking your vehicle, first
unlock the driver's door, then the rest
of the vehicle.
You will see this symbol
throughout the Owner's Manual. It
is to remind you at appropriate places
of the settings that are available to
you.<
Page 62 of 215

62n
AirbagsOperational status
The indicator lamp in the instru-
ment cluster displays the opera-
tional status of the airbag
system when the ignition key is in posi-
tion 1 and higher.
System operational:
>The indicator lamp comes on briefly
then goes out.
System malfunction:
>The indicator lamp fails to come on.
>The indicator lamp comes on briefly
before going out, and then lights up
again.
If there is a system malfunction, there is
a risk that the airbags will not be trig-
gered within their normal response
range, even if the level of impact would
normally have triggered them.
Have your BMW center inspect the
system immediately.
The airbag indicator lamp also
comes on if the safety belt
tensioners have been triggered.<
Sitting correctly with airbags
For your safety, comply with the
following instructions for the
airbags. If you do not, the airbags may
not be able to provide their maximum
protection. All passengers in the vehicle
should be aware of and comply with
this information:
The airbags are supplemental restraint
devices designed to provide extra
protection; they are not a substitute for
safety belts. Wear your safety belt at all
times. The airbags will not be triggered
in the event of a minor accident, a
vehicle roll-over, or collisions from the
rear. In these instances, the safety belt
provides optimal protection.
Airbags are located under cover panels
in the steering wheel, in the dashboard
and in the side trim panels in the front
and rear
*.
Adjust your seat to a position that
provides a maximum distance between
you and the steering wheel, the instru-
ment panel and the door while still
allowing comfortable and safe access
to all vehicle controls.
To avoid sustaining hand and arm inju-
ries, always grasp the steering wheel
on the rim with your hands at the 9 and
3 o'clock positions. Do not place your
hands on the center pad.
Never allow any objects to obstruct the
area between the airbag and an occu-
pant.
Do not use the cover panel above the
passenger-side airbag as a storage
area.
Do not apply adhesive materials to the
cover panels of the airbags, cover them
or modify them in any other way.
Do not install a rear-facing child
restraint system in the front passenger
seat of this vehicle.
Children under 13 years of age and
children less than 5 ft (150 cm) tall
should ride only in the rear seat.
Infants or small children should never
be held on the lap of a passenger.
If your car is equipped with side airbags
in the rear passenger area
*, be sure
that child restraints are mounted
correctly and provided with the grea-
test-possible distance between the
airbags in the side trim panels. Do not
allow children to lean out of the child's
seat in the direction of the side trim
panels. If they do so, serious injuries
can occur if the airbag is triggered.<
Page 107 of 215

107n
IndexDataTechnologyRepairsCar careControlsOverview
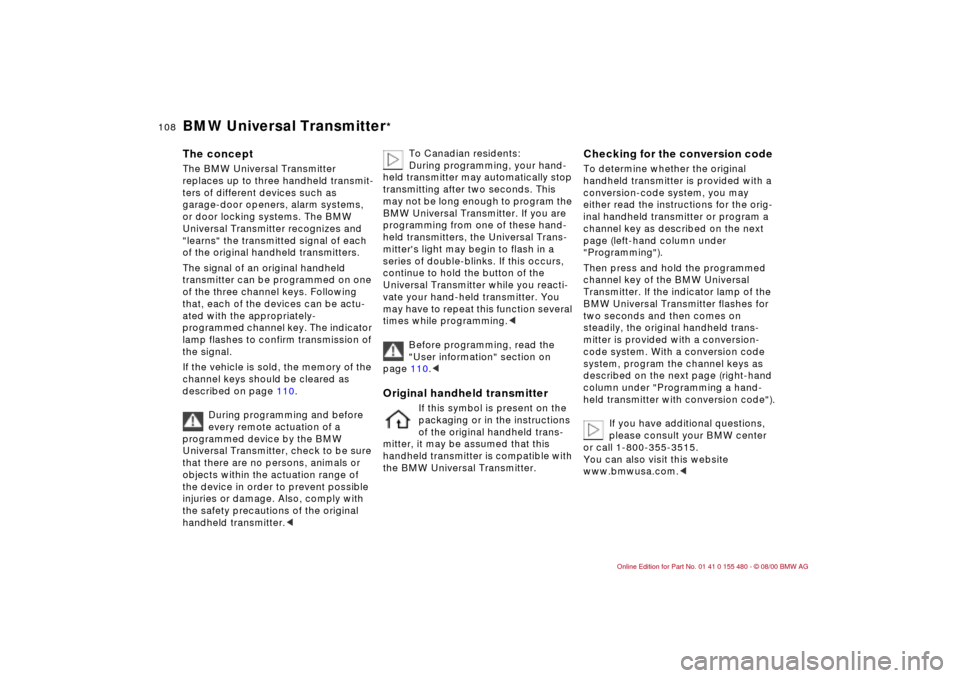
The seat cushion and backrest can be
heated with ignition key in position 2.
You can call up different heating modes
by repeatedly pressing the button.
When the three indicator lamps are illu-
minated, the highest heating mode is
activated. One lamp indicates the
lowest heating mode. The temperature
is regulated with a thermostat in each
mode.
You can also switch the higher heating
modes off directly:
Press the button and hold it slightly
longer.46cus047
To openPull the handle and the lamp comes on.ClosingFold up cover.To lockUse one of the master keys. A master
key must also be used for unlocking.
If you turn over only your door and
ignition keys for valet parking
(refer to page 32), for example, access
to the glove compartment and to the
luggage compartment is not possible.<462de235
To prevent injury in the event of
a crash, close the glove compart-
ment immediately after use.<
Rechargeable flashlightThe flashlight is located on the left-
hand side of the glove compartment.
It features integral overload protection
so that it can be left in its holder contin-
uously.
Be sure that the flashlight is
switched off when it is inserted
into its holder. Failure to comply with
this precaution could lead to over-
charging and damage.<
Seat heating
*
Glove compartment
Page 108 of 215

108n
BMW Universal Transmitter
*
The concept The BMW Universal Transmitter
replaces up to three handheld transmit-
ters of different devices such as
garage-door openers, alarm systems,
or door locking systems. The BMW
Universal Transmitter recognizes and
"learns" the transmitted signal of each
of the original handheld transmitters.
The signal of an original handheld
transmitter can be programmed on one
of the three channel keys. Following
that, each of the devices can be actu-
ated with the appropriately-
programmed channel key. The indicator
lamp flashes to confirm transmission of
the signal.
If the vehicle is sold, the memory of the
channel keys should be cleared as
described on page 110.
During programming and before
every remote actuation of a
programmed device by the BMW
Universal Transmitter, check to be sure
that there are no persons, animals or
objects within the actuation range of
the device in order to prevent possible
injuries or damage. Also, comply with
the safety precautions of the original
handheld transmitter.<
To Canadian residents:
During programming, your hand-
held transmitter may automatically stop
transmitting after two seconds. This
may not be long enough to program the
BMW Universal Transmitter. If you are
programming from one of these hand-
held transmitters, the Universal Trans-
mitter's light may begin to flash in a
series of double-blinks. If this occurs,
continue to hold the button of the
Universal Transmitter while you reacti-
vate your hand-held transmitter. You
may have to repeat this function several
times while programming.<
Before programming, read the
"User information" section on
page 110.<
Original handheld transmitter
If this symbol is present on the
packaging or in the instructions
of the original handheld trans-
mitter, it may be assumed that this
handheld transmitter is compatible with
the BMW Universal Transmitter.
Checking for the conversion code To determine whether the original
handheld transmitter is provided with a
conversion-code system, you may
either read the instructions for the orig-
inal handheld transmitter or program a
channel key as described on the next
page (left-hand column under
"Programming").
Then press and hold the programmed
channel key of the BMW Universal
Transmitter. If the indicator lamp of the
BMW Universal Transmitter flashes for
two seconds and then comes on
steadily, the original handheld trans-
mitter is provided with a conversion-
code system. With a conversion code
system, program the channel keys as
described on the next page (right-hand
column under "Programming a hand-
held transmitter with conversion code").
If you have additional questions,
please consult your BMW center
or call 1-800-355-3515.
You can also visit this website
www.bmwusa.com.<