2001 BMW 320i ECU
[x] Cancel search: ECUPage 67 of 211
67n
IndexDataTechnologyRepairsCar careControlsOverview
Automatic transmission with Steptronic
*
D Drive (automatic shift program)This position is designed for driving
under all normal operating conditions.
All forward gears are available, the
Adaptive Transmission Control (ATC) is
fully operational."Kickdown"In the "Kickdown" mode, you achieve
the maximum performance.
To activate this mode, depress the
accelerator pedal beyond the full-
throttle position, at which a resistance
point must be overcome.
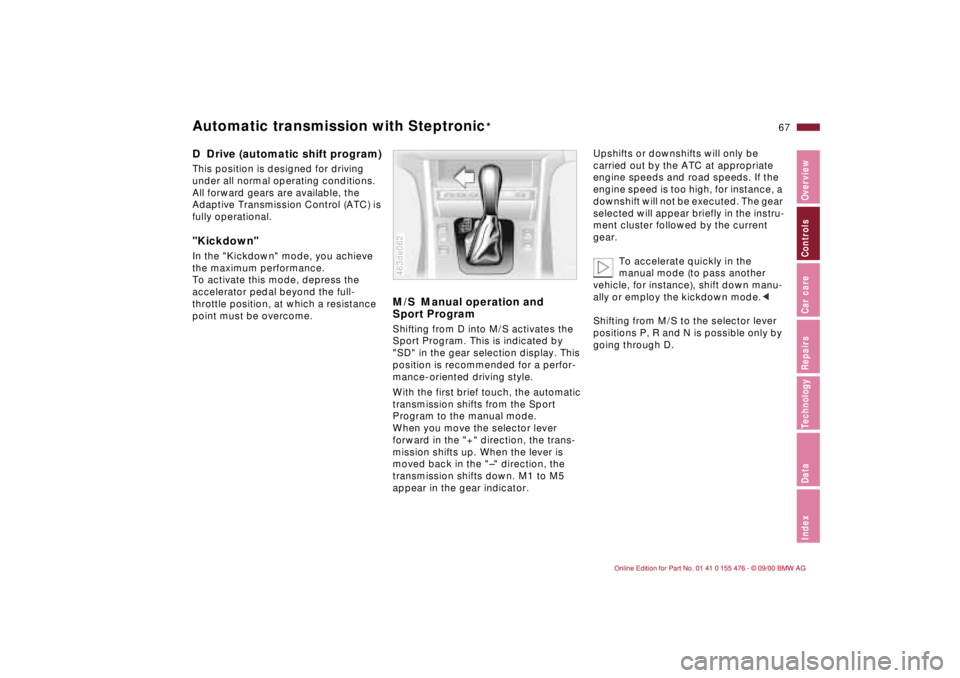
M/S Manual operation and
Sport ProgramShifting from D into M/S activates the
Sport Program. This is indicated by
"SD" in the gear selection display. This
position is recommended for a perfor-
mance-oriented driving style.
With the first brief touch, the automatic
transmission shifts from the Sport
Program to the manual mode.
When you move the selector lever
forward in the "+" direction, the trans-
mission shifts up. When the lever is
moved back in the "Ð" direction, the
transmission shifts down. M1 to M5
appear in the gear indicator.463de062
Upshifts or downshifts will only be
carried out by the ATC at appropriate
engine speeds and road speeds. If the
engine speed is too high, for instance, a
downshift will not be executed. The gear
selected will appear briefly in the instru-
ment cluster followed by the current
gear.
To accelerate quickly in the
manual mode (to pass another
vehicle, for instance), shift down manu-
ally or employ the kickdown mode.<
Shifting from M/S to the selector lever
positions P, R and N is possible only by
going through D.
Page 109 of 211
109n
IndexDataTechnologyRepairsCar careControlsOverview
Through-loading system
*
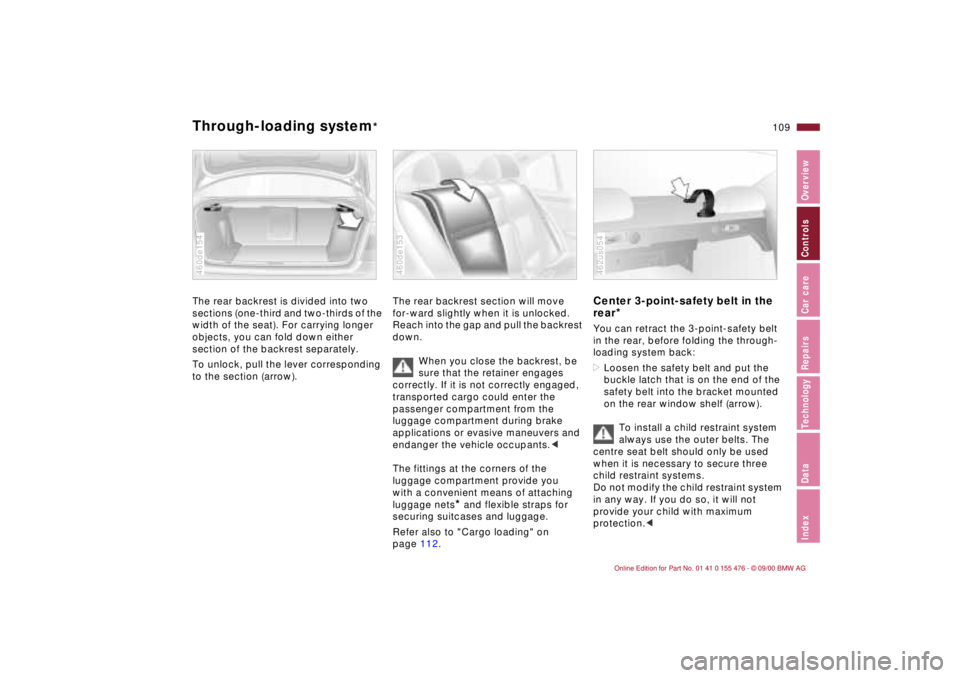
The rear backrest is divided into two
sections (one-third and two-thirds of the
width of the seat). For carrying longer
objects, you can fold down either
section of the backrest separately.
To unlock, pull the lever corresponding
to the section (arrow).460de154
The rear backrest section will move
for-ward slightly when it is unlocked.
Reach into the gap and pull the backrest
down.
When you close the backrest, be
sure that the retainer engages
correctly. If it is not correctly engaged,
transported cargo could enter the
passenger compartment from the
luggage compartment during brake
applications or evasive maneuvers and
endanger the vehicle occupants.<
The fittings at the corners of the
luggage compartment provide you
with a convenient means of attaching
luggage nets
* and flexible straps for
securing suitcases and luggage.
Refer also to "Cargo loading" on
page 112.
460de153
Center 3-point-safety belt in the
rear
*
You can retract the 3-point-safety belt
in the rear, before folding the through-
loading system back:
>Loosen the safety belt and put the
buckle latch that is on the end of the
safety belt into the bracket mounted
on the rear window shelf (arrow).
To install a child restraint system
always use the outer belts. The
centre seat belt should only be used
when it is necessary to secure three
child restraint systems.
Do not modify the child restraint system
in any way. If you do so, it will not
provide your child with maximum
protection.<462us054
Page 111 of 211
111n
IndexDataTechnologyRepairsCar careControlsOverview
Ski bag
*
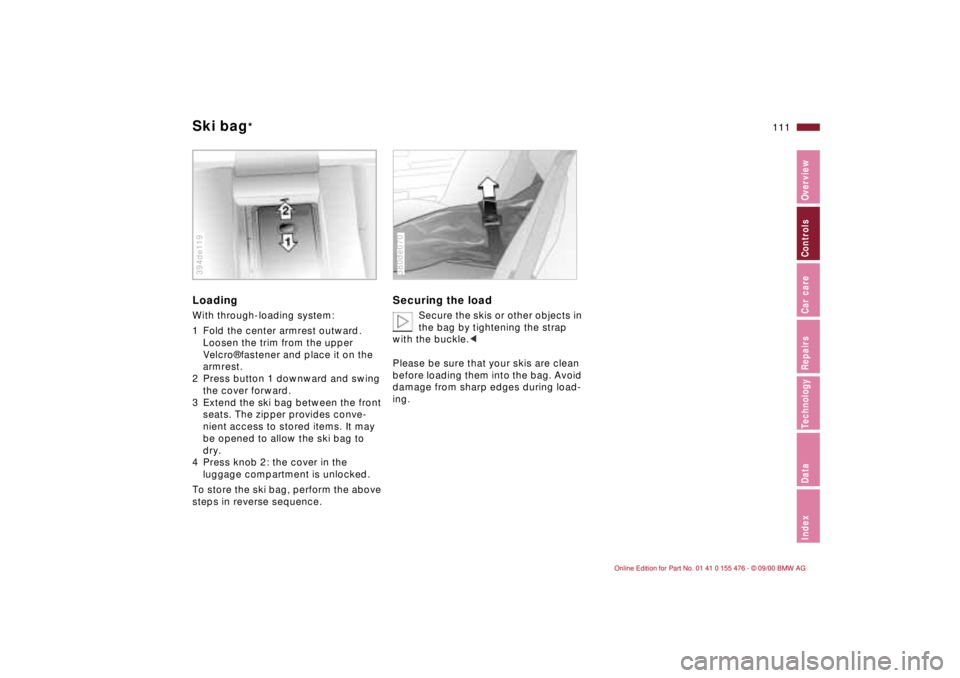
LoadingWith through-loading system:
1 Fold the center armrest outward.
Loosen the trim from the upper
Velcro¨ fastener and place it on the
armrest.
2 Press button 1 downward and swing
the cover forward.
3 Extend the ski bag between the front
seats. The zipper provides conve-
nient access to stored items. It may
be opened to allow the ski bag to
dry.
4 Press knob 2: the cover in the
luggage compartment is unlocked.
To store the ski bag, perform the above
steps in reverse sequence.394de119
Securing the load
Secure the skis or other objects in
the bag by tightening the strap
with the buckle.<
Please be sure that your skis are clean
before loading them into the bag. Avoid
damage from sharp edges during load-
ing.
380de070
Page 112 of 211
112n
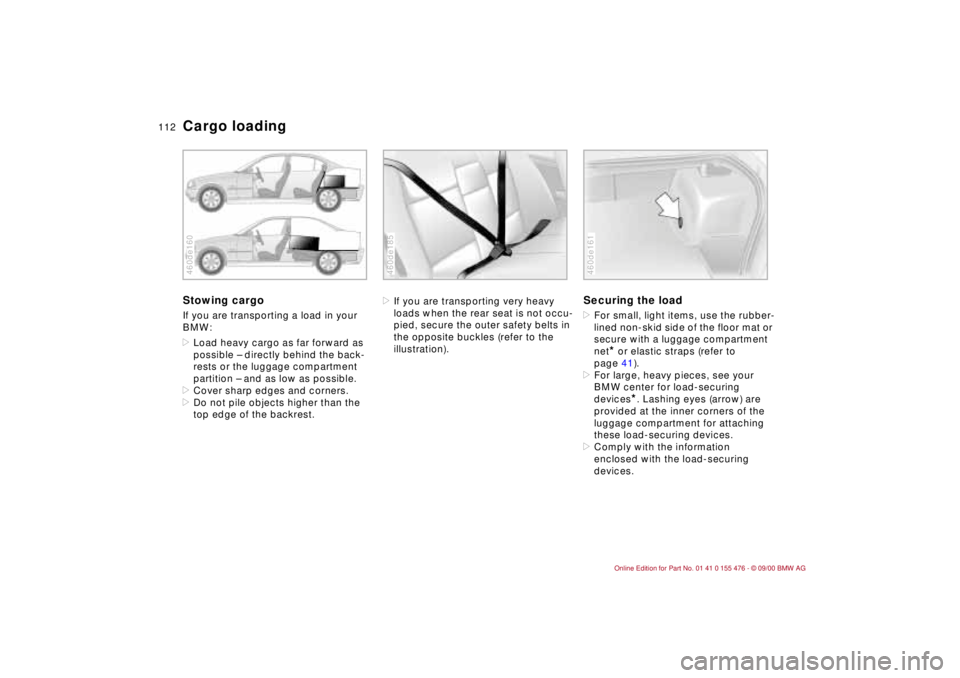
Cargo loadingStowing cargo If you are transporting a load in your
BMW:
>Load heavy cargo as far forward as
possible Ð directly behind the back-
rests or the luggage compartment
partition Ð and as low as possible.
>Cover sharp edges and corners.
>Do not pile objects higher than the
top edge of the backrest.460de160
>If you are transporting very heavy
loads when the rear seat is not occu-
pied, secure the outer safety belts in
the opposite buckles (refer to the
illustration).460de185
Securing the load >For small, light items, use the rubber-
lined non-skid side of the floor mat or
secure with a luggage compartment
net
* or elastic straps (refer to
page 41).
>For large, heavy pieces, see your
BMW center for load-securing
devices
*. Lashing eyes (arrow) are
provided at the inner corners of the
luggage compartment for attaching
these load-securing devices.
>Comply with the information
enclosed with the load-securing
devices.
460de161
Page 113 of 211
113n
IndexDataTechnologyRepairsCar careControlsOverview
Cargo loading Roof-mounted luggage rack
*
Always position and secure the
load correctly. If you do not, it can
endanger the passengers during brak-
ing or evasive maneuvers.
Do not exceed the permissible gross
vehicle weight and the permissible axle
loads (refer to page 194). If you do, the
operating safety of the vehicle is no
longer ensured and you are in violation
of the law.
Do not carry hard or heavy objects
unsecured in the passenger compart-
ment. If you do so, they may be
projected through the air during braking
and evasive maneuvers, thus
endangering vehicle occupants.<
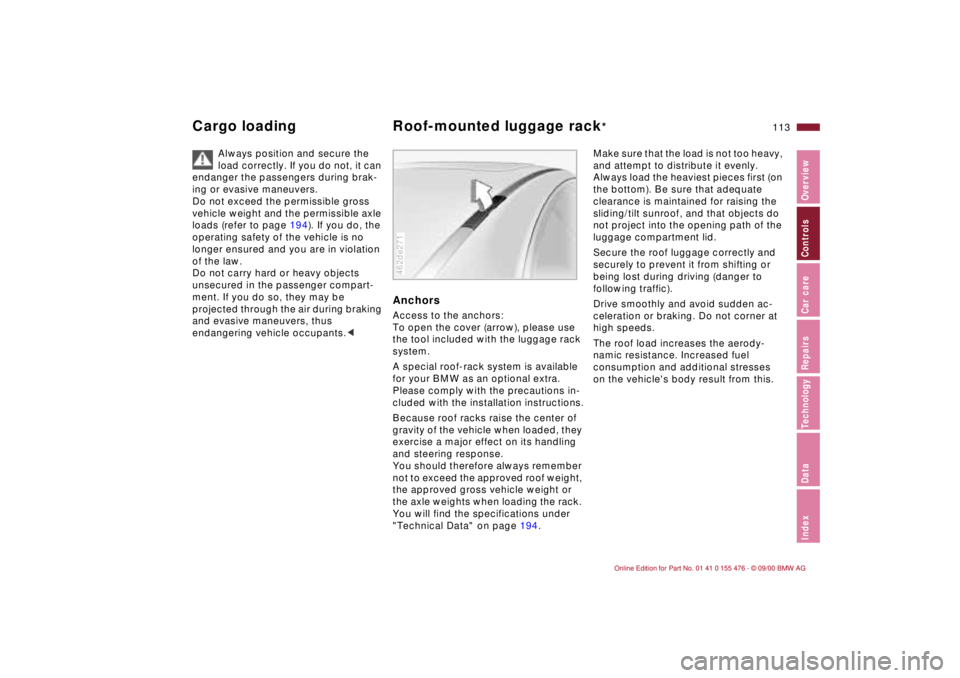
AnchorsAccess to the anchors:
To open the cover (arrow), please use
the tool included with the luggage rack
system.
A special roof-rack system is available
for your BMW as an optional extra.
Please comply with the precautions in-
cluded with the installation instructions.
Because roof racks raise the center of
gravity of the vehicle when loaded, they
exercise a major effect on its handling
and steering response.
You should therefore always remember
not to exceed the approved roof weight,
the approved gross vehicle weight or
the axle weights when loading the rack.
You will find the specifications under
"Technical Data" on page 194.462de271
Make sure that the load is not too heavy,
and attempt to distribute it evenly.
Always load the heaviest pieces first (on
the bottom). Be sure that adequate
clearance is maintained for raising the
sliding/tilt sunroof, and that objects do
not project into the opening path of the
luggage compartment lid.
Secure the roof luggage correctly and
securely to prevent it from shifting or
being lost during driving (danger to
following traffic).
Drive smoothly and avoid sudden ac-
celeration or braking. Do not corner at
high speeds.
The roof load increases the aerody-
namic resistance. Increased fuel
consumption and additional stresses
on the vehicle's body result from this.
Page 135 of 211
135n
IndexDataTechnologyRepairsCar careControlsOverview
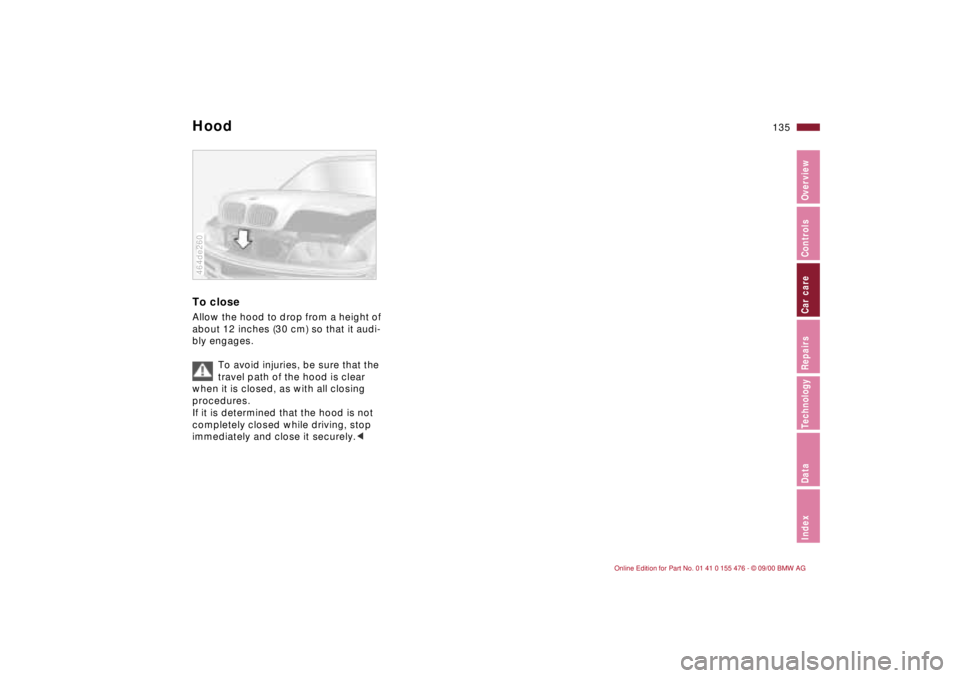
HoodTo closeAllow the hood to drop from a height of
about 12 inches (30 cm) so that it audi-
bly engages.
To avoid injuries, be sure that the
travel path of the hood is clear
when it is closed, as with all closing
procedures.
If it is determined that the hood is not
completely closed while driving, stop
immediately and close it securely.<464de260
Page 150 of 211

150n
Caring for your vehicleCare of upholstery materials Depressions in the upholstery that
result from everyday use can be
brushed smooth by brushing against
the nap with a lightly dampened brush.
The tendency of the pile to lie in a
particular direction on velour upholstery
is not a quality defect. Just as with
home textiles or clothing, this cannot be
avoided.
Lint on upholstery materials, rubbed-in
fabric or suede residues can be re-
moved with a lint brush or Velcro¨
brush. A cleaning glove is available for
especially "stubborn" lint. Stains and
fairly large areas of dirt should be
cleaned off without delay, using luke-
warm water and an interior cleaner,
stain remover or appropriate cleaning
fluid. Brush the fabric afterwards to
restore its appearance.
If the vehicle will be stored for an
extended period or if it is exposed to
intense sunlight, cover all the seats or
the windows to prevent fading.
Use cleaning and car-care
products that you can obtain at
your BMW center.<
The buildup of an electrostatic charge
on the seat covers, particularly if
atmospheric humidity is low, can give
the occupants an unpleasant electric
shock if they touch metal body parts
after leaving the vehicle. Although this is
not dangerous in any way, it can be
avoided by touching a bare or polished
metal part of the vehicle while getting
out.
Leather care The leather upholstery
* used by BMW
is a natural product of the highest
quality, processed using state-of-the-
art methods to ensure that it will main-
tain its high quality for years to come,
provided that it is properly cared for.
Because this product is manufactured
using natural materials, you must make
allowance for its special characteristics
and for the peculiarities of its use and
care.
Regular periodic cleaning and care are
essential, as dust and road dirt act as
abrasives in the pores and creases of
the material. This leads to wear spots
and premature brittleness on the
surface of the leather. We therefore
suggest that you clean the leather with
a vacuum cleaner or cloth at frequent
intervals.
For cleaning, use BMW leather cleaning
foam.
Since dirt and grease gradually attack
the protective layer of the leather, the
cleaned surfaces should be treated
with BMW leather care agent. This also
acts as an antistatic agent.
Page 166 of 211
166n
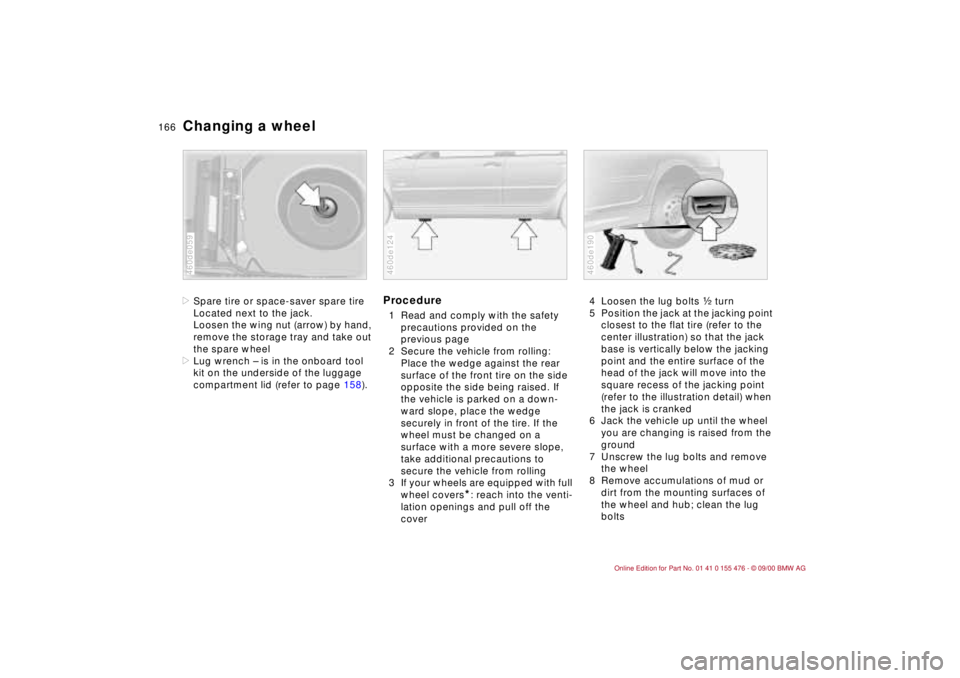
Changing a wheel>Spare tire or space-saver spare tire
Located next to the jack.
Loosen the wing nut (arrow) by hand,
remove the storage tray and take out
the spare wheel
>Lug wrench Ð is in the onboard tool
kit on the underside of the luggage
compartment lid (refer to page 158).460de059
Procedure1 Read and comply with the safety
precautions provided on the
previous page
2 Secure the vehicle from rolling:
Place the wedge against the rear
surface of the front tire on the side
opposite the side being raised. If
the vehicle is parked on a down-
ward slope, place the wedge
securely in front of the tire. If the
wheel must be changed on a
surface with a more severe slope,
take additional precautions to
secure the vehicle from rolling
3 If your wheels are equipped with full
wheel covers
*: reach into the venti-
lation openings and pull off the
cover
460de124
4 Loosen the lug bolts g turn
5 Position the jack at the jacking point
closest to the flat tire (refer to the
center illustration) so that the jack
base is vertically below the jacking
point and the entire surface of the
head of the jack will move into the
square recess of the jacking point
(refer to the illustration detail) when
the jack is cranked
6 Jack the vehicle up until the wheel
you are changing is raised from the
ground
7 Unscrew the lug bolts and remove
the wheel
8 Remove accumulations of mud or
dirt from the mounting surfaces of
the wheel and hub; clean the lug
bolts460de190