Page 15 of 91

3-1
3
EAU00027
3-INSTRUMENT AND CONTROL FUNCTIONS
EAU00028
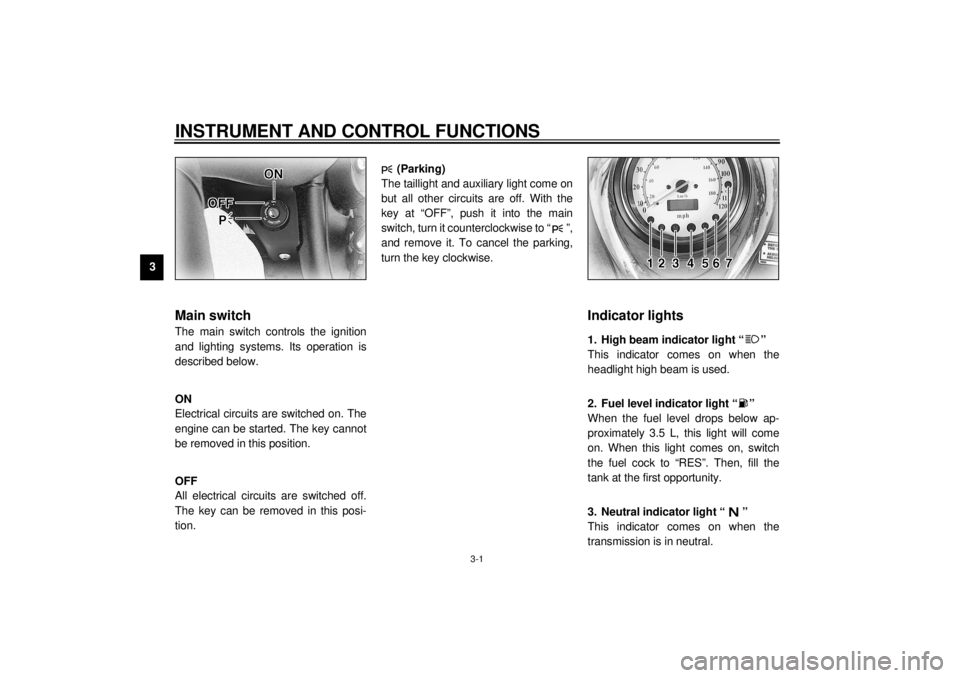
Main switchThe main switch controls the ignition
and lighting systems. Its operation is
described below.
EAU00036
ON
Electrical circuits are switched on. The
engine can be started. The key cannot
be removed in this position.
EAU00038
OFF
All electrical circuits are switched off.
The key can be removed in this posi-
tion.
EAU00054*
(Parking)
The taillight and auxiliary light come on
but all other circuits are off. With the
key at “OFF”, push it into the main
switch, turn it counterclockwise to “ ”,
and remove it. To cancel the parking,
turn the key clockwise.
EAU00056
Indicator lights
EAU00063
1. High beam indicator light “ ”
This indicator comes on when the
headlight high beam is used.
EAU00079
2. Fuel level indicator light “ ”
When the fuel level drops below ap-
proximately 3.5 L, this light will come
on. When this light comes on, switch
the fuel cock to “RES”. Then, fill the
tank at the first opportunity.
EAU00061
3. Neutral indicator light “ ”
This indicator comes on when the
transmission is in neutral.
E_4YP_Functions.fm Page 1 Wednesday, October 6, 1999 10:03 AM
Page 18 of 91
INSTRUMENT AND CONTROL FUNCTIONS
3-4
3
EAU00118
Handlebar switches
EAU00119
1. Pass switch “ ”
Press the switch to operate the passing
light.
EAU00121
2. Dimmer switch
Turn the switch to “ ” for the high
beam and to “ ” for the low beam.
EAU00127
3. Turn signal switch
To signal a right-hand turn, push the
switch to “ ”. To signal a left-hand
turn, push the switch to “ ”. Once the
switch is released it will return to the
center position. To cancel the signal,
push the switch in after it has returned
to the center position.
EAU00129
4. Horn switch “ ”
Press the switch to sound the horn.
E_4YP_Functions.fm Page 4 Wednesday, October 6, 1999 10:03 AM
Page 69 of 91

PERIODIC MAINTENANCE AND MINOR REPAIR
6-27
6
EAU00833
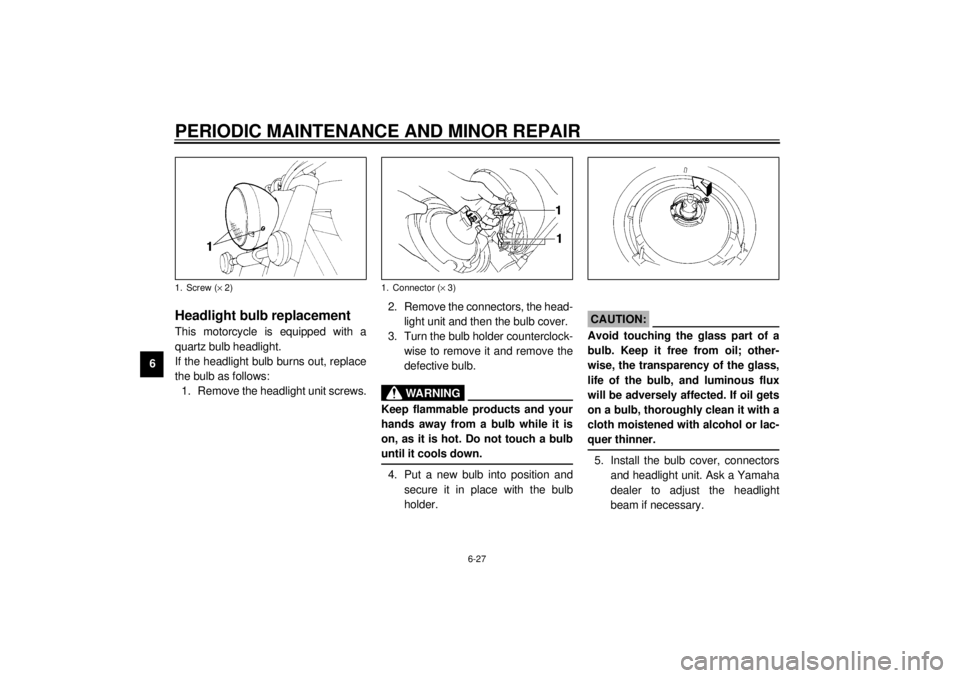
Headlight bulb replacementThis motorcycle is equipped with a
quartz bulb headlight.
If the headlight bulb burns out, replace
the bulb as follows:
1. Remove the headlight unit screws.2. Remove the connectors, the head-
light unit and then the bulb cover.
3. Turn the bulb holder counterclock-
wise to remove it and remove the
defective bulb.
EW000119
WARNING
@ Keep flammable products and your
hands away from a bulb while it is
on, as it is hot. Do not touch a bulb
until it cools down. @4. Put a new bulb into position and
secure it in place with the bulb
holder.
EC000105
CAUTION:@ Avoid touching the glass part of a
bulb. Keep it free from oil; other-
wise, the transparency of the glass,
life of the bulb, and luminous flux
will be adversely affected. If oil gets
on a bulb, thoroughly clean it with a
cloth moistened with alcohol or lac-
quer thinner. @5. Install the bulb cover, connectors
and headlight unit. Ask a Yamaha
dealer to adjust the headlight
beam if necessary.
1. Screw (´ 2)
1. Connector (´ 3)
E_4YP_Periodic.fm Page 27 Wednesday, October 6, 1999 10:05 AM