Page 51 of 91

PERIODIC MAINTENANCE AND MINOR REPAIR
6-9
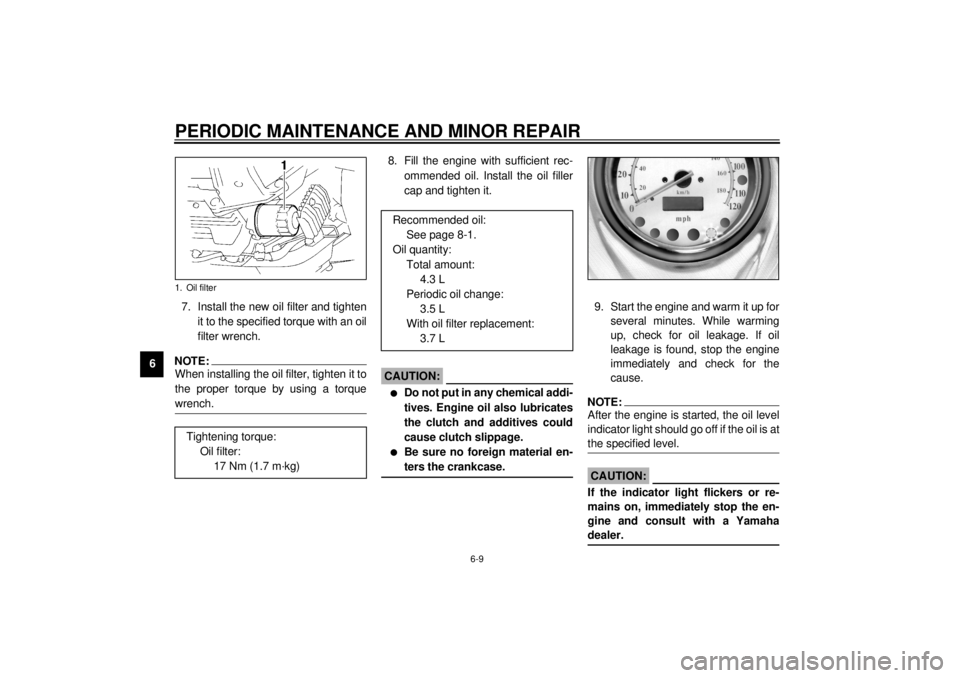
67. Install the new oil filter and tighten
it to the specified torque with an oil
filter wrench.
NOTE:@ When installing the oil filter, tighten it to
the proper torque by using a torque
wrench. @
8. Fill the engine with sufficient rec-
ommended oil. Install the oil filler
cap and tighten it.
EC000066
CAUTION:@ l
Do not put in any chemical addi-
tives. Engine oil also lubricates
the clutch and additives could
cause clutch slippage.
l
Be sure no foreign material en-
ters the crankcase.
@
9. Start the engine and warm it up for
several minutes. While warming
up, check for oil leakage. If oil
leakage is found, stop the engine
immediately and check for the
cause. NOTE:After the engine is started, the oil level
indicator light should go off if the oil is at
the specified level.
EC000067
CAUTION:@ If the indicator light flickers or re-
mains on, immediately stop the en-
gine and consult with a Yamaha
dealer. @
1. Oil filterTightening torque:
Oil filter:
17 Nm (1.7 m·kg)
Recommended oil:
See page 8-1.
Oil quantity:
Total amount:
4.3 L
Periodic oil change:
3.5 L
With oil filter replacement:
3.7 L
E_4YP_Periodic.fm Page 9 Wednesday, October 6, 1999 10:05 AM
Page 52 of 91

PERIODIC MAINTENANCE AND MINOR REPAIR
6-10
6
EAU01220
Final gear oilCheck for oil leakage. If any leakage is
found, take the motorcycle to a
Yamaha dealer for repairs.
EAU01589
Coolant1. Remove the reservoir tank cover
by removing the screw.
2. Check the coolant level in the res-
ervoir tank when the engine is cold
as the coolant level will vary with
engine temperature. The coolant
level should be between the maxi-
mum and minimum marks.
3. If the level is low, remove the rid-
er’s seat, open the reservoir tank
cap and add coolant or distilled
water to raise it to the specified
level. (See page 3-10 for seat re-
moval procedures.)4. Install the reservoir tank cap and
rider’s seat.
5. Place the reservoir tank cover in
the original position and install the
screw.
EC000080
CAUTION:@ Hard water or salt water is harmful
to the engine. You may use distilled
water if you can’t get soft water. @
1. Final gear oil filler bolt
2. Final gear oil drain bolt
1. Reservoir tank
2. Maximum level mark
3. Minimum level markReservoir tank capacity:
0.84 L
E_4YP_Periodic.fm Page 10 Wednesday, October 6, 1999 10:05 AM
Page 63 of 91
PERIODIC MAINTENANCE AND MINOR REPAIR
6-21
6
EAU00742
Brake fluid replacementThe brake fluid should be replaced only
by trained Yamaha service personnel.
Have the Yamaha dealer replace the
following components during periodic
maintenance or when they are dam-
aged or leaking:l
oil seals (every two years)
l
brake hoses (every four years)
EAU02984
Brake and shift pedal
lubricationLubricate the pivoting parts.
Recommended lubricant:
Engine oil
E_4YP_Periodic.fm Page 21 Wednesday, October 6, 1999 10:05 AM
Page 64 of 91
PERIODIC MAINTENANCE AND MINOR REPAIR
6-22
6
EAU02985
Brake and clutch lever
lubricationLubricate the pivoting parts.
EAU02986
Sidestand lubricationLubricate the sidestand pivoting point
and metal-to-metal contact surfaces.
Check that the sidestand moves up
and down smoothly.
EW000113
WARNING
@ If the sidestand does not move
smoothly, consult a Yamaha dealer. @
Recommended lubricant:
Engine oil
Recommended lubricant:
Engine oil
E_4YP_Periodic.fm Page 22 Wednesday, October 6, 1999 10:05 AM
Page 77 of 91

MOTORCYCLE CARE AND STORAGE
7-3
71. Clean your motorcycle with cold
water and soap after the engine
has cooled down.
ECA00012
CAUTION:@ Do not use warm water since it in-
creases the corrosive action of the
salt. @2. Be sure to apply a corrosion pro-
tection spray on all (even chrome-
and nickel-plated) metal surfaces
to prevent corrosion.After cleaning
1. Dry the motorcycle with a chamois
or an absorbing cloth.
2. Use a chrome polish to shine
chrome, aluminum and stainless-
steel parts, including the exhaust
system. (Even the thermally in-
duced discoloring of stainless-
steel exhaust systems can be re-
moved through polishing.)
3. To prevent corrosion, it is recom-
mended to apply a corrosion pro-
tection spray on all (even chrome-
and nickel-plated) metal surfaces.
4. Use spray oil as a universal clean-
er to remove any remaining dirt.
5. Touch up minor paint damage
caused by stones, etc.
6. Wax all painted surfaces.
7. Let the motorcycle dry completely
before storing it or covering it.
EWA00001
WARNING
@ Make sure that there is no oil or wax
on the brakes and tires. If neces-
sary, clean the brake discs and lin-
ings with a regular brake disc
cleaner or acetone, and wash the
tires with warm water and mild soap.
Then, carefully test the motorcycle
for its braking performance and cor-
nering behavior. @
E_4YP_Cleaning.fm Page 3 Wednesday, October 6, 1999 10:06 AM
Page 79 of 91

MOTORCYCLE CARE AND STORAGE
7-5
7a. Remove the spark plug caps and
spark plugs.
b. Pour a teaspoonful of engine oil
into each spark plug bore.
c. Install the spark plug caps onto the
spark plugs and place the spark
plugs on the cylinder head so that
the electrodes are grounded. (This
will limit sparking during the next
step.)
d. Turn the engine over several times
with the starter. (This will coat the
cylinder walls with oil.)
e. Remove the spark plug caps from
the spark plugs, install the spark
plugs and then the spark plug
caps.
EWA00003
WARNING
@ When turning the engine over, be
sure to ground the spark plug elec-
trodes to prevent damage or injury
from sparking. @
6. Lubricate all control cables and
the pivoting points of all levers and
pedals as well as of the sidestand/
centerstand.
7. Check and, if necessary, correct
the tire air pressure, then raise the
motorcycle so that both of its
wheels are off the ground. Alterna-
tively, turn the wheels a little every
month in order to prevent the tires
from becoming degraded in one
spot.
8. Cover up the muffler outlets with
plastic bags to prevent moisture
from entering.9. Remove the battery and fully
charge it. Store it in a cool, dry
place and recharge it once a
month. Do not store the battery in
an excessively cold or warm place
(less than 0 °C or more than
30 °C). For more information, see
“Battery storage” in the chapter
“PERIODIC MAINTENANCE AND
MINOR REPAIRS”.
NOTE:@ Make any necessary repairs before
storing the motorcycle. @
E_4YP_Cleaning.fm Page 5 Wednesday, October 6, 1999 10:06 AM
Page 81 of 91

8-1
8
EAU01038
8-SPECIFICATIONSSpecifications
Model XVZ1300A
Dimensions
Overall length 2,480 mm
Overall width 950 mm
Overall height 1,160 mm
Seat height 715 mm
Wheelbase 1,695 mm
Ground clearance 150 mm
Minimum turning radius 3,400 mm
Basic weight (with oil and full
fuel tank)
330 kg
Engine
Engine type Liquid cooled 4-stroke, DOHC
Cylinder arrangement V type 4-cylinder
Displacement 1,294 cm
3
Bore ´ stroke 79 ´ 66 mm
Compression ratio 10:1
Starting system Electric starter
Lubrication system Wet sumpEngine oil
Ty p e
Recommended engine oil
classification API Service SE, SF, SG type or
higher
Quantity
Periodic oil change 3.5 L
With oil filter replacement 3.7 L
Total amount 4.3 L
-20˚ -10˚ 0˚
10˚20˚ 30˚
40˚50˚C
SAE 10W/30
SAE 15W/40SAE 20W/40SAE 20W/50
SAE 10W/40
CAUTION:Be sure to use motor oils that do not contain anti-friction
modifiers. Passenger car motor oils (often labeled
“Energy Conserving”) contain anti-friction additives which
will cause clutch and/or starter clutch slippage, resulting in
reduced component life and poor engine performance.
E_4YP_Spec.fm Page 1 Wednesday, October 6, 1999 10:06 AM
Page 84 of 91
SPECIFICATIONS
8-4
8
Headlight typeQuar tz bulb (halogen)
Bulb voltage, wattage ´ quantity
Headlight 12 V, 60/55 W ´ 1
Auxiliary light 12 V, 4 W ´ 1
Tail/brake light 12 V, 5/21 W ´ 1
Turn signal lights 12 V, 21 W ´ 4
Meter light 14 V, 1.4 W ´ 2
Neutral indicator light 12 V, 1.7 W ´ 1
High beam indicator light 12 V, 1.7 W ´ 1
Oil level indicator light 12 V, 1.7 W ´ 1
Turn indicator light 12 V, 1.7 W ´ 1
Fuel level indicator light 14 V, 3 W ´ 1
Engine overheat indicator light 12 V, 1.7 W ´ 1
Overdrive / Engine trouble
indicator light 12 V, 1.7 W ´ 1
Fuses
Main fuse 30 A
Ignition fuse 10 A
Signaling system fuse 20 A
Headlight fuse 20 A
Fan fuse 10 A
Odometer fuse 5 A
E_4YP_Spec.fm Page 4 Wednesday, October 6, 1999 10:06 AM