Page 35 of 106

4-1
EAU01114
PRE-OPERATION CHECKS
1
2
34
5
6
7
8
9The condition of a vehicle is the ownerÕs responsibility. Vital components can start to deteriorate quickly and unexpect-
edly, even if the vehicle remains unused (for example, as a result of exposure to the elements). Any damage, fluid leak-
age or loss of tire air pressure could have serious consequences. Therefore, it is very important, in addition to a thor-
ough visual inspection, to check the following points before each ride.
EAU03439
Pre-operation check list
ITEMCHECKSPAGE
Fuel¥Check fuel level in fuel tank.
¥Refuel if necessary.
¥Check fuel line for leakage.3-4, 3-9Ð3-10
Engine oil¥Check oil level in engine.
¥If necessary, add recommended oil to specified level.
¥Check vehicle for oil leakage.6-14Ð6-17
Final gear oil¥Check vehicle for oil leakage.6-17Ð6-18
Coolant¥Check coolant level in reservoir.
¥If necessary, add recommended coolant to specified level.
¥Check cooling system for leakage.3-4, 6-18Ð6-20
Front brake¥Check operation.
¥If soft or spongy, have Yamaha dealer bleed hydraulic system.
¥Check lever free play.
¥Adjust if necessary.
¥Check fluid level in reservoir.
¥If necessary, add recommended brake fluid to specified level.
¥Check hydraulic system for leakage.3-8, 6-25Ð6-28
5GM-9-E1(No ABS) 9/27/00 2:18 PM Page 34
Page 59 of 106
6-15
PERIODIC MAINTENANCE AND MINOR REPAIR
1
2
3
4
56
7
8
93.Wait a few minutes until the oil
settles, remove the oil filler cap,
wipe the dipstick clean, insert it
back into the oil filler hole (with-
out screwing it in), and then
remove it again to check the oil
level.
NOTE:
The engine oil should be between the
minimum and maximum level marks.
3121
1.Engine oil filler cap
2.Maximum level mark
3.Minimum level mark
4.If the engine oil is below the min-
imum level mark, add sufficient
oil of the recommended type to
raise it to the correct level.
5.Insert the dipstick into the oil filler
hole, and then tighten the oil filler
cap.
1
1.Engine oil drain boltTo change the engine oil
1.Start the engine, warm it up for
several minutes, and then turn it
off.
2.Place an oil pan under the
engine to collect the used oil.
3.Remove the engine oil filler cap
and the engine oil drain bolt to
drain the oil from the crankcase.
5GM-9-E1(No ABS) 9/27/00 2:18 PM Page 58
Page 60 of 106

6-16
PERIODIC MAINTENANCE AND MINOR REPAIR
1
2
3
4
56
7
8
9
12
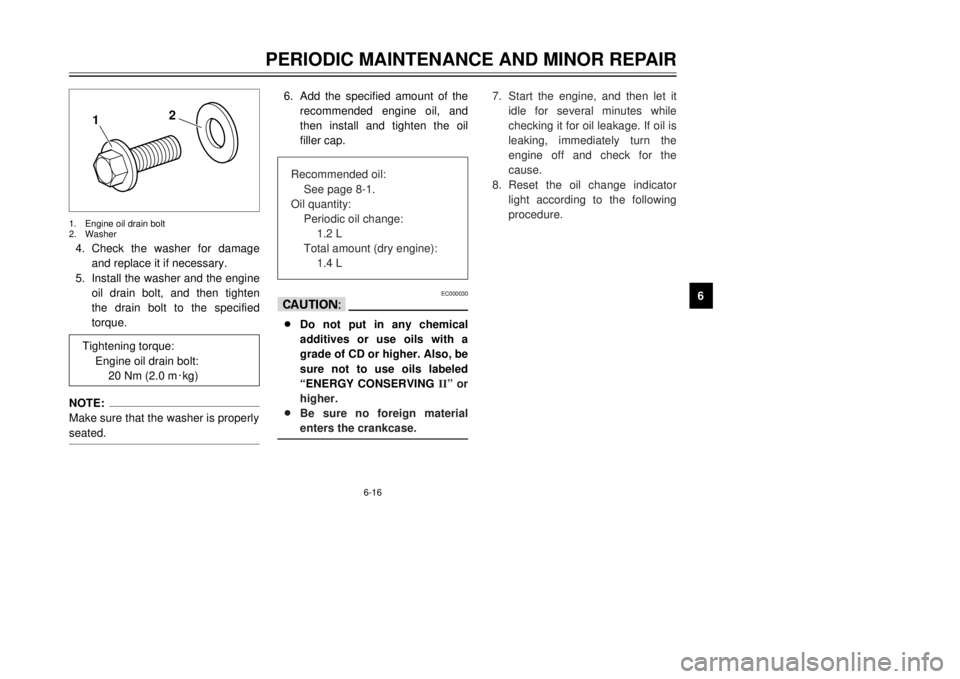
4.Check the washer for damage
and replace it if necessary.
5.Install the washer and the engine
oil drain bolt, and then tighten
the drain bolt to the specified
torque.NOTE:
Make sure that the washer is properly
seated.1.Engine oil drain bolt
2.Washer
Tightening torque:
Engine oil drain bolt:
20 Nm (2.0 m0kg)
6.Add the specified amount of the
recommended engine oil, and
then install and tighten the oil
filler cap.
EC000030
cC8Do not put in any chemical
additives or use oils with a
grade of CD or higher. Also, be
sure not to use oils labeled
ÒENERGY CONSERVING
IIÓ or
higher.
8Be sure no foreign material
enters the crankcase.
Recommended oil:
See page 8-1.
Oil quantity:
Periodic oil change:
1.2 L
Total amount (dry engine):
1.4 L
7.Start the engine, and then let it
idle for several minutes while
checking it for oil leakage. If oil is
leaking, immediately turn the
engine off and check for the
cause.
8.Reset the oil change indicator
light according to the following
procedure.
5GM-9-E1(No ABS) 9/27/00 2:18 PM Page 59
Page 62 of 106

4.Remove the oil filler cap and
drain bolt to drain the oil from the
final gear case.
5.Install the final gear oil drain bolt,
and then tighten it to the speci-
fied torque.
6.Add the specified amount of the
recommended final gear oil, and
then install and tighten the oil
filler cap.
6-18
PERIODIC MAINTENANCE AND MINOR REPAIR
1
2
3
4
56
7
8
9
1
1.Final gear oil filler cap
Tightening torque:
Final gear oil drain bolt:
22 Nm (2.2 m0kg)
EW000066
w8Make sure that no foreign
material enters the final gear
case.
8Make sure that no oil gets on
the tire or wheel.7.Check the final gear case for oil
leakage. If oil is leaking, check
for the cause.
1
1.Final gear oil drain bolt
Recommended final gear oil:
See page 8-2.
Oil quantity:
0.25 L
EAU01587
CoolantThe coolant reservoir is located
under the battery cover. (See page
6-31 for battery cover removal proce-
dures.)
To check the coolant level
1.Place the scooter on a level sur-
face and hold it in an upright
position.NOTE:
8The coolant level must be
checked on a cold engine since
the level varies with engine tem-
perature.
8Make sure that the scooter is
positioned straight up when
checking the coolant level. A
slight tilt to the side can result in
a false reading.
5GM-9-E1(No ABS) 9/27/00 2:18 PM Page 61
Page 65 of 106
6-21
PERIODIC MAINTENANCE AND MINOR REPAIR
1
2
3
4
56
7
8
9
NOTE:
The sponge material should be wet
but not dripping.7.Insert the sponge material into
the air filter case.
8.Install the air filter case cover by
installing the screws. Recommended oil:
Engine oil
4.Check the sponge material for
damage and replace it if neces-
sary.
5.Allow the sponge material to dry.
6.Apply oil of the recommended
type to the entire surface of the
sponge material, and then
squeeze the excess oil out.
2
1
1.V-belt case air filter cover
2.Screw (´3)Cleaning the V-belt case air filter
element
1.Remove cowling A (See page
6-7 for cowling removal and
installation procedures.)
2.Remove the air filter case cover
by removing the screws.
3.Remove the V-belt case air filter
cover by removing the screws.
5GM-9-E1(No ABS) 9/27/00 2:18 PM Page 64
Page 71 of 106

6-27
PERIODIC MAINTENANCE AND MINOR REPAIR
1
2
3
4
56
7
8
9
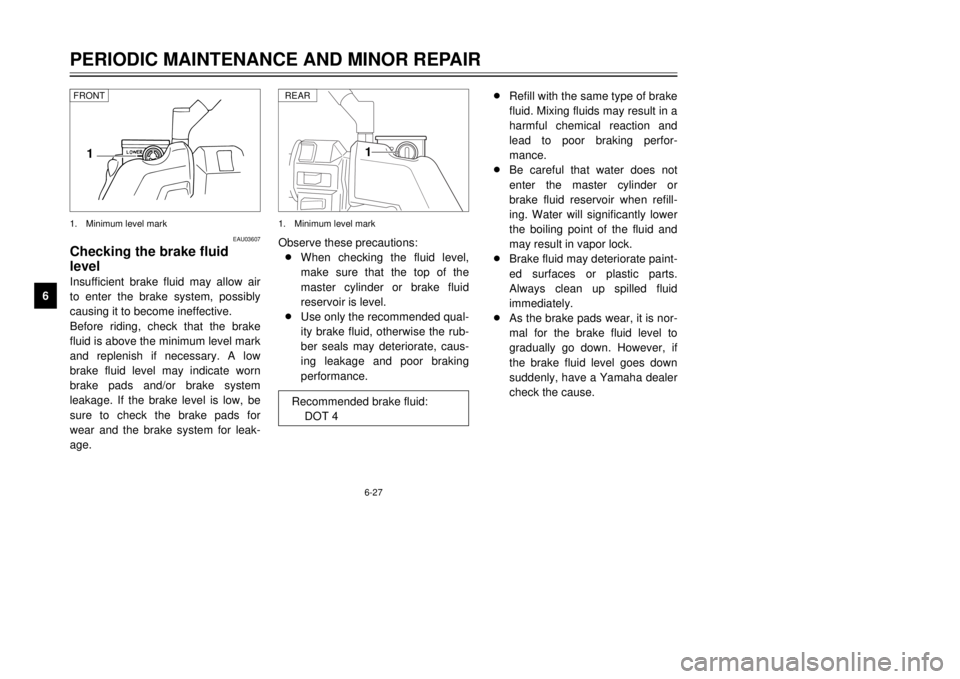
1
Observe these precautions:
8When checking the fluid level,
make sure that the top of the
master cylinder or brake fluid
reservoir is level.
8Use only the recommended qual-
ity brake fluid, otherwise the rub-
ber seals may deteriorate, caus-
ing leakage and poor braking
performance.1.Minimum level markREARRecommended brake fluid:
DOT 4
8Refill with the same type of brake
fluid. Mixing fluids may result in a
harmful chemical reaction and
lead to poor braking perfor-
mance.
8Be careful that water does not
enter the master cylinder or
brake fluid reservoir when refill-
ing. Water will significantly lower
the boiling point of the fluid and
may result in vapor lock.
8Brake fluid may deteriorate paint-
ed surfaces or plastic parts.
Always clean up spilled fluid
immediately.
8As the brake pads wear, it is nor-
mal for the brake fluid level to
gradually go down. However, if
the brake fluid level goes down
suddenly, have a Yamaha dealer
check the cause.
1
EAU03607
Checking the brake fluid
levelInsufficient brake fluid may allow air
to enter the brake system, possibly
causing it to become ineffective.
Before riding, check that the brake
fluid is above the minimum level mark
and replenish if necessary. A low
brake fluid level may indicate worn
brake pads and/or brake system
leakage. If the brake level is low, be
sure to check the brake pads for
wear and the brake system for leak-
age.1.Minimum level mark FRONT
5GM-9-E1(No ABS) 9/27/00 2:18 PM Page 70
Page 72 of 106

6-28
PERIODIC MAINTENANCE AND MINOR REPAIR
1
2
3
4
56
7
8
9
EAU03073
Changing the brake fluidHave a Yamaha dealer change the
brake fluid at the intervals specified in
the periodic maintenance and lubrica-
tion chart. In addition, have the oil
seals of the master cylinder and
caliper as well as the brake hoses
replaced at the intervals listed below
or whenever they are damaged or
leaking.
8Oil seals: Replace every two
years.
8Brake hoses: Replace every four
years.
EAU02962
Checking and lubricating the
cablesThe operation of all control cables
and the condition of the cables
should be checked before each ride,
and the cables and cable ends
should be lubricated if necessary. If
a cable is damaged or does not move
smoothly, have a Yamaha dealer
check or replace it.
EW000112
wDamage to the outer sheath may
interfere with proper cable opera-
tion and will cause the inner cable
to rust. Replace a damaged cable
as soon as possible to prevent
unsafe conditions.
Recommended lubricant:
Engine oil
EAU03118
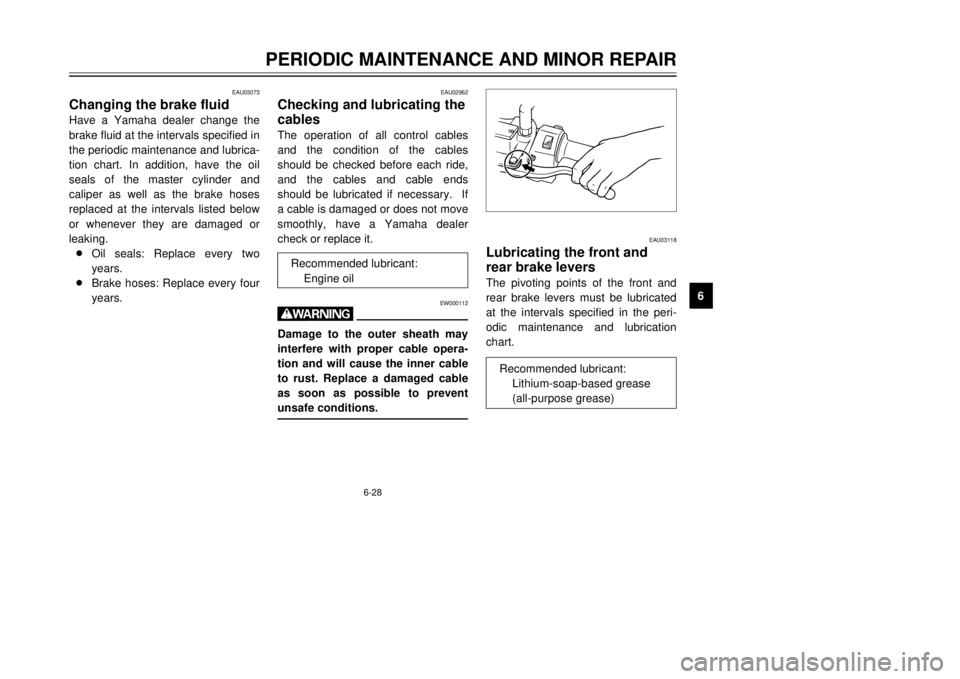
Lubricating the front and
rear brake leversThe pivoting points of the front and
rear brake levers must be lubricated
at the intervals specified in the peri-
odic maintenance and lubrication
chart.
Recommended lubricant:
Lithium-soap-based grease
(all-purpose grease)
5GM-9-E1(No ABS) 9/27/00 2:18 PM Page 71
Page 73 of 106
6-29
PERIODIC MAINTENANCE AND MINOR REPAIR
1
2
3
4
56
7
8
9
EAU02939
Checking the front forkThe condition and operation of the
front fork must be checked as follows
at the intervals specified in the peri-
odic maintenance and lubrication
chart.
To check the condition
EW000115
wSecurely support the scooter so
that there is no danger of it falling
over.Check the inner tubes for scratches,
damage and excessive oil leakage. Recommended lubricant:
Lithium-soap-based grease
(all-purpose grease)
Centerstand
EAU03371
Checking and lubricating the
centerstand and sidestandThe operation of the centerstand and
sidestand should be checked before
each ride, and the pivots and metal-
to-metal contact surfaces should be
lubricated if necessary.
EW000114
wIf the centerstand or sidestand
does not move up and down
smoothly, have a Yamaha dealer
check or repair it.Sidestand
5GM-9-E1(No ABS) 9/27/00 2:18 PM Page 72