2000 TOYOTA LAND CRUISER steering wheel
[x] Cancel search: steering wheelPage 82 of 235
L/C 100_U
104 2000 L/C 100 (OM60866U)
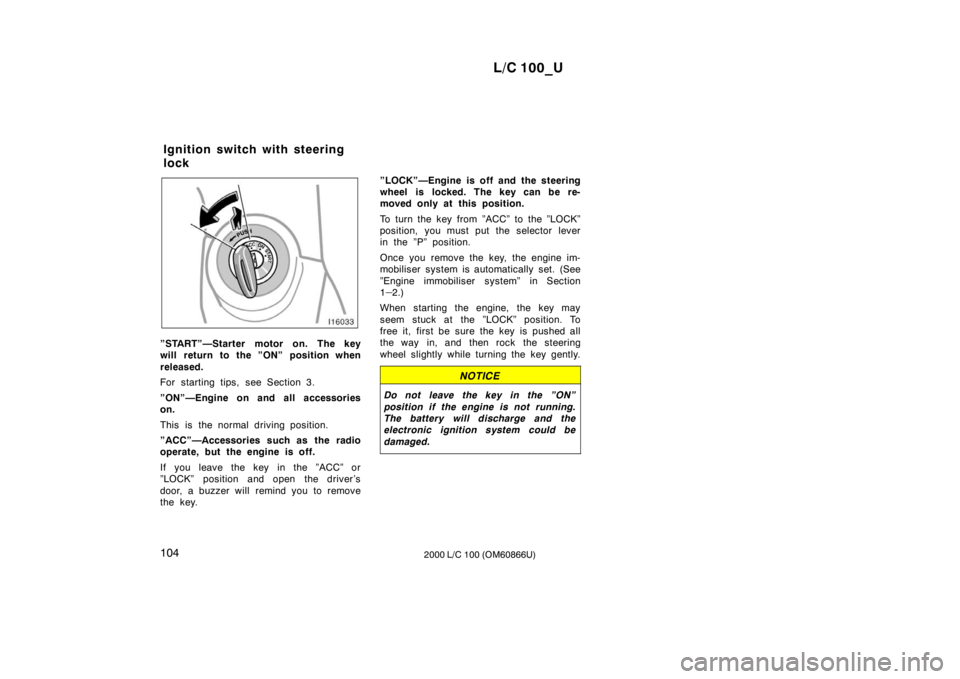
”START”—Starter motor on. The key
will return to the ”ON” position when
released.
For starting tips, see Section 3.
”ON”—Engine on and all accessories on.
This is the normal driving position.
”ACC”—Accessories such as the radio
operate, but the engine is off.
If you leave the key in the ”ACC” or
”LOCK” position and open the driver’s
door, a buzzer will remind you to remove
the key.”LOCK”—Engine is off and the steering
wheel is locked. The key can be re-
moved only at this position.
To turn the key from ”ACC” to the ”LOCK”
position, you must put the selector lever
in the ”P” position.
Once you remove the key, the engine im-
mobiliser system is automatically set. (See
”Engine immobiliser system” in Section 1
–
2.)
When starting the engine, the key may
seem stuck at the ”LOCK” position. To
free it, first be sure the key is pushed all
the way in, and then rock the steering
wheel slightly while turning the key gently.
NOTICE
Do not leave the key in the ”ON”
position if the engine is not running.
The battery will discharge and the
electronic ignition system could be damaged.
Ignition switch with steering
lock
Page 96 of 235
L/C 100_U
11 8 2000 L/C 100 (OM60866U)
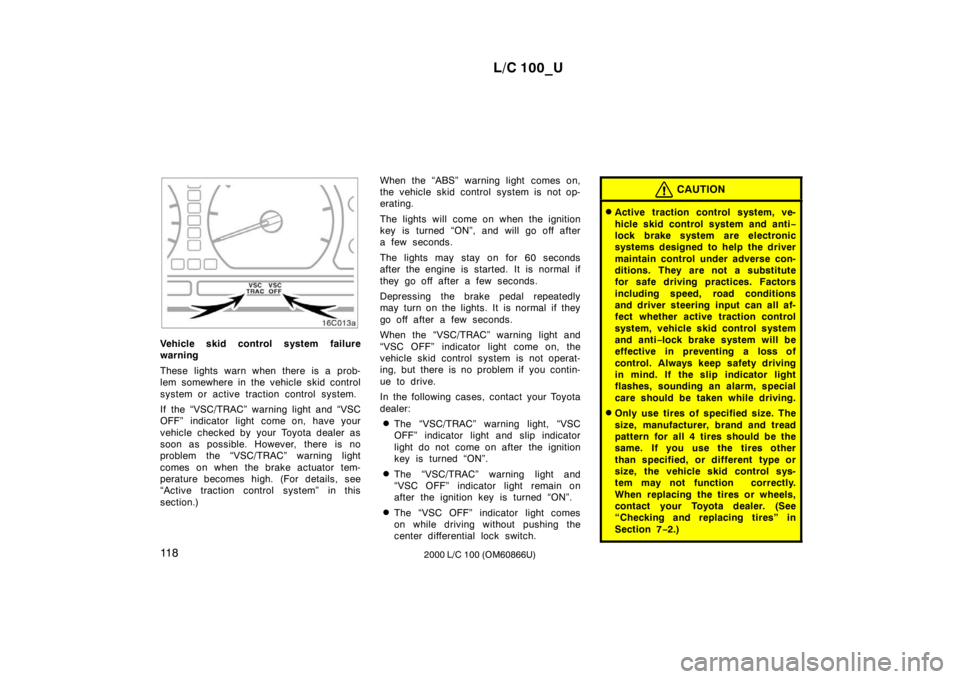
Vehicle skid control system failure
warning
These lights warn when there is a prob-
lem somewhere in the vehicle skid control
system or active traction control system.
If the “VSC/TRAC” warning light and “VSC
OFF” indicator light come on, have your
vehicle checked by your Toyota dealer as
soon as possible. However, there is no
problem the “VSC/TRAC” warning light
comes on when the brake actuator tem-
perature becomes high. (For details, see
“Active traction control system” in this
section.)When the “ABS” warning light comes on,
the vehicle skid control system is not op-
erating.
The lights will come on when the ignition
key is turned “ON”, and will go off after
a few seconds.
The lights may stay on for 60 seconds
after the engine is started. It is normal if
they go off after a few seconds.
Depressing the brake pedal repeatedly
may turn on the lights. It is normal if they
go off after a few seconds.
When the “VSC/TRAC” warning light and
“VSC OFF” indicator light come on, the
vehicle skid control system is not operat-
ing, but there is no problem if you contin-
ue to drive.
In the following cases, contact your Toyota
dealer:
� The “VSC/TRAC” warning light, “VSC
OFF” indicator light and slip indicator
light do not come on after the ignition
key is turned “ON”.
� The “VSC/TRAC” warning light and
“VSC OFF” indicator light remain on
after the ignition key is turned “ON”.
� The “VSC OFF” indicator light comes
on while driving without pushing the
center differential lock switch.
CAUTION
�Active traction control system, ve-
hicle skid control system and anti −
lock brake system are electronic
systems designed to help the driver
maintain control under adverse con-
ditions. They are not a substitute
for safe driving practices. Factors
including speed, road conditions
and driver steering input can all af-
fect whether active traction control
system, vehicle skid control system
and anti −lock brake system will be
effective in preventing a loss of
control. Always keep safety driving
in mind. If the slip indicator light
flashes, sounding an alarm, special
care should be taken while driving.
� Only use tires of specified size. The
size, manufacturer, brand and tread
pattern for all 4 tires should be the
same. If you use the tires other
than specified, or different type or
size, the vehicle skid control sys-
tem may not function correctly.
When replacing the tires or wheels,
contact your Toyota dealer. (See
“Checking and replacing tires” in
Section 7 −2.)
Page 148 of 235
L/C 100_U
170 2000 L/C 100 (OM60866U)
There may be the case that the brake
system warning light stays on for a
bout
60 seconds after the engine is started. It
is normal if the light goes out after a
while.
Depressing the brake pedal repeatedly
may turn on the brake system warning
light and buzzer. It is normal if the light
goes out and the buzzer stops sounding
after a few seconds.
You may hear a small sound in the engine
compartment after the engine is started or
the brake pedal is depressed repeatedly.
This is a pump pulsating sound of the
brake system, and it is not a malfunction.
CAUTION
� Do not pump the brake pedal if the
engine stalls. Each push on the
pedal uses up your brake fluid
pressure reserve.
� Even if the power assist is com-
pletely lost, the brakes will still
work. But you will have to push the
pedal hard, much harder than nor-
mal. And your braking distance will
be longer.
ANTI −LOCK BRAKE SYSTEM
(with “ABS” warning light)
The anti −lock brake system is designed
to help prevent lock −up of the wheels
during a sudden braking or braking on
slippery road surfaces. This assists in
providing stability and steering perfor-
mance of the vehicle under these cir-
cumstances.
Effective way to press the ”ABS” brake
pedal: When the anti −lock brake system
function is in action, just hold the brake
pedal down more firmly. Especially in a
panic stop, you need to keep it de-
pressed more firmly, and do not pump
the brake. Pumping the brake pedal
makes the stopping distance longer.
The anti −lock brake system becomes op-
erative after the vehicle has accelerated
to a speed in excess of approximately 10
km/h (6 mph). It stops operating when the
vehicle decelerates to a speed below
approximately 5 km/h (3 mph).
Depressing the brake pedal on slippery
road surfaces such as on the manhole
cover, the steel plate under the construc-
tion, joints in the bridge, etc. on a rainy
day tends to activate the anti −lock brake
system. You may hear a click or motor sound in
the engine compartment for a few seconds
when the engine is started or just after
the vehicle is started. This means that the
anti
−lock brake system is in the self
check mode, and does not indicate a mal-
function.
When the anti −lock brake system is ac-
tivated, the following conditions may
occur, however, do not indicate a mal-
function of the system:
� You may hear the anti −lock brake sys-
tem operating and feel the brake pedal
pulsating and the vibrations of the body
and steering wheel. You may also hear
the motor sound in the engine compart-
ment even after the vehicle is stopped.
� At the end of the anti −lock brake sys-
tem activation, the brake pedal may
move a little forward.
Page 149 of 235
L/C 100_U171
2000 L/C 100 (OM60866U)
CAUTION
Do not overestimate the anti −lock
brake system: Although the anti −lock
brake system assists in providing ve-
hicle control, it is still important to
drive with all due care and maintain
a moderate speed and safe distance
from the vehicle in front of you, be-
cause there are limits to the vehicle
stability and effectiveness of steering
wheel operation even with the anti −
lock brake system on.
If tires grip performance exceeds its
capability, or if hydroplaning occurs
during high speed driving in the rain,
the anti −lock brake system does not
provide vehicle control.
Anti −lock brake system is not de-
signed to shorten the stopping dis-
tance: Always drive at the moderate
speed and maintain a safe distance
from the vehicle in front of you.
Compared with vehicles not fitted
with an anti −lock brake system, your
vehicle may require a longer stopping
distance in the following cases: � Driving on rough, gravel or snow −
covered roads.
� Driving with tire chains installed.
� Driving over the steps such as the
joints on the road.
� Driving on roads where the road
surface is pitted or has other differ-
ences in surface height.
Install all 4 tires of specified size at
designated pressure: The anti −lock
brake system detects vehicle speeds
using the speed sensors for respec-
tive wheels’ turning speeds. The use
of tires other than specified may fail
to detect the accurate turning speed,
resulting in a longer stopping dis-
tance.
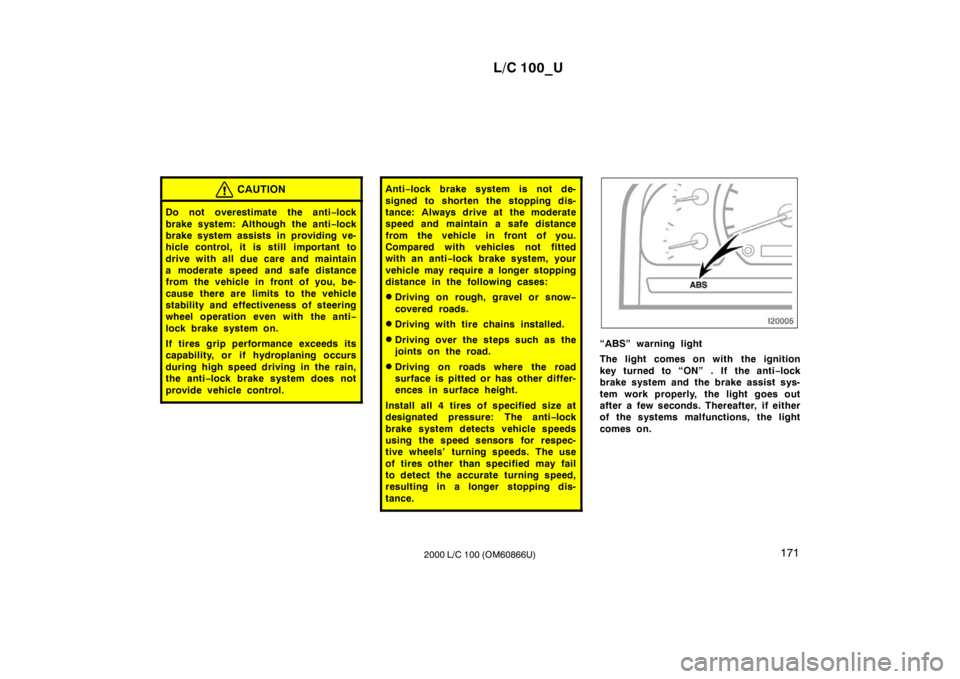
“ABS” warning light
The light comes on with the ignition
key turned to “ON” . If the anti −lock
brake system and the brake assist sys-
tem work properly, the light goes out
after a few seconds. Thereafter, if either
of the systems malfunctions, the light
comes on.
Page 174 of 235
L/C 100_U
210 2000 L/C 100 (OM60866U)
If towing is necessary, we recommend
you to have it done by your Toyota
dealer or a commercial tow truck ser-
vice.
If towing service is not available in an
emergency, your vehicle may be tempo-
rarily towed by a cable or chain se-
cured to one of the following parts:
Front: Front emergency towing hook
Rear: Rear emergency towing hook
Use extreme caution when towing the
vehicle.
A driver must be in the vehicle to steer it
and operate the brakes.
Towing in this manner may be done only
on hard
−surfaced roads for a short dis-
tance and at low speeds. Also, the
wheels, axles, drive train, steering and
brakes must all be in good condition.
CAUTION
Use extreme caution when towing ve-
hicle. Avoid sudden starts or erratic
driving maneuvers which would place
excessive stress on the emergency
towing hook and towing cable or
chain. The hook and towing cable or
chain may break and cause serious
injury or damage.
NOTICE
� Do not use front and rear eyelets.
It is not designed for towing.
� Use only a cable or chain specifi-
cally intended for use in towing ve-
hicles. Securely fasten the cable or
chain to the towing hook provided.
Before towing, release the parking brake
and put the transmission in ”N”. Unlock
the center differential. The key must be in
”ACC” (engine off) or ”ON” (engine run-
ning).
CAUTION
If the engine is not running, the pow-
er assist for the brakes and steering
will not work so steering and braking
will be much harder than usual.
Page 186 of 235

L/C 100_U
222 2000 L/C 100 (OM60866U)
INSIDE THE VEHICLE
Items listed below should be checked
regularly, e.g. while performing periodic
services, cleaning the vehicle, etc.
Lights
Make sure the headlights, stop lights, tail
lights, turn signal lights, and other lights
are all working. Check headlight aim.
Service reminder indicators and warning
buzzers
Check that all service reminder indicators
and warning buzzers function properly.
Steering wheel
Be alert for changes in steering condition,
such as hard steering or strange noise.
Seats
Check that all front seat controls such as
seat adjusters, seatback recliner, etc. op-
erate smoothly and that all latches lock
securely in any position. Check that the
head restraint move up and down smooth-
ly and that the locks hold securely in any
latched position. For folding
−down rear
seatbacks, swing −up rear seat cushions
and detachable third seats, check that the
latches lock securely. Seat belts
Check that the seat belt system such as
buckles, retractors and anchors operate
properly and smoothly. Make sure the belt
webbing is not cut, frayed, worn or dam-aged.
Accelerator pedal
Check the pedal for smooth operation and
uneven pedal effort or catching.
Brake pedal
Check the pedal for smooth operation and
that the pedal has the proper clearance.
Check the brake booster function.
Brakes
At a safe place, check that the brakes do
not pull to one side when applied.
Parking brake
Check that the lever has the proper travel
and that, on a safe incline, your vehicle
is held securely with only the parking
brake applied.
Automatic transmission ”Park” mecha-
nism
Check the lock release button of the se-
lector lever for proper and smooth opera-
tion. On a safe incline, check that your
vehicle is held securely with the selector
lever in ”P” position and all brakes re-
leased.
IN THE ENGINE COMPARTMENT
Items listed below should be checked
from time to time, e.g. each time when
refueling.
Washer fluid
Make sure there is sufficient fluid in the
tank. See Section 7
−3 for additional in-
formation.
Engine coolant level
Make sure the coolant level is between
the ”FULL” and ”LOW” lines on the see −
through reservoir when the engine is cold.
See Section 7 −2 for additional information.
Battery electrolyte level
Make sure the electrolyte level of all bat-
tery cells is between upper and lower lev-
el lines on the case. Add only distilled
water when replenishing. See Section 7 −3
for additional information.
Page 195 of 235
L/C 100_U231
2000 L/C 100 (OM60866U) DO
−IT −YOURSELF MAINTENANCE
Engine and Chassis
Checking the engine oil level232
. . . . . . . . . . . . . . . . . . . . . . . . . . . . . . . . .
Checking the engine coolant level234
. . . . . . . . . . . . . . . . . . . . . . . . . . . .
Checking brake fluid235
. . . . . . . . . . . . . . . . . . . . . . . . . . . . . . . . . . . . . . . .
Checking power steering fluid236
. . . . . . . . . . . . . . . . . . . . . . . . . . . . . . . .
Checking tire pressure237
. . . . . . . . . . . . . . . . . . . . . . . . . . . . . . . . . . . . . .
Checking and replacing tires237
. . . . . . . . . . . . . . . . . . . . . . . . . . . . . . . . .
Rotating tires238
. . . . . . . . . . . . . . . . . . . . . . . . . . . . . . . . . . . . . . . . . . . . . . .
Installing snow tires and chains239
. . . . . . . . . . . . . . . . . . . . . . . . . . . . . .
Replacing wheels240
. . . . . . . . . . . . . . . . . . . . . . . . . . . . . . . . . . . . . . . . . . .
Aluminum wheel precautions241
. . . . . . . . . . . . . . . . . . . . . . . . . . . . . . . . SECTION
7− 2
Page 222 of 235

L/C 100_U
258 2000 L/C 100 (OM60866U)
Oil type:
Standard differential
Hypoid gear oil API GL −5
Limited −slip differential
Hypoid gear oil for limited −slip differ-
ential API GL −5
Recommended oil viscosity: Above −18 �C (0 �F)
SAE 90
Below −18 �C (0 �F)
SAE 80W or 80W −90
CHASSIS LUBRICATION
Wheel bearings: Lithium base wheel bearing grease,
NLGI No.2
Front drive shaft thrust bushings: Synthetic oil and lithium soap base
chassis grease, NLGI No.1
Propeller shafts: Lithium base wheel bearing grease,
NLGI No.2 BRAKES
Minimum pedal clearance when depressed
with the pressure of 490 N (50 kgf, 110
lbf) with the engine running, mm (in.):
116 (4.6)
Pedal free play, mm (in.): 1—6 (0.04—0.24)
Pad wear limit, mm (in.):
1.0 (0.04)
Lining wear limit, mm (in.): 1.0 (0.04)
Parking brake adjustment when pulled with
the force of 196 N (20 kgf, 44 lbf): 4—6 clicks
Fluid type: SAE J1703 or FMVSS No.116 DOT 3
STEERING
Wheel free play: Less than 40 mm (1.6 in.)
Power steering fluid type: Automatic transmission fluid DEXRON �
II
or III Tires
Tire size:
P275/70R16 114S
Tire pressure, kPa (kgf/cm 2
or bar, psi):
Normal driving Front 200 (2.0, 29)
Rear 220 (2.2, 32)
Trailer towing Front 200 (2.0, 29)
Rear 240 (2.4, 35)
Wheel size: 16 � 8JJ
Wheel nut torque, N·m (kgf·m, ft·lbf): 131 (13.4, 96.6)
NOTE: For a complete information on tires (e.g. replacing tires or replacing
wheels), see ”Checking tire pres-
sure” through ”Aluminum wheel
precautions” in Section 7 −2.