Page 118 of 246

2000 Corolla(U)
44
�Do not modify or remove any wir-
ing. Do not modify, remove, strike
or open any components such as
the steering wheel pad, steering
wheel, column cover, front passen-
ger airbag cover, front passenger
airbag or airbag sensor assembly.
Doing any of these may cause sud-
den SRS airbag inflation or disable
the system, which could result in
death or serious injury.
Failure to follow these instructions
can result in death or serious injury.NOTICE
Do not perform any of the following
changes without consulting your
Toyota dealer. Such changes can
interfere with proper operation of the
SRS airbag system in some cases.
�Installation of electronic devices
such as a mobile two- way radio,
cassette tape player or compact
disc player
�Modification of the suspension sys-
tem
�Modification of the front end struc-
ture
�Attachment of a grille guard (bull
bar, kangaroo bar, etc.), snowplow,
winches or any other equipment to
the front end
�Repairs made on or near the front
fenders, front end structure, con-
sole, steering column, steering
wheel or dashboard near the front
passenger 's airbag
This SRS airbag system has a service
reminder indicator to inform the driver of
operating problems. If either of the
following conditions occurs, this indicates
a malfunction of the airbags. Contact your
Toyota dealer as soon as possible to
service the vehicle.
�The light does not come on when the
ignition key is turned to the ACCº or
ONº position, or the light remains on.
�The light comes on while driving.
ProCarManuals.com
Page 119 of 246

2000 Corolla(U)
45
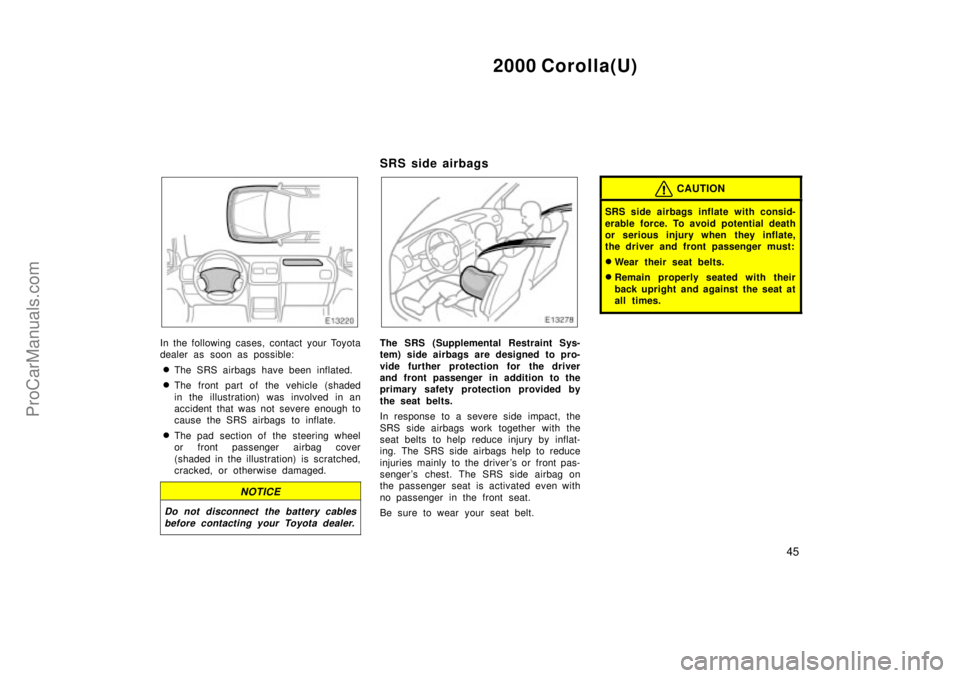
In the following cases, contact your Toyota
dealer as soon as possible:
�The SRS airbags have been inflated.
�The front part of the vehicle (shaded
in the illustration) was involved in an
accident that was not severe enough to
cause the SRS airbags to inflate.
�The pad section of the steering wheel
or front passenger airbag cover
(shaded in the illustration) is scratched,
cracked, or otherwise damaged.
NOTICE
Do not disconnect the battery cables
before contacting your Toyota dealer.
SRS side airbags
The SRS (Supplemental Restraint Sys-
tem) side airbags are designed to pro-
vide further protection for the driver
and front passenger in addition to the
primary safety protection provided by
the seat belts.
In response to a severe side impact, the
SRS side airbags work together with the
seat belts to help reduce injury by inflat-
ing. The SRS side airbags help to reduce
injuries mainly to the driver's or front pas-
senger 's chest. The SRS side airbag on
the passenger seat is activated even with
no passenger in the front seat.
Be sure to wear your seat belt.
CAUTION
SRS side airbags inflate with consid-
erable force. To avoid potential death
or serious injury when they inflate,
the driver and front passenger must:
�Wear their seat belts.
�Remain properly seated with their
back upright and against the seat at
all times.
ProCarManuals.com
Page 145 of 246

2000 Corolla(U)
71
Tilt steering wheel
To change the steering wheel angle,
hold the steering wheel, push down the
lock release lever, tilt the steering
wheel to the desired angle and return
the lever to its original position.
When the steering wheel is in a low posi-
tion, it will spring up as you release the
lock release lever.
CAUTION
�Do not adjust the steering wheel
while the vehicle is moving.
�After adjusting the steering wheel,
try moving it up and down to make
sure it is locked in position.
Outside rear view mirrorsÐ
Adjust the mirror so that you can see
the side of your vehicle in the mirror.
Be careful when judging the size or dis-
tance of any object seen in the outside
rear view mirror on the passenger 's side.
It is a convex mirror with a curved sur-
face. Any object seen in a convex mirror
will look smaller and farther away than
when seen in a flat mirror.
CAUTION
Do not adjust the mirror while the
vehicle is moving. It may cause the
driver to mishandle the vehicle and
an accident may occur resulting in
personal injuries.
ProCarManuals.com
Page 166 of 246

2000 Corolla(U)
92
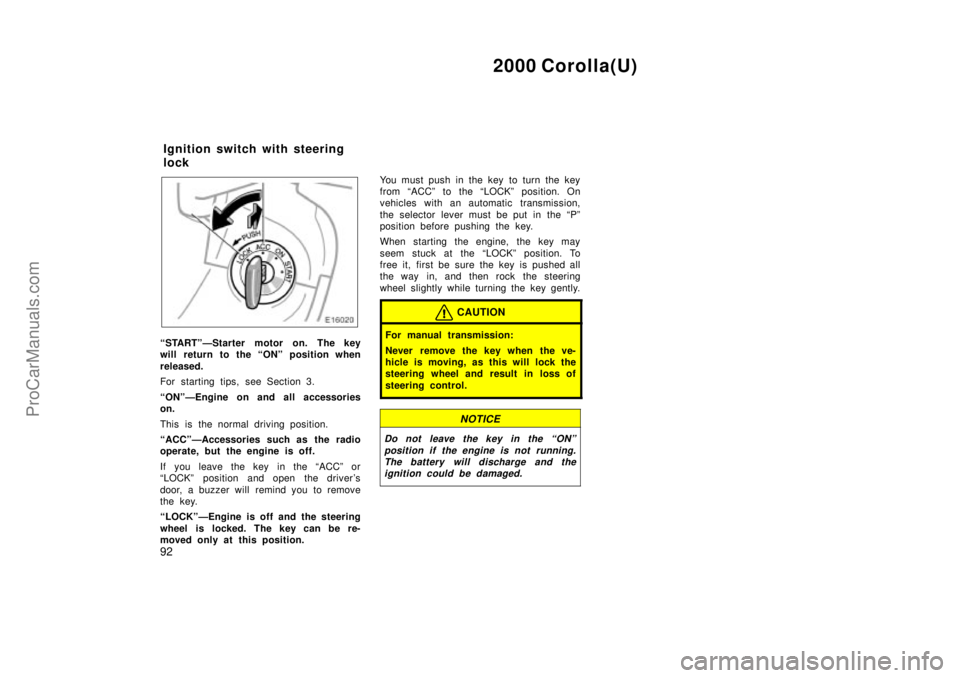
STARTºÐStarter motor on. The key
will return to the ONº position when
released.
For starting tips, see Section 3.
ONºÐEngine on and all accessories
on.
This is the normal driving position.
ACCºÐAccessories such as the radio
operate, but the engine is off.
If you leave the key in the ACCº or
LOCKº position and open the driver's
door, a buzzer will remind you to remove
the key.
LOCKºÐEngine is off and the steering
wheel is locked. The key can be re-
moved only at this position.You must push in the key to turn the key
from ACCº to the LOCKº position. On
vehicles with an automatic transmission,
the selector lever must be put in the Pº
position before pushing the key.
When starting the engine, the key may
seem stuck at the LOCKº position. To
free it, first be sure the key is pushed all
the way in, and then rock the steering
wheel slightly while turning the key gently.
CAUTION
For manual transmission:
Never remove the key when the ve-
hicle is moving, as this will lock the
steering wheel and result in loss of
steering control.
NOTICE
Do not leave the key in the ONº
position if the engine is not running.
The battery will discharge and the
ignition could be damaged.
Ignition switch with steering
lock
ProCarManuals.com
Page 223 of 246

2000 Corolla(U)
205
DO- IT- YOURSELF MAINTENANCE
Engine and Chassis
Checking the engine oil level206 . . . . . . . . . . . . . . . . . . . . . . . . . . . . . . . . .
Checking the engine coolant level207 . . . . . . . . . . . . . . . . . . . . . . . . . . . .
Checking brake fluid208 . . . . . . . . . . . . . . . . . . . . . . . . . . . . . . . . . . . . . . . .
Checking power steering fluid209 . . . . . . . . . . . . . . . . . . . . . . . . . . . . . . . .
Checking tire pressure210 . . . . . . . . . . . . . . . . . . . . . . . . . . . . . . . . . . . . . .
Checking and replacing tires211 . . . . . . . . . . . . . . . . . . . . . . . . . . . . . . . . .
Rotating tires212 . . . . . . . . . . . . . . . . . . . . . . . . . . . . . . . . . . . . . . . . . . . . . . .
Installing snow tires and chains213 . . . . . . . . . . . . . . . . . . . . . . . . . . . . . .
Replacing wheels214 . . . . . . . . . . . . . . . . . . . . . . . . . . . . . . . . . . . . . . . . . . .
Aluminum wheel precautions214 . . . . . . . . . . . . . . . . . . . . . . . . . . . . . . . .
SECTION 7- 2
ProCarManuals.com
Page 228 of 246

2000 Corolla(U)
210
Clean all dirt from outside of the reservoir
tank and look at the fluid level. If the fluid
is cold, the level should be in the COLDº
range. Similarly, if it is hot, the fluid level
should be in the HOTº range. If the level
is at the low side of either range, add
automatic transmission fluid DEXRON�
II or III to bring the level within the range.
To remove the filler cap, turn it counter-
clockwise and lift up. To reinstall it, turn
it clockwise. After replacing the filler
cap,visually check the steering box case,
vane pump and hose connections for
leaks or damage.
CAUTION
The reservoir tank may be hot so be
careful not to burn yourself.
NOTICE
Avoid overfilling, or the power steer-
ing could be damaged.
Checking tire pressure
Keep your tire pressures at the proper
level.
The recommended cold tire pressures, tire
size and the vehicle capacity weight are
given in Section 8. They are also on the
tire pressure label as shown.
You should check the tire pressures every
two weeks, or at least once a month. And
don't forget the spare!
Incorrect tire pressure can reduce tire
life and make your vehicle less safe to
drive.Low tire pressure results in excessive
wear, poor handling, reduced fuel econo-
my, and the possibility of blowouts from
overheated tires. Also, low tire pressure
can cause poor sealing of the tire bead.
If the tire pressure is excessively low,
there is the possibility of wheel deforma-
tion and/or tire separation.
High tire pressure produces a harsh ride,
handling problems,excessive wear at the
center of the tire tread, and a greater
possibility of tire damage from road haz-
ards.
If a tire frequently needs refilling, have it
checked by your Toyota dealer.
The following instructions for checking
tire pressure should be observed:
�The pressure should be checked only
when the tires are cold. If your ve-
hicle has been parked for at least 3
hours and has not been driven for
more than 1.5 km or 1 mile since, you
will get an accurate cold tire pressure
reading.
�Always use a tire pressure gauge.
The appearance of a tire can be mis-
leading. Besides, tire pressures that
are even just a few pounds off can
degrade handling and ride.
ProCarManuals.com
Page:
< prev 1-8 9-16 17-24