2000 NISSAN XTERRA parking brake
[x] Cancel search: parking brakePage 50 of 263
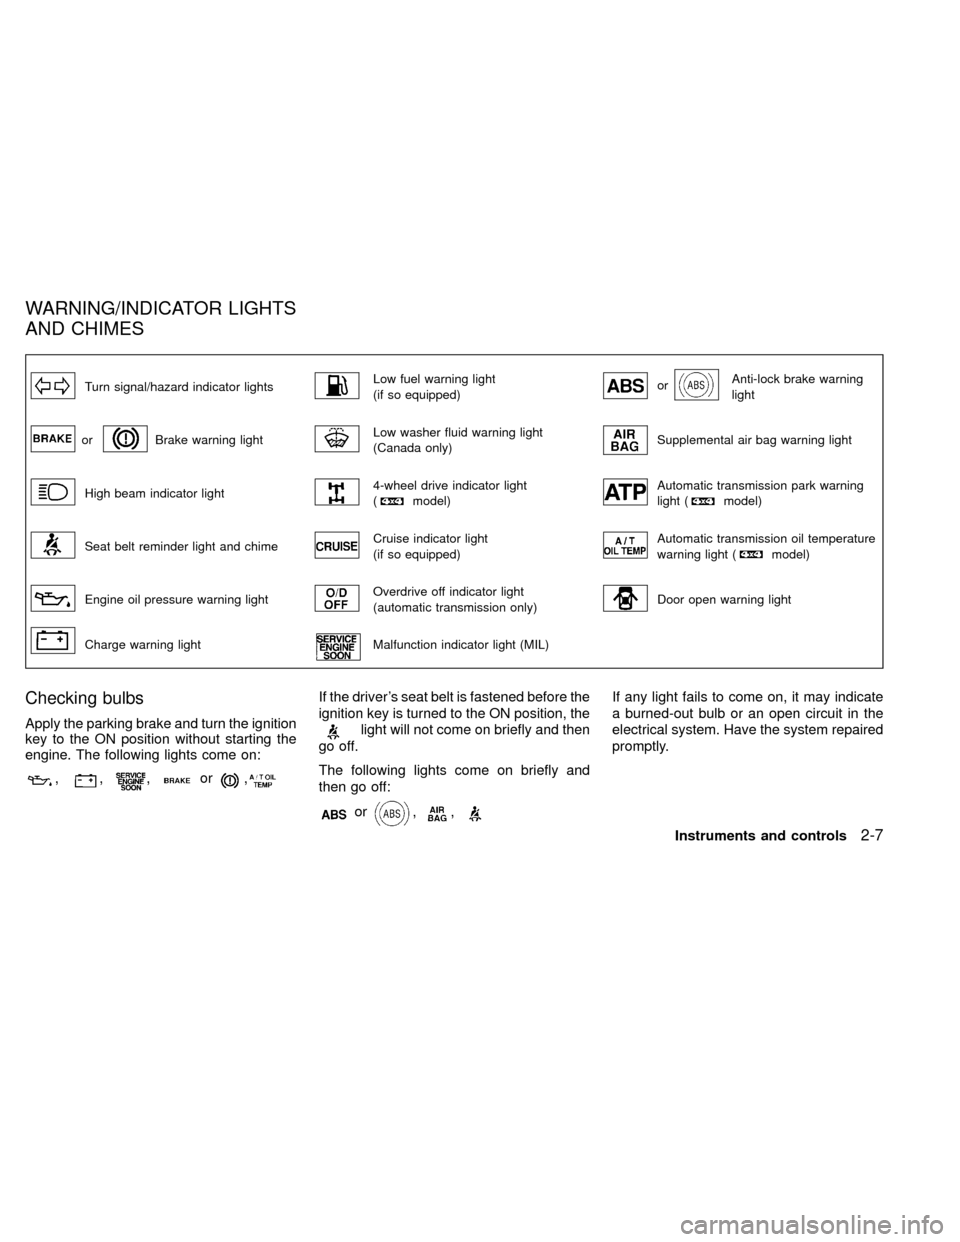
Turn signal/hazard indicator lightsLow fuel warning light
(if so equipped)orAnti-lock brake warning
light
orBrake warning lightLow washer fluid warning light
(Canada only)Supplemental air bag warning light
High beam indicator light4-wheel drive indicator light
(model)Automatic transmission park warning
light (model)
Seat belt reminder light and chimeCruise indicator light
(if so equipped)Automatic transmission oil temperature
warning light (model)
Engine oil pressure warning lightOverdrive off indicator light
(automatic transmission only)Door open warning light
Charge warning lightMalfunction indicator light (MIL)
Checking bulbs
Apply the parking brake and turn the ignition
key to the ON position without starting the
engine. The following lights come on:
,,,or,
If the driver's seat belt is fastened before the
ignition key is turned to the ON position, the
light will not come on briefly and then
go off.
The following lights come on briefly and
then go off:
or,,
If any light fails to come on, it may indicate
a burned-out bulb or an open circuit in the
electrical system. Have the system repaired
promptly.
WARNING/INDICATOR LIGHTS
AND CHIMES
Instruments and controls2-7
ZX
Page 51 of 263
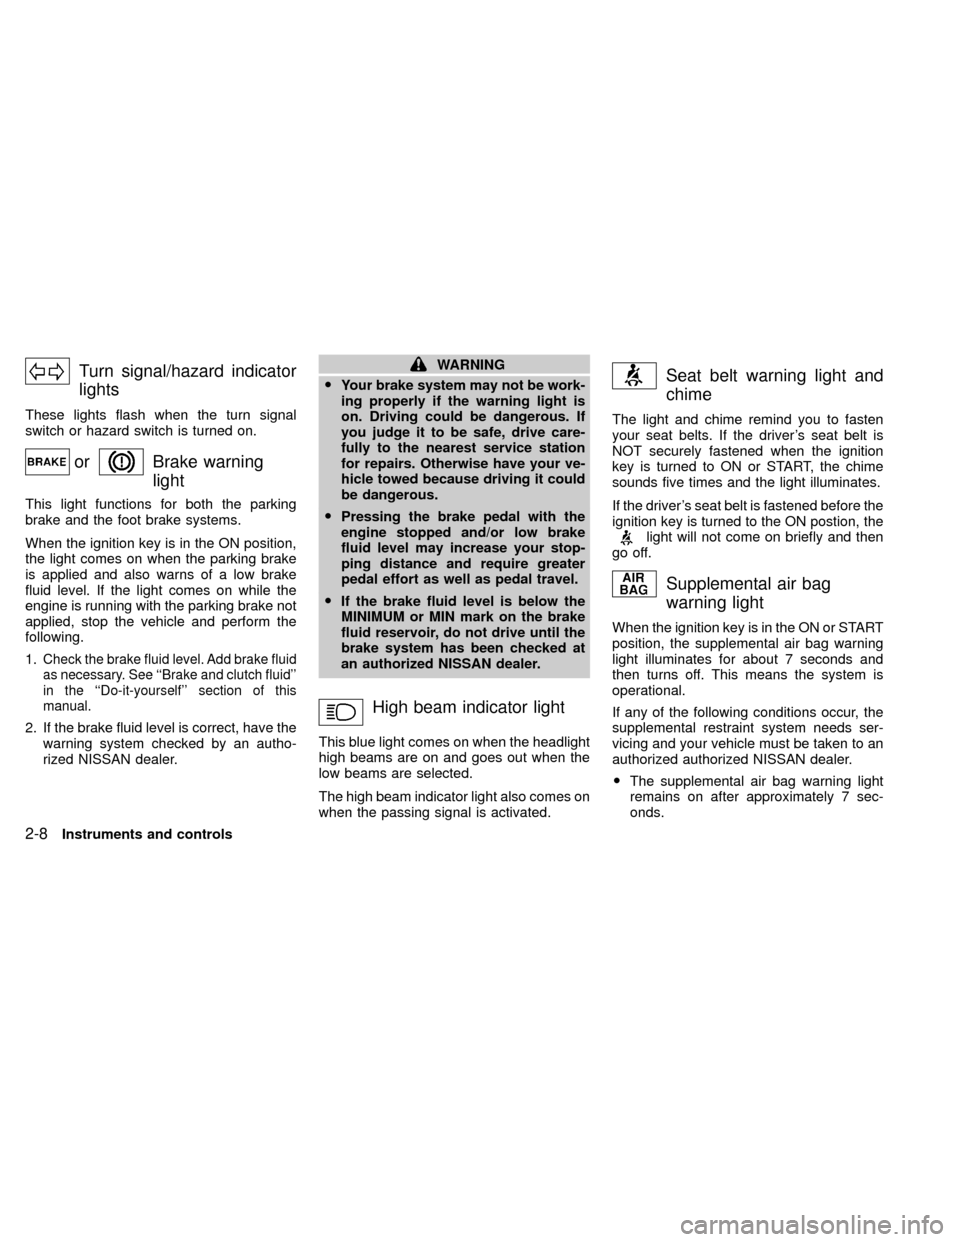
Turn signal/hazard indicator
lights
These lights flash when the turn signal
switch or hazard switch is turned on.
orBrake warning
light
This light functions for both the parking
brake and the foot brake systems.
When the ignition key is in the ON position,
the light comes on when the parking brake
is applied and also warns of a low brake
fluid level. If the light comes on while the
engine is running with the parking brake not
applied, stop the vehicle and perform the
following.
1.
Check the brake fluid level. Add brake fluid
as necessary. See ``Brake and clutch fluid''
in the ``Do-it-yourself'' section of this
manual.
2. If the brake fluid level is correct, have the
warning system checked by an autho-
rized NISSAN dealer.
WARNING
OYour brake system may not be work-
ing properly if the warning light is
on. Driving could be dangerous. If
you judge it to be safe, drive care-
fully to the nearest service station
for repairs. Otherwise have your ve-
hicle towed because driving it could
be dangerous.
OPressing the brake pedal with the
engine stopped and/or low brake
fluid level may increase your stop-
ping distance and require greater
pedal effort as well as pedal travel.
OIf the brake fluid level is below the
MINIMUM or MIN mark on the brake
fluid reservoir, do not drive until the
brake system has been checked at
an authorized NISSAN dealer.
High beam indicator light
This blue light comes on when the headlight
high beams are on and goes out when the
low beams are selected.
The high beam indicator light also comes on
when the passing signal is activated.
Seat belt warning light and
chime
The light and chime remind you to fasten
your seat belts. If the driver's seat belt is
NOT securely fastened when the ignition
key is turned to ON or START, the chime
sounds five times and the light illuminates.
If the driver's seat belt is fastened before the
ignition key is turned to the ON postion, the
light will not come on briefly and then
go off.
Supplemental air bag
warning light
When the ignition key is in the ON or START
position, the supplemental air bag warning
light illuminates for about 7 seconds and
then turns off. This means the system is
operational.
If any of the following conditions occur, the
supplemental restraint system needs ser-
vicing and your vehicle must be taken to an
authorized authorized NISSAN dealer.
OThe supplemental air bag warning light
remains on after approximately 7 sec-
onds.
2-8Instruments and controls
ZX
Page 53 of 263
WARNING
OWhen parking always make sure the
transfer control lever is in the 2H, 4H
or 4L position and the parking brake
is applied.
OFailure to engage the transfer con-
trol lever in 2H, 4H or 4L could result
in the vehicle moving unexpectedly,
which could cause serious personal
injury or property damage.
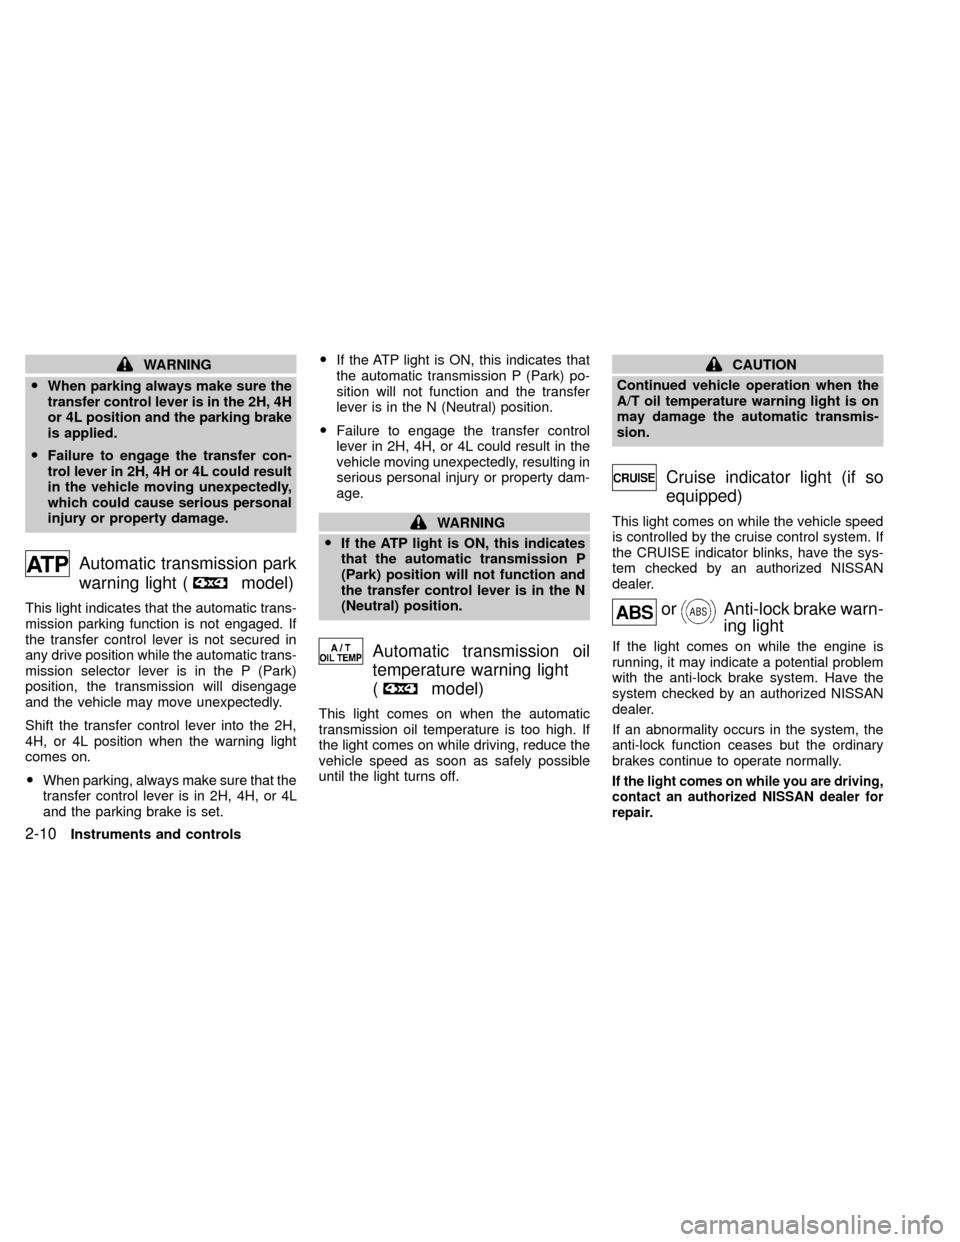
Automatic transmission park
warning light (
model)
This light indicates that the automatic trans-
mission parking function is not engaged. If
the transfer control lever is not secured in
any drive position while the automatic trans-
mission selector lever is in the P (Park)
position, the transmission will disengage
and the vehicle may move unexpectedly.
Shift the transfer control lever into the 2H,
4H, or 4L position when the warning light
comes on.
OWhen parking, always make sure that the
transfer control lever is in 2H, 4H, or 4L
and the parking brake is set.OIf the ATP light is ON, this indicates that
the automatic transmission P (Park) po-
sition will not function and the transfer
lever is in the N (Neutral) position.
OFailure to engage the transfer control
lever in 2H, 4H, or 4L could result in the
vehicle moving unexpectedly, resulting in
serious personal injury or property dam-
age.
WARNING
OIf the ATP light is ON, this indicates
that the automatic transmission P
(Park) position will not function and
the transfer control lever is in the N
(Neutral) position.
Automatic transmission oil
temperature warning light
(
model)
This light comes on when the automatic
transmission oil temperature is too high. If
the light comes on while driving, reduce the
vehicle speed as soon as safely possible
until the light turns off.
CAUTION
Continued vehicle operation when the
A/T oil temperature warning light is on
may damage the automatic transmis-
sion.
Cruise indicator light (if so
equipped)
This light comes on while the vehicle speed
is controlled by the cruise control system. If
the CRUISE indicator blinks, have the sys-
tem checked by an authorized NISSAN
dealer.
orAnti-lock brake warn-
ing light
If the light comes on while the engine is
running, it may indicate a potential problem
with the anti-lock brake system. Have the
system checked by an authorized NISSAN
dealer.
If an abnormality occurs in the system, the
anti-lock function ceases but the ordinary
brakes continue to operate normally.
If the light comes on while you are driving,
contact an authorized NISSAN dealer for
repair.
2-10Instruments and controls
ZX
Page 57 of 263
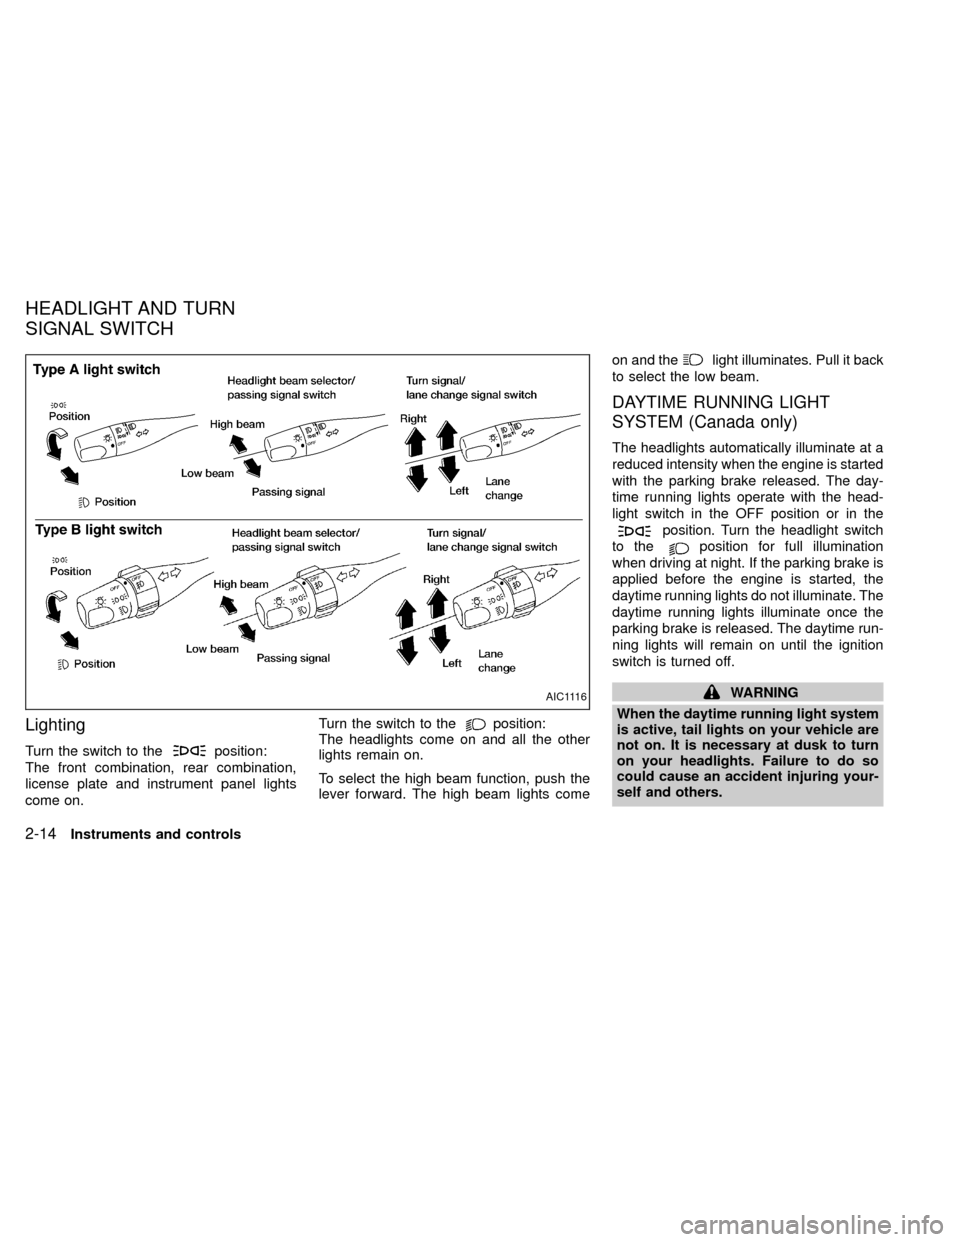
Lighting
Turn the switch to theposition:
The front combination, rear combination,
license plate and instrument panel lights
come on.Turn the switch to the
position:
The headlights come on and all the other
lights remain on.
To select the high beam function, push the
lever forward. The high beam lights comeon and the
light illuminates. Pull it back
to select the low beam.
DAYTIME RUNNING LIGHT
SYSTEM (Canada only)
The headlights automatically illuminate at a
reduced intensity when the engine is started
with the parking brake released. The day-
time running lights operate with the head-
light switch in the OFF position or in the
position. Turn the headlight switch
to the
position for full illumination
when driving at night. If the parking brake is
applied before the engine is started, the
daytime running lights do not illuminate. The
daytime running lights illuminate once the
parking brake is released. The daytime run-
ning lights will remain on until the ignition
switch is turned off.
WARNING
When the daytime running light system
is active, tail lights on your vehicle are
not on. It is necessary at dusk to turn
on your headlights. Failure to do so
could cause an accident injuring your-
self and others.AIC1116
HEADLIGHT AND TURN
SIGNAL SWITCH
2-14Instruments and controls
ZX
Page 126 of 263

5 Starting and driving
Precautions when starting and driving ...................5-2
Exhaust gas (carbon monoxide) ............................5-2
Three-way catalyst .................................................5-3
On-pavement and off-road driving precautions .....5-3
Avoiding collision and rollover................................5-3
Drinking alcohol/drugs and driving .........................5-4
Driving safety precautions ......................................5-4
Ignition switch .........................................................5-6
Manual transmission ..............................................5-6
Automatic transmission ..........................................5-7
Before starting the engine ......................................5-8
Driving with automatic transmission
(if so equipped) ......................................................5-8
Driving with manual transmission ........................5-13Starting the engine ...............................................5-14
Parking brake operation .......................................5-15
Cruise control (if so equipped) .............................5-16
Break-in schedule ................................................5-18
Increasing fuel economy ......................................5-18
Transfer case shifting procedures for 4-wheel
drive vehicles........................................................5-19
Auto-lock free-running hubs .................................5-20
Tires of four-wheel drive ......................................5-22
Parking/parking on hills ........................................5-23
Power steering system .........................................5-24
Brake system........................................................5-24
Anti-lock brake system (ABS) ..............................5-25
Cold weather driving ............................................5-26
ZX
Page 131 of 263
correctly could result in loss of con-
trol and/or a rollover accident.
OAlways use tires of the same type,
size, brand, construction (bias, bias
belted or radial), and tread pattern
on all four wheels. Install tire chains
on the rear wheels when driving on
slippery roads and drive carefully.
OBe sure to check the brakes immedi-
ately after driving in mud or water.
See ``Brake system'' later in this sec-
tion for ``Wet brakes''.
OAvoid parking your vehicle on steep
hills. If you get out of the vehicle and
it rolls forward, backward or side-
ways, you could be injured.
OWhenever you drive off-road
through sand, mud or water as deep
as the wheel hub, more frequent
maintenance may be required. See
``Periodic maintenance'' in the
``Maintenance'' section of this
manual.
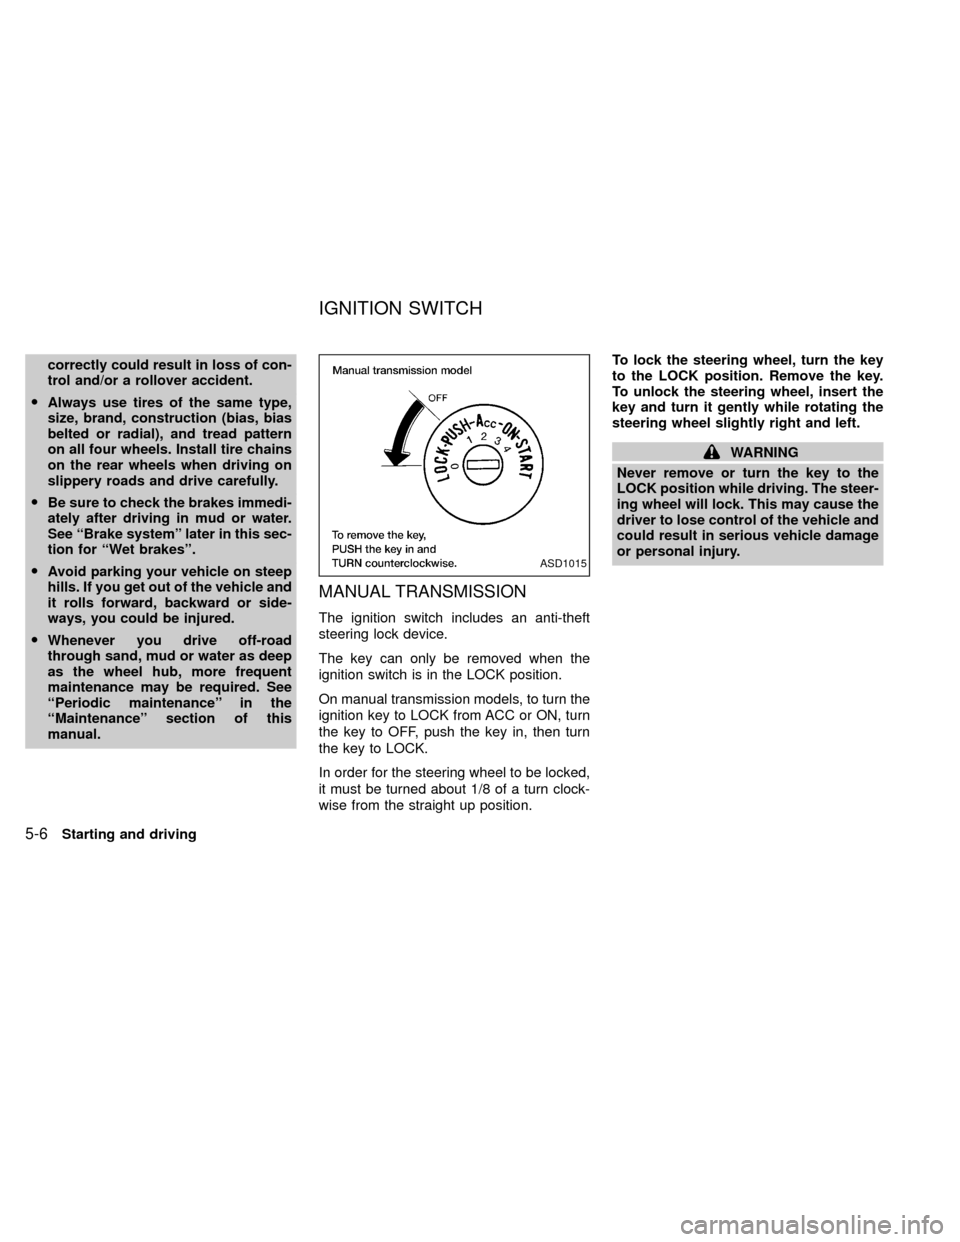
MANUAL TRANSMISSION
The ignition switch includes an anti-theft
steering lock device.
The key can only be removed when the
ignition switch is in the LOCK position.
On manual transmission models, to turn the
ignition key to LOCK from ACC or ON, turn
the key to OFF, push the key in, then turn
the key to LOCK.
In order for the steering wheel to be locked,
it must be turned about 1/8 of a turn clock-
wise from the straight up position.To lock the steering wheel, turn the key
to the LOCK position. Remove the key.
To unlock the steering wheel, insert the
key and turn it gently while rotating the
steering wheel slightly right and left.
WARNING
Never remove or turn the key to the
LOCK position while driving. The steer-
ing wheel will lock. This may cause the
driver to lose control of the vehicle and
could result in serious vehicle damage
or personal injury.
ASD1015
IGNITION SWITCH
5-6Starting and driving
ZX
Page 132 of 263
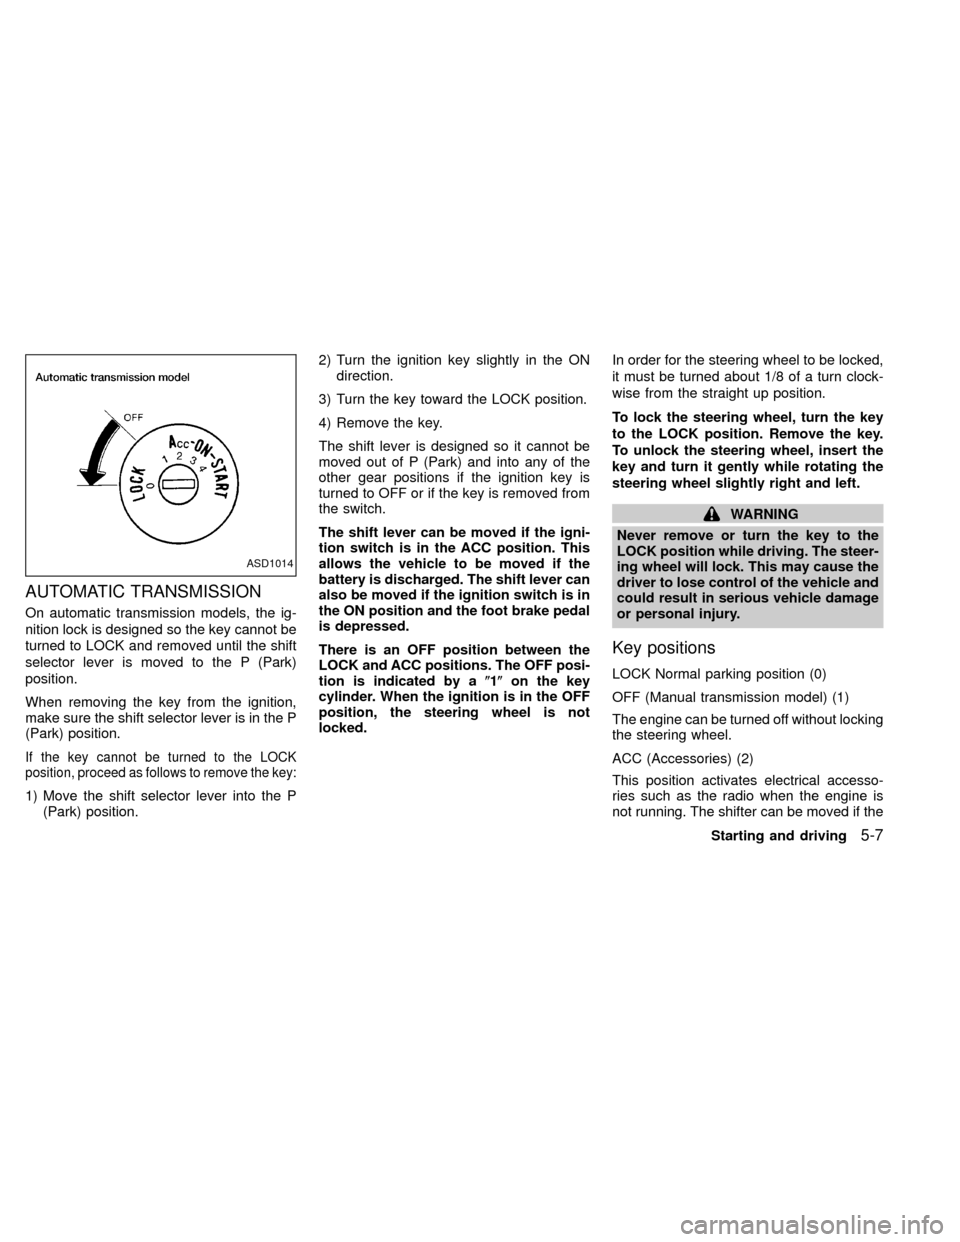
AUTOMATIC TRANSMISSION
On automatic transmission models, the ig-
nition lock is designed so the key cannot be
turned to LOCK and removed until the shift
selector lever is moved to the P (Park)
position.
When removing the key from the ignition,
make sure the shift selector lever is in the P
(Park) position.
If the key cannot be turned to the LOCK
position, proceed as follows to remove the key:
1) Move the shift selector lever into the P
(Park) position.2) Turn the ignition key slightly in the ON
direction.
3) Turn the key toward the LOCK position.
4) Remove the key.
The shift lever is designed so it cannot be
moved out of P (Park) and into any of the
other gear positions if the ignition key is
turned to OFF or if the key is removed from
the switch.
The shift lever can be moved if the igni-
tion switch is in the ACC position. This
allows the vehicle to be moved if the
battery is discharged. The shift lever can
also be moved if the ignition switch is in
the ON position and the foot brake pedal
is depressed.
There is an OFF position between the
LOCK and ACC positions. The OFF posi-
tion is indicated by a(1(on the key
cylinder. When the ignition is in the OFF
position, the steering wheel is not
locked.In order for the steering wheel to be locked,
it must be turned about 1/8 of a turn clock-
wise from the straight up position.
To lock the steering wheel, turn the key
to the LOCK position. Remove the key.
To unlock the steering wheel, insert the
key and turn it gently while rotating the
steering wheel slightly right and left.
WARNING
Never remove or turn the key to the
LOCK position while driving. The steer-
ing wheel will lock. This may cause the
driver to lose control of the vehicle and
could result in serious vehicle damage
or personal injury.
Key positions
LOCK Normal parking position (0)
OFF (Manual transmission model) (1)
The engine can be turned off without locking
the steering wheel.
ACC (Accessories) (2)
This position activates electrical accesso-
ries such as the radio when the engine is
not running. The shifter can be moved if the
ASD1014
Starting and driving5-7
ZX
Page 135 of 263

Shifting with automatic transmission
Push the button to shift into P (Park), R
(Reverse) or from D (Drive) to 2. All other
positions can be selected without pushing
the button.
P (Park):
Use this selector position when the vehicle
is parked or when starting the engine. Al-
ways be sure the vehicle is at a complete
stop. For maximum safety, depress the
brake pedal, then push in the shift lever
button and move the lever to the P (Park)
position. Apply the parking brake. Whenparking on a hill, apply the parking brake
first, then shift the lever into the P (Park)
position.
Shifting from P (Park)
If the ignition switch is in the ON position
and the foot brake pedal is depressed, but
the shift selector lever still cannot be moved
out of P (Park), follow these instructions.
1. Turn the ignition key to the LOCK posi-
tion.
2. Apply the parking brake.3. Reinsert the key and turn it to the ACC
position.
4. Depress the foot brake pedal and move
the shift selector lever to N (Neutral).
5. Start the engine.
These instructions for starting the vehicle in
N (Neutral) should only be used until service
can be obtained at an authorized NISSAN
dealership.
R (Reverse):
Use this position to back up. Always be sure
the vehicle is at a complete stop before
shifting into the R (Reverse) position. For
maximum safety, check to ensure the area
behind the vehicle is clear. With the brake
pedal depressed, push in the shift selector
lever button and move the shift selector
lever to the R (Reverse) position.
N (Neutral)
Neither forward nor reverse gear is en-
gaged. The engine can be started in this
position. You may shift to N (Neutral) and
restart a stalled engine while the vehicle is
moving.
ASD1024
5-10Starting and driving
ZX