2000 NISSAN SENTRA headlights
[x] Cancel search: headlightsPage 54 of 240

CHIMES
Key reminder chime
A chime sounds if the driver's side door is
opened while the key is left in the ignition
switch. Remove the key and take it with you
when leaving the vehicle.
Light reminder chime
With the ignition switch in the OFF position,
a chime sounds when the driver's side door
is opened if the headlights or parking lights
are on.
Turn the headlight control switch off before
leaving the vehicle.
Brake pad wear warning
The disc brake pads have an audible wear
warning. When a brake pad requires re-
placement, it makes a high pitched scraping
sound when the vehicle is in motion,
whether or not the brake pedal is de-
pressed. Have the brakes checked as soon
as possible if the warning sound is heard.Your vehicle has two types of security sys-
tems:
cNissan Vehicle Immobilizer System±
NVIS (if so equipped)
cTheft warning (if so equipped)
NISSAN VEHICLE IMMOBILIZER
SYSTEM (NVIS) (if so equipped)
The Nissan Vehicle Immobilizer System
(NVIS) will not allow the engine to start
without the use of a registered NVIS key.
If the engine fails to start using a registered
NVIS key (for example, when interference iscaused by another NVIS key, an automated
toll road device or automated payment de-
vice on the key ring), restart the engine
using the following procedures:
1. Leave the ignition switch in the ON posi-
tion for approximately 5 seconds.
2. Turn the ignition switch to the OFF or
LOCK position, and wait approximately 5
seconds.
3. Repeat step 1 and 2.
4. Restart the engine while holding the de-
vice (which may have caused the inter-
ference) separate from the registered
NVIS key.
If the no start condition re-occurs, Nissan
recommends placing the registered NVIS
key on a separate key ring to avoid interfer-
ence from other devices.
Statement related to section 15 of FCC
rules for Nissan Vehicle Immobilizer
System (CONT ASSY - IMMOBILIZER,
ANT ASSY - IMMOBILIZER)
This device complies with part 15 of the
FCC Rules and RSS-210 of Industry
Canada. Operation is subject to the fol-
lowing two conditions;
IC0005
SECURITY SYSTEMS
Instruments and controls2-11
ZX
Page 57 of 240

system is now pre-armed. After about 30
seconds the theft warning system auto-
matically shifts into the armed phase. The
SECURITY light begins to flash once ev-
ery three seconds. If, during the 30-
second pre-arm time period, the door is
unlocked by the key or the multi-remote
controller, or the ignition key is turned to
ACC or ON, the system will not arm.
cIf the key is turned slowly when lock-
ing the door, the system may not arm.
Furthermore, if the key is turned ex-
cessively to the unlock position, the
system may be disarmed when the key
is removed. If the indicator light fails to
glow for 30 seconds, unlock the door
once and lock it again.
cEven when the driver and/or passen-
gers are in the vehicle, the system will
arm with all doors, hood and trunk lid
closed and locked with the ignition
key in the OFF position.
Theft warning system activation
The theft warning system will give the fol-
lowing alarm:
cThe headlights blink and the horn sounds
intermittently.cThe alarm automatically turns off after
about 50 seconds. However, the alarm
reactivates if the vehicle is tampered with
again. The alarm can be shut off by
unlocking a door or trunk lid with the key,
or by pressing the UNLOCK button on
the multi-remote controller.
The alarm is activated by:
copening the door or trunk lid without
using the key or multi-remote controller
(even if the door is unlocked by releasing
the door inside lock switch) or opening
the trunk lid by operating the opener
lever.
copening the hood.
How to stop an activated alarm
The alarm stops only by unlocking a door or
the trunk lid with the key, or by pressing
the UNLOCK button on the multi-remote
controller.
The alarm does not stop if the ignition
switch is turned to ACC or ON.
Silencing the horn beep feature
If desired, the horn beep feature can be
deactivated using the multi-remote control-
ler. The instructions are on the back of the
multi-remote controller.
WIC0036
2-14Instruments and controls
ZX
Page 59 of 240
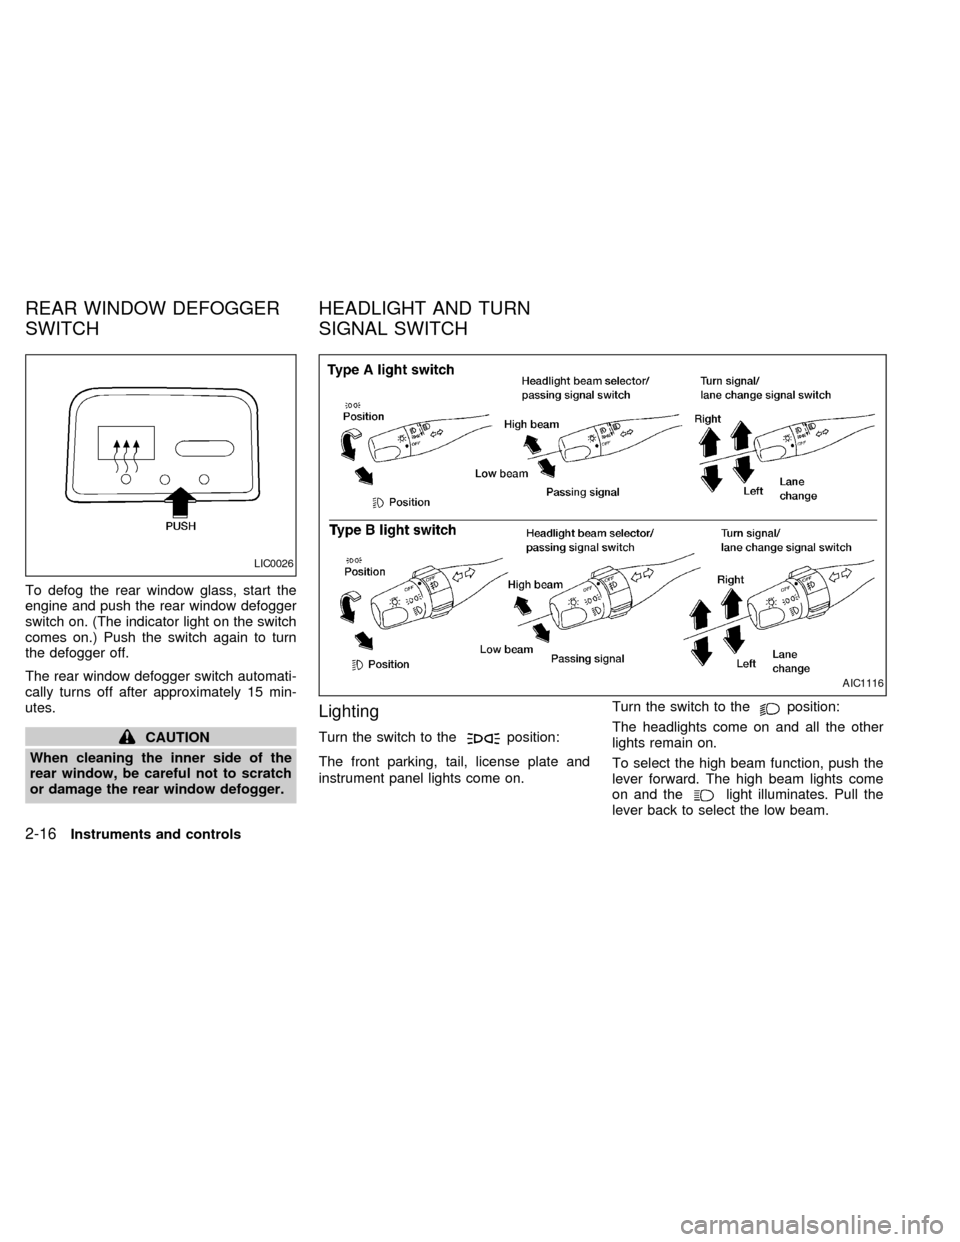
To defog the rear window glass, start the
engine and push the rear window defogger
switch on. (The indicator light on the switch
comes on.) Push the switch again to turn
the defogger off.
The rear window defogger switch automati-
cally turns off after approximately 15 min-
utes.
CAUTION
When cleaning the inner side of the
rear window, be careful not to scratch
or damage the rear window defogger.
Lighting
Turn the switch to theposition:
The front parking, tail, license plate and
instrument panel lights come on.Turn the switch to the
position:
The headlights come on and all the other
lights remain on.
To select the high beam function, push the
lever forward. The high beam lights come
on and the
light illuminates. Pull the
lever back to select the low beam.
LIC0026
AIC1116
REAR WINDOW DEFOGGER
SWITCHHEADLIGHT AND TURN
SIGNAL SWITCH
2-16Instruments and controls
ZX
Page 60 of 240
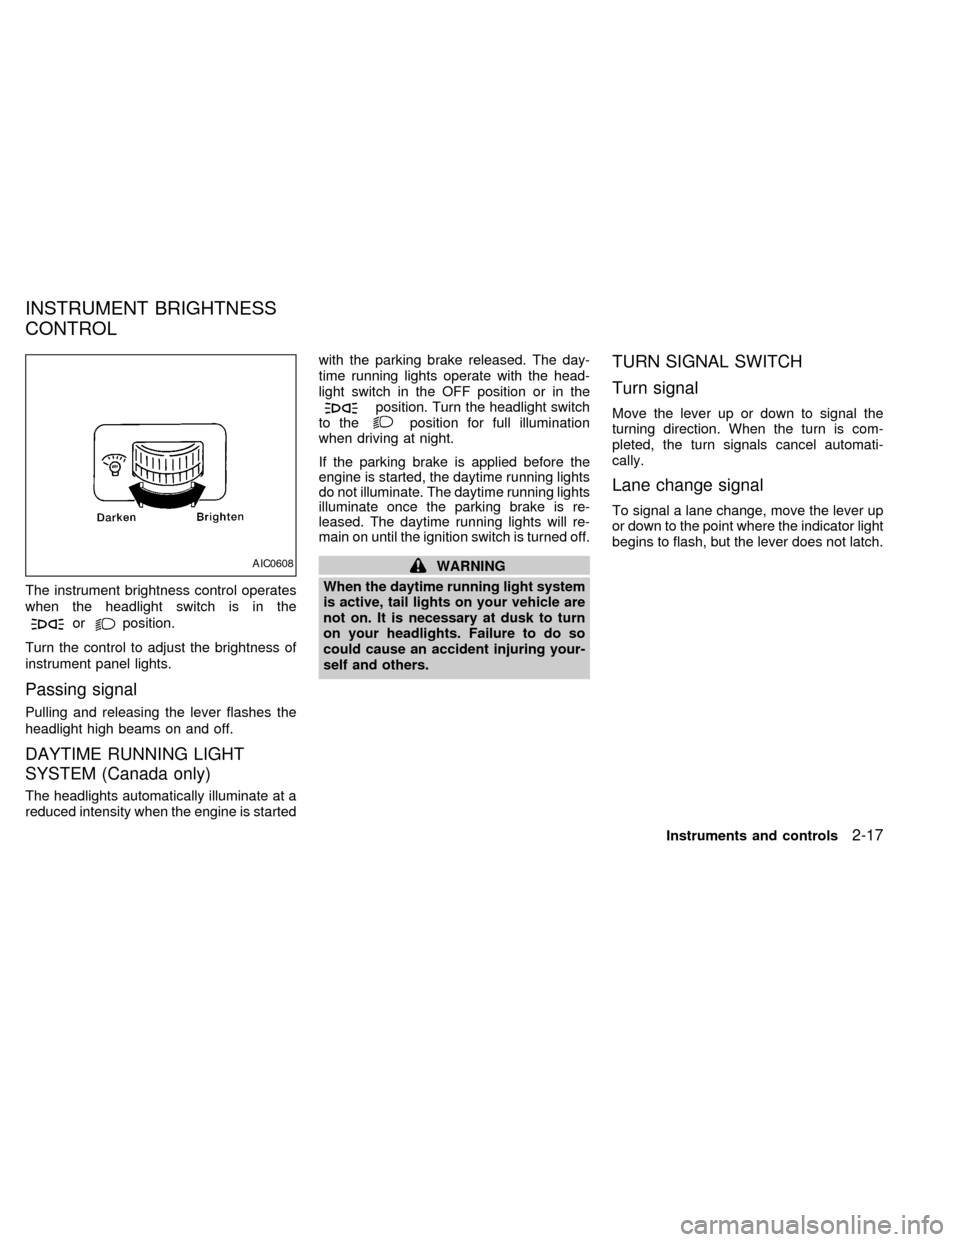
The instrument brightness control operates
when the headlight switch is in the
orposition.
Turn the control to adjust the brightness of
instrument panel lights.
Passing signal
Pulling and releasing the lever flashes the
headlight high beams on and off.
DAYTIME RUNNING LIGHT
SYSTEM (Canada only)
The headlights automatically illuminate at a
reduced intensity when the engine is startedwith the parking brake released. The day-
time running lights operate with the head-
light switch in the OFF position or in the
position. Turn the headlight switch
to theposition for full illumination
when driving at night.
If the parking brake is applied before the
engine is started, the daytime running lights
do not illuminate. The daytime running lights
illuminate once the parking brake is re-
leased. The daytime running lights will re-
main on until the ignition switch is turned off.
WARNING
When the daytime running light system
is active, tail lights on your vehicle are
not on. It is necessary at dusk to turn
on your headlights. Failure to do so
could cause an accident injuring your-
self and others.
TURN SIGNAL SWITCH
Turn signal
Move the lever up or down to signal the
turning direction. When the turn is com-
pleted, the turn signals cancel automati-
cally.
Lane change signal
To signal a lane change, move the lever up
or down to the point where the indicator light
begins to flash, but the lever does not latch.
AIC0608
INSTRUMENT BRIGHTNESS
CONTROL
Instruments and controls2-17
ZX
Page 61 of 240
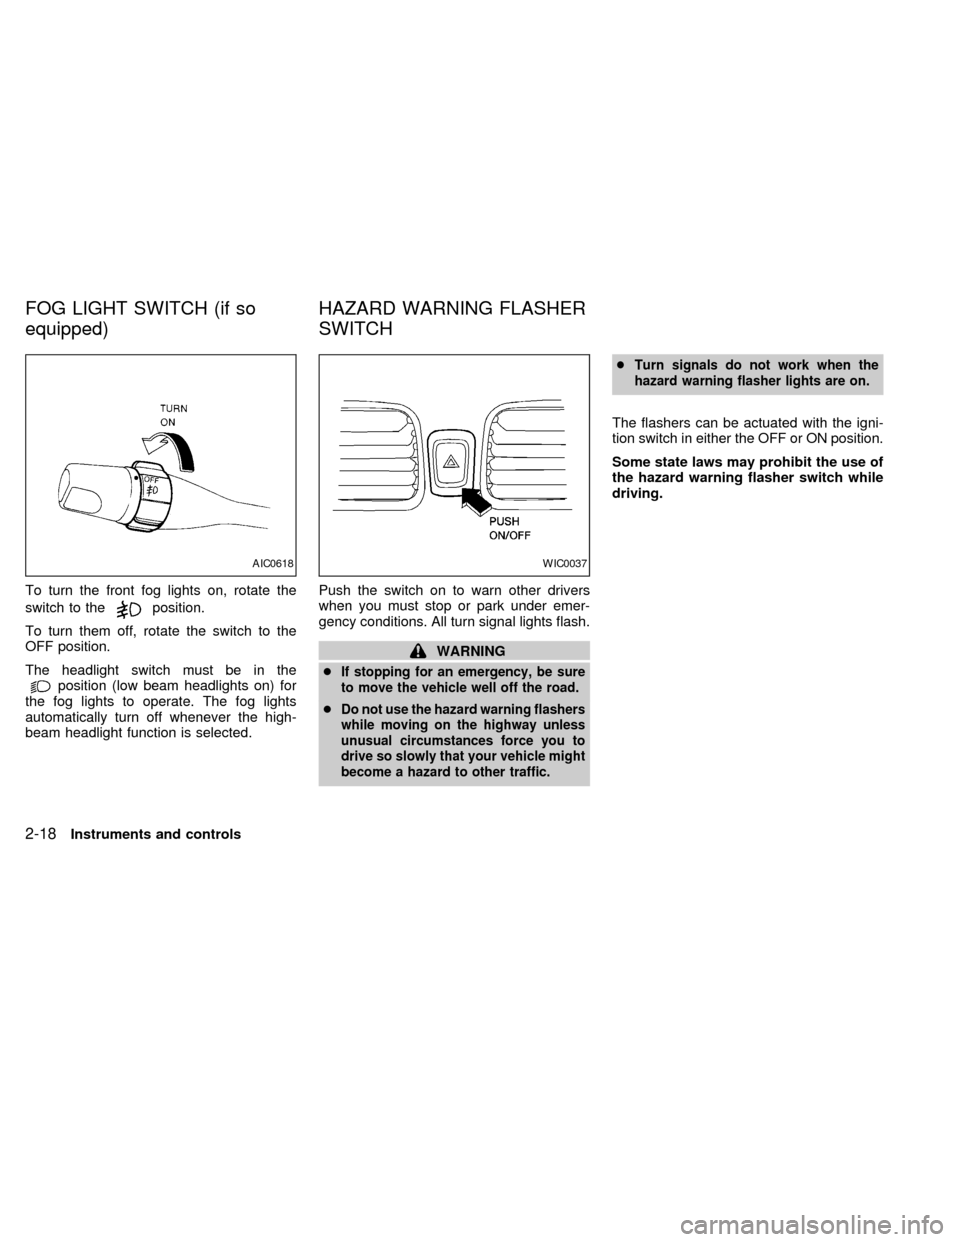
To turn the front fog lights on, rotate the
switch to the
position.
To turn them off, rotate the switch to the
OFF position.
The headlight switch must be in the
position (low beam headlights on) for
the fog lights to operate. The fog lights
automatically turn off whenever the high-
beam headlight function is selected.Push the switch on to warn other drivers
when you must stop or park under emer-
gency conditions. All turn signal lights flash.
WARNING
c
If stopping for an emergency, be sure
to move the vehicle well off the road.
cDo not use the hazard warning flashers
while moving on the highway unless
unusual circumstances force you to
drive so slowly that your vehicle might
become a hazard to other traffic.cTurn signals do not work when the
hazard warning flasher lights are on.
The flashers can be actuated with the igni-
tion switch in either the OFF or ON position.
Some state laws may prohibit the use of
the hazard warning flasher switch while
driving.
AIC0618WIC0037
FOG LIGHT SWITCH (if so
equipped)HAZARD WARNING FLASHER
SWITCH
2-18Instruments and controls
ZX
Page 62 of 240
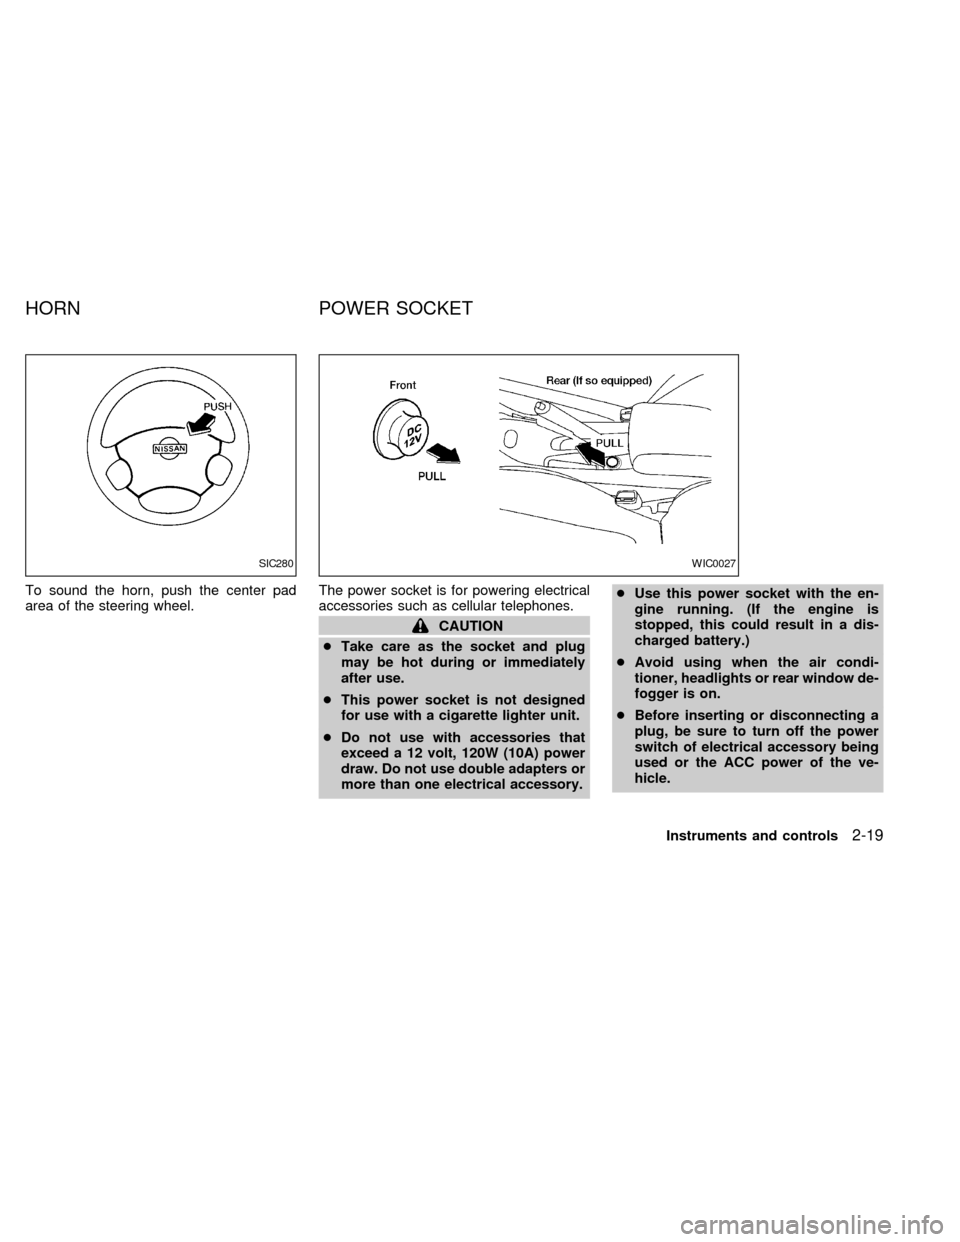
To sound the horn, push the center pad
area of the steering wheel.The power socket is for powering electrical
accessories such as cellular telephones.
CAUTION
cTake care as the socket and plug
may be hot during or immediately
after use.
cThis power socket is not designed
for use with a cigarette lighter unit.
cDo not use with accessories that
exceed a 12 volt, 120W (10A) power
draw. Do not use double adapters or
more than one electrical accessory.cUse this power socket with the en-
gine running. (If the engine is
stopped, this could result in a dis-
charged battery.)
cAvoid using when the air condi-
tioner, headlights or rear window de-
fogger is on.
cBefore inserting or disconnecting a
plug, be sure to turn off the power
switch of electrical accessory being
used or the ACC power of the ve-
hicle.
SIC280WIC0027
HORN POWER SOCKET
Instruments and controls2-19
ZX
Page 79 of 240

Unlocking doors
1. Push the UNLOCK button on the multi-
remote controller. Only the driver side
door unlocks.
2. Push the UNLOCK button on the multi-remote controller again within 5 seconds.
The passenger doors unlock.
3. The interior light illuminates for approxi-
mately 30 seconds.
The interior light can be turned off withoutwaiting for 30 seconds by turning the igni-
tion to the ON position or by pressing the
LOCK button on the multi-remote controller.
Releasing the trunk lid
1. Push the TRUNK button on the multi-
remote controller for longer than 0.5 sec-
ond. The trunk release button on the
multi-remote controller will not operate
when the ignition switch is in the ON
position.
2. The trunk lid opens.
Using the panic alarm
If you are near your vehicle and feel threat-
ened, you may activate the panic alarm to
call attention as follows:
1. Push the PANIC button on the remote
controller forlonger than 0.8 seconds.
2. The panic alarm and headlights stay on
for 25 seconds.
3. The panic alarm stops when the LOCK,
UNLOCK, or the PANIC button is pushed
on the multi-remote controller.
WPD0025
3-6Pre-driving checks and adjustments
ZX
Page 87 of 240
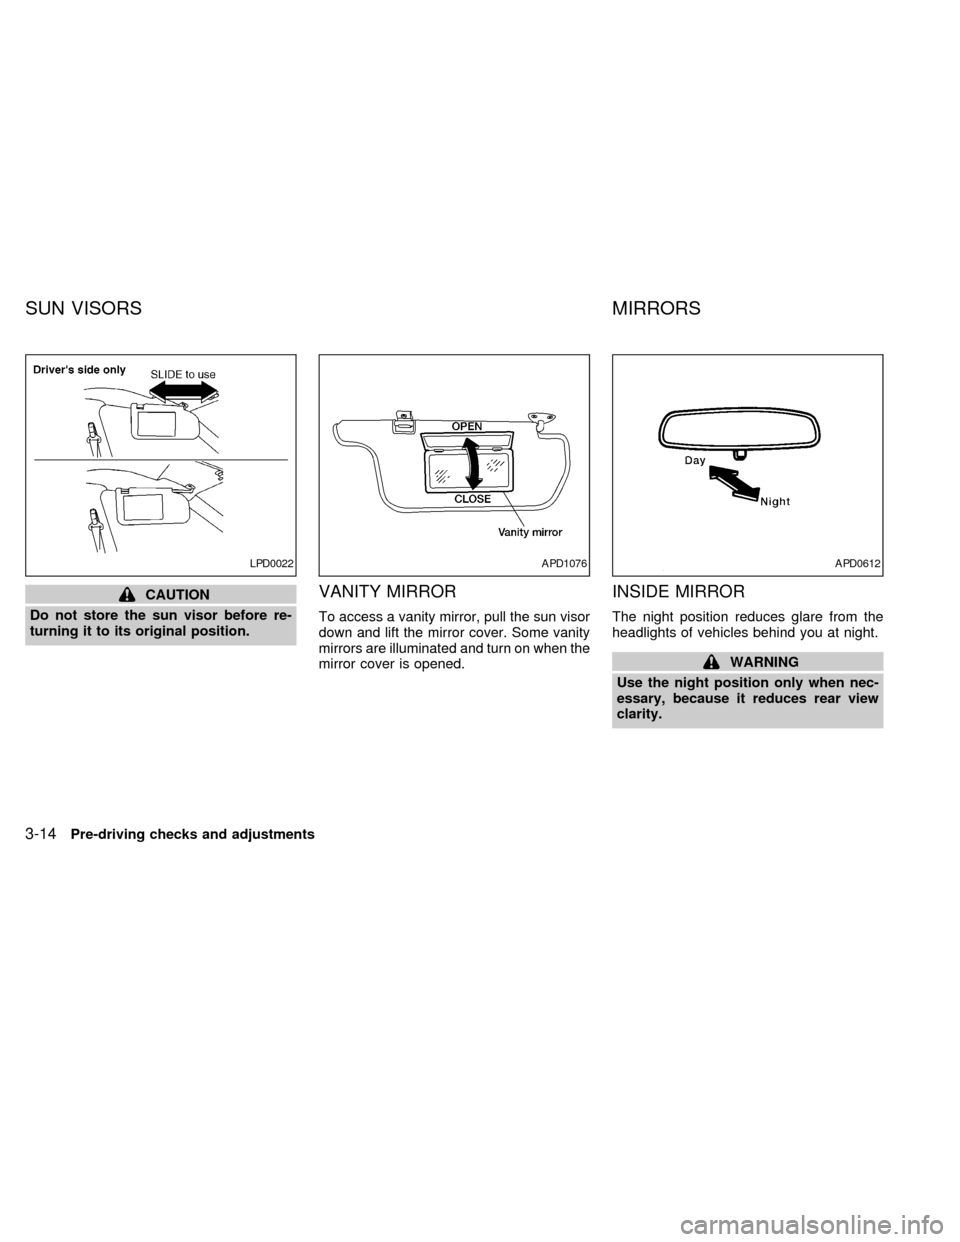
CAUTION
Do not store the sun visor before re-
turning it to its original position.VANITY MIRROR
To access a vanity mirror, pull the sun visor
down and lift the mirror cover. Some vanity
mirrors are illuminated and turn on when the
mirror cover is opened.
INSIDE MIRROR
The night position reduces glare from the
headlights of vehicles behind you at night.
WARNING
Use the night position only when nec-
essary, because it reduces rear view
clarity.
LPD0022APD1076APD0612
SUN VISORS MIRRORS
3-14Pre-driving checks and adjustments
ZX