2000 NISSAN QUEST ECO mode
[x] Cancel search: ECO modePage 165 of 292

Clock operation
The clock is on in the display regardless of
what mode, media, or function the radio is in
as long as the ignition is in ACC or ON.
Clock set
Press the RDS/CLK button until SELECT
HOURS is displayed then use the SEL
buttons to change the hour, press
the RDS/CLK button again until SELECT
MINS is displayed then use the SEL
buttons to change the minutes.
The display will return to the previous radio
station, tape or CD that was being played
previous to setting the clock in 7 seconds or
you may press the RDS/CLK button until the
previous display appears.
Selecting the desired band
Push the AM buttons to change to AM band
or push the FM button to change to FM1 or
FM2 band reception.
The FM stereo indicator, ST illuminates
during FM stereo reception. When the ste-
reo broadcast signal is weak, the radio
automatically changes from stereo to mon-
aural reception.
FM-AM Radio operation
MUTE button
Push the MUTE button to mute out the
radio.
TUNE buttons
WARNING
The radio should not be tuned while
driving so full attention may be given to
vehicle operation.
Use the
orbuttons for manual
tuning. To move quickly through the chan-
nels, hold either of the tune buttons down
for more than 0.5 seconds.
AUTO SET
Press the AUTO button while listening to the
radio to activate the auto set feature. When
AUTO is depressed for less than 5 seconds,
the display window momentarily indicates
AUTO ON, and the radio seeks the first six
strong stations for the respective band. The
first six strong stations are then stored in
order in memory buttons one through six.
Only stations in the selected band are set,and the station seek begins from the last
frequency stored in memory button six. If
AM, FM, SCAN, TUNE, SEEK, AUTO or a
memory button is pushed while auto set is
operating, auto set is canceled and AUTO
OFF shows in the display window.
AUTO LOAD
Press the AUTO button for longer than 5
seconds while listening to the radio to acti-
vate the auto load feature. When AUTO is
depressed for longer than 5 seconds, the
display window momentarily indicates
AUTO LOAD, and the radio seeks the first
six strong stations for every band. The first
six strong stations are then stored in order
in memory buttons one through six for each
band (AM, FM1, and FM2).
SEEK tuning
Push the SEEKorbuttons to find the
next broadcast station. Pushing the
SEEKS up andbutton SEEKS down.
Pushing the button again continues the SEEK
function. Once the highest broadcast station
is reached, the radio continues in the SEEK
mode at the lowest station. Once the lowest
broadcast station is reached, the radio con-
4-24Heater, air conditioner and audio systems
ZX
Page 166 of 292

tinues in the SEEK mode at the highest
station.
SCAN tuning
Push the SCAN tuning button, SCAN illumi-
nates in the display. SCAN tuning begins
from low to high frequencies and stops at
each broadcasting station for 5 seconds.
Pushing the button again during this 5 sec-
ond period stops SCAN tuning and remains
tuned to that station.
Station memory operations
Six stations can be set for the AM band.
Twelve stations can be set for the FM band
(six for FM1, six for FM2).
1. Push the FM or AM buttons to select AM,FM1, or FM2. The selected band illumi-
nates in the display.
2. Tune to the desired station.
3. Push the desired station select button for
more than 1.5 seconds. The radio mutes
when the select button is pushed.
4. When the sound resumes, memorizing is
complete.
5. Other station select buttons can be set in
the same manner.
If the battery is disconnected, or if the radio
fuse opens, the radio memory is canceled.
In that case, reset the desired stations.
RDS (Radio Data System)
RDS stands for Radio Data System, and is
a data information service transmitted by
some radio stations on the FM band (not
AM band) encoded within a regular radio
broadcast. Most RDS stations are currently
in large cities, but many stations are now
considering broadcasting RDS data.
RDS can display:
cStation name or call-sign, such as
``WHFR 98.3''.
AHA1108
Heater, air conditioner and audio systems4-25
ZX
Page 168 of 292

Precautions on cassette player opera-
tion
cTo maintain good quality sound, Nis-
san recommends using cassette
tapes of 60 minutes or shorter in
length.
cCassette tapes should be removed
from the player when not in use. Store
cassettes in their protective cases
and away from direct sunlight, heat,
dust, moisture, and magnetic
sources.
cDirect sunlight can cause the cassette
to become deformed. The use of de-
formed cassettes may cause the cas-
sette to jam in the player.
cDo not use cassettes with loose labels
which are peeling and loose. If used
the label could jam in the player.
cIf a cassette has loose tape, insert a
pencil through one of the cassette
hubs and rewind the tape firmly
around the hubs. Loose tape may
cause tape jamming and wavering
sound quality.
cOver a period of time, the playbackhead, capstan and pinch roller may
collect a tape coating residue as the
tape is played. This residue accumu-
lation can cause weak or wavering
sound, and should be removed peri-
odically with a head cleaning tape. If
the residue is not removed periodi-
cally, the player may need to be dis-
assembled for cleaning.
PLAY/STOP
Push the CD, AM, or FM button while the
cassette tape is playing to stop the tape.
Push the TAPE button to play the tape.
Changing the direction of tape play
Push the SIDE 1-2 select button to switch
sides on the tape. The display will change
from TAPE 1 PLAY to TAPE 2 PLAY.
FF (Fast Forward), REW (Rewind)
Push the REW or FF button for the desired
direction.
When REW is pushed TAPE 1 REW illumi-
nates on the display (TAPE 2 REW will
illuminate if on side 2). When FF is pushed
TAPE 2 FF illuminates on the display (TAPE
2 FF will illuminate if on side 2). To stop the
FF or REW function, press the FF or REWbutton again or the TAPE button.
Dolby NR (Noise Reduction)
Push the
button for Dolby NR encoded
tapes to reduce high frequency tape noise.
When activated, a
appears in the dis-
play window.
Dolby NR is manufactured under license
from Dolby Laboratories Licensing Corpora-
tion. ``Dolby NR'' and the double-D symbol
are trademarks of Dolby Laboratories Li-
censing Corporation.
AMS (Automatic Music Search)
Pushing the seek button while playing a
cassette tape activates the Automatic Music
Search (AMS) mode. Press
SEEK to
rewind the tape to the previous selection, or
press SEEK
to forward the tape to the
nest selection.
This system searches for the blank intervals
between selections. If there is a blank inter-
val within one program or there is no interval
between programs, the system may not
stop in the desired or expected location.
Heater, air conditioner and audio systems
4-27
ZX
Page 171 of 292

COMPACT DISC (CD) PLAYER
(if so equipped)
The compact disc player consists of two
main components; the 6 CD magazine and
the CD changer. Both components are lo-
cated on the center instrument panel con-
sole, below the ashtray.
How to load the CD magazine
To load the magazine with CDs, first push
the EJECT button on the CD changer to
eject the magazine, then remove the maga-
zine from the changer. The inside of the CD
magazine contains six shelves, one foreach CD to be loaded. Carefully slide a CD
(label side up) onto one of the shelves and
push it in. Repeat as desired, loading up to
six CDs.
CD magazine insert
Once the desired number of CDs are loaded
into the magazine, insert the magazine back
into the CD changer.
With the ignition switch OFF, the CD maga-
zine loads into the CD changer. Once the
ignition switch is turned to ACC or ON, the
audio system returns to its previous mode.
With the ignition switch in the ACC or ONposition, the CD magazine loads into the
CD changer and begins play with disc one,
track one.
CD button
Push this button to switch from radio or tape
mode to CD mode. CD play begins auto-
matically if at least one disc is loaded in the
magazine. The display window shows the
CD number for three seconds, then the track
number for three seconds, then displays
both together for the remainder of the track.
If the CD button is pushed while in the radio
or tape mode, and there are no CDs loaded
in the magazine, the display window flashes
a NO DISC message for 4 seconds.
CD Player controls
SEEK
Push
SEEK to select the previous
track number, or push SEEKto select
the next track number. After the last track on
a disc, pushing SEEK
selects the first
track of the same disc.
SELECT DISCS
Push
TUNE to select the previous CD
in the magazine. Push TUNEto select
AHA1064
4-30Heater, air conditioner and audio systems
ZX
Page 176 of 292

CD CARE AND CLEANING
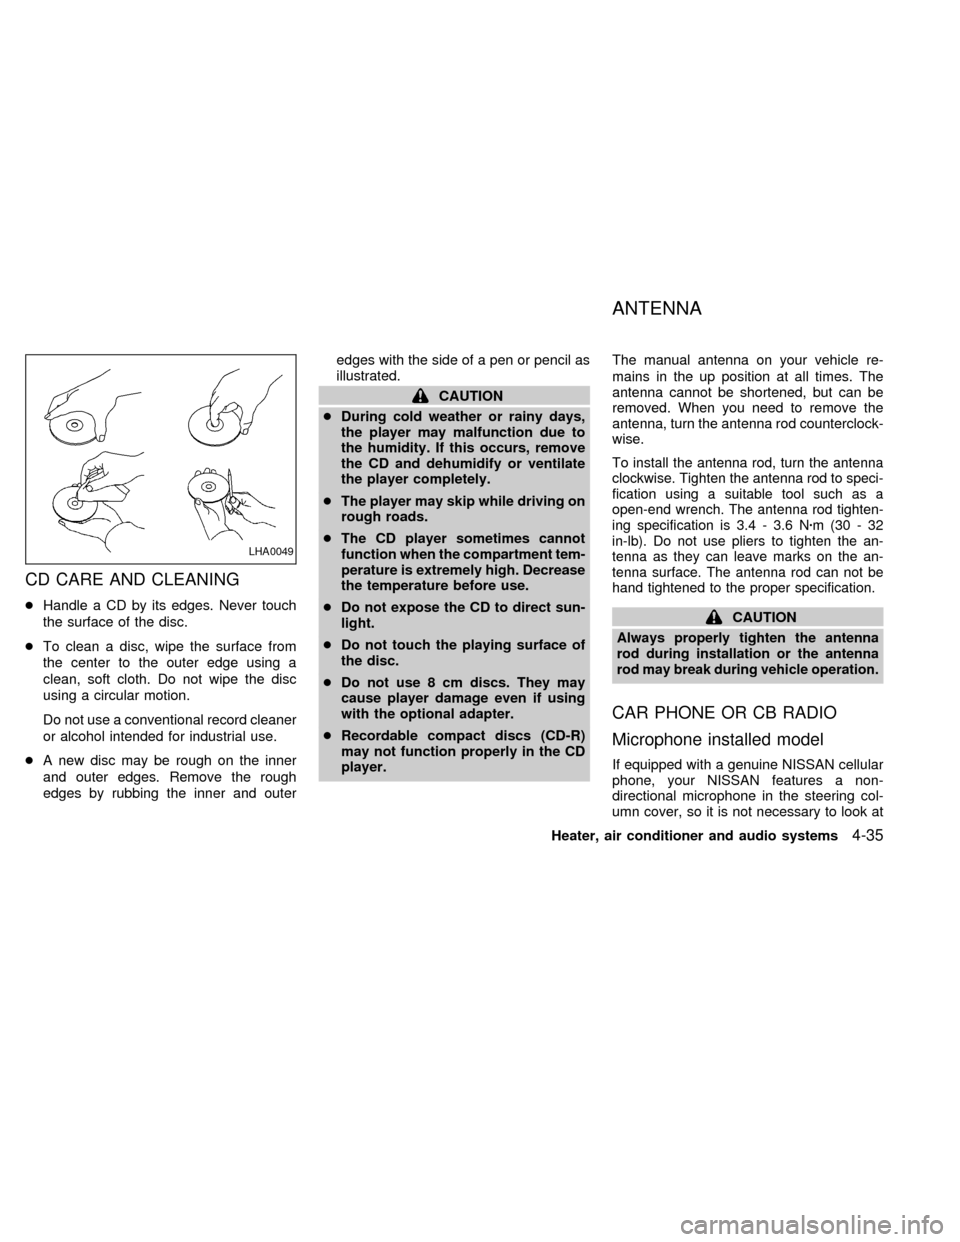
cHandle a CD by its edges. Never touch
the surface of the disc.
cTo clean a disc, wipe the surface from
the center to the outer edge using a
clean, soft cloth. Do not wipe the disc
using a circular motion.
Do not use a conventional record cleaner
or alcohol intended for industrial use.
cA new disc may be rough on the inner
and outer edges. Remove the rough
edges by rubbing the inner and outeredges with the side of a pen or pencil as
illustrated.
CAUTION
cDuring cold weather or rainy days,
the player may malfunction due to
the humidity. If this occurs, remove
the CD and dehumidify or ventilate
the player completely.
cThe player may skip while driving on
rough roads.
cThe CD player sometimes cannot
function when the compartment tem-
perature is extremely high. Decrease
the temperature before use.
cDo not expose the CD to direct sun-
light.
cDo not touch the playing surface of
the disc.
cDo not use 8 cm discs. They may
cause player damage even if using
with the optional adapter.
cRecordable compact discs (CD-R)
may not function properly in the CD
player.The manual antenna on your vehicle re-
mains in the up position at all times. The
antenna cannot be shortened, but can be
removed. When you need to remove the
antenna, turn the antenna rod counterclock-
wise.
To install the antenna rod, turn the antenna
clockwise. Tighten the antenna rod to speci-
fication using a suitable tool such as a
open-end wrench. The antenna rod tighten-
ing specification is 3.4 - 3.6 Nzm(30-32
in-lb). Do not use pliers to tighten the an-
tenna as they can leave marks on the an-
tenna surface. The antenna rod can not be
hand tightened to the proper specification.
CAUTION
Always properly tighten the antenna
rod during installation or the antenna
rod may break during vehicle operation.
CAR PHONE OR CB RADIO
Microphone installed model
If equipped with a genuine NISSAN cellular
phone, your NISSAN features a non-
directional microphone in the steering col-
umn cover, so it is not necessary to look at
LHA0049
ANTENNA
Heater, air conditioner and audio systems4-35
ZX
Page 177 of 292

or speak directly into the microphone when
calling.
To do so could detract from the driving
operation and cause an accident.
See the manual for car phone operation.
Pre-wired and antenna for phone
installed model
Some models are pre-wired to accept the
genuine NISSAN cellular phone.
In addition, the same model has the phone
antenna built into the rear glass window.
When installing a CB ham radio, a car
phone or other transmitters in your NISSAN,
be sure to observe the following cautions,
otherwise the new equipment may ad-
versely affect the MFI (Multiport Fuel Injec-
tion) system and other electronic parts.
WARNING
cA cellular telephone should not be
used while driving so full attention
may be given to vehicle operation.
Some jurisdictions prohibit the use
of cellular telephones while driving.
cIf you must make a call while your
vehicle is in motion, the hands free
cellular phone operational mode (if
so equipped) is highly recom-
mended. Exercise extreme caution
at all times so full attention may be
given to vehicle operation.cIf a conversation in a moving vehicle
requires you to take notes, pull off
the road to a safe location and stop
your vehicle before doing so.
CAUTION
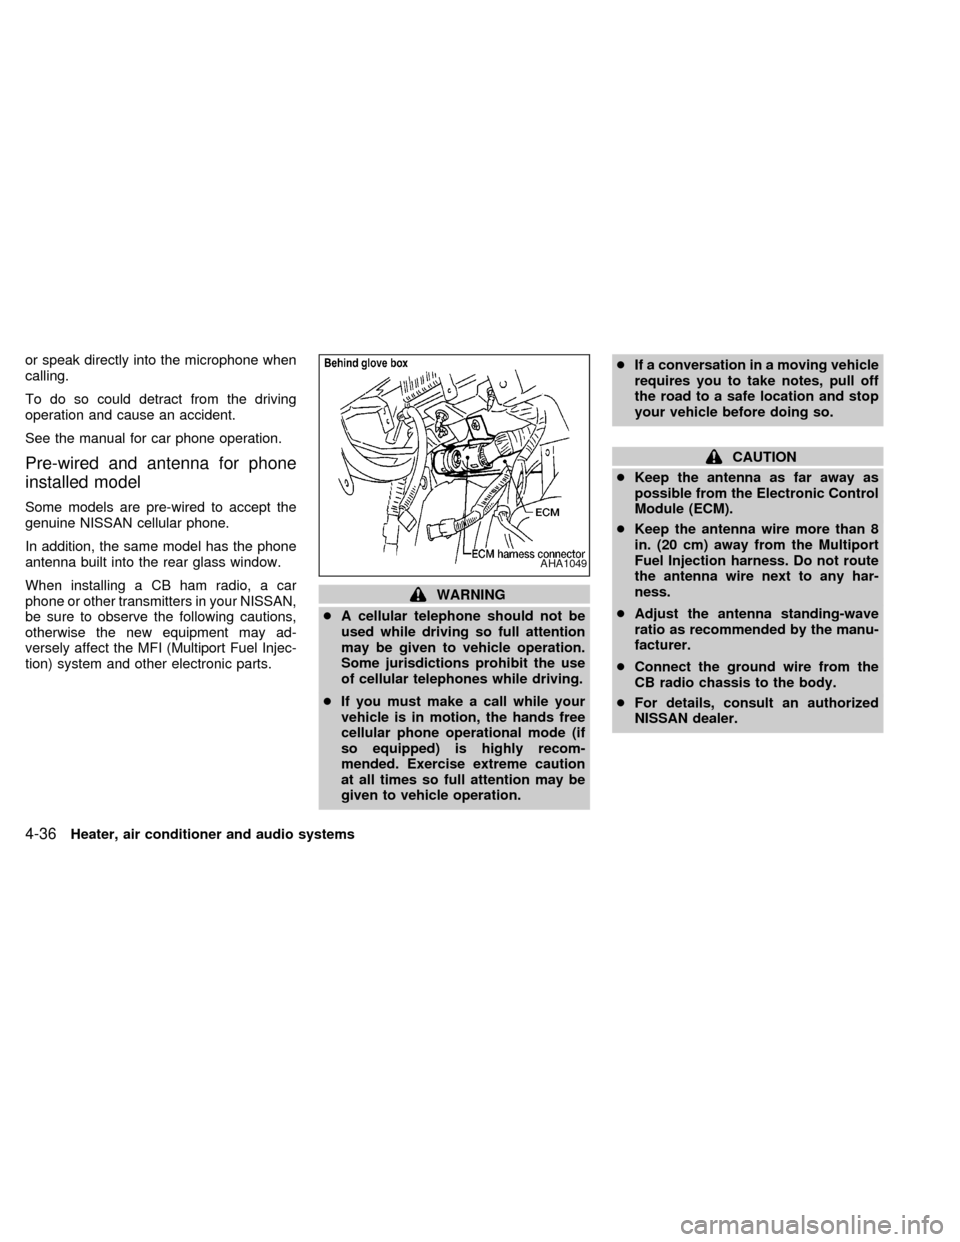
cKeep the antenna as far away as
possible from the Electronic Control
Module (ECM).
cKeep the antenna wire more than 8
in. (20 cm) away from the Multiport
Fuel Injection harness. Do not route
the antenna wire next to any har-
ness.
cAdjust the antenna standing-wave
ratio as recommended by the manu-
facturer.
cConnect the ground wire from the
CB radio chassis to the body.
cFor details, consult an authorized
NISSAN dealer.
AHA1049
4-36Heater, air conditioner and audio systems
ZX
Page 182 of 292

cMake sure the area around the vehicle is
clear.
cMaintenance items listed here should be
checked periodically (for example, each
time you check engine oil).
cCheck that all windows and lights are
clean.
cVisually inspect tires for their appearance
and condition. Also check tires for proper
inflation.
cLock all doors.
cPosition seat and adjust head restraints.
cAdjust inside and outside mirrors.
cFasten seat belts and ask all passengers
to do likewise.
cCheck the operation of warning lights
when key is turned to the ON position.
See ``Warning/Indicator lights and chimes''
in the ``Instrument and controls'' section.
1. Apply the parking brake.
2. Move the selector lever to P (Park) or N
(Neutral) (P is recommended).
The shift selector lever cannot be
moved out of P and into any of the
other gear positions under the follow-
ing conditions:
cThe ignition key is turned to the
LOCK position.
cThe ignition key is turned to the ON
position without depressing the
foot brake pedal.
The starter will not operate if the shift
selector lever is in one of the driving
positions.
3. Crank the enginewith your foot off the
accelerator pedalby turning the ignition
key to START. Release the key when the
engine starts. If the engine starts, but
fails to run, repeat the above procedure.
Ð If the engine is very hard to start in
extremely cold or hot weather, de-
press the accelerator pedal to the
floor and hold it to help start the
engine.Ð In the summer, when restarting the
engine within 30 minutes after it has
been stopped, keep the accelerator
pedal slightly depressed while start-
ing.
CAUTION
Do not operate the starter for more than
15 seconds at a time. If the engine does
not start, turn the key off and wait 10
seconds before cranking again, other-
wise the starter could be damaged.
4. Warm-up
Allow the engine to idle for at least 30
seconds after starting. Drive at moderate
speeds for a short distance first, espe-
cially in cold weather.
BEFORE STARTING THE
ENGINESTARTING THE ENGINE
Starting and driving5-5
ZX
Page 189 of 292

cAccelerate slowly and smoothly. Main-
tain cruising speeds with a constant ac-
celerator position.
cDrive at moderate speeds on the high-
way. Driving at high speed lowers fuel
economy.
cAvoid unnecessary stopping and brak-
ing. Maintain a safe distance behind
other vehicles.
cUse a proper gear range which suits road
conditions.
cAvoid unnecessary engine idling.cKeep your engine tuned up.
cFollow the recommended periodic main-
tenance schedule.
cKeep the tires inflated at the correct
pressure. Low tire pressure increases
tire wear and wastes fuel.
cKeep the wheels in correct alignment.
Improper alignment causes not only tire
wear but also lower fuel economy.
cAir conditioner operation lowers fuel
economy. Use the air conditioner only
when necessary.
cWhen cruising at highway speeds, it is
more economical to use the air condi-
tioner and leave the windows closed to
reduce drag.
SD1001M
INCREASING FUEL
ECONOMY
5-12Starting and driving
ZX