Page 6 of 242
Table of
ContentsSeats, restraints and supplemental air bag systems
Instruments and controls
Pre-driving checks and adjustments
Heater, air conditioner and audio systems
Starting and driving
In case of emergency
Appearance and care
Do-it-yourself
Maintenance
Technical and consumer information
Index
1
2
3
4
5
6
7
8
9
10
11
Page 8 of 242

1 Seats, restraints and supplemental air
bag systems
Seats ......................................................................1-2
Front manual seat adjustment ...............................1-3
Front power seat adjustment (if so equipped) .......1-4
Rear seat adjustment .............................................1-6
Head restraint adjustment ......................................1-8
Supplemental restraint system ...............................1-9
Precautions on supplemental restraint system ......1-9
Supplemental air bag warning labels ...................1-19
Supplemental air bag warning light......................1-19
Seat belts .............................................................1-21
Precautions on seat belt usage ...........................1-21
Child safety...........................................................1-23Pregnant women ..................................................1-23
Injured persons ....................................................1-24
Three-point type seat belt with retractor ..............1-24
Seat belt extenders ..............................................1-28
Seat belt maintenance .........................................1-28
Child restraints .....................................................1-28
Precautions on child restraints .............................1-28
Installation on rear seat center or outboard
positions ...............................................................1-30
Top tether strap child restraint .............................1-35
Installation on front passenger seat .....................1-36
ZX
Page 10 of 242
FRONT MANUAL SEAT
ADJUSTMENT
WARNING
cDo not adjust the driver's seat while
driving so full attention may be given
to vehicle operation. The seat may
move suddenly and could cause
loss of control of the vehicle.
cAfter adjustment, gently rock in the
seat to make sure it is securely
locked.
Forward and backward
Pull the lever up while you slide the seat
forward or backward to the desired position.
Release the lever to lock the seat in posi-
tion.
Reclining
To recline the seatback, pull the lever up
and lean back. To bring the seatback for-
ward again, pull the lever and move your-
body forward.
WRS0001
Seats, restraints and supplemental air bag systems1-3
ZX
Page 11 of 242
Seat lifter (Driver's seat)
Turn either dial to adjust the angle and
height of the seat cushion to the desired
position.
FRONT POWER SEAT
ADJUSTMENT (if so equipped)
WARNING
cDo not adjust the driver's seat while
driving so full attention may be given
to vehicle operation.
cDo not leave children unattended in-
side the vehicle. They could un-
knowingly activate switches or con-
trols. Unattended children could
become involved in serious acci-
dents.
Operating Tips
cThe motor has an auto-reset overload
protection circuit. If the motor stops dur-
ing operation, wait 30 seconds, then re-
activate the switch.
cDo not operate the power seat switch for
a long period of time when the engine is
off. This will discharge the battery.
Forward and backward
Moving the switch forward or backward will
slide the seat forward or backward to the
desired position.
SPA0099ALRS0016
1-4Seats, restraints and supplemental air bag systems
ZX
Page 13 of 242

REAR SEAT ADJUSTMENT
Interior trunk access
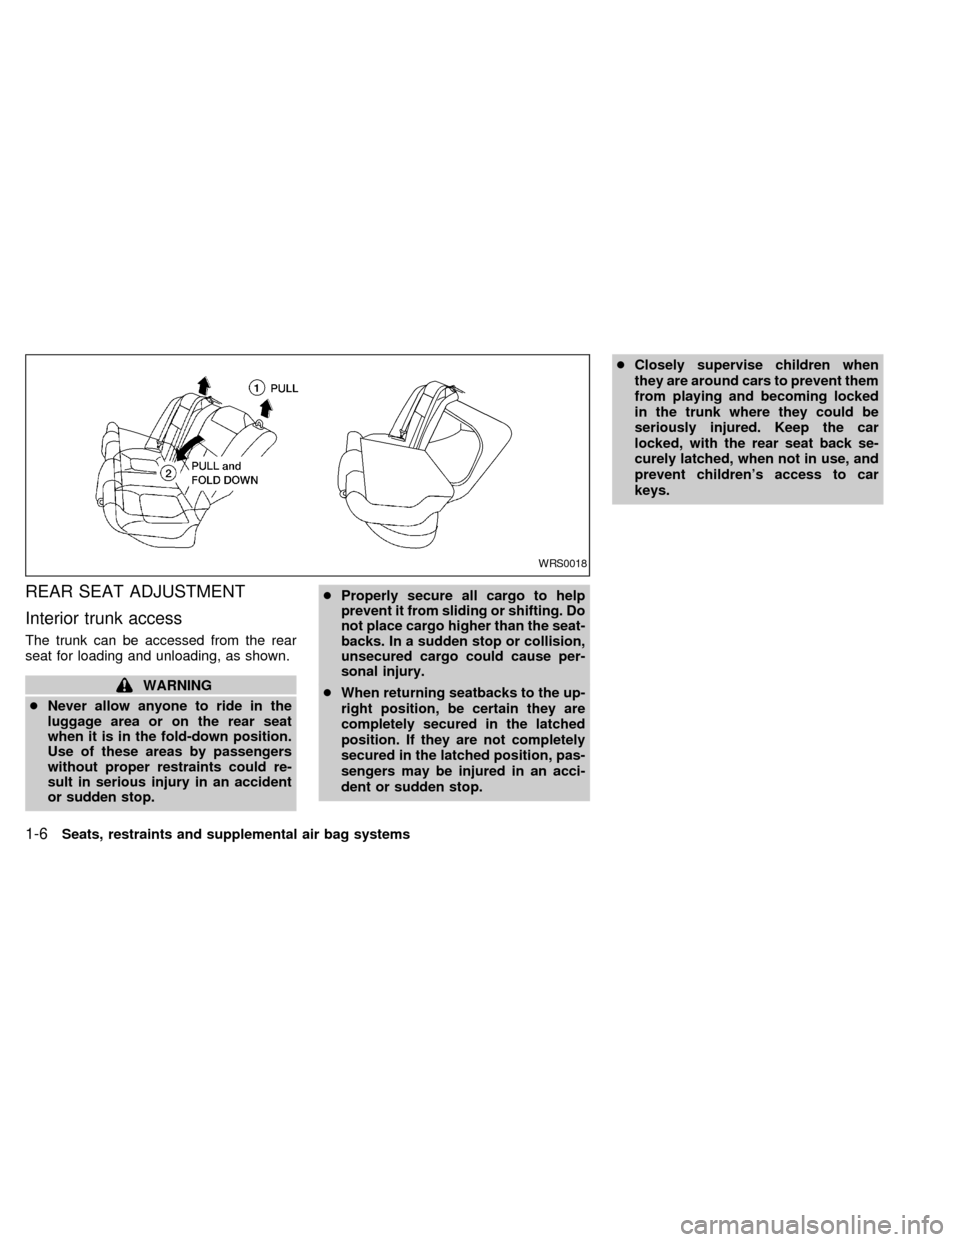
The trunk can be accessed from the rear
seat for loading and unloading, as shown.
WARNING
cNever allow anyone to ride in the
luggage area or on the rear seat
when it is in the fold-down position.
Use of these areas by passengers
without proper restraints could re-
sult in serious injury in an accident
or sudden stop.cProperly secure all cargo to help
prevent it from sliding or shifting. Do
not place cargo higher than the seat-
backs. In a sudden stop or collision,
unsecured cargo could cause per-
sonal injury.
cWhen returning seatbacks to the up-
right position, be certain they are
completely secured in the latched
position. If they are not completely
secured in the latched position, pas-
sengers may be injured in an acci-
dent or sudden stop.cClosely supervise children when
they are around cars to prevent them
from playing and becoming locked
in the trunk where they could be
seriously injured. Keep the car
locked, with the rear seat back se-
curely latched, when not in use, and
prevent children's access to car
keys.
WRS0018
1-6Seats, restraints and supplemental air bag systems
ZX
Page 15 of 242
Center armrest (if so equipped)
Pull the armrest forward until it is horizontal.
HEAD RESTRAINT ADJUSTMENT
To raise the head restraint, pull it up. To
lower, push and hold the lock knob and
push the head restraint down.
WARNING
Head restraints should be adjusted
properly as they may provide signifi-
cant protection against injury in an ac-
cident. Do not remove them. Check the
adjustment after someone else uses
the seat.Adjust the head restraints so the top is level
with the tops of your ears.
ARS1020PD1319WRS0002
1-8Seats, restraints and supplemental air bag systems
ZX
Page 34 of 242

Center of rear seat
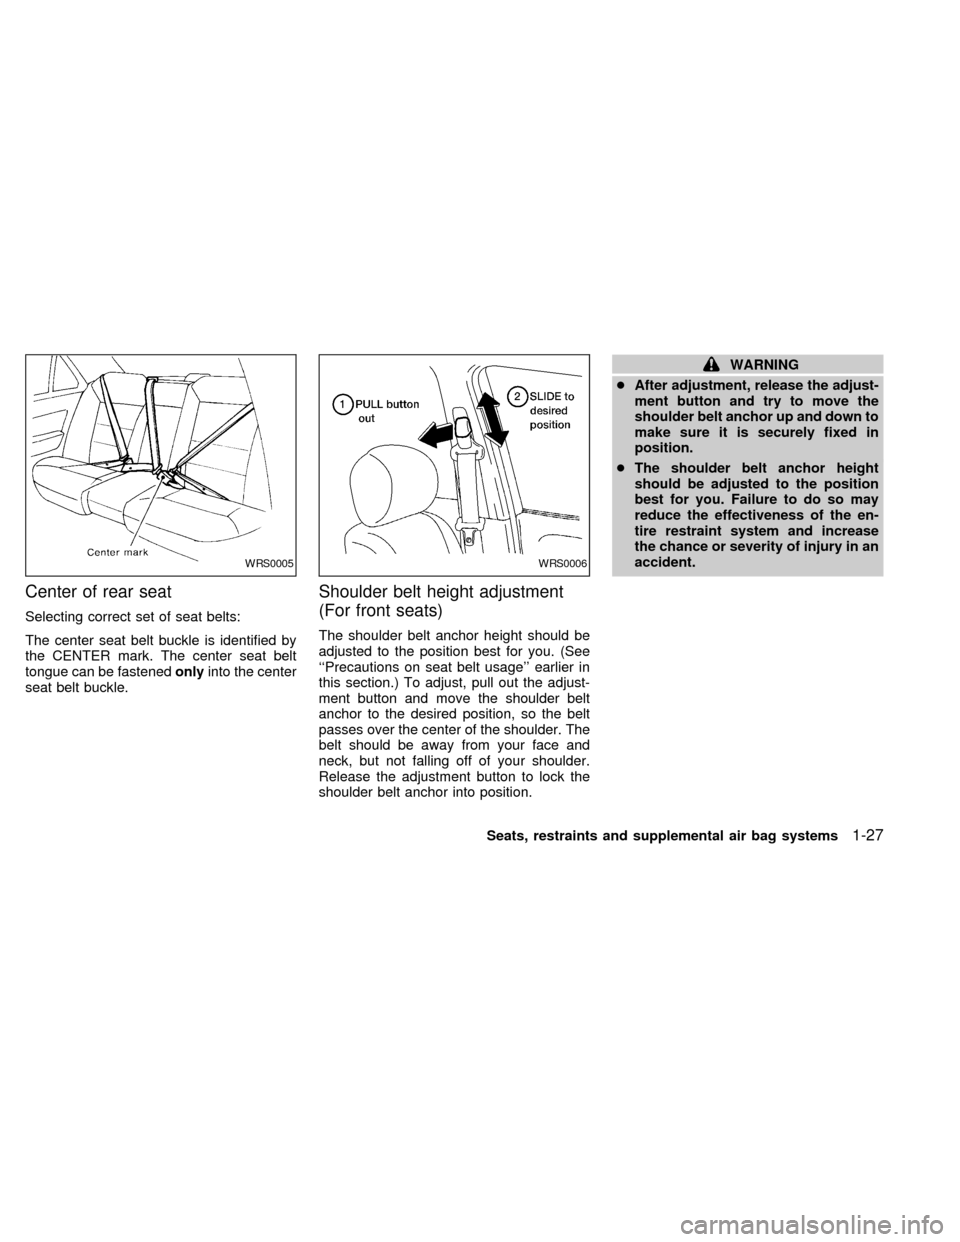
Selecting correct set of seat belts:
The center seat belt buckle is identified by
the CENTER mark. The center seat belt
tongue can be fastenedonlyinto the center
seat belt buckle.
Shoulder belt height adjustment
(For front seats)
The shoulder belt anchor height should be
adjusted to the position best for you. (See
``Precautions on seat belt usage'' earlier in
this section.) To adjust, pull out the adjust-
ment button and move the shoulder belt
anchor to the desired position, so the belt
passes over the center of the shoulder. The
belt should be away from your face and
neck, but not falling off of your shoulder.
Release the adjustment button to lock the
shoulder belt anchor into position.
WARNING
cAfter adjustment, release the adjust-
ment button and try to move the
shoulder belt anchor up and down to
make sure it is securely fixed in
position.
cThe shoulder belt anchor height
should be adjusted to the position
best for you. Failure to do so may
reduce the effectiveness of the en-
tire restraint system and increase
the chance or severity of injury in an
accident.
WRS0005WRS0006
Seats, restraints and supplemental air bag systems1-27
ZX
Page 83 of 242

NISSAN VEHICLE IMMOBILIZER
SYSTEM (NVIS) KEYS
You can only start your vehicle using the
keys which are supplied by your NISSAN
dealer. Each key has a transponder chip in
the key head which is electronically regis-
tered to your vehicle's NVIS. These keys
can be used for all the key locks on your
vehicle.
Never leave these keys in the vehicle.
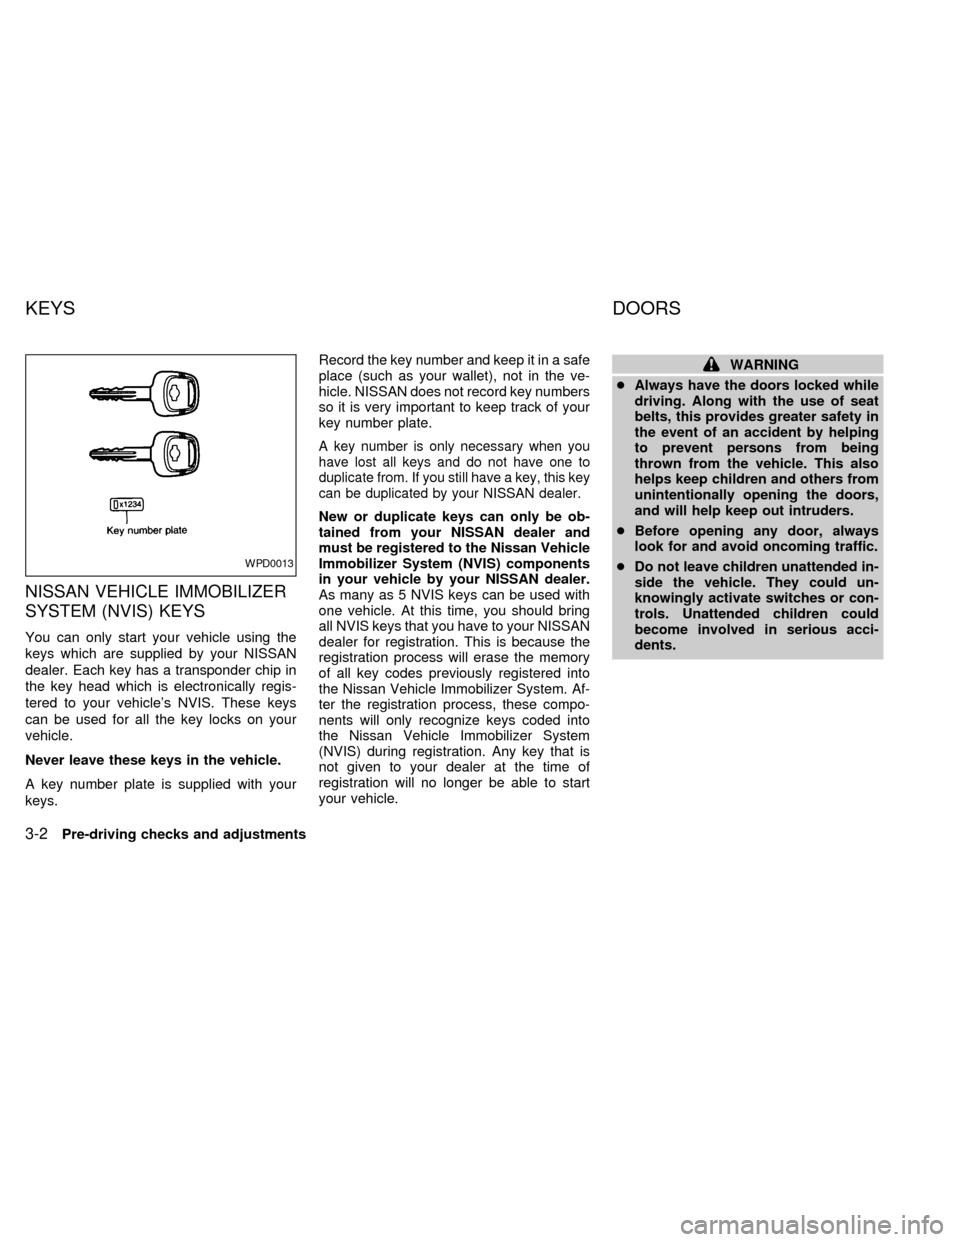
A key number plate is supplied with your
keys.Record the key number and keep it in a safe
place (such as your wallet), not in the ve-
hicle. NISSAN does not record key numbers
so it is very important to keep track of your
key number plate.
A key number is only necessary when you
have lost all keys and do not have one to
duplicate from. If you still have a key, this key
can be duplicated by your NISSAN dealer.
New or duplicate keys can only be ob-
tained from your NISSAN dealer and
must be registered to the Nissan Vehicle
Immobilizer System (NVIS) components
in your vehicle by your NISSAN dealer.
As many as 5 NVIS keys can be used with
one vehicle. At this time, you should bring
all NVIS keys that you have to your NISSAN
dealer for registration. This is because the
registration process will erase the memory
of all key codes previously registered into
the Nissan Vehicle Immobilizer System. Af-
ter the registration process, these compo-
nents will only recognize keys coded into
the Nissan Vehicle Immobilizer System
(NVIS) during registration. Any key that is
not given to your dealer at the time of
registration will no longer be able to start
your vehicle.
WARNING
cAlways have the doors locked while
driving. Along with the use of seat
belts, this provides greater safety in
the event of an accident by helping
to prevent persons from being
thrown from the vehicle. This also
helps keep children and others from
unintentionally opening the doors,
and will help keep out intruders.
cBefore opening any door, always
look for and avoid oncoming traffic.
cDo not leave children unattended in-
side the vehicle. They could un-
knowingly activate switches or con-
trols. Unattended children could
become involved in serious acci-
dents.
WPD0013
KEYS DOORS
3-2Pre-driving checks and adjustments
ZX