2000 NISSAN ALTIMA engine coolant
[x] Cancel search: engine coolantPage 168 of 242

The engine cooling system is filled at the
factory with a high-quality, year-round, anti-
freeze coolant solution. The anti-freeze so-
lution contains rust and corrosion inhibitors,
therefore additional engine cooling system
additives are not necessary.
CAUTION
When adding or replacing coolant, be
sure to use only an ethelene glycol anti-
freeze with the proper mixture ratio of
50% Genuine Nissan Anti-freeze coolant
or equivalent and 50% demineralized or
distilled water. The use of other types of
coolant solutions may damage the en-
gine cooling system.
Outside
temperature
down toGenuine
Nissan
Anti-freeze
coolant or
equivalentDemineral-
ized or
Distilled
water
ÉC ÉF
þ35 þ30 50% 50%
WARNING
cNever remove the radiator cap when
the engine is hot. Serious burns
could be caused by high pressure
fluid escaping from the radiator.
c
The radiator is equipped with a pres-
sure type radiator cap. To prevent
engine damage, use only a genuine
NISSAN radiator cap.
CHECKING ENGINE COOLANT
LEVEL
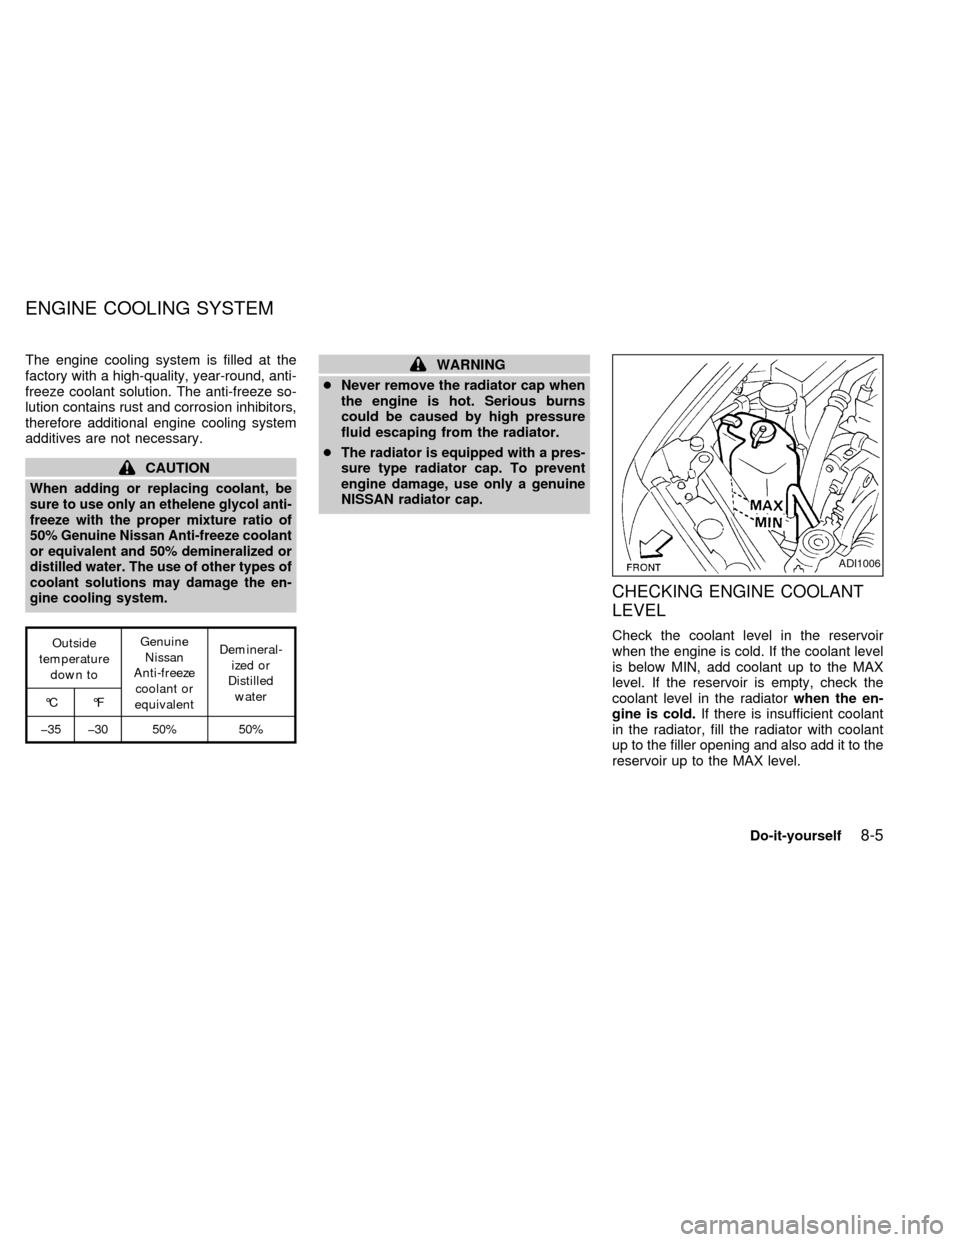
Check the coolant level in the reservoir
when the engine is cold. If the coolant level
is below MIN, add coolant up to the MAX
level. If the reservoir is empty, check the
coolant level in the radiatorwhen the en-
gine is cold.If there is insufficient coolant
in the radiator, fill the radiator with coolant
up to the filler opening and also add it to the
reservoir up to the MAX level.
ADI1006
ENGINE COOLING SYSTEM
Do-it-yourself8-5
ZX
Page 169 of 242

If the cooling system frequently requires
coolant, have it checked by an autho-
rized NISSAN dealer.
CHANGING ENGINE COOLANT
cMajor cooling system repairs should be
performed by an authorized NISSAN
dealer. The service procedures can be
found in an appropriate NISSAN Service
Manual.cImproper servicing can result in reduced
heater performance and engine over-
heating.
WARNING
cTo avoid the danger of being
scalded, never change the coolant
when the engine is hot.
cNever remove the radiator cap when
the engine is hot. Serious burns
could be caused by high pressure
fluid escaping from the radiator.
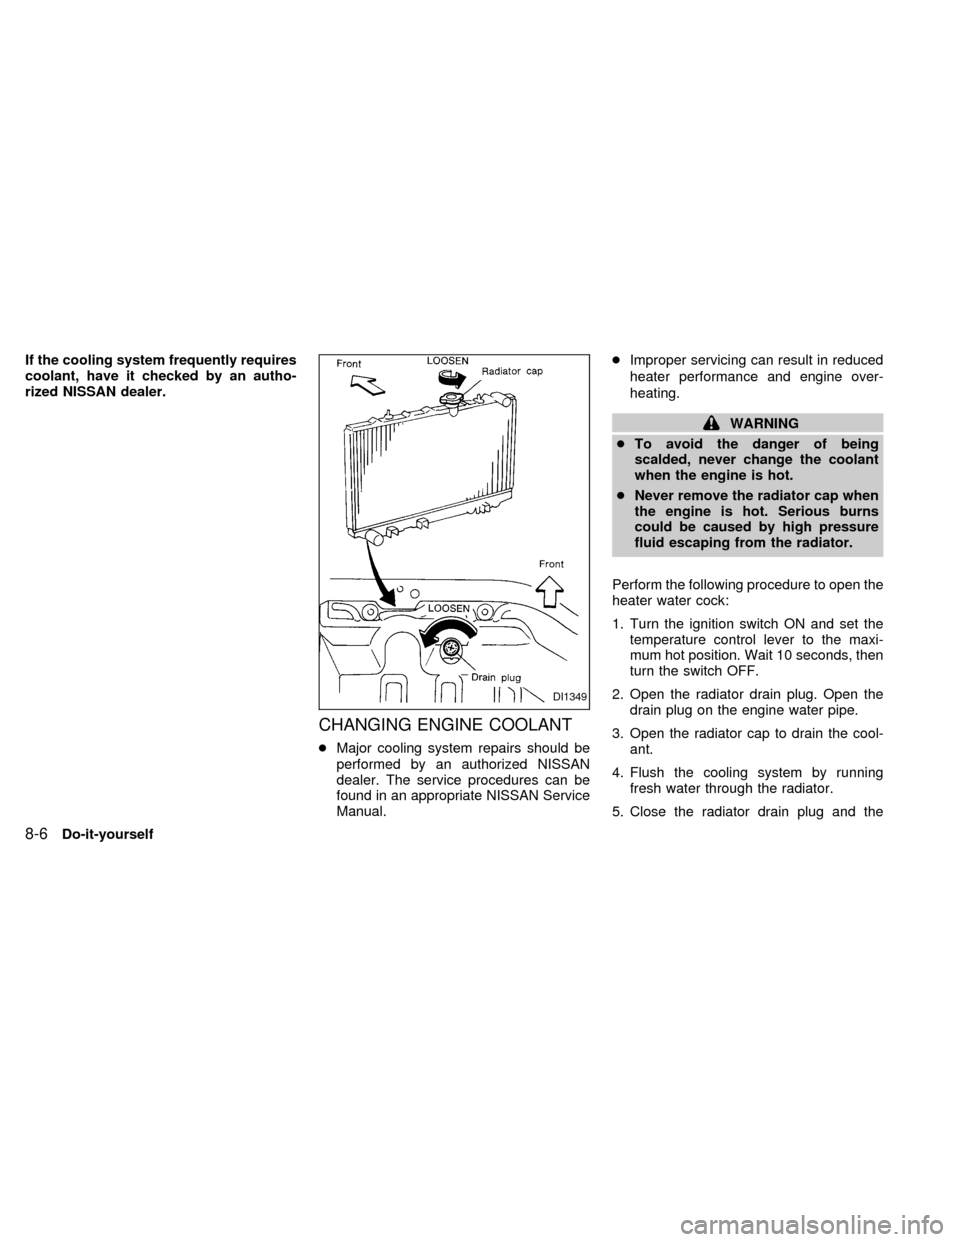
Perform the following procedure to open the
heater water cock:
1. Turn the ignition switch ON and set the
temperature control lever to the maxi-
mum hot position. Wait 10 seconds, then
turn the switch OFF.
2. Open the radiator drain plug. Open the
drain plug on the engine water pipe.
3. Open the radiator cap to drain the cool-
ant.
4. Flush the cooling system by running
fresh water through the radiator.
5. Close the radiator drain plug and the
DI1349
8-6Do-it-yourself
ZX
Page 170 of 242

drain plug on the engine water pipe se-
curely.
6. See the ``Technical and consumer infor-
mation'' section for cooling system ca-
pacity. Fill the radiator slowly with the
proper mixture of coolant and water. Fill
the reservoir tank up to the MAX level.
7. Open and close the air release plug to
release air. Then fill the radiator again
and install the radiator cap.
8. Start the engine and let it idle until it
reaches normal operating temperature.
Then race the engine 2 or 3 times under
no load. Watch the engine coolant tem-
perature gauge for signs of overheating.
9. Stop the engine. After it completely cools
down, refill the radiator up to the filler
opening. Fill the reservoir tank up to the
MAX level.
10. Open and close the air release plug to
release air. Then fill the radiator again
and install the radiator cap.11. Check the radiator drain plug and the
drain plug on the engine water pipe for
any sign of leakage, tighten if neces-
sary.
AMA098DI1299
Do-it-yourself8-7
ZX
Page 176 of 242

WARNING
Use only new fluid from a sealed con-
tainer. Old, inferior, or contaminated
fluid may damage the brake and clutch
systems. The use of improper fluids
can damage the brake system and af-
fect the vehicle's stopping ability.
CAUTION
Do not spill the fluid on painted sur-
faces. This will damage the paint. If
fluid is spilled, immediately wash the
surface with water.
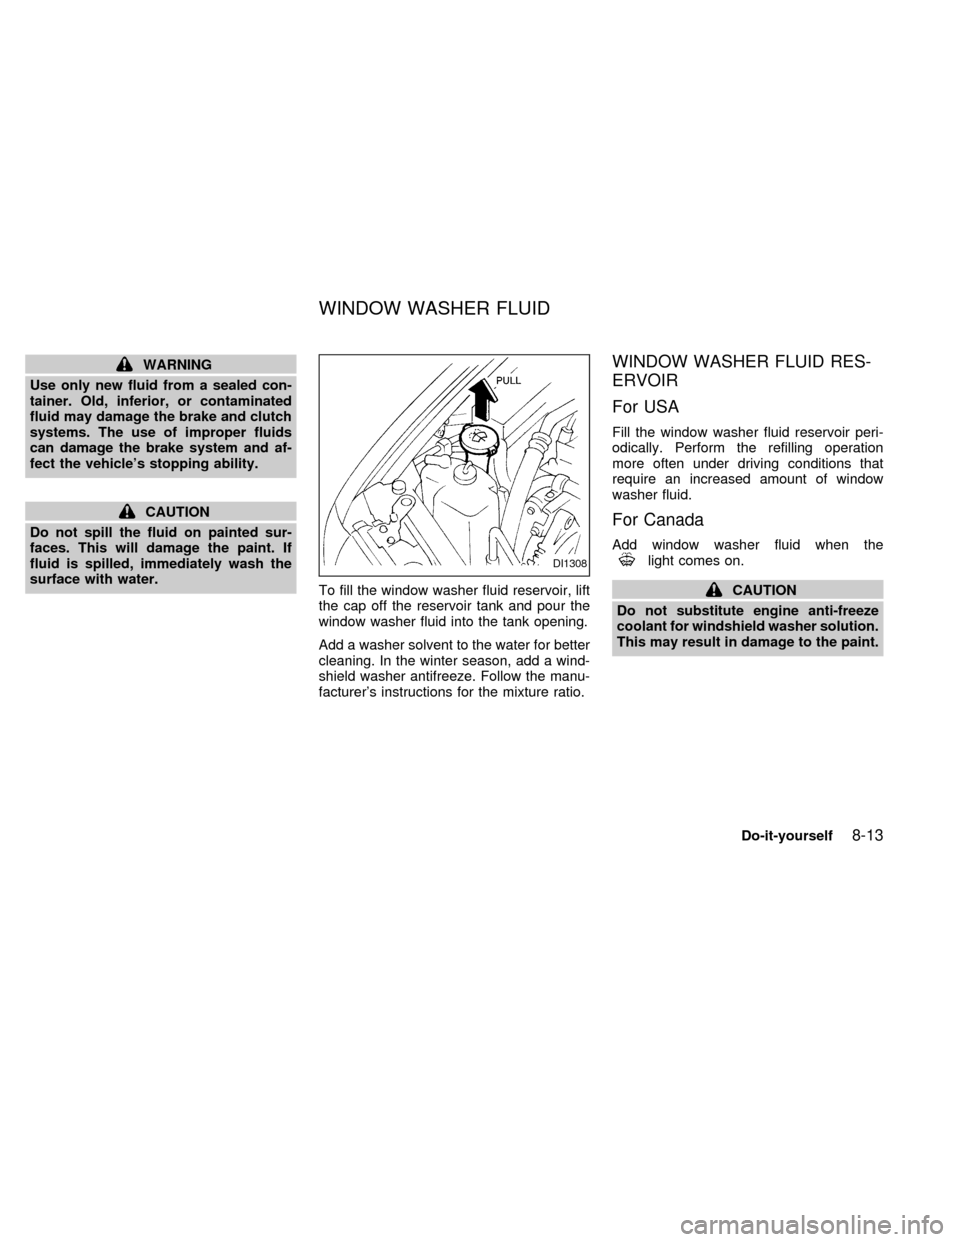
To fill the window washer fluid reservoir, lift
the cap off the reservoir tank and pour the
window washer fluid into the tank opening.
Add a washer solvent to the water for better
cleaning. In the winter season, add a wind-
shield washer antifreeze. Follow the manu-
facturer's instructions for the mixture ratio.
WINDOW WASHER FLUID RES-
ERVOIR
For USA
Fill the window washer fluid reservoir peri-
odically. Perform the refilling operation
more often under driving conditions that
require an increased amount of window
washer fluid.
For Canada
Add window washer fluid when thelight comes on.
CAUTION
Do not substitute engine anti-freeze
coolant for windshield washer solution.
This may result in damage to the paint.
DI1308
WINDOW WASHER FLUID
Do-it-yourself8-13
ZX
Page 188 of 242

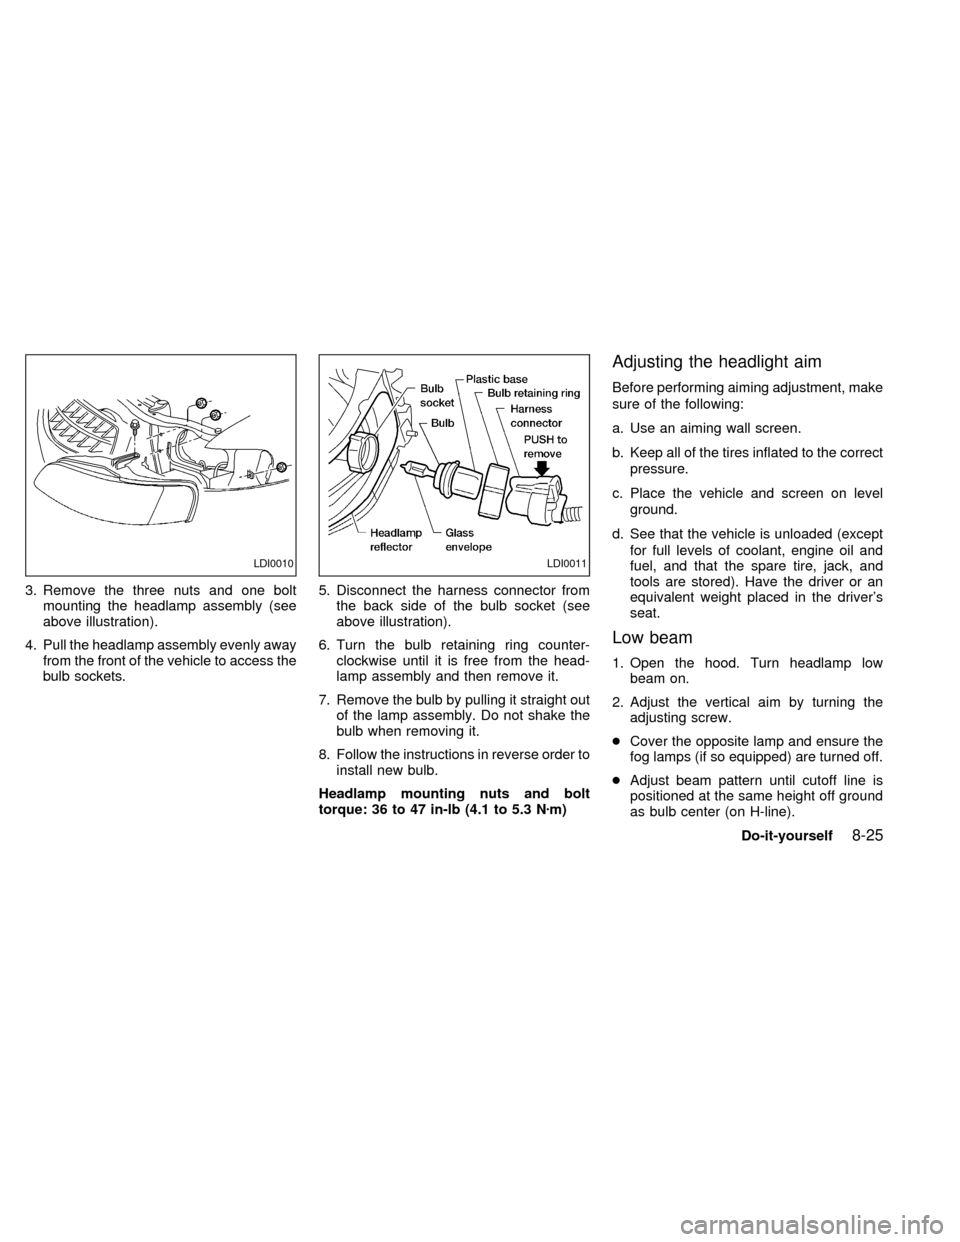
3. Remove the three nuts and one bolt
mounting the headlamp assembly (see
above illustration).
4. Pull the headlamp assembly evenly away
from the front of the vehicle to access the
bulb sockets.5. Disconnect the harness connector from
the back side of the bulb socket (see
above illustration).
6. Turn the bulb retaining ring counter-
clockwise until it is free from the head-
lamp assembly and then remove it.
7. Remove the bulb by pulling it straight out
of the lamp assembly. Do not shake the
bulb when removing it.
8. Follow the instructions in reverse order to
install new bulb.
Headlamp mounting nuts and bolt
torque: 36 to 47 in-lb (4.1 to 5.3 Nzm)
Adjusting the headlight aim
Before performing aiming adjustment, make
sure of the following:
a. Use an aiming wall screen.
b. Keep all of the tires inflated to the correct
pressure.
c. Place the vehicle and screen on level
ground.
d. See that the vehicle is unloaded (except
for full levels of coolant, engine oil and
fuel, and that the spare tire, jack, and
tools are stored). Have the driver or an
equivalent weight placed in the driver's
seat.
Low beam
1. Open the hood. Turn headlamp low
beam on.
2. Adjust the vertical aim by turning the
adjusting screw.
cCover the opposite lamp and ensure the
fog lamps (if so equipped) are turned off.
cAdjust beam pattern until cutoff line is
positioned at the same height off ground
as bulb center (on H-line).
LDI0010LDI0011
Do-it-yourself8-25
ZX
Page 205 of 242

Accelerator pedal ÐCheck the pedal for
smooth operation and make sure the pedal
does not catch or require uneven effort.
Keep the floor mat away from the pedal.
Clutch pedal* ÐMake sure the pedal
operates smoothly and check that it has the
proper free travel.
Brakes ÐCheck that the brakes do not pull
the vehicle to one side when applied.
Brake pedal and booster* ÐCheck the
pedal for smooth operation and make sure it
has the proper distance under it when de-
pressed fully. Check the brake booster func-
tion. Be certain to keep the floor mat away
from the pedal.
Parking brake* ÐCheck that the lever has
the proper travel and confirm that your
vehicle is held securely on a fairly steep hill
with only the parking brake applied.
Automatic transmission P position
mechanism ÐOn a fairly steep hill check
that your vehicle is held securely with the
shift selector lever in the P (Park) position
without applying any brakes.Under the hood and vehicle
The maintenance items listed here should
be checked periodically, such as each time
you check the engine oil or refuel.
Additional information on the items
marked with an ª*º can be found in the
ªDo-it-yourself'' section of this manual.
Windshield washer fluid* ÐCheck that
there is adequate fluid in the tank.
Engine oil level* ÐCheck the level after
parking the vehicle on a level surface, with
the engine off. Wait a few minutes for the oil
to drain back into the oil pan.
Brake and (if so equipped) clutch fluid
levels* ÐMake sure that the brake and
clutch fluid level are between the MIN and
MAX lines on each reservoir.
Power steering fluid level* and lines Ð
Check the level when the fluid is cold and
with the engine off. Check the lines for
proper attachment, leaks, cracks, etc.
Automatic transmission fluid level* Ð
Check the level after putting the shift selec-
tor lever in P (Park) with the engine idling at
operating temperature.Engine coolant level* ÐCheck the cool-
ant level when the engine is cold.
Radiator and hoses ÐCheck the front of
the radiator and clean off any dirt, insects,
leaves, etc., that may have accumulated.
Make sure the hoses have no cracks, de-
formation, rot or loose connections.
Engine drive belts* ÐMake sure the drive
belts are not frayed, worn, cracked or oily.
Battery* ÐCheck the fluid level in each
cell. It should be between the MAX and MIN
lines.
Exhaust system ÐMake sure there are no
cracks, holes, loose joints or supports. If the
sound of the exhaust seems unusual or
there is a smell of exhaust fumes, immedi-
ately have the exhaust system inspected by
a qualified individual. (See the carbon mon-
oxide warning in the ``Starting and driving''
section of this manual.)
Underbody ÐThe underbody is frequently
exposed to corrosive substances such as
those used on icy roads or to control dust. It
is very important to remove these sub-
stances from the underbody, otherwise rust
may form on the floor pan, frame, fuel lines
9-4Maintenance
ZX
Page 207 of 242
![NISSAN ALTIMA 2000 L30 / 2.G Owners Manual Schedule 1
Abbreviations: R = Replace I = Inspect. Correct or replace if necessary. [ ]: At the mileage intervals only
MAINTENANCE OPERATIONMAINTENANCE INTERVAL
Perform at number of miles,
kilometers NISSAN ALTIMA 2000 L30 / 2.G Owners Manual Schedule 1
Abbreviations: R = Replace I = Inspect. Correct or replace if necessary. [ ]: At the mileage intervals only
MAINTENANCE OPERATIONMAINTENANCE INTERVAL
Perform at number of miles,
kilometers](/manual-img/5/637/w960_637-206.png)
Schedule 1
Abbreviations: R = Replace I = Inspect. Correct or replace if necessary. [ ]: At the mileage intervals only
MAINTENANCE OPERATIONMAINTENANCE INTERVAL
Perform at number of miles,
kilometers or months,
whichever comes first.Miles x 1,000 3.75 7.5 11.25 15 18.75 22.5 26.25 30 33.75 37.5 41.25 45 48.75 52.5 56.25 60
(km x 1,000) (6) (12) (18) (24) (30) (36) (42) (48) (54) (60) (66) (72) (78) (84) (90) (96)
Months 3 6 9 12 15 18 21 24 27 30 33 36 39 42 45 48
Emission control system maintenance
Drive belts See NOTE (1)I*
Air cleaner filter See NOTE (2) [R] [R]
EVAP vapor linesI* I*
Fuel linesI* I*
Fuel filter See NOTE (3)*
Engine coolant See NOTE (4)R*
Engine oilRRRRRRRRRRRRRRRR
Engine oil filterRRRRRRRRRRRRRRRR
Spark plugs (Use PLATINUM-TIPPED type) Replace every 105,000 miles (169,000 km)
Intake & exhaust valve clearance See NOTE (5)*
NOTE: (1) After 60,000 miles (96,000 km) or 48 months, inspect every 15,000 miles (24,000 km) or 12 months.
(2) If operating mainly in dusty conditions, more frequent maintenance may be required.
(3) When the filter becomes clogged, the vehicle speed cannot be increased as the driver wishes. In such an event,
replace the filter.
(4) After 60,000 miles (96,000 km) or 48 months, replace every 30,000 miles (48,000 km) or 24 months.
(5) If valve noise increases, inspect valve clearance.
* Maintenance items and intervals marked with an ``*'' are recommended by NISSAN for reliable vehicle operation. The
owner need not perform such maintenance in order to maintain the emission warranty or manufacturer recall liability.
Other maintenance items and intervals are required.
9-6Maintenance
ZX
Page 209 of 242
![NISSAN ALTIMA 2000 L30 / 2.G Owners Manual Schedule 2
Abbreviations: R = Replace I = Inspect. Correct or replace if necessary. [ ]: At the mileage intervals only
MAINTENANCE OPERATIONMAINTENANCE INTERVAL
Perform at number of miles, kilometers NISSAN ALTIMA 2000 L30 / 2.G Owners Manual Schedule 2
Abbreviations: R = Replace I = Inspect. Correct or replace if necessary. [ ]: At the mileage intervals only
MAINTENANCE OPERATIONMAINTENANCE INTERVAL
Perform at number of miles, kilometers](/manual-img/5/637/w960_637-208.png)
Schedule 2
Abbreviations: R = Replace I = Inspect. Correct or replace if necessary. [ ]: At the mileage intervals only
MAINTENANCE OPERATIONMAINTENANCE INTERVAL
Perform at number of miles, kilometers or
months, whichever comes first.Miles x 1,000 7.5 15 22.5 30 37.5 45 52.5 60
(km x 1,000) (12) (24) (36) (48) (60) (72) (84) (96)
Months 6 12 18 24 30 36 42 48
Emission control system maintenance
Drive belts See NOTE (1)I*
Air cleaner filter[R] [R]
EVAP vapor linesI* I*
Fuel linesI* I*
Fuel filter See NOTE (2)*
Engine coolant See NOTE (3)R*
Engine oilRRRRRRRR
Engine oil filterRRRRRRRR
Spark plugs (Use PLATINUM-TIPPED type) Replace every 105,000 miles (169,000 km)
Intake & exhaust valve clearance See NOTE (4)*
NOTE: (1) After 60,000 miles (96,000 km) or 48 months, inspect every 15,000 miles (24,000 km) or 12 months.
(2) When the filter becomes clogged, the vehicle speed cannot be increased as the driver wishes. In such an event,
replace the filter.
(3) After 60,000 miles (96,000 km) or 48 months, replace every 30,000 miles (48,000 km) or 24 months.
(4) If valve noise increases, inspect valve clearance.
* Maintenance items and intervals marked with an ``*'' are recommended by NISSAN for reliable vehicle operation. The
owner need not perform such maintenance in order to maintain the emission warranty or manufacturer recall liability.
Other maintenance items and intervals are required.
9-8Maintenance
ZX