Page 183 of 280

FOR PLEASANT DRIVING
6–43
CAUTION
When using the air conditioning, the
idling speed may slightly increase as
the air conditioning compressor is
switched on/off automatically. Es-
pecially for vehicles with an auto-
matic transmission, while the vehicle
is stationary, fully depress the brake
pedal to prevent the vehicle from
creeping.
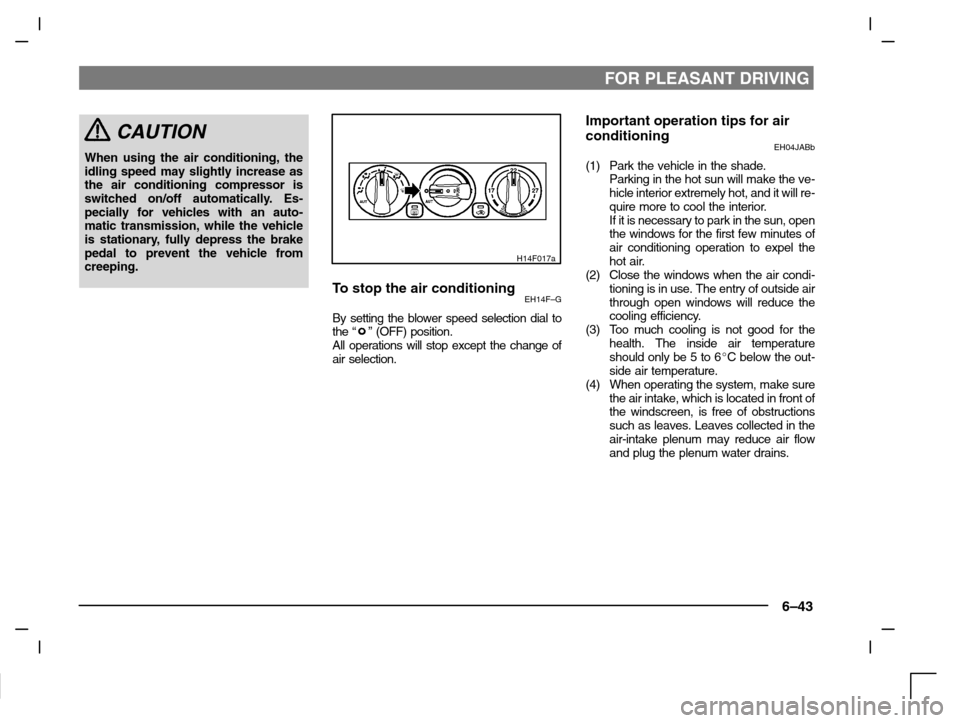
H14F017a
To stop the air conditioningEH14F–G
By setting the blower speed selection dial to
the “” (OFF) position.
All operations will stop except the change of
air selection.
Important operation tips for air
conditioning
EH04JABb
(1) Park the vehicle in the shade.
Parking in the hot sun will make the ve-
hicle interior extremely hot, and it will re-
quire more to cool the interior.
If it is necessary to park in the sun, open
the windows for the first few minutes of
air conditioning operation to expel the
hot air.
(2) Close the windows when the air condi-
tioning is in use. The entry of outside air
through open windows will reduce the
cooling efficiency.
(3) Too much cooling is not good for the
health. The inside air temperature
should only be 5 to 6�C below the out-
side air temperature.
(4) When operating the system, make sure
the air intake, which is located in front of
the windscreen, is free of obstructions
such as leaves. Leaves collected in the
air-intake plenum may reduce air flow
and plug the plenum water drains.
Page 189 of 280
FOR PLEASANT DRIVING
6–49
G14C044a
Centre console box with lid*EG14CAC
To open the box, tilt the armrest backward
and raise the lid. (Refer to “Armrest” on page
3–9.)
G34H066a
Cup holder
EG34HAK
The cup holder is located at the side of the
parking brake lever.
CAUTION
Do not drink beverages while driving
the vehicle; doing so could distract
you and result in an accident.
G17B024a
Rear shelf panel
(Hatchback)
EG17B - X
To remove
1. Pull the knob and tilt the rear seat back
slightly forward.
2. Slightly lift up the front edge of the rear
shelf. Slide the rear shelf rearward by
tapping it lightly at the right and left
sides to release the pins from the
catches.
3. Lift the rear shelf and remove it.
Page 204 of 280

FOR EMERGENCIES
8–4
N21C026a
JackEN21C - Ba
1-To remove
Turn the shaft end so that the jack re-
tracts and detach it from fixing bracket
(A).
2-To store
Turn the shaft end by hand to expand
the jack until it is secured firmly in posi-
tion.
Jacking up the vehicleEN22ALEb
1. Park the vehicle on a level and stable
ground.
2. Activate the hazard flashers and turn
the ignition key to the “LOCK” position.
3. Set the parking brake firmly, move the
gearshift lever (manual transmission)
to the 1st position or move the selector
lever (automatic transmission) to the
“P” (PARK) position.
N22A220a
4. Apply a chock or block (A) at the tyre
diagonally opposite the tyre (B) to be
changed.
CAUTION
Be sure to apply a chock to the rel-
evant tyre when jacking up the ve-
hicle. If the vehicle moves while
jacked up, the jack could slip out of
position, leading to an accident.
NOTE
(1)The chock shown in the illustration is
not supplied with the vehicle. It is rec-
ommended one be obtained and car-
ried for use if required.
(2) If a chock is not available, use a stone
or any other object that is large enough
to hold the wheel in position.
Page 209 of 280

FOR EMERGENCIES
8–9
N23B083a
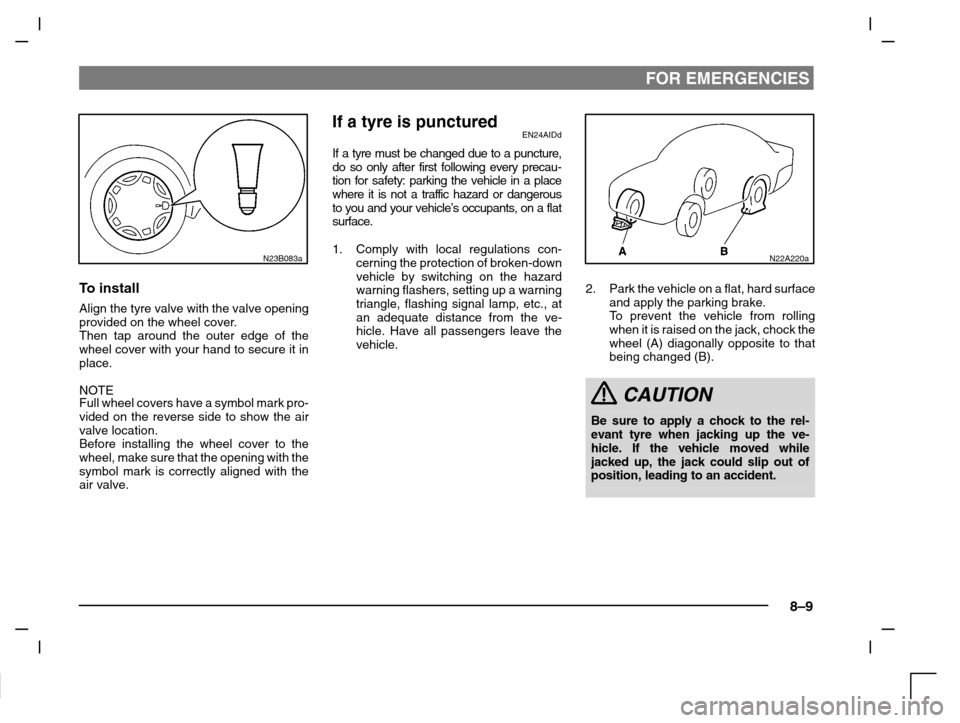
To install
Align the tyre valve with the valve opening
provided on the wheel cover.
Then tap around the outer edge of the
wheel cover with your hand to secure it in
place.
NOTE
Full wheel covers have a symbol mark pro-
vided on the reverse side to show the air
valve location.
Before installing the wheel cover to the
wheel, make sure that the opening with the
symbol mark is correctly aligned with the
air valve.
If a tyre is puncturedEN24AIDd
If a tyre must be changed due to a puncture,
do so only after first following every precau-
tion for safety: parking the vehicle in a place
where it is not a traffic hazard or dangerous
to you and your vehicle’s occupants, on a flat
surface.
1. Comply with local regulations con-
cerning the protection of broken-down
vehicle by switching on the hazard
warning flashers, setting up a warning
triangle, flashing signal lamp, etc., at
an adequate distance from the ve-
hicle. Have all passengers leave the
vehicle.
N22A220a
2. Park the vehicle on a flat, hard surface
and apply the parking brake.
To prevent the vehicle from rolling
when it is raised on the jack, chock the
wheel (A) diagonally opposite to that
being changed (B).
CAUTION
Be sure to apply a chock to the rel-
evant tyre when jacking up the ve-
hicle. If the vehicle moved while
jacked up, the jack could slip out of
position, leading to an accident.
Page 215 of 280

FOR EMERGENCIES
8–15
Towing the vehicle by a tow truck
CAUTION
(1) This vehicle cannot be towed by
a tow truck using Type A equip-
ment to prevent the bumper from
deformation. If this vehicle is
towed, use Type B, Type C, Type
D or Type E equipment.
(2) In case the vehicle with automatic
transmission must be towed far-
ther than 30 km, transport the ve-
hicle with all wheels off the
ground (Type B or C) or with front
wheels off the ground (Type D).
(3) If the transmission is not operat-
ing, transport the vehicle with all
wheels off the ground (Type B or
C).
Towing with front wheels off the
ground (Type D)
Release the parking brake. Place the gear-
shift lever (manual transmission) or the se-
lector lever (automatic transmission) in the
“N” (NEUTRAL) position.
Towing with rear wheels off the
ground (Type E)
Place the gearshift lever (manual trans-
mission) or the selector lever (automatic
transmission) in the “N” (NEUTRAL) posi-
tion.
Turn the ignition key to the “ACC” position
and secure the steering wheel in a straight-
ahead position with a rope, etc.
Never place the ignition key in the “LOCK”
position. It is dangerous as the steering
wheel may lock.
Engine overheatingEN26A - Ub
If the water temperature gauge indication re-
mains in the overheating zone for a long
time, the engine may be overheating. If this
occurs, take the following corrective
measures :
1. Stop the vehicle in a safe place.
Page 218 of 280

FOR EMERGENCIES
8–18
CAUTION
Check the other vehicle. It must have
a 12-volt battery.
If the other system isn’t 12-volt, short-
ing can damage both vehicles.
2. You could be injured if the vehicles roll.
Set the parking brake firmly on each
vehicle. Put an automatic trans-
mission in “P” (PARK) or a manual
transmission in “N” (Neutral). Turn off
the ignition switch.
WARNING
Tu r n o f f t h e ignition on both vehicles
beforehand. Use care to make sure
that the cables or your clothes do not
get caught by the fan or drive belt.
Personal injury could result.
NOTE
Turn off all lamps, heater and other electrical
loads. This will avoid sparks and help save
both batteries.
3. Make sure battery electrolyte is at the
proper level.
Refer to “Battery” on page 9–7.
WARNING
If electrolyte fluid is not visible, or ap-
pears to be frozen, do not attempt
jump starting!
A battery might rupture or explode if
the temperature is below the freezing
point or if it is not filled to the proper
level.
Petrol-powered vehicles (1300 models)
N28A195a
4. Connect one end of one jumper cable
to the positive (+) terminal of the dis-
charged battery, and the other end to
the positive (+) terminal of the booster
battery.
5. Connect one end of the other jumper
cable to the negative (-) terminal of the
booster battery, and the other end to
the engine block of the vehicle with the
discharged battery at the point farthest
from the battery.
NOTE
Remove the cover before connecting the
jumper cable to the positive terminal of the
battery.
Page 239 of 280

Maintenance
Engine oil 9–2. . . . . . . . . . . . . . . . . . . . . . . . . . . . . . . .
Automatic transmission fluid* 9–4. . . . . . . . . . . . . .
Engine coolant 9–5. . . . . . . . . . . . . . . . . . . . . . . . . . . .
Battery 9–7. . . . . . . . . . . . . . . . . . . . . . . . . . . . . . . . . . .
Brake fluid 9–8. . . . . . . . . . . . . . . . . . . . . . . . . . . . . . .
Power steering fluid 9–9. . . . . . . . . . . . . . . . . . . . . . .
Clutch fluid* 9–10. . . . . . . . . . . . . . . . . . . . . . . . . . . . .
Washer fluid 9–10. . . . . . . . . . . . . . . . . . . . . . . . . . . . .
Wheel condition 9–11. . . . . . . . . . . . . . . . . . . . . . . . .
Tyre inflation pressure 9–12. . . . . . . . . . . . . . . . . . . .
Tyre rotation 9–13. . . . . . . . . . . . . . . . . . . . . . . . . . . . .
Snow tyres 9–14. . . . . . . . . . . . . . . . . . . . . . . . . . . . . .
Tyre chains 9–15. . . . . . . . . . . . . . . . . . . . . . . . . . . . . .
Fuel, engine coolant, oil and exhaust gas
leakage 9–16. . . . . . . . . . . . . . . . . . . . . . . . . . . . . . . . .
Exterior and interior lamp operation 9–16. . . . . . . .
Meter, gauge and indication/ warning lamp
operation 9–16. . . . . . . . . . . . . . . . . . . . . . . . . . . . . . . .
Clutch pedal free play* 9–17. . . . . . . . . . . . . . . . . . . .
Brake pedal free play 9–17. . . . . . . . . . . . . . . . . . . . .
Parking brake lever stroke 9–17. . . . . . . . . . . . . . . .
Hinges and latches lubrication 9–18. . . . . . . . . . . . .
Wiper blades 9–18. . . . . . . . . . . . . . . . . . . . . . . . . . . .
Ventilation slots 9–19. . . . . . . . . . . . . . . . . . . . . . . . . .
Weatherstripping 9–19. . . . . . . . . . . . . . . . . . . . . . . . .
Additional equipment
(For regions where snow is encountered) 9–19. . .
Page 242 of 280

MAINTENANCE
9–4
Type 1
M03B029a
Selection of engine oil
(diesel-powered vehicles)
EM03BAKe
(1) Select engine oil of the proper SAE vis-
cosity number according to the atmos-
pheric temperature.
(2) Use engine oil conforming to the follow-
ing classification:
Ty p e 1 :ACEA classification:
“For service B2-96 or B3-96”
Ty p e 2 :API classification:
“For service CF”
NOTE
Use of additives is not recommended
since they may reduce the effectiveness of
additives already included in the engine
oil. It may result in failure of the mechani-
cally assembly.
Type 2
M03B030aM05A069a
Automatic transmission fluid*EM05AAH
The proper amount of automatic trans-
mission fluid is essential to the life and oper-
ation of the automatic transmission. Either in-
sufficient fluid or excessive fluid could cause
transmission trouble. The transmission fluid
filler port cap is equipped with a dipstick. Use
the following procedure to check the fluid
level.
1. Check the fluid level after the vehicle
has been driven enough to warm up
the transmission fluid.
2. Park the vehicle on a flat, level surface
and apply the parking brake.