2000 MERCEDES-BENZ SLK320 mirror controls
[x] Cancel search: mirror controlsPage 70 of 273
67 Rear view mirrors
Te ch n ica l
data Instruments
and controlsOperationDrivingInstrument
cluster displayPractical hints Car care Index With the key in steering lock position 2, the driver’s
side mirror reflection brightness responds to changes in
light sensitivity.
W it h g e a r s e l e c t or l e ve r ( m a nu a l t ra ns m i s si o n: g e a rs h if t
l ever) in position “R”, or w it h t he interior la mp switch ed
on, the driver’s side mirror brightness does not respond
to changes in light sensitivity.
Important!
Electrolyte drops coming into contact with the vehicle
paint finish can only be completely removed while in
their liquid state, by applying plenty of water.
Wa r n i n g !
In the case of an accident liquid electrolyte may
escape the mirror housing when the mirror glass
breaks.Electrolyte has an irritating effect. Do not allow the
liquid come into contact with eyes, skin, clothing,
or respiratory system. In cases it does, imm edi ately
flush affected area with water, and seek medical
help if necessary.
Page 114 of 273
111 Interior equipment
Te ch n ica l
data Instruments
and controlsOperationDrivingInstrument
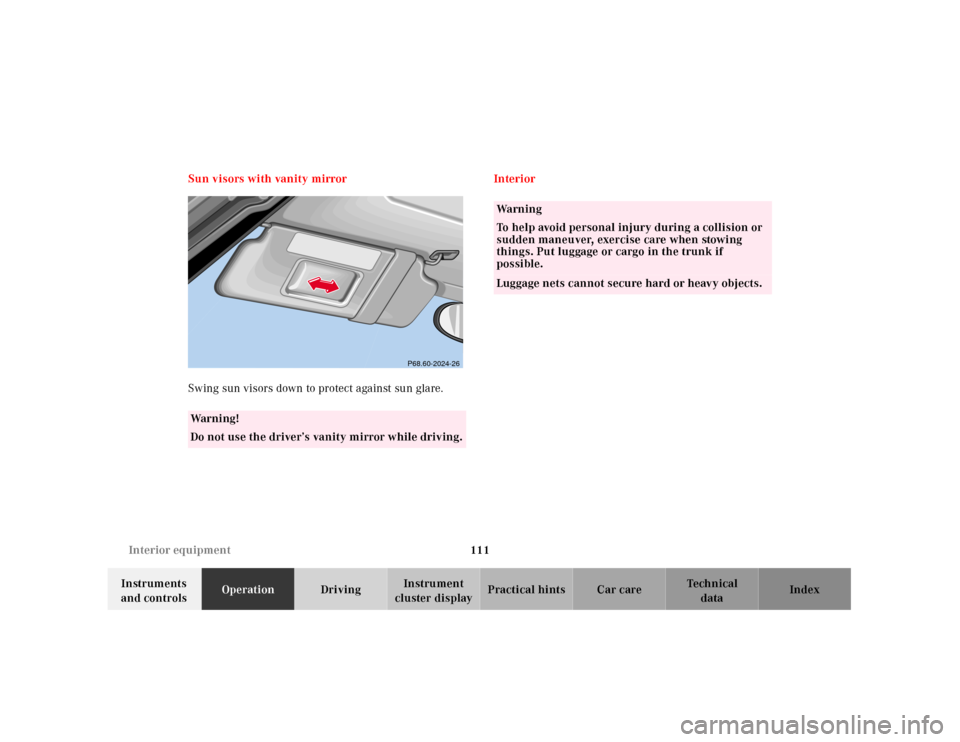
cluster displayPractical hints Car care Index Sun visors with vanity mirror
Swing sun visors down to protect against sun glare.Interior
Wa r n i n g !
Do not use the driver’s vanity mirror while driving.
P68.60-2024-26
Wa r n i n g
To help avoid personal injury during a collision or
sudden maneuver, exercise care when stowing
things. Put luggage or cargo in the trunk if
possible.Luggage nets cannot secure hard or heavy objects.
Page 121 of 273
118 Garage door opener
Te ch n ica l
data Instruments
and controlsOperationDrivingInstrument
cluster displayPractical hints Car care Index
Programming or reprogramming the integrated
remote control:
1.Turn key in starter switch to position 1 or 2.
2.Hold the end of the hand-held transmitter of the
d evice you w ish to train approxim ately 2 to 5 inch es
(5 cm to 12 cm) away from the surface of the
integrated remote control located on the inside rear
view mirror, keeping the indicator lamp in view.
3.Using both hands, simultaneously push the hand-
held transmitter button and the desired integrated
remote control button. Do not release the buttons
until completing step 4.
4.The indicator lamp on the integrated remote control
will flash, first slowly and then rapidly. When the
indicator lamp flashes rapidly, both buttons may be
released (the rapid flashing lamp indicates
successful programming of the new frequency
signal). To program the remaining two buttons,
follow steps 1 through 4.Note:
If, after repeated attempts, you do not successfully
program the integrated remote control device to learn
the signal of the hand-held transmitter, the garage door
opener could be equipped with the “rolling code
feature”.
Rolling code programming:
To train a garage door opener (or other rolling code
devices) with the rolling code feature, follow these
instructions after completing the “Programming”
portion of this text. (A second person may make the
following training procedures quicker and easier.)
1.Locate training button on the garage door opener
motor head unit. Exact location and color of the
button may vary by garage door opener brand. If
there is difficulty locating the transmitting button,
reference to garage door opener operator’s manual.
2.Press “training” button on the garage door opener
motor head unit (which activated the “training
light”).
Page 134 of 273
131 Tele Aid
Te ch n ica l
data Instruments
and controlsOperationDrivingInstrument
cluster displayPractical hints Car care Index Emergency calls
An emergency call is initiated automatically:
•following an accident in which the Emergency
Tensioning Retractors (ETR’s) or airbags deploy,
•if the antitheft alarm or the tow away alarm stays on
for more than 20 seconds, see pages 35 and 37.
An emergency call can also be initiated manually by
opening the cover next to the interior rear view mirror
labeled “SOS”, then pressing the button (for longer than
2 seconds) located under the cover. See below for
instructions on initiating an emergency call manually.
Once the emergency call is in progress, the indicator
lamp in the “SOS” button will begin to f lash. All
information relevant to the emergency, such as the
location of the vehicle (determined by the GPS satellite
location system), vehicle model, identification number
and color are generated.
A voice connection between the Response Center and
the occupants of the vehicle will be established
automatically soon after the emergency call has been
initiated. When a voice connection is established the
audio system mutes. The Response Center will attempt
to determine more precisely the nature of the accident
provided they can speak to an occupant of the vehicle.The Tele Aid system is available if:
•it has been activated and is operational. Activation
requires a subscription for monitoring services and
cellular air time
•the relevant cellular phone network and GPS signals
are available and pass the information on to the
Response Center.
Note:
Location of the vehicle on a map is possible if the
vehicle is able to receive signals from the GPS satellite
network and pass the information on to the Response
Center.
Wa r n i n g !
If the indicator lamp in the “SOS” button is
illuminated continuously and there was no voice
connection to the Response Center established,
then the Tele Aid system could not initiate an
emergency call (e.g. the relevant cellular phone
network is not available).Should this occur, assistance must be summoned
by other means.
Page 226 of 273
223 Exterior lamps
Te ch n ica l
data Instruments
and controlsOperation DrivingInstrument
cluster displayPractical hintsCar care Index Side marker lamp, front
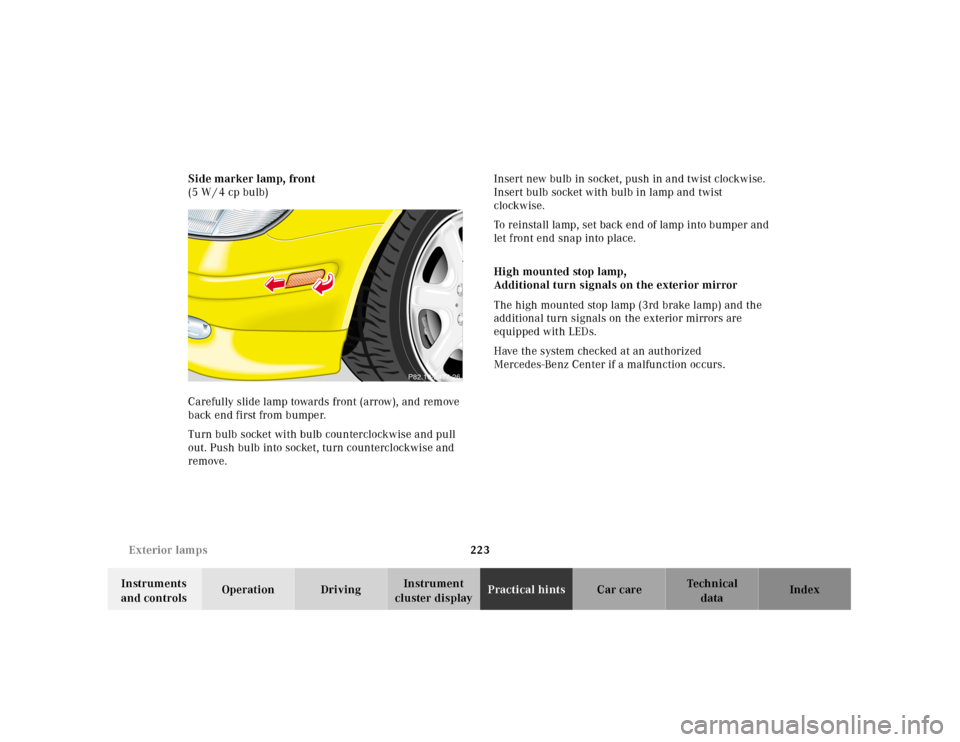
(5 W / 4 cp bulb)
Carefully slide lamp towards front (arrow), and remove
back end first from bumper.
Turn bulb socket with bulb counterclockwise and pull
out. Push bulb into socket, turn counterclockwise and
remove.Insert new bulb in socket, push in and twist clockwise.
Insert bulb socket with bulb in lamp and twist
clockwise.
To reinstall lamp, set back end of lamp into bumper and
let front end snap into place.
High mounted stop lamp,
Additional turn signals on the exterior mirror
The high mounted stop lamp (3rd brake lamp) and the
additional turn signals on the exterior mirrors are
equipped with LEDs.
Have the system checked at an authorized
Mercedes-Benz Center if a malfunction occurs.
P82.10-2477-26
Page 239 of 273
236 Cleaning and care of the vehicle
Te ch n ica l
data Instruments
and controlsOperation DrivingInstrument
cluster displayPractical hintsCar careIndex
Engine cleaning
Prior to cleaning the engine compartment make sure to
protect electrical components and connectors from the
intrusion of water and cleaning agents.
Corrosion protection, such as MB Anticorrosion Wax
should be applied to the engine compartment after
every engine cleaning. Before applying, all control
linkage bushings and joints should be lubricated. The
poly-V-belt and all pulleys should be protected from any
wax.Ve h i c l e w a s h i n g
Do not use hot water or wash your vehicle in direct
sunlight. Use only a mild car wash detergent, such as
Mercedes-Benz approved Car Shampoo.
Thoroughly spray the vehicle with a diffused jet of
water. Direct only a very weak spray towards the
ventilation intake. Use plenty of water and rinse the
sponge and chamois frequently.
Rinse with clear water and thoroughly wipe dry with a
chamois. Do not allow cleaning agents to dry on the
finish.
Due to the width of the vehicle, prior to running the
vehicle through an automatic car wash, fold back the
outside mirrors to prevent them from getting damaged.
In the winter, thoroughly remove all traces of road salt
as soon as possible.
When washing the underbody, do not forget to clean the
inner sides of the wheels.
Page 266 of 273
263 Index
Te ch n ica l
data Instruments
and controlsOperation DrivingInstrument
cluster displayPractical hints Car careIndex Engine oil level ................................................................. 77
Engine oils ......................................................................254
ESP (Electronic stability program) .............................. 170
Control switch ........................................................... 172
Malfunction indicator lamp ..................................... 181
Synchronizing ........................................................... 171
Warning lamp ............................................................ 181
ETR (Emergency tensioning retractor) ......................... 52
SRS indicator lamp ................................................... 180
Exterior lamp failure indicator .................................... 185
Exterior lamp switch ....................................................... 79
Exterior lamps ................................................................ 218
Additional turn signals on the exterior mirror ....223
Headlamp assembly ................................................. 219
High mounted stop lamp .........................................223
Low and high beam ..................................................220
Parking lamps .................................................. 221, 222
Replacing bulbs ......................................................... 218
Side marker lamp, front ...........................................223
Standing lamps ................................................. 221, 222
Taillamp assemblies .................................................222
Turn signal lamps ............................................ 221, 222
FFirst aid kit ...................................................................... 188
Flexible service system (FSS) ........................................ 75
FSS indicator lamp .............................................. 71, 185
Fuel
Gasoline additives .................................................... 256
Premium unleaded gasoline .................. 174, 253, 255
Fuel cap placement warning ........................................ 181
Fuel filler f lap
Manual release ......................................................... 232
Fuel requirements ........................................................ 255
Fuel reserve warning ..................................................... 181
Fuels, coolants, lubricants etc. - capacities .............. 252
Fuses, electrical .............................................................. 188GGarage door opener ....................................................... 117
Gasoline
Additives .................................................................... 256
Fuel requirements ................................................... 255
Premium unleaded .................................................. 255
General notes on the central locking system .............. 24
Glove box ......................................................................... 112
Page 268 of 273
265 Index
Te ch n ica l
data Instruments
and controlsOperation DrivingInstrument
cluster displayPractical hints Car careIndex
LLamps, exterior
Fog lamps ............................................................ 79, 222
Headlamps ......................................... 79, 185, 219, 237
Parking lamps ............................................ 79, 219, 221
Replacing bulbs ......................................................... 218
Side marker lamp, front .................................... 79, 223
Standing lamps ........................................... 79, 219, 221
Taillamps ............................................79, 185, 222, 237
Layout of poly-V-belt drive ............................................245
Lighter ..............................................................................115
Limp Home Mode (Automatic transmission) ............ 152
Locking and unlocking ................................................... 26
Low engine coolant level warning .............................. 183
Luggage cover ................................................................. 126MMaintenance ................................................................... 129
Malfunction and indicator lamps
in the instrument cluster ......................................... 178
Manual transmission .................................................... 143
Mirror, exterior, adjusting .............................................. 65
Mirror, exterior, rear view .............................................. 65
Mirror, inside, rear view ................................................. 64
NNight security illumination .......................................... 110OOn-board diagnostic system .........................................178
Operator’s manual ............................................................. 6
Outside temperature indicator .......................................73
Overhead control panel ................................................... 19PPanic button ......................................................................27
Parcel net in passenger footwell .................................. 116
Parking ............................................................................ 156
Parking brake ............................... 153, 155, 156, 171, 179
Power assistance ............................................................ 155
Power seats ....................................................................... 38
Power windows ...............................................................109
Express opening ........................................................109
Operate with hard top switch ..................................120
Problems with your vehicle ............................................ 12
Product information .......................................................... 5