2000 MERCEDES-BENZ SLK230 audio
[x] Cancel search: audioPage 4 of 273

1 Contents
IntroductionProduct information .......................... 5
Operator’s manual ............................. 6
Where to find it ................................ 11
Reporting Safety Defects ................ 13Instruments and controlsInstruments and controls ............... 16
Center console .............................. 18
Overhead control panel ............... 19OperationVehicle keys ...................................... 22
Remote control with
folding master key ...................... 22
Start lock-out .................................... 24
General notes on the
central locking system ............... 24
Central locking system ................... 25
Remote control ............................. 25
Panic button .................................. 27
Doors .................................................. 28Central locking switch .................... 30
Automatic central locking ...............31
Emergency unlocking in
case of accident .......................... 32
Trunk ................................................. 33
Emergency release
for trunk lid ................................. 35
Antitheft alarm system ................... 35
Tow-away alarm ............................... 37
Seats .................................................. 38
Seat heater ........................................ 42
Seat belts and integrated
restraint system .......................... 44
Seat belts .......................................... 44
Seat belt nonusage
warning system ............................ 45
BabySmart
TM airbag
deactivation system ................... 50
Self-test BabySmart
TM without
special child
seat installed .................................51
Supplemental restraint
system (SRS) ................................51
Emergency tensioning
retractor (ETR) ............................ 52Airbags .............................................. 52
Safety guidelines for the
seat belt, emergency
tensioning retractor
and airbag .................................... 59
Infant and child
restraint systems ......................... 61
Adjusting telescoping
steering column .......................... 63
Rear view mirrors ............................ 64
Instrument cluster ........................... 68
Flexible service
system (FSS) ................................ 75
Checking engine oil level ............... 77
Engine oil consumption .................. 78
Exterior lamp switch ....................... 79
Headlamp cleaning system ............ 80
Combination switch ........................ 81
Hazard warning flasher
switch ............................................ 83
Climate control ................................. 84
Rear window defroster .................... 88
Audio and telephone,
operation ...................................... 91
Page 20 of 273

17 Instruments and controls
Te ch n ica l
data Instruments
and controlsOperation DrivingInstrument
cluster displayPractical hints Car care Index 1Side defroster outlet, adjustable
2Cruise control switch, see page 163
3Side air outlet, adjustable
4Combination switch, see page 81
5Exterior lamp switch, see page 79
6Hood lock release, see page 190
7Instrument cluster, see page 68
8Horn (with key in steering lock position 1 or 2)
9Airbag
10Steering wheel adjustment handle, see page 64
11Steering lock with ignition / starter switch,
see page 140
12Voice recognition system switch, see separate
operating instructions
13Cup holder, see page 112
14Center air outlets, adjustable15Air volume control for center air outlets
16Climate control, see page 84
Rear window defroster switch
17Glove box (illuminated with key in steering lock
position 1 or 2), see page 112
18Audio system, see page 91
19Hazard warning f lasher switch, see page 83
20Central locking switch, see page 30
21Left seat heater switch, see page 42
22Headlamp washer switch, see page 80
23ESP control switch, see page 172
24Tow-away alarm switch, see page 37
25Right seat heater switch, see page 42
26Ashtray, coin holder, see page 114
27Storage compartment
Page 24 of 273
21 Contents - Operation
Te ch n ica l
data Instruments
and controlsOperationDrivingInstrument
cluster displayPractical hints Car care Index Hazard warning flasher switch ..... 83
Climate control ................................. 84
Rear window defroster .................... 88
Audio and telephone, operation .... 91
Power windows ............................... 109
Interior lighting ..............................110
Night security illumination ..........110
Sun visors with Vanity Mirror ......111Interior ............................................. 111
Cup holder and glove box ............. 112
Storage compartments ................... 113
Ashtrays ........................................... 114
Coin Holder ..................................... 114
Lighter .............................................. 115Parcel net in
passenger footwell .....................116
Shelf behind roll bars .....................116
Cellular telephone ..........................116
Garage door opener ........................117
Retractable hardtop ....................... 120
Wind screen .................................... 125
Luggage cover ................................. 126
Page 67 of 273
64 Adjusting telescoping steering column
Te ch n ica l
data Instruments
and controlsOperationDrivingInstrument
cluster displayPractical hints Car care Index
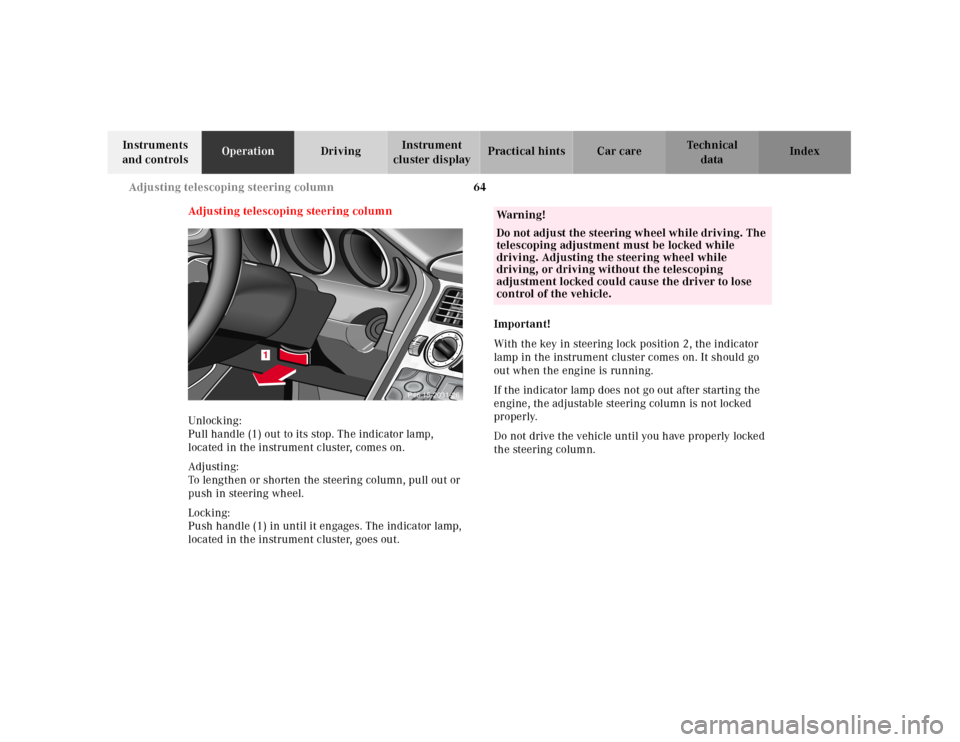
Adjusting telescoping steering column
Unlocking:
Pull handle (1) out to its stop. The indicator lamp,
located in the instrument cluster, comes on.
Adjusting:
To lengthen or shorten the steering column, pull out or
push in steering wheel.
Locking:
Push handle (1) in until it engages. The indicator lamp,
located in the instrument cluster, goes out.Important!
With the key in steering lock position 2, the indicator
lamp in the instrument cluster comes on. It should go
out when the engine is running.
If the indicator lamp does not go out after starting the
engine, the adjustable steering column is not locked
properly.
Do not drive the vehicle until you have properly locked
the steering column.
AUDIO
TEL
AUDIO
TEL
1
AUDIO
TEL
AUDIO
TEL
P46.15-2031-26
Wa r n i n g !
Do not adjust the steering wheel while driving. The
telescoping adjustment must be locked while
driving. Adjusting the steering wheel while
driving, or driving without the telescoping
adjustment locked could cause the driver to lose
control of the vehicle.
Page 94 of 273
91 Audio system
Te ch n ica l
data Instruments
and controlsOperationDrivingInstrument
cluster displayPractical hints Car care Index Audio and telephone, operation
These instructions are intended to help you become
acquainted with your Mercedes- Benz car radio. They
contain useful tips and a detailed description of the user
functions.
The right to correct errors and make technical amendments is
reserved.
Operating safety1 Optional equipment
Dolby and the double-D symbol
Ù
are trademarks of Dolby
Laboratories Licensing Corporation. The Dolby noise reduction
system is manufactured under licence from Dolby Laboratories
Licensing Corporation.
Wa r n i n g !
In order to avoid distraction which could lead to an
accident, system settings should be entered with
the vehicle at standstill and systems should be
operated by the driver only when traffic conditions
permit. Always pay full attention to traffic
conditions first before operating system controls
while driving. Bear in mind that at a speed of just 30 mph
(approximately 50 km / h), your car is covering a
distance of approximately 50 feet (approximately
14 m ) e v e r y s e c o n d .
Wa r n i n g !
Any alternations made to electronic components
can cause malfunctionsThe radio, cassette deck, CD changer
1 and
telephone
1 are interconnected. Therefore, when
one of the components is defective or has not been
removed / replaced properly this may impair the
function of other components.
These malfunctions might seriously impair the
operating safety of your vehicle.We recommend that you have any service work or
alternations on electronic components done in an
authorized Mercedes-Benz Center.
Page 95 of 273
92 Audio system
Te ch n ica l
data Instruments
and controlsOperationDrivingInstrument
cluster displayPractical hints Car care Index
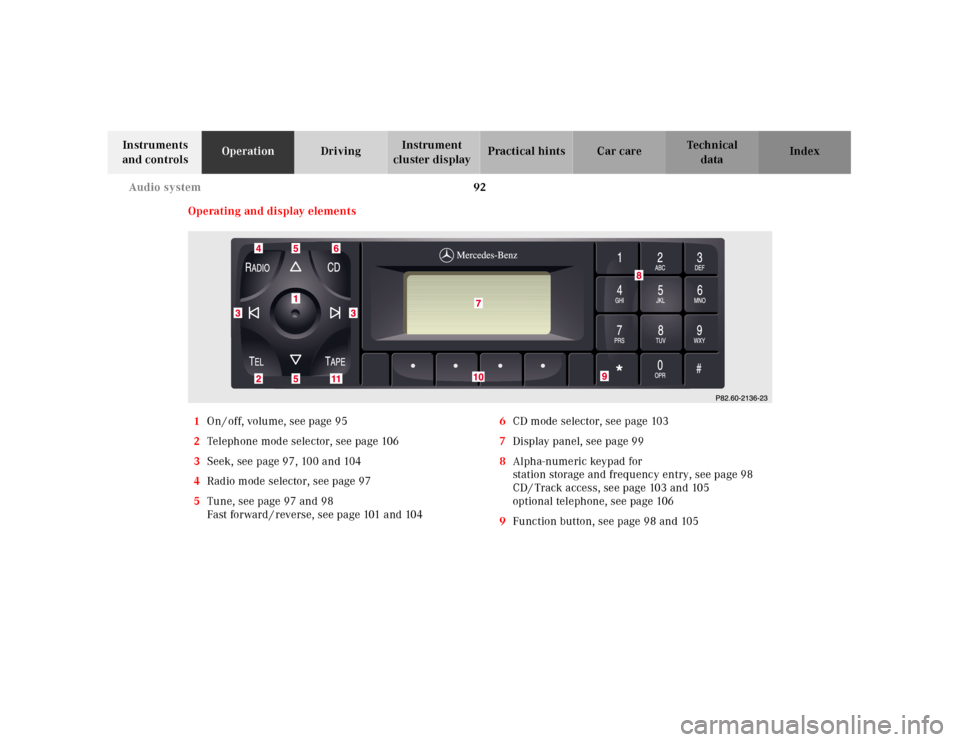
Operating and display elements
1On / off, volume, see page 95
2Telephone mode selector, see page 106
3Seek, see page 97, 100 and 104
4Radio mode selector, see page 97
5Tune, see page 97 and 98
Fast forward / reverse, see page 101 and 1046CD mode selector, see page 103
7Display panel, see page 99
8Alpha-numeric keypad for
station storage and frequency entry, see page 98
CD / Track access, see page 103 and 105
optional telephone, see page 106
9Function button, see page 98 and 105
Page 96 of 273
93 Audio system
Te ch n ica l
data Instruments
and controlsOperationDrivingInstrument
cluster displayPractical hints Car care Index 10Soft keys for
radio band selection, see page 97
tone controls, see page 95
scan, see page 98
Tape eject, see page 100
Tape track select, see page 100
Dolby, see page 101
CD random / repeat, see page 105
11Tape mode selector, see page 99
Anti-theft system
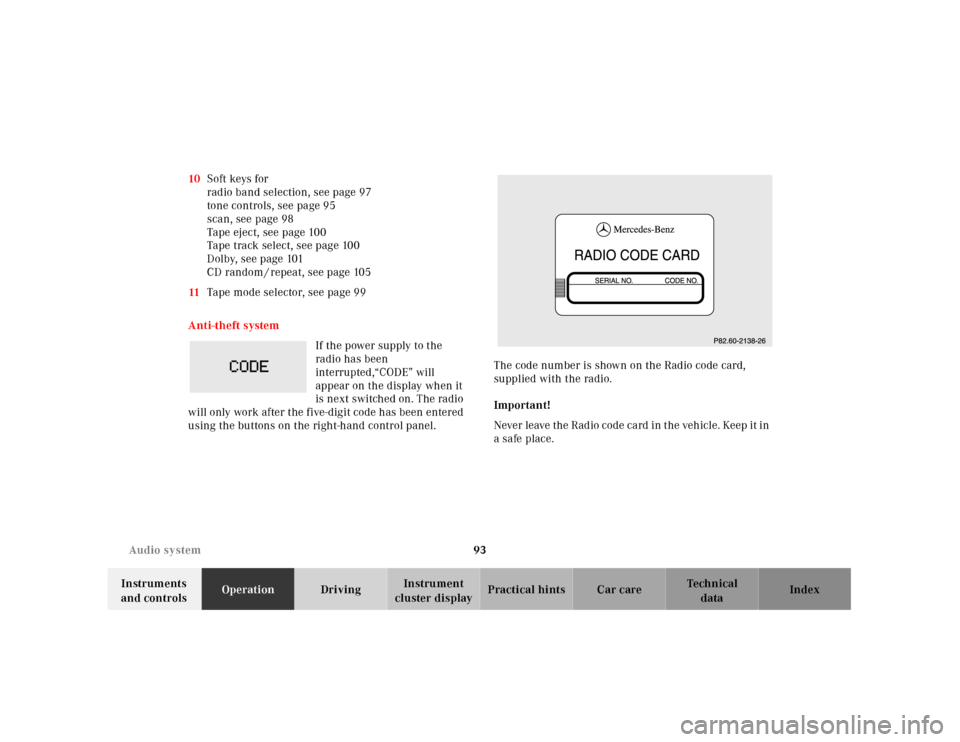
If the power supply to the
radio has been
interrupted,“CODE” will
appear on the display when it
is next switched on. The radio
will only work after the five-digit code has been entered
using the buttons on the right-hand control panel.The code number is shown on the Radio code card,
supplied with the radio.
Important!
Never leave the Radio code card in the vehicle. Keep it in
a safe place.
Page 97 of 273
94 Audio system
Te ch n ica l
data Instruments
and controlsOperationDrivingInstrument
cluster displayPractical hints Car care Index
Entering the code number
Switch on the radio.“CODE” will appear on the display.
Using the buttons on the alpha-numeric keypad, enter
the five digit code. Confirm by pressing the “OK” key.
If an incorrect code has been entered and confirmed,
“CODE” will reappear on the display. The correct code
must be entered once again.
If an incorrect code is entered
three times, “WAIT” will
appear on the display and the
radio will be locked out for
about 10 minutes.
Note:
Th e lock out time w il l only cou nt d own if th e ra dio is le ft
switched on.Button and soft key operation
In these instructions, the alpha-numeric keypad (right
side of radio face) and the function buttons (left side of
the radio face) are referred to as “buttons” and the four
keys under the display are referred to as “soft keys”.
Note:
Do not press directly on the radio display face.