Page 214 of 273

211 Battery
Te ch n ica l
data Instruments
and controlsOperation DrivingInstrument
cluster displayPractical hintsCar care Index Therefore, we strongly recommend that you have the
battery charge checked frequently, and corrected if
necessary, especially if you use the vehicle less than
approximately 200 miles (300 km) per month,
mostly for short distance trips, or if it is not used for
long periods of time.
Only charge a battery with a battery charger after the
battery has been disconnected from the vehicle’s
electrical circuit.
Always disconnect the battery negative lead first and
connect last.
When removing and connecting the battery, always
make sure that all electrical consumers are off and the
key is in steering lock position 0. The battery must
always be securely installed when the vehicle is in
operation. During removal and installation always
protect the disconnected battery positive (+) terminal
with the cover attached to the battery.
While the engine is running the battery terminal clamps
must not be loosened or detached, otherwise the
generator and other electronic components will be
damaged.Battery recycling
Batteries contain materials that can harm the
environment with improper disposal.
Large 12 Volt storage batteries contain lead.
Recycling of batteries is the preferred method of
disposal.
Many states require sellers of batteries to accept old
batteries for recycling.
Page 217 of 273
214 Towing the vehicle
Te ch n ica l
data Instruments
and controlsOperation DrivingInstrument
cluster displayPractical hintsCar care Index
Towing the vehicleThe rear towing eye is located at the right, below the
bumper. The front towing eye is located on the
passenger-side behind the grille in the bumper panel.
Grille removal for SLK 320 except Sport Package
version:
Hold left and right end of grille (1) and pull out.
Grille removal for SLK 230 except Sport Package
version:
Hold grille (2), fold it down and pull out firmly.
Grille installation for all except Sport Package version:
Position grille and press in securely.
Model SLK 320
except Sport PackageModel SLK 230
except Sport Package
1
2P88.20-2111-26
Page 218 of 273

215 Towing the vehicle
Te ch n ica l
data Instruments
and controlsOperation DrivingInstrument
cluster displayPractical hintsCar care Index Sport Package
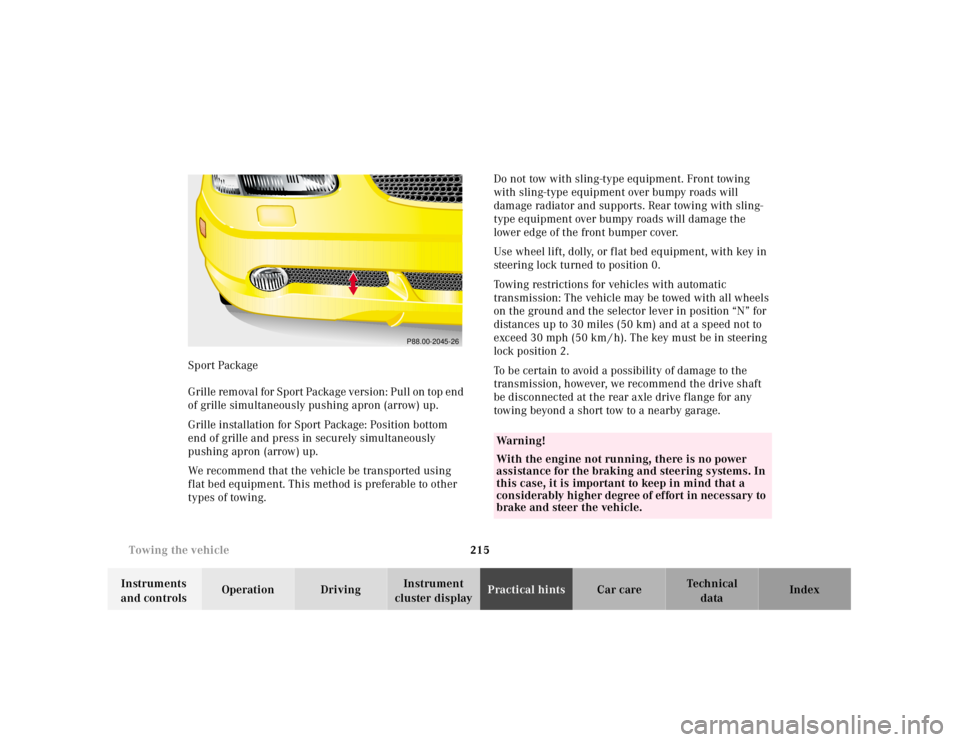
G r il l e re m ova l f or S p or t Pa cka g e v e rs i on : P u l l on t op e n d
of grille simultaneously pushing apron (arrow) up.
Grille installation for Sport Package: Position bottom
end of grille and press in securely simultaneously
pushing apron (arrow) up.
We recommend that the vehicle be transported using
f lat bed equipment. This method is preferable to other
types of towing.Do not tow with sling-type equipment. Front towing
with sling-type equipment over bumpy roads will
damage radiator and supports. Rear towing with sling-
type equipment over bumpy roads will damage the
lower edge of the front bumper cover.
Use wheel lift, dolly, or f lat bed equipment, with key in
steering lock turned to position 0.
Towing restrictions for vehicles with automatic
transmission: The vehicle may be towed with all wheels
on the ground and the selector lever in position “N” for
distances up to 30 miles (50 km) and at a speed not to
exceed 30 mph (50 km / h). The key must be in steering
lock position 2.
To be certain to avoid a possibility of damage to the
transmission, however, we recommend the drive shaft
be disconnected at the rear axle drive f lange for any
towing beyond a short tow to a nearby garage.
P88.00-2045-26
Wa r n i n g !
With the engine not running, there is no power
assistance for the braking and steering systems. In
this case, it is important to keep in mind that a
considerably higher degree of effort in necessary to
brake and steer the vehicle.
Page 223 of 273
220 Exterior lamps
Te ch n ica l
data Instruments
and controlsOperation DrivingInstrument
cluster displayPractical hintsCar care Index
Bulbs for high and low beam
H 7 (55 W)
Open hood.
Push down tab at top end of cover (2) and remove. Pull
off electrical connector (3) or (4). Unhook clamping ring
and pull out bulb together with clamping ring. Remove
bulb.
Insert new bulb (seating properly in cutouts of bulb
socket), mount clamping ring. Reinstall and push
electrical connector on securely. Reinstall cover (2).Xenon bulb for low beam
D2R (35W)
Wa r n i n g !
Because of high voltage in Xenon lamps, it is
dangerous to replace the bulb or repair the lamp
and its components. We recommend that you have
such work done by a qualified technician.
Page 268 of 273

265 Index
Te ch n ica l
data Instruments
and controlsOperation DrivingInstrument
cluster displayPractical hints Car careIndex
LLamps, exterior
Fog lamps ............................................................ 79, 222
Headlamps ......................................... 79, 185, 219, 237
Parking lamps ............................................ 79, 219, 221
Replacing bulbs ......................................................... 218
Side marker lamp, front .................................... 79, 223
Standing lamps ........................................... 79, 219, 221
Taillamps ............................................79, 185, 222, 237
Layout of poly-V-belt drive ............................................245
Lighter ..............................................................................115
Limp Home Mode (Automatic transmission) ............ 152
Locking and unlocking ................................................... 26
Low engine coolant level warning .............................. 183
Luggage cover ................................................................. 126MMaintenance ................................................................... 129
Malfunction and indicator lamps
in the instrument cluster ......................................... 178
Manual transmission .................................................... 143
Mirror, exterior, adjusting .............................................. 65
Mirror, exterior, rear view .............................................. 65
Mirror, inside, rear view ................................................. 64
NNight security illumination .......................................... 110OOn-board diagnostic system .........................................178
Operator’s manual ............................................................. 6
Outside temperature indicator .......................................73
Overhead control panel ................................................... 19PPanic button ......................................................................27
Parcel net in passenger footwell .................................. 116
Parking ............................................................................ 156
Parking brake ............................... 153, 155, 156, 171, 179
Power assistance ............................................................ 155
Power seats ....................................................................... 38
Power windows ...............................................................109
Express opening ........................................................109
Operate with hard top switch ..................................120
Problems with your vehicle ............................................ 12
Product information .......................................................... 5
Page:
< prev 1-8 9-16 17-24