2000 MERCEDES-BENZ SLK CLASS manual transmission
[x] Cancel search: manual transmissionPage 150 of 273
147 Automatic transmission
Te ch n ica l
data Instruments
and controlsOperationDrivingInstrument
cluster displayPractical hints Car care Index Selector lever position
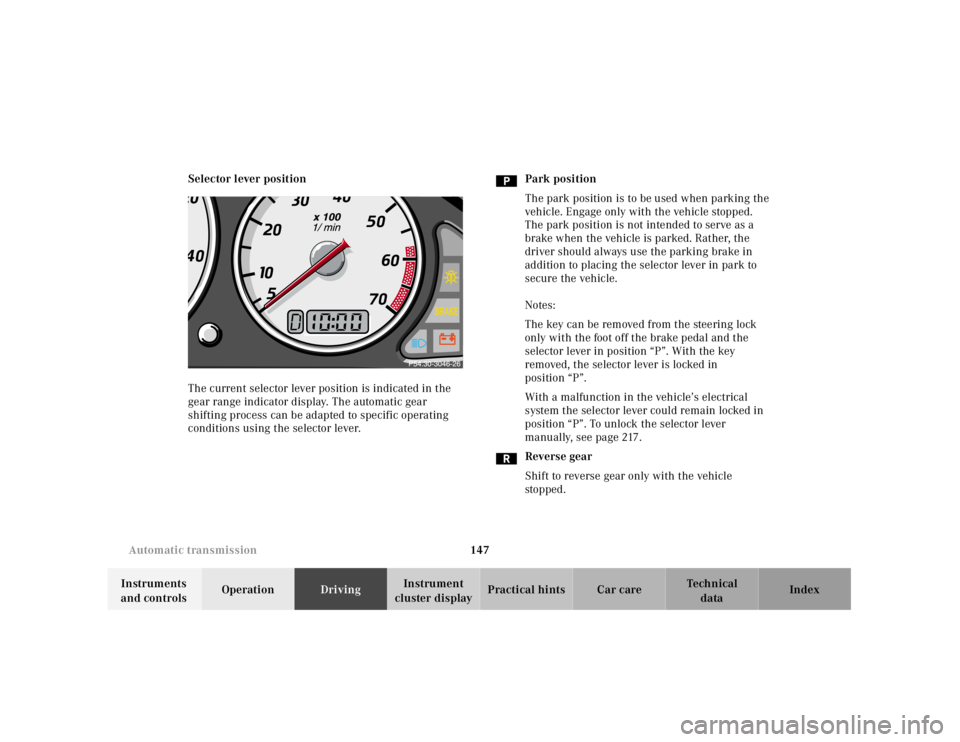
The current selector lever position is indicated in the
gear range indicator display. The automatic gear
shifting process can be adapted to specific operating
conditions using the selector lever.Park position
The park position is to be used when parking the
vehicle. Engage only with the vehicle stopped.
The park position is not intended to serve as a
brake when the vehicle is parked. Rather, the
driver should always use the parking brake in
addition to placing the selector lever in park to
secure the vehicle.
Notes:
The key can be removed from the steering lock
only with the foot off the brake pedal and the
selector lever in position “P”. With the key
removed, the selector lever is locked in
position “P”.
With a malfunction in the vehicle’s electrical
system the selector lever could remain locked in
position “P”. To unlock the selector lever
manually, see page 217.
Reverse gear
Shift to reverse gear only with the vehicle
sto p ped .
Page 159 of 273
156 Driving instructions
Te ch n ica l
data Instruments
and controlsOperationDrivingInstrument
cluster displayPractical hints Car care Index
Caution!
When driving down long and steep grades, relieve the
load on the brakes by shifting into a lower gear to use
the engine’s braking power. This helps prevent
overheating of the brakes and reduces brake pad wear.
After hard braking, it is advisable to drive on for some
time, rather than immediately parking, so the air stream
will cool down the brakes faster.
Driving off
Apply the service brakes to test them briefly after
driving off. Perform this procedure only when the road
is clear of other traffic.
Warm up the engine smoothly. Do not place full load on
the engine until the operating temperature has been
reached.
W hen sta rting of f on a sl ippery surfa ce, d o not al low one
drive wheel to spin for an extended period with the ESP
switched off. Doing so may cause serious damage to the
drive train which is not covered by the Mercedes-Benz
Limited Warranty.Parking
Wa r n i n g !
To reduce the risk of personal injury as a result of
vehicle movement, before
turning off the engine
and leaving the vehicle, always:
1. Keep right foot on the service brake pedal.
2. Firmly engage parking brake.
3. Move the selector lever to position “P”
(manual transmission: first or reverse gear).
4. Slowly release the service brake pedal.
5. Turn front wheels towards the road curb.
6. Turn the key to steering lock position 0 and
remove.
7. Take the key and lock vehicle when leaving.
Page 160 of 273
157 Driving instructions
Te ch n ica l
data Instruments
and controlsOperationDrivingInstrument
cluster displayPractical hints Car care Index Important!
It is advisable to set the parking brake whenever
parking or leaving the vehicle. In addition, move
selector lever to position “P” (manual transmission:
first or reverse gear).
When parking on hills, always set the parking brake.Tires
Tread wear indicators (TWI) are required by law. These
indicators are located in six places on the tread
circumference and become visible at a tread depth of
approximately
1/16 in (1.5 mm), at w hich point t he tire is
considered worn and should be replaced.
The tread wear indicator appears as a solid band across
the tread.
Wa r n i n g !
If you feel a sudden significant vibration or ride
disturbance, or you suspect that possible damage to
your vehicle has occurred, you should turn on the
hazard warning flashers, carefully slow down, and
drive with caution to an area which is a safe
distance from the roadway.Inspect the tires and under the vehicle for possible
damage. If the vehicle or tires appear unsafe, have
it towed to the nearest Mercedes-Benz Center or
tire dealer for repairs.
Page 163 of 273

160 Driving instructions
Te ch n ica l
data Instruments
and controlsOperationDrivingInstrument
cluster displayPractical hints Car care Index
Snow chains
Use only snow chains that are tested and recommended
by Mercedes-Benz. Your authorized Mercedes-Benz
Center will be glad to advise you on this subject.
Chains should only be used on the rear wheels. Follow
the manufacturer’s mounting instructions.
Snow chains should only be driven on snow covered
roads at speeds not to exceed 30 mph (50 km / h).
Remove chains as soon as possible when driving on
roads without snow.
When driving with snow chains, press the ESP control
switch to OFF, see page 172.
Important!
Use of snow chains is not permissible with tire size
225 / 50 R 16, with th e col lapsib le spa re tire, or with tire
size 245 / 40 ZR 17 (Sport Package).Winter driving instructions
The most important rule for slippery or icy roads is to
drive sensibly and to avoid abrupt acceleration, braking
and steering maneuvers. Do not use the cruise control
system under such conditions.
When the vehicle is in danger of skidding, move
selector lever to position “N” or in case of manual
transmission declutch. Try to keep the vehicle under
control by corrective steering action.
Road salts and chemicals can adversely affect braking
efficiency. Increased pedal force may become necessary
to produce the normal brake effect. We therefore
recommend depressing the brake pedal periodically
when traveling at length on salt-strewn roads. This can
bring road salt impaired braking efficiency back to
normal. A prerequisite is, however, that this be done
without endangering other drivers on the road.
If t he veh icle is pa rked af te r b eing driven on sal t trea ted
road s, th e braking ef f ic iency should be tested as soon a s
possible after driving is resumed while observing the
safety rules in the previous paragraph.
Page 168 of 273

165 Driving systems
Te ch n ica l
data Instruments
and controlsOperationDrivingInstrument
cluster displayPractical hints Car care IndexNotes:
If the engine does not brake the vehicle sufficiently
while driving on a downgrade, the speed you set on the
cruise control may be exceeded. In this case the
following will assist in maintaining the set cruise
controlled speed:
Vehicles with automatic transmission:
Downshift occurs (max. to 3rd gear) to maintain the set
cruise controlled speed by using the engine’s braking
power.
As soon as the grade eases, the automatic transmission
shifts up again dependent on the selector lever position.
Vehicles with manual transmission:
The set cruise controlled speed is switched off when
decl utch ing exceed s fou r se conds during d ow nsh if ting a
gear.
Neverth eless, in some ca ses you m ay have to step on t he
bra ke peda l to slow d ow n. In t his ca se th e cruise control
is switched off.
Use the lever to resume the previously set speed.
Wa r n i n g !
Only use the cruise control if the traffic and
weather conditions make it advisable to travel at a
steady speed.
• The use of cruise control can be dangerous on
winding roads or in heavy traffic because
conditions do not allow safe driving at a steady
speed.• The use of cruise control can be dangerous on
slippery roads. Rapid changes in tire adhesion
can result in wheel spin and loss of control.The “Resume” function should only be operated if
the driver is fully aware of the previously set speed
and wishes to resume this particular preset speed.
Page 190 of 273

187 Contents - Practical hints
Te ch n ica l
data Instruments
and controlsOperation DrivingInstrument
cluster displayPractical hintsCar care Index
Practical hintsFirst aid kit ..................................... 188
Stowing things in the vehicle ...... 188
Fuses ................................................ 188
Hood ................................................. 190
Automatic transmission
fluid level ................................... 192
Checking engine oil level ............. 193
Coolant level ................................... 194
Adding coolant ........................... 194
Windshield and headlamp
washer system ........................... 195
Air pump, spare wheel,
vehicle tools, storage
compartment ............................. 196Vehicle jack .....................................197
Wheels .............................................198
Tire replacement ........................198
Rotating wheels ..........................199
Spare wheel .................................... 200
Spare wheel bolts ...................... 201
Changing wheels ........................... 202
Inflating the collapsible
spare tire ..................................... 207
Storing spare wheel
in wheel well .............................. 208
Tire inflation pressure ................. 209
Battery ..............................................210
Jump starting ..................................212
Towing the vehicle .........................214Transmission selector lever,
manually unlocking .................. 217
Exterior lamps ................................ 218
Headlamp assembly ................... 219
Taillamp assemblies ..................222
Changing batteries
in the remote control ................224
Synchronizing
remote control ............................225
Emergency engine
shut-down ..................................226
Raising hardtop manually ............226
Replacing wiper blade insert ....... 231
Antenna ...........................................232
Manual release of
fuel filler flap .............................232
Page 205 of 273
202 Tires, wheels
Te ch n ica l
data Instruments
and controlsOperation DrivingInstrument
cluster displayPractical hintsCar care Index
Changing wheelsMove vehicle to a level area which is a safe distance
from the roadway.
1.Set parking brake and turn on hazard warning
flasher.
2.Move selector lever to position “P” and turn off
engine (manual transmission to 1st or reverse gear).
3.Prevent vehicle from rolling away by blocking
wheels with wheel chocks (not supplied with
vehicle) or sizable wood block or stone. When
changing a wheel on a hill, place chocks on the
downhill side blocking both wheels of the other
axle. On a level road, place one chock in front of and
one behind the wheel that is diagonally opposite to
the wheel being changed.
The jack is designed exclusively for jacking up the
veh icle at the jack tu bes bui lt into eith er si de of th e
vehicle. To help avoid personal injury, use the jack
only to lift the vehicle during a wheel change.
Never get beneath the vehicle while it is supported
by th e jack. Keep hands and feet away from the area
under the lifted vehicle. Always firmly set parking
brake and block wheels before raising vehicle with
jack.Do not disengage parking brake whi le th e vehic le is
raised. Be certain that the jack is always vertical
when in use, especially on hills. Always try to use
the jack on level surface. Be sure that the jack arm
is fully inserted in the jack tube. Always lower the
vehicle onto sufficient capacity jackstands before
working under the vehicle.
Page 216 of 273
213 Jump starting
Te ch n ica l
data Instruments
and controlsOperation DrivingInstrument
cluster displayPractical hintsCar care Index Proceed as follows:
1.Position the vehicle with the charged battery so that
the jumper cables will reach, but never let the
vehicles touch. Make sure the jumper cables do not
have loose or missing insulation.
2.On both vehicles:
•Turn off engine and all lights and accessories,
except hazard warning flashers or work lights.
•Apply parking brake and shift selector lever to
position “P” (manual transmission to Neutral).
Important!
3.Clamp one end of the first jumper cable to the
positive (+) terminal of the discharged battery and
the other end to the positive (+) terminal of the
charged battery. Make sure the cable clamps do not
touch any other metal parts.
4.Clamp one end of the second jumper cable to the
grounded negative (–) terminal of the charged
battery and the final connection to a grounded
heavy metal bracket in the engine compartment or
on the engine of the disabled vehicle.Important!
5.Start engine of the vehicle with the charged battery
and run at high idle. Make sure the cables are not
on or near pulleys, fans, or other parts that will
move when the engine is started. Allow the
discharged battery to charge for a few minutes. Start
engine of the disabled vehicle in the usual manner.
6.After the engine has started, remove jumper cables
by exactly reversing the above installation
sequence, starting with the last connection made
first. When removing each clamp, make sure that it
does not touch any other metal while the other end
is still attached.
Note:
If engine does not run after several unsuccessful
starting attempts, have it checked at the nearest
authorized Mercedes-Benz Center.
Excessive unburned fuel may damage the catalytic
converter.