2000 MERCEDES-BENZ SL600 Level control system
[x] Cancel search: Level control systemPage 86 of 297
82 Checking engine oil level indicator
Technical
data Instruments
and controlsOperationDrivingInstrument
cluster displayPractical hints Car care Index
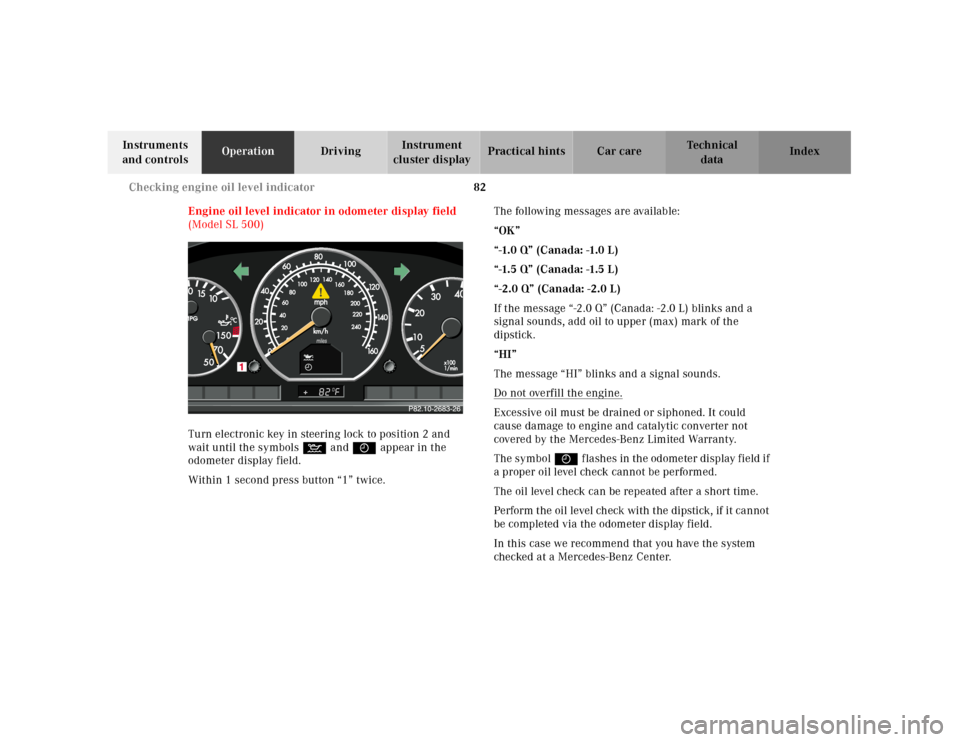
Engine oil level indicator in odometer display field
(Model SL 500)
Turn electronic key in steering lock to position 2 and
wait until the symbols : and I appear in the
odometer display field.
Within 1 second press button “1” twice.The following messages are available:
“OK”
“-1.0 Q” (Canada: -1.0 L)
“-1.5 Q” (Canada: -1.5 L)
“-2.0 Q” (Canada: -2.0 L)
If the message “-2.0 Q” (Canada: -2.0 L) blinks and a
signal sounds, add oil to upper (max) mark of the
dipstick.
“HI”
The message “HI” blinks and a signal sounds.
Do not overfill the engine.
Excessive oil must be drained or siphoned. It could
cause damage to engine and catalytic converter not
covered by the Mercedes-Benz Limited Warranty.
The symbol I f la sh es in th e od ome ter display f ield if
a proper oil level check cannot be performed.
The oil level check can be repeated after a short time.
Perform the oil level check with the dipstick, if it cannot
be completed via the odometer display field.
In this case we recommend that you have the system
checked at a Mercedes-Benz Center.
Page 87 of 297
83 Checking engine oil level indicator
Technical
data Instruments
and controlsOperationDrivingInstrument
cluster displayPractical hints Car care Index Notes:
If the symbols : and I are continuously
illuminated after pressing button (1) twice and there is
no change in the odometer display field or the low
engine oil level warning lamp comes on, a malfunction
has occurred to the system. Perform the engine oil level
check with the dipstick.
If no oil leaks are noted continue to drive to the nearest
Mercedes-Benz Center to have the system checked.
Observe the engine oil temperature gauge.
Fuel consumption gauge
While driving, instantaneous fuel consumption is
indicated in miles per gallon (mpg), or in Canada liters
per 100 kilometers (l/100 km).
With the engine switched off, the needle reads “0”.
Due to system design, minimum consumption is
indicated at idle speed.Engine oil temperature gauge
Normal operating engine oil temperatures are from
175 F (80 C) to 250 F (120 C).
During severe operating conditions and stop-and-go
traffic, the engine oil temperature may rise close to the
red marking.
The engine should not be operated with the engine oil
temperature in the red zone. Doing so may cause
serious engine damage which is not covered by the
Mercedes-Benz Limited Warranty.
When the engine oil temperature is close to the red
marking, relieve the load on the engine by decreasing
vehicle speed to lower engine oil temperature.
Once the engine oil temperature returns to the normal
temperature range, the engine oil level should be
checked. See page 82 or 221.
Engine oil consumption
Engine oil consumption checks should only be made
after the break-in period. During the break-in period,
higher oil consumption may be noticed and is normal.
Frequent driving at high engine speeds results in
increased consumption.
Page 100 of 297
96 Automatic climate control
Technical
data Instruments
and controlsOperationDrivingInstrument
cluster displayPractical hints Car care Index
Air recirculation
This mode can be selected to temporarily reduce the
entry of annoying odors or dust into the vehicle’s
interior.
Outside air is not supplied to the car’s interior.
To select, press O button.
To cancel, press O button again.
The system will automatically switch from recirculated
air to fresh air
• after approx. 5 minutes at outside temperatures
below approx. 40°F (5°C),
• after approx. 30 minutes, at outside temperatures
above approx. 40°F (5°C),
• after approx. 5 minutes, if button S is pressed.
Notes:
If the windows should fog up from the inside, switch
from recirculated air back to fresh air.
At high outside temperatures, the system automatically
engages the recirculated air mode thereby increasing
the cooling capacity performance, switching to partially
fresh air within 20 minutes.Residual engine heat utilization
With the engine switched off, it is possible to continue
heating the interior for a short while.
Air volume and distribution are controlled
automatically.
To select:
Turn electronic key in steering lock to position 1 or 0 or
remove electronic key.
Press T button.
This function selection will not activate if the battery
charge level is insufficient.
To c a n c e l :
Press T button.
The system will automatically shut off
• If you turn electronic key in steering lock to
position 2,
• after approx. 30 minutes,
• if the battery voltage drops.
Page 106 of 297

102 Audio system
Technical
data Instruments
and controlsOperationDrivingInstrument
cluster displayPractical hints Car care Index
Operation
Switching on and off
Press the control knob .
Th e ra dio is switch ed of f wh en the ignition key is tu rned
to position 0 or removed from the ignition. The radio is
switched on again when the ignition key is turned to
position 1 or 2.
Note:
The radio can also be switched on even if the ignition
key is not inserted, but will switch itself off
automatically after one hour to conserve vehicle battery
power.
Adjusting the volume
Turn the control knob - Turning the knob clockwise will
increase the volume, counterclockwise will decrease the
volume.Audio functions
The AUD key is used to select the BASS, TREBLE and
BALANCE functions. Settings for bass and treble are
stored separately for the radio, cassette and CD modes.
Tone level settings are identified by the vertical bars.
The center (flat) setting is shown by one longer bar in
the center of the display.
Bass
Press the AUD key repeatedly
until “BASS” appears in the
display.
Treble
Press the AUD key repeatedly
until “TREBLE” appears in th e
display.
Press the “+” key to increase
or the “-” key to decrease the level.
Page 107 of 297
103 Audio system
Technical
data Instruments
and controlsOperationDrivingInstrument
cluster displayPractical hints Car care Index Balance
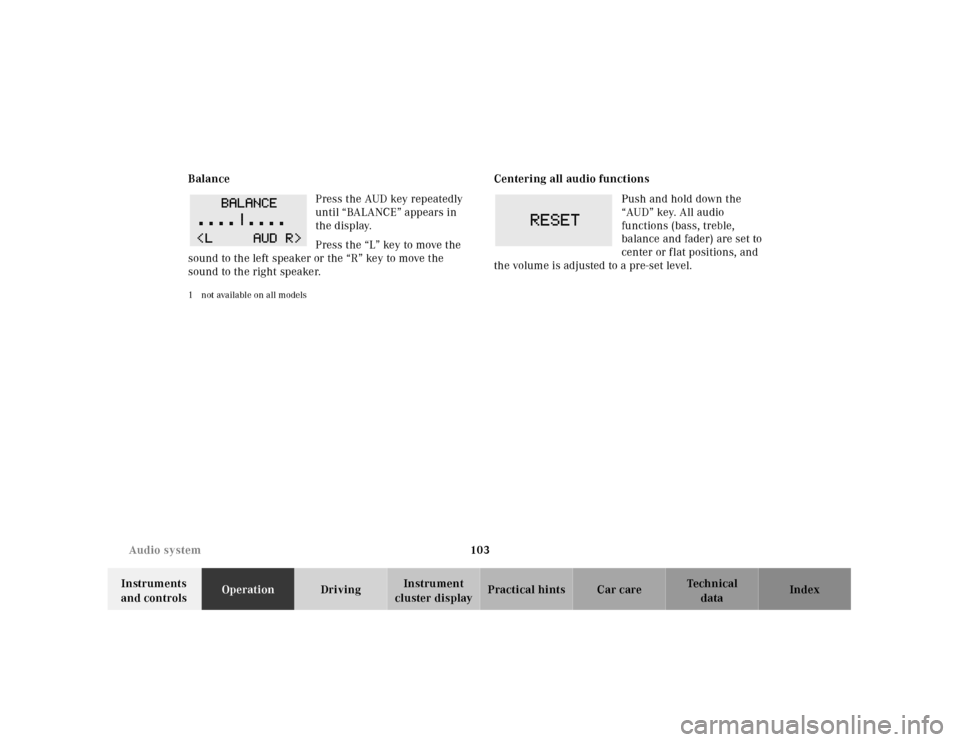
Press the AUD key repeatedly
until “BALANCE” appears in
the display.
Press the “L” key to move the
sound to the left speaker or the “R” key to move the
sound to the right speaker.
1 not available on all models
Centering all audio functions
Push and hold down the
“AUD” key. All audio
functions (bass, treble,
balance and fader) are set to
center or flat positions, and
the volume is adjusted to a pre-set level.
Page 113 of 297
109 Audio system
Technical
data Instruments
and controlsOperationDrivingInstrument
cluster displayPractical hints Car care Index CD mode
General notes on CD mode
Should excessive temperatures occur while in CD mode,
“TEMP HIGH” will appear in the display and muting
will take place. The unit will then switch back to radio
mode until the temperature has decreased to a safe
operating level.
Should temperatures occur while in CD mode which are
too low, “TEMP LOW” will be displayed, but the CD will
play. It will be sensitive to skipping if you are driving
over rough roads.
Handle CDs carefully to prevent interference during
playback.
Avoid fingerprints and dust on CDs. Do not write on the
CDs or apply any label to the CDs.
Clean CDs from time to time with a commercially
available cleaning cloth. No solvents, anti-static sprays,
etc. should be used. Replace the CD in its container after use. Protect CDs
from heat and direct sunlight.
1 Optional equipmentWa r n i n g !
The CD changer
1 is a Class 1 laser product. There
is a danger of invisible laser radiation if the cover
is opened or damaged.
Do not remove the cover. The CD changer
1 does not
contain any parts which can be serviced by the
user. For safety reasons, have any service work
which may be necessary performed only by
qualified personnel.
Page 156 of 297
152 Contents – Driving
Technical
data Instruments
and controlsOperationDrivingInstrument
cluster displayPractical hints Car care Index
DrivingControl and operation of radio
transmitters ............................... 153
Radio, telephone and
two-way radio .............................. 153
The first 1 000 miles
(1 500 km) ................................. 154
Maintenance ................................... 154
Tele Aid ........................................... 155
Catalytic converter ........................ 163
Emission control ............................ 164
Steering lock ................................... 165
Starting and turning off
the engine .................................. 167
Before starting ............................ 167
Starting ........................................ 167
Turning off .................................. 167
Automatic transmission ............... 168
Driving ......................................... 168
Accelerator Position ................... 169
Selector lever positions ............. 169
Maneuvering ............................... 172
Stopping ....................................... 172Program mode
selector switch ........................... 173
Emergency Operation ................174
Parking brake ................................ 175
Driving instructions ....................... 176
Drive sensibly - Save fuel .......... 176
Drinking and driving ................. 176
Pedals ........................................... 176
Power assistance ........................ 177
Brakes .......................................... 177
Driving off ................................... 178
Parking ........................................ 178
Tires ............................................. 179
Aquaplaning ................................180
Tire traction .................................180
Tire speed rating ........................181
Snow chains ................................ 181
Ve h i c l e s w i t h s p o r t
package ........................................181
Winter driving
instructions .................................182
Winter driving .............................183
Block heater .................................183
Deep water ...................................184Traveling abroad ........................ 184
Cruise control ................................. 185
Brake assist system (BAS) ............ 188
Antilock brake system (ABS) ....... 190
ABS control ................................. 191
Electronic Stability Program
(ESP) ........................................... 192
Synchronizing ESP .................... 193
ESP Control Switch .................... 194
Level control system ...................... 196
Level control switch
positions ...................................... 196
Normal Level ............................... 197
Wheel Change Switch ............... 198
Adaptive Damping System
(ADS) ........................................... 199
Adaptive damping system
adjustment .................................. 199
What you should know at the gas
station .........................................200
Fuel supply ..................................200
Fuel ...............................................200
Check regularly and before
a long trip ...................................202
Page 181 of 297
177 Driving insturctions
Technical
data Instruments
and controlsOperationDrivingInstrument
cluster displayPractical hints Car care Index Power assistance
BrakesThe condition of the parking brake system is checked
each time the vehicle is in the shop for the required
maintenance service.
If the parking brake is released and the brake warning
lamp in the instrument cluster stays on, the brake f luid
level in the reservoir is too low.
Brake pad wear or a leak in the system may be the
reason for low brake f luid in the reservoir.
Have the brake system inspected at an authorized
Mercedes-Benz Center immediately.
Al l checks and service work on the brake system shoul d
be carried out by an authorized Mercedes-Benz Center.
Install only brake pads and brake fluid recommended by
Mercedes-Benz.
Wa r n i n g !
When the engine is not running, the brake and
steering systems are without power assistance.
Under these circumstances, a much greater effort is
necessary to stop or steer the vehicle.Wa r n i n g !
After driving in heavy rain for some time without
applying the brakes or through water deep enough
to wet brake components, the first braking action
may be somewhat reduced and increased pedal
pressure may be necessary to obtain expected
braking effect. Be sure to maintain a safe distance
from vehicles in front.Resting your foot on the brake pedal will cause
excessive and premature wear of the brake pads.It can also result in the brakes overheating thereby
significantly reducing their effectiveness. It may
not be possible to stop the vehicle in sufficient time
to avoid an accident.
Wa r n i n g !
If other than recommended brake pads are
installed, or other than recommended brake fluid
is used, t he braking properties of th e vehic le can be
degraded to an extent that safe braking is
substantially impaired. This could result in an
accident.The trunk is the preferred place to carry objects.