2000 MERCEDES-BENZ SL500 steering wheel adjustment
[x] Cancel search: steering wheel adjustmentPage 23 of 297
20 Instruments and controls
Technical
data Instruments
and controlsOperation DrivingInstrument
cluster displayPractical hints Car care Index
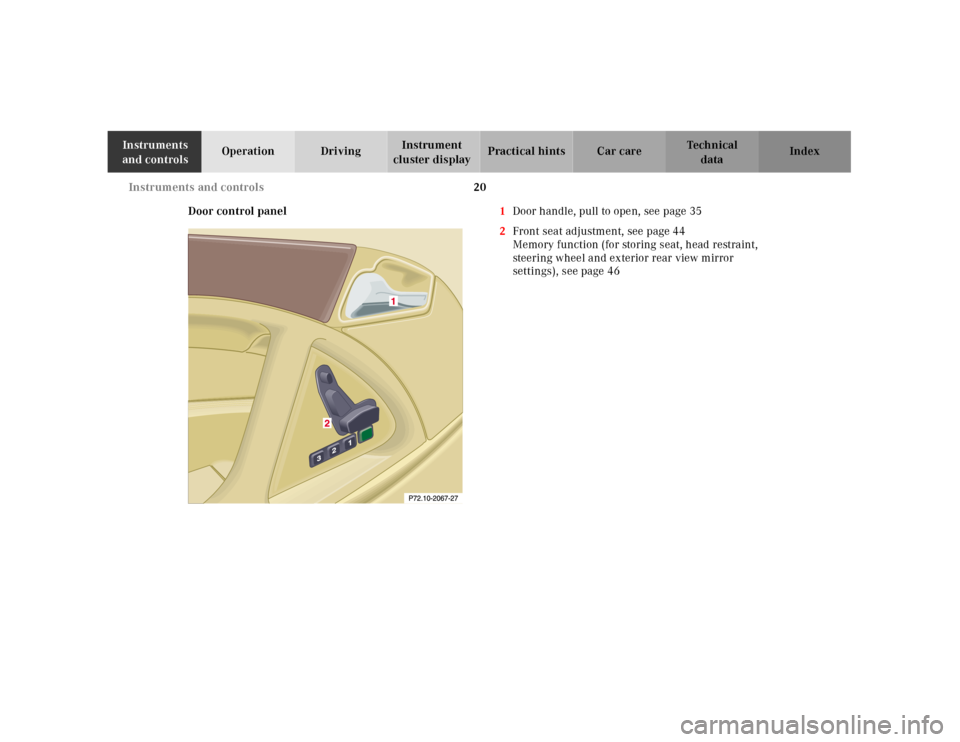
Door control panel1Door handle, pull to open, see page 35
2Front seat adjustment, see page 44
Memory function (for storing seat, head restraint,
steering wheel and exterior rear view mirror
settings), see page 46
Page 26 of 297

23 Instruments and controls
Technical
data Instruments
and controlsOperation DrivingInstrument
cluster displayPractical hints Car care Index 1Side air outlet, adjustable, see page 91
2Level control switch and wheel change switch,
see page 196
3Exterior lamp switch, see page 86
4Parking brake release, see page 175
5Hood lock release, see page 219
6Parking brake pedal, see page 175
7Combination switch, see page 86
8Cruise control switch, see page 185
9Horn
10Airbag, see page 60
11Voice recognition system switch, see separate
operating instructions
12Instrument cluster, see page 74
13Steering lock with ignition/starter switch,
see page 165
14Center air outlets adjustable, see page 91
15Heated air supply button - center air outlet,
see page 9116Non-heated/cooled air supply button - center air
outlet, see page 91
17Storage/eyeglasses compartment, see page 124
18Air volume control for left air outlet, see page 91
19Air volume control for center air outlets, see page 91
20Air volume control for right air outlet, see page 91
21Airbag off indicator lamp, see page 213
22Automatic climate control, see page 90
Rear window defroster switch, see page 95
23Audio system, see page 98
24Trunk lid release switch, see page 40
25Switch for tow-away alarm, see page 43
Indicator lamp for antitheft alarm system,
see page 42
26Central locking switch, see page 37
27Hazard warning f lasher switch, see page 89
28Adaptive damping system adjustment switch,
see page 199
29ESP control switch, see page 194
30Roll bar operation switch, see page 118
Page 48 of 297
44 Seats
Technical
data Instruments
and controlsOperationDrivingInstrument
cluster displayPractical hints Car care Index
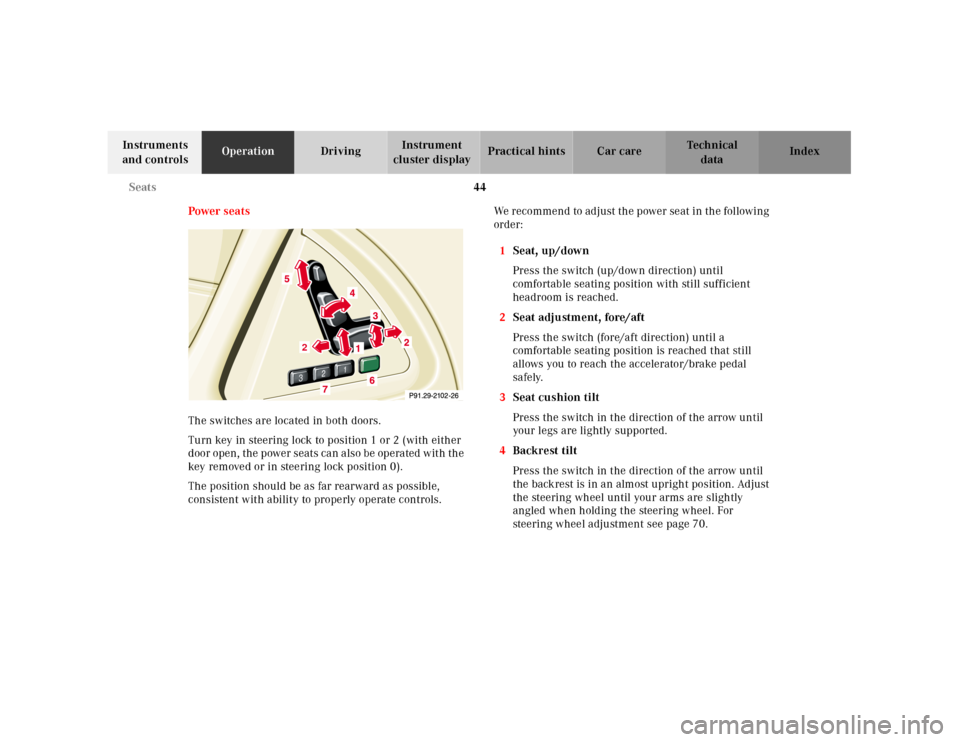
Power seats
The switches are located in both doors.
Turn key in steering lock to position 1 or 2 (with either
d oor open, the power seats ca n a lso be opera ted w it h th e
key removed or in steering lock position 0).
The position should be as far rearward as possible,
consistent with ability to properly operate controls.We recommend to ad just th e power se at in th e fol lowing
order:
1Seat, up/down
Press the switch (up/down direction) until
comfortable seating position with still sufficient
headroom is reached.
2Seat adjustment, fore/aft
Press the switch (fore/aft direction) until a
comfortable seating position is reached that still
allows you to reach the accelerator/brake pedal
safely.
3Seat cushion tilt
Press the switch in the direction of the arrow until
your legs are lightly supported.
4Backrest tilt
Press the switch in the direction of the arrow until
the backrest is in an almost upright position. Adjust
the steering wheel until your arms are slightly
angled when holding the steering wheel. For
steering wheel adjustment see page 70.
3
2
1
2
1
2
Page 51 of 297

47 Seats
Technical
data Instruments
and controlsOperationDrivingInstrument
cluster displayPractical hints Car care Index Important!
Prior to operating the vehicle, the driver should adjust
the seat height for proper vision as well as fore/aft
placement and backrest angle to insure adequate
control, reach, operation, and comfort. The head
restraint should also be adjusted for proper height.
Adjust head restraint to support the back of the head
approximately at ear level. See also airbag section for
proper seat positioning on page 60.
In addition, also adjust the steering wheel to ensure
adequate control, reach, operation, and comfort.
Both the inside and outside rear view mirrors should be
adjusted for adequate rearward vision.
Fasten seat belts. Infants and small children should be
seated in a properly secured restraint system that
complies with U.S. Federal Motor Vehicle Safety
Standard 213 and Canadian Motor Vehicle Safety
Standard 213.
All seat, head restraint, rear view mirror, and steering
wheel adjustments as well as fastening of seat belts
should be done before the vehicle is put into motion.
BabySmart
TM is a trademark of Siemens Automotive Corp.
Wa r n i n g !
Children 12 years old and under must never ride in
this vehicle, except in a Mercedes-Benz authorized
BabySmart
TM compatible child seat, which operates
with the BabySmart
TM system installed in the
vehicle to deactivate the passenger side front
airbag when it is properly installed.
Otherwise they will be struck by the airbag when it
inflates in a crash. If this happens, serious or fatal
injury will result.Infants and small children must be seated in an
appropriate infant or child restraint system, which
is properly secured with the vehicle’s seat belt,
fully in accordance with the child seat
manufacturer’s instructions.A child’s risk of serious or fatal injuries is
significantly increased if the child restraints are
not properly secured in the vehicle and the child is
not properly secured in the child restraint.
Page 68 of 297
64 Restraint systems
Technical
data Instruments
and controlsOperationDrivingInstrument
cluster displayPractical hints Car care Index
To reduce the risk of injury when the front airbags
inflate, it is very important for the driver and front
passenger to always be in a properly seated
position and to wear your seat belt.
For maximum protection in the event of a collision
always be in normal seated position w ith your back
against the backrest. Fasten your seat belt and
ensure that it is properly positioned on your body.For unobstructive inflation of door side impact
airbags, keep door pocket lids closed.Since the airbag inflates with considerable speed
and force, a proper seating and hands on steering
wheel position will help to keep you at a safe
distance from the airbag.
Occupants who are unbelted, out of position or too
close to the airbag can be seriously injured by an
airbag as it inflates with great force in the blink of
an eye:• Sit properly belted in an upright position with
your back against the backrest.
• Adjust the driver seat as far as possible
rearward, still permitting proper operation of
vehicle controls. Adjust the driver seat as far
as possible rearward, still permitting proper
operation of vehicle controls. The distance
from the center of the driver’s breastbone to
the center of the airbag cover on the steering
wheel must be at least ten inches (25 cm) or
more. You should be able to accomplish this by
a combination of adjustments to the seat and
steering wheel. If you have any problems,
please see your authorized Mercedes-Benz
Center.• Do not lean wi th you r head or chest close to th e
steering wheel or dashboard.• Keep hands on the outside of steering wheel
rim. Placing hands and arms inside the rim
can increase the risk and potential severity of
hand/arm injury when the driver front airbag
inflates.• Do not lean against doors.
Page 74 of 297
70 Adjusting steering column
Technical
data Instruments
and controlsOperationDrivingInstrument
cluster displayPractical hints Car care Index
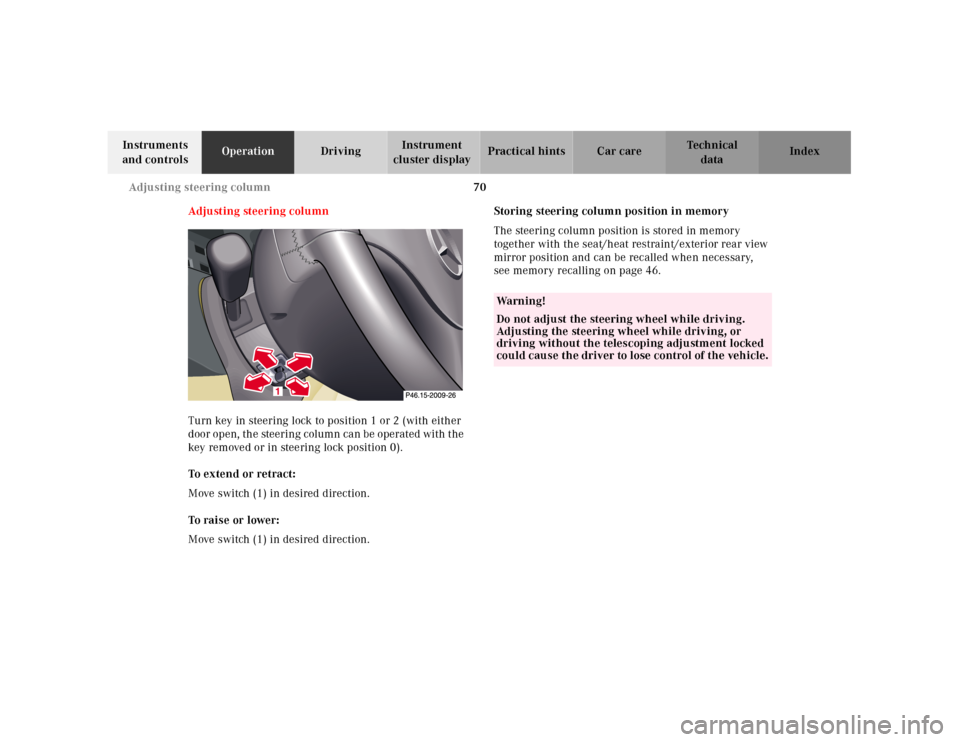
Adju st in g steerin g c olu mn
Turn key in steering lock to position 1 or 2 (with either
door open, the steering column can be operated with the
key removed or in steering lock position 0).
To extend or retract:
Move switch (1) in desired direction.
To raise or lower:
Move switch (1) in desired direction.Storing steering column position in memory
The steering column position is stored in memory
together with the seat/heat restraint/exterior rear view
mirror position and can be recalled when necessary,
see memory recalling on page 46.
Wa r n i n g !
Do not adjust the steering wheel while driving.
Adjusting the steering wheel while driving, or
driving without the telescoping adjustment locked
could cause the driver to lose control of the vehicle.
Page 156 of 297
152 Contents – Driving
Technical
data Instruments
and controlsOperationDrivingInstrument
cluster displayPractical hints Car care Index
DrivingControl and operation of radio
transmitters ............................... 153
Radio, telephone and
two-way radio .............................. 153
The first 1 000 miles
(1 500 km) ................................. 154
Maintenance ................................... 154
Tele Aid ........................................... 155
Catalytic converter ........................ 163
Emission control ............................ 164
Steering lock ................................... 165
Starting and turning off
the engine .................................. 167
Before starting ............................ 167
Starting ........................................ 167
Turning off .................................. 167
Automatic transmission ............... 168
Driving ......................................... 168
Accelerator Position ................... 169
Selector lever positions ............. 169
Maneuvering ............................... 172
Stopping ....................................... 172Program mode
selector switch ........................... 173
Emergency Operation ................174
Parking brake ................................ 175
Driving instructions ....................... 176
Drive sensibly - Save fuel .......... 176
Drinking and driving ................. 176
Pedals ........................................... 176
Power assistance ........................ 177
Brakes .......................................... 177
Driving off ................................... 178
Parking ........................................ 178
Tires ............................................. 179
Aquaplaning ................................180
Tire traction .................................180
Tire speed rating ........................181
Snow chains ................................ 181
Ve h i c l e s w i t h s p o r t
package ........................................181
Winter driving
instructions .................................182
Winter driving .............................183
Block heater .................................183
Deep water ...................................184Traveling abroad ........................ 184
Cruise control ................................. 185
Brake assist system (BAS) ............ 188
Antilock brake system (ABS) ....... 190
ABS control ................................. 191
Electronic Stability Program
(ESP) ........................................... 192
Synchronizing ESP .................... 193
ESP Control Switch .................... 194
Level control system ...................... 196
Level control switch
positions ...................................... 196
Normal Level ............................... 197
Wheel Change Switch ............... 198
Adaptive Damping System
(ADS) ........................................... 199
Adaptive damping system
adjustment .................................. 199
What you should know at the gas
station .........................................200
Fuel supply ..................................200
Fuel ...............................................200
Check regularly and before
a long trip ...................................202
Page 203 of 297
199 Driving systems
Technical
data Instruments
and controlsOperationDrivingInstrument
cluster displayPractical hints Car care Index Adaptive Damping System (ADS)
(SL 600 only)
Depending upon road surface conditions, load, driving
style, ADS will automatically adjust the optimal ride
firmness.
The malfunction indicator lamp comes on with the key
in steering lock position 2 and should go out with the
engine running.
If the malfunction indicator lamp stays on after the
engine is running or comes on while driving, then the
system has detected a malfunction.
Have the ADS checked at your authorized
Mercedes-Benz Center as soon as possible.
Note:
If the power supply was interrupted (battery
disconnected or empty), the malfunction indicator lamp
will light up when the engine is running.
Turn the steering wheel from full left to full right lock
position. The light should go out. Adaptive damping system adjustment
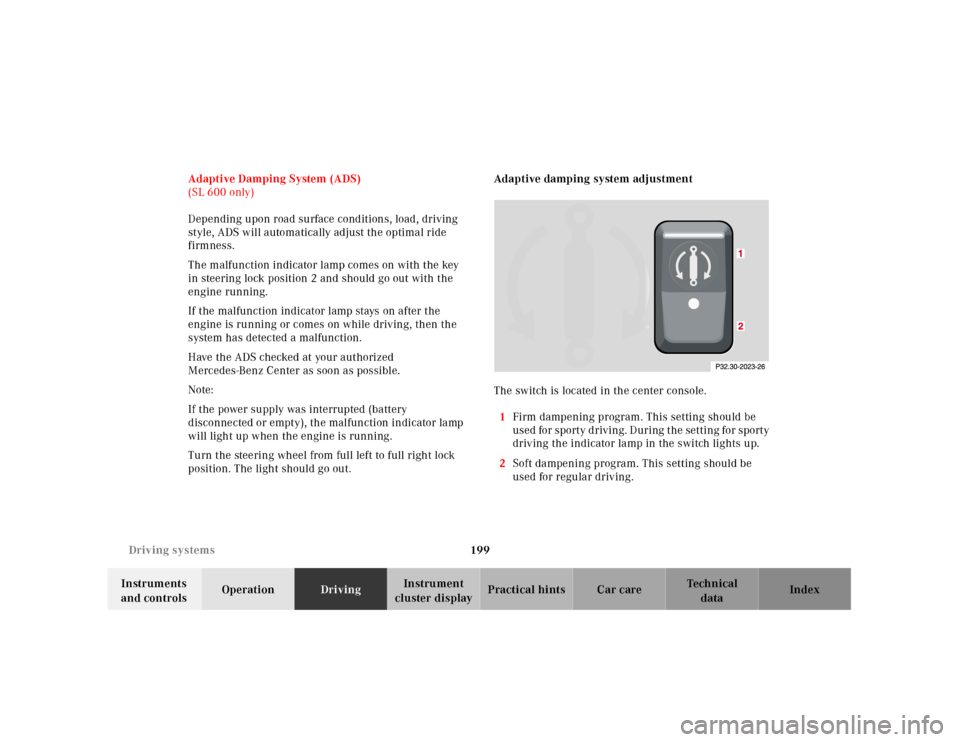
The switch is located in the center console.
1Firm dampening program. This setting should be
u s e d fo r s po rt y d r iv i n g . D u r i ng t h e se t t i n g f o r s po rt y
driving the indicator lamp in the switch lights up.
2Soft dampening program. This setting should be
used for regular driving.